Solution
This article demonstrates how to take a screenshot, which can then be attached to an email response to ESET Technical Support. Screenshots help our representatives better understand your issue and expedite its resolution.
To take a screenshot, click your operating system (below) and follow the step-by-step instructions:
Windows
Take a screenshot using your keyboard
-
Press the Windows key + PrintScreen key (or PrtSc key). Screenshots are automatically saved to Pictures/Screenshots in your user directory (
C:/Users/%username%/Pictures/Screenshotsby default). -
To access your screenshot, press the Windows key + E key to open an explorer window and browse to Pictures/Screenshots.
macOS
Take a screenshot using your keyboard
-
Press Command + Shift + 3 on your keyboard: This takes a screenshot of your entire screen, including screens from multiple monitors, and automatically saves the file to your desktop. The file will be named "Screen shot" followed by the date and time.
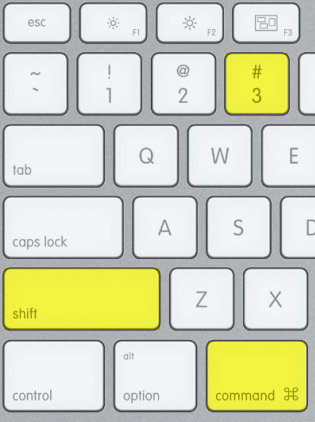
Figure 4-1
-
If necessary, attach your screenshot to an email response to ESET Technical Support.
Android
Android 9 and later
Press and hold the Power and Volume down buttons at the same time until an animation plays to indicate that your screen has been saved.