Issue
- ESET Management Agent installation on client computers with ESET PROTECT On-Prem components or ESET endpoint products
- ESET PROTECT On-Prem version 11.x and earlier
Solution
Related solutions: Linux users
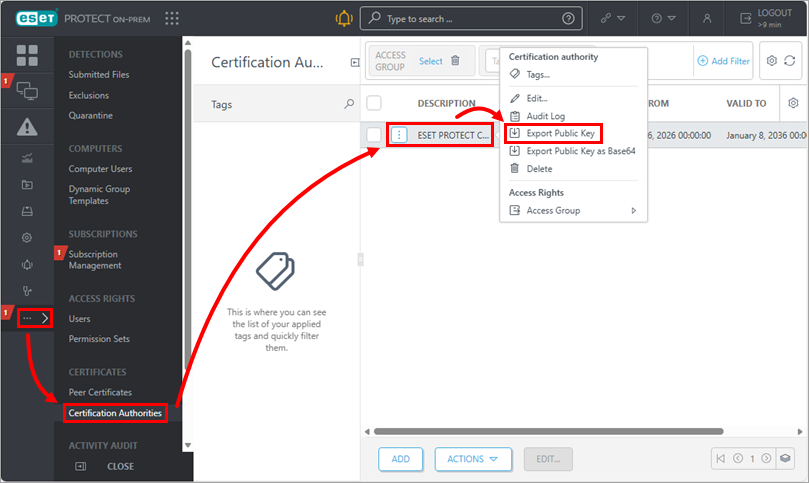
I. Export Peer Certificate and Certification Authority
-
Click More → Peer Certificates → the certificate you want to use for this installation → Export.

-
Click More → Certification Authorities → the Certification Authority you want to use for this installation → Export Public Key.
-
Transfer the exported Peer Certificate and Certificate Authority to the client computer.
II. ESET Management Agent setup
-
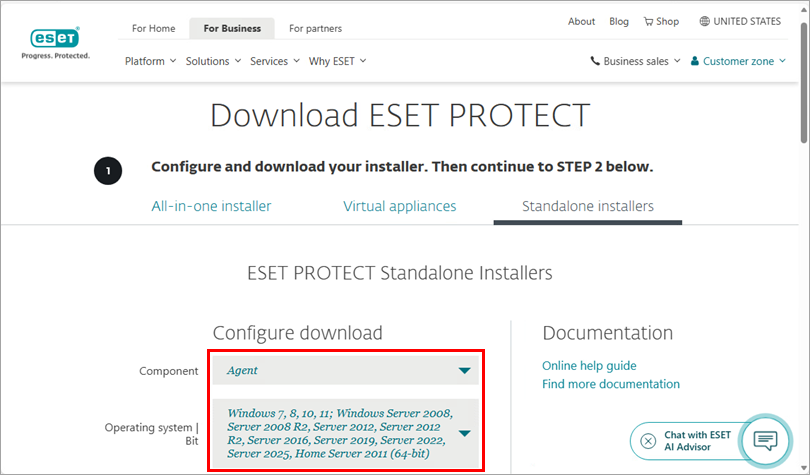
On the client workstation, open the ESET PROTECT Standalone installers download page.
-
Click Standalone installers and select the Component and Operating system from the drop-down menu.
-
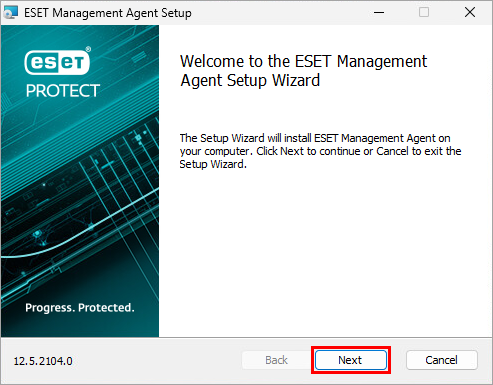
Double-click the downloaded .msi file and click Next.
-
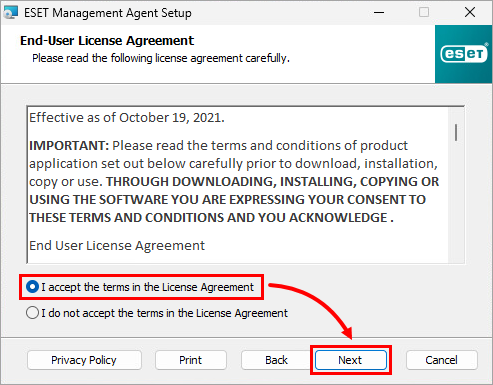
Select I accept the terms in the License Agreement and click Next.
-
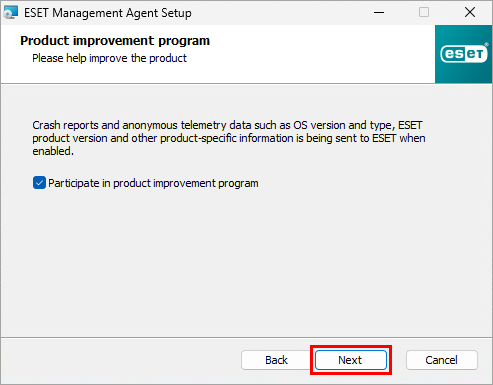
Click Next to agree to send crash reports and telemetry data to ESET. If you do not agree, deselect the check box next to Participate in product improvement program.
-
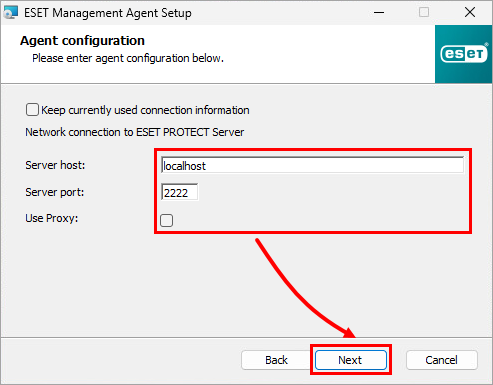
Specify the Server host (name or IP address) and Server port of your ESET PROTECT Server (the default Server port is 2222). If you are using a different port, replace the default port with your custom port number. If you use a proxy for Agent–Server connection, check Use Proxy. Click Next.
-
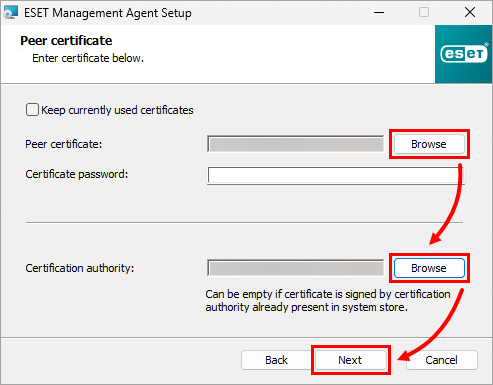
Click Browse. Search for the Peer Certificate and Certificate Authority. Click Next.
-
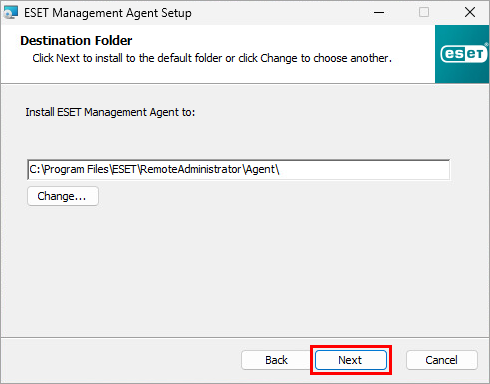
You can leave the default destination folder for ESET Management Agent installation or change it. Click Next.
-
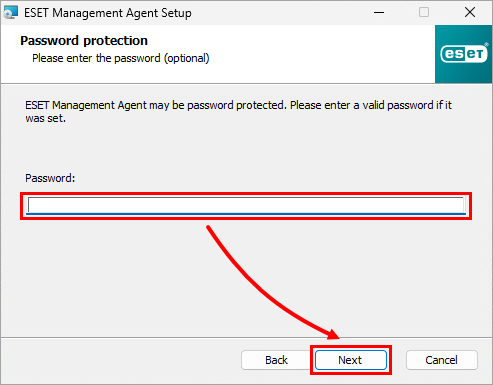
If ESET Management Agent is protected with a password, type the password and click Next.
-
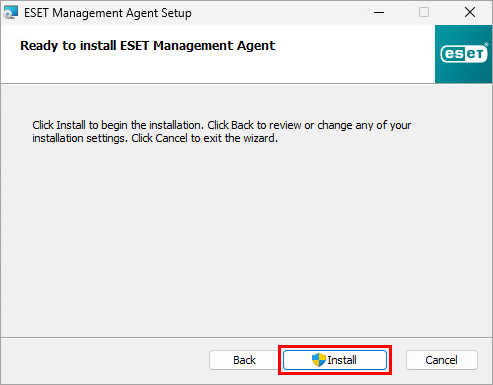
Click Install and follow the on-screen steps to complete the installation.
-
To verify the Agent is working properly, check the status log:
C:\ProgramData\ESET\RemoteAdministrator\Agent\EraAgentApplicationData\Logs\status.html
If you are performing a new installation of ESET PROTECT On-Prem, proceed to deploy ESET endpoint products to your client computers.
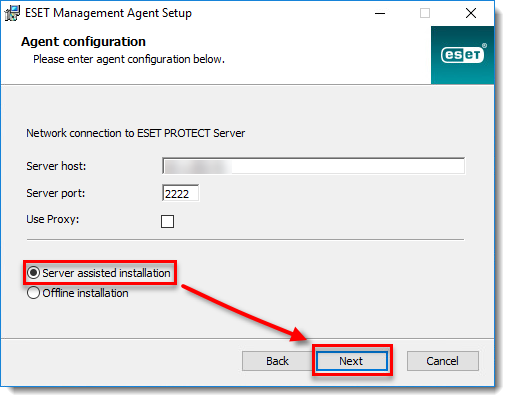
ESET PROTECT On-Prem version 11.x and earlier
Users on ESET PROTECT On-Prem version 11.x and earlier have the option of a Server assisted installation. The client computer must be able to communicate with ESET PROTECT Server over the network.
-
Download and run the ESET Management Agent Setup Wizard.
-
Select Server assisted installation and click Next.
-
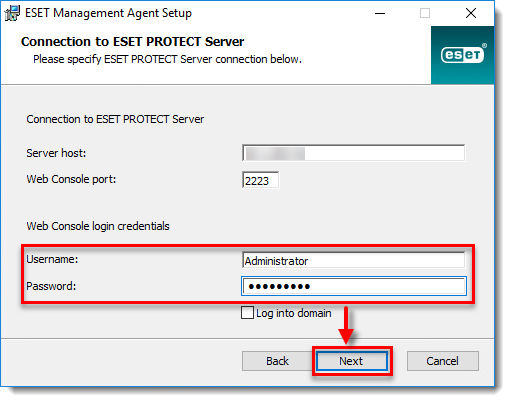
Type the Username and Password used to access your ESET PROTECT Web Console to allow the Agent to download updates and new certificates. To log in as a domain user, select the check box next to Log into domain. Click Next → Yes to accept the server certificate.
-
Select Do not create computer (computer will be created automatically during the first connection) or Choose custom static group. If you select Choose custom static group, you will be able to select an existing static group in ESET PROTECT from the drop-down menu. The client computer will be added to the selected static group.
