Issue
- Create a database in Microsoft SQL or MySQL for the ESET PROTECT Server installation
- Create a dedicated database user for Microsoft SQL or MySQL
Details
Click to expand
We recommend creating a dedicated database and a dedicated database user for the ESET PROTECT Server. Using high-privilege database administrator accounts such as sa (Microsoft SQL) or root (MySQL) is not recommended, as ESET PROTECT does not require full administrative access. A dedicated user and database provide a clearer, safer, and supported setup for connecting ESET PROTECT Server to its database.
Solution
- Create a dedicated database and database user for ESET PROTECT On-Prem in Microsoft SQL
- Create a dedicated database and database user for ESET PROTECT On-Prem in MySQL
Create a dedicated database and database user for ESET PROTECT On-Prem in Microsoft SQL
Prerequisites
- Administrative access to the operating system
- Installed and properly configured a supported Microsoft SQL Server
- Installed Microsoft SQL Server Management Studio
- Access to a Microsoft SQL administrator account and Microsoft SQL Server Management Studio
Create a database for ESET PROTECT On-Prem in Microsoft SQL
-
Open Microsoft SQL Server Management Studio and log in with your administrator account.
-
In Object Explorer, right-click Databases and select New Database from the context menu.
-
In the Database name field, type the database name. For example, use the default ESET PROTECT On-Prem database name
era_db. -
Click OK.
Create a dedicated database user for ESET PROTECT On-Prem in Microsoft SQL and assign it to the dedicated database
-
Open Microsoft SQL Server Management Studio and log in with your administrator account.
-
In Object Explorer, right-click Security and click New → Login.
-
In the Login name field, type the user account name. For example, use the default ESET PROTECT On-Prem database username
era_user. -
Select SQL authentication and type and confirm the user account password.
-
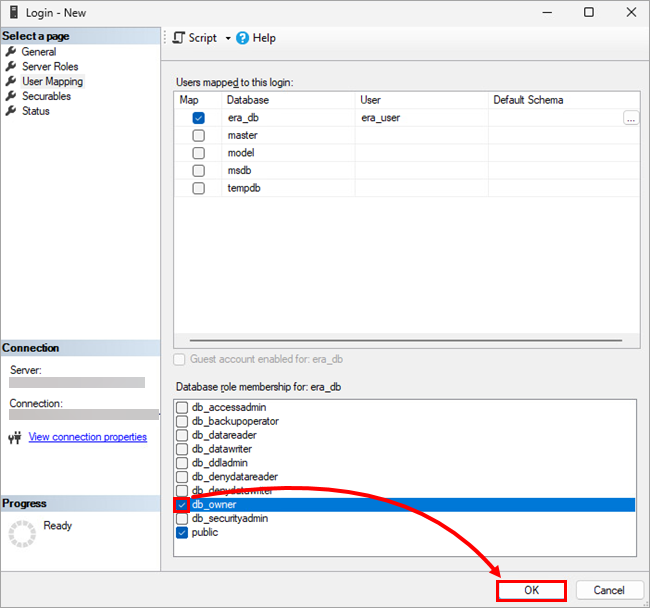
In the left-side menu, click User Mapping and select the check box next to the database you created. The user account name should appear in the User column next to the selected database.
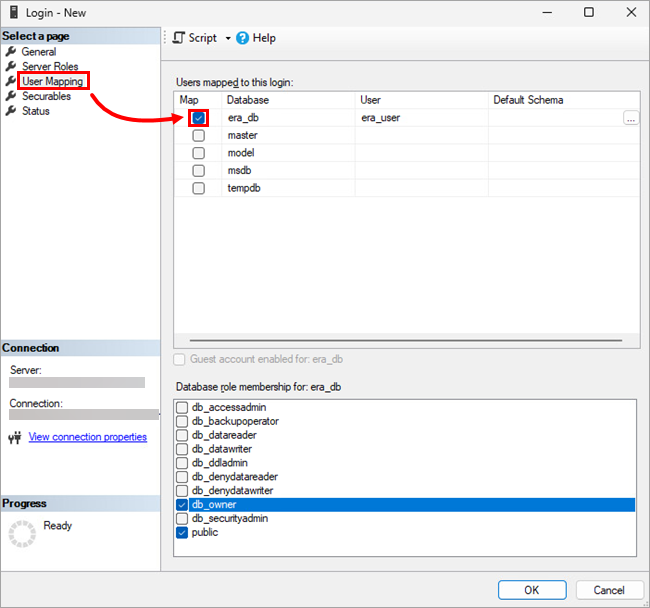
-
Below Database role membership, select the check box next to db_owner and click OK.
Create a dedicated database and database user for ESET PROTECT On-Prem in MySQL
Prerequisites
- Administrative access to the operating system
- Installed and properly configured a supported MySQL Server
- Access to a MySQL administrator account; this article uses HeidiSQL as the administration tool, but you can use a different MySQL client or the command line
Create a database for ESET PROTECT On-Prem in MySQL
-
Open your MySQL administration tool and log in to the local database using the root account and password. Set the hostname to
127.0.0.1. Click Open. -
Right-click the database root and select Create new → Database from the context menu.
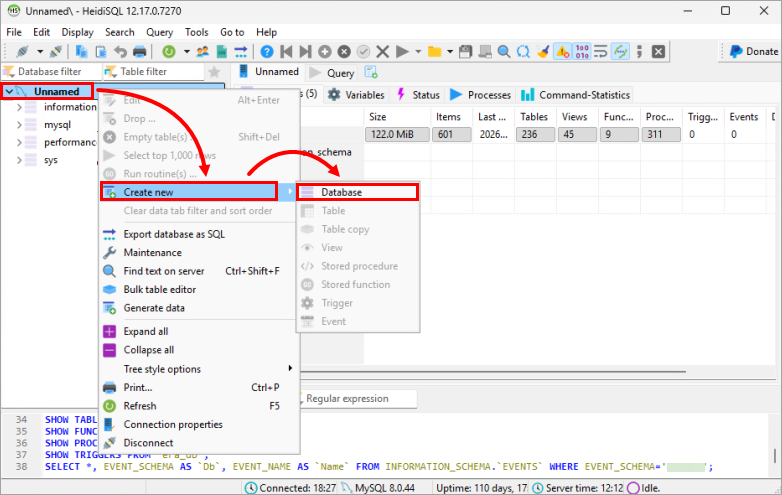
- In the Name field, type the database name. For example, use the default ESET PROTECT On-Prem database name
era_db. Click OK.
Create a dedicated database user for ESET PROTECT On-Prem in MySQL and assign it to the dedicated database
-
Open your MySQL administration tool and log in to the local database using the root account and password. Set the hostname to
127.0.0.1. Click Open. -
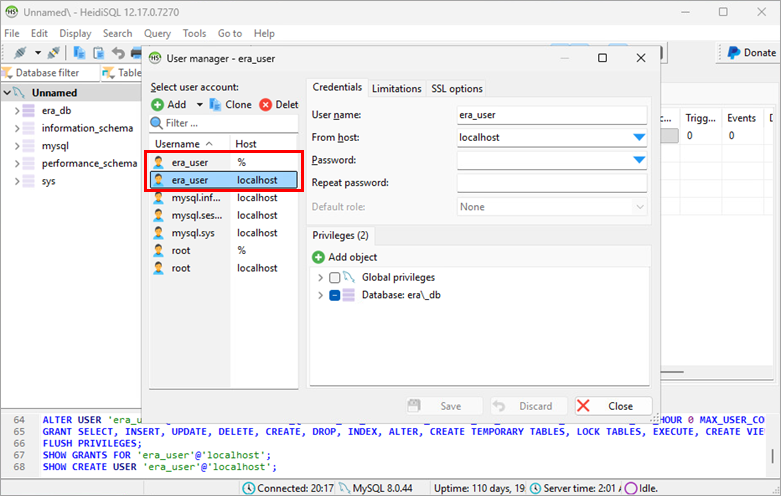
Click Tools → User manager.
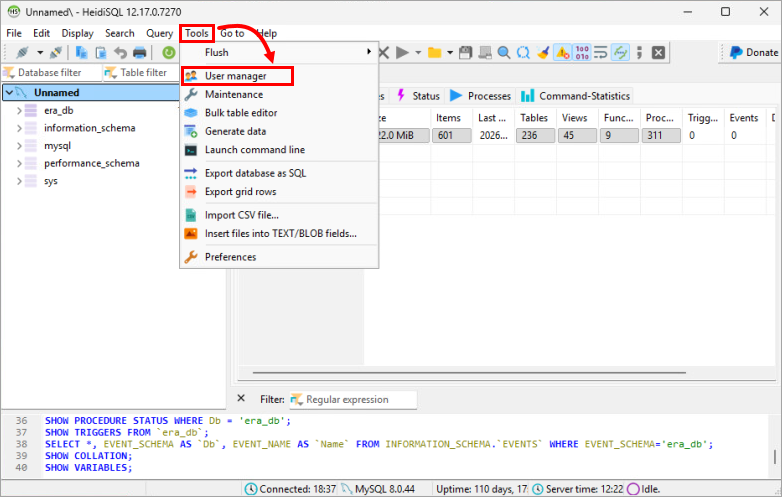
-
Click Add → User.
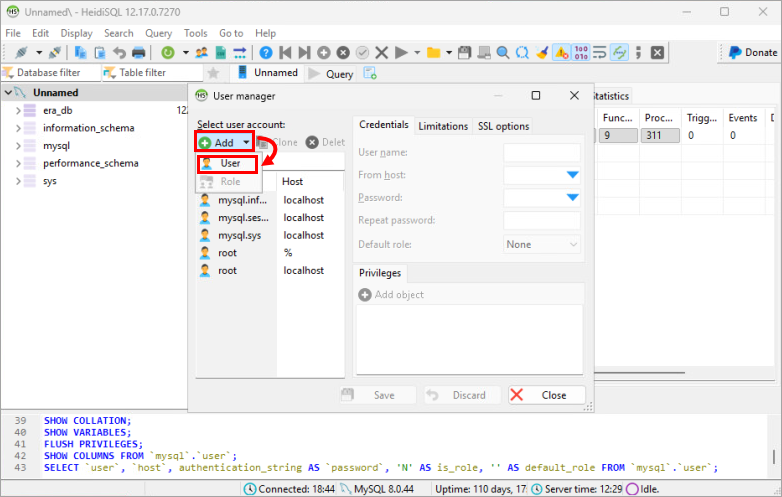
-
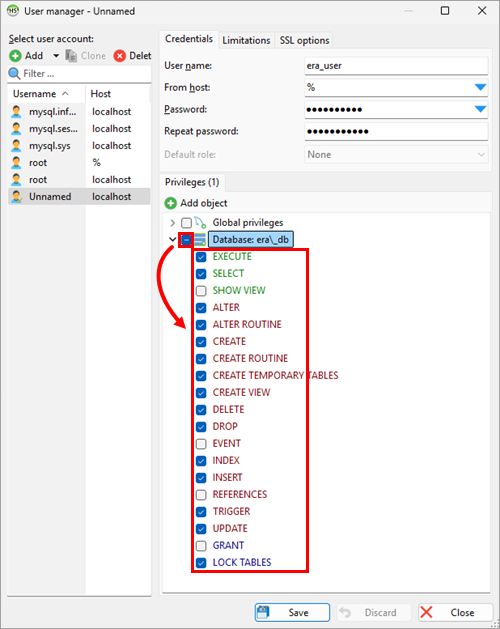
Provide the user details:
- In the User name field, type the username. For example, use the default ESET PROTECT On-Prem database username
era_user. - In the From host drop-down menu, select Access from everywhere or type
%. - In the Password and Repeat password fields, type the password.
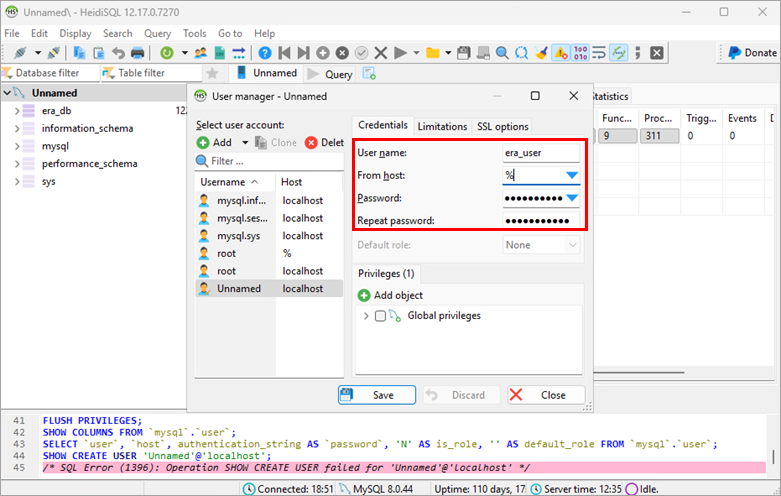
- In the User name field, type the username. For example, use the default ESET PROTECT On-Prem database username
-
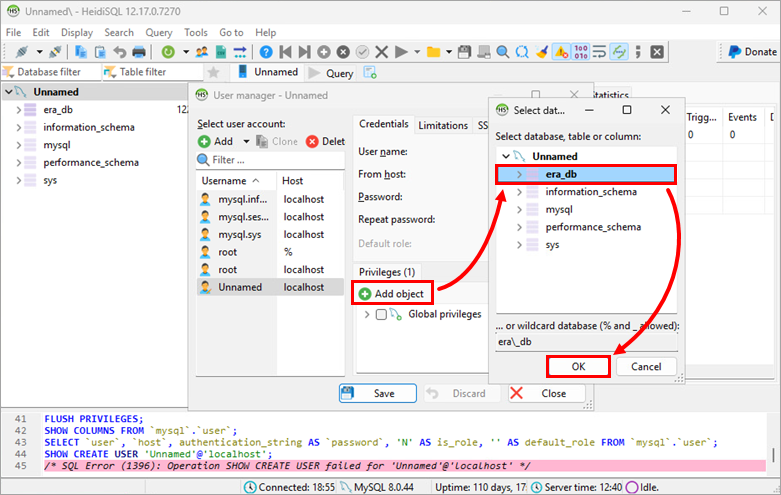
Click Add object, select the database you created and click OK.
-
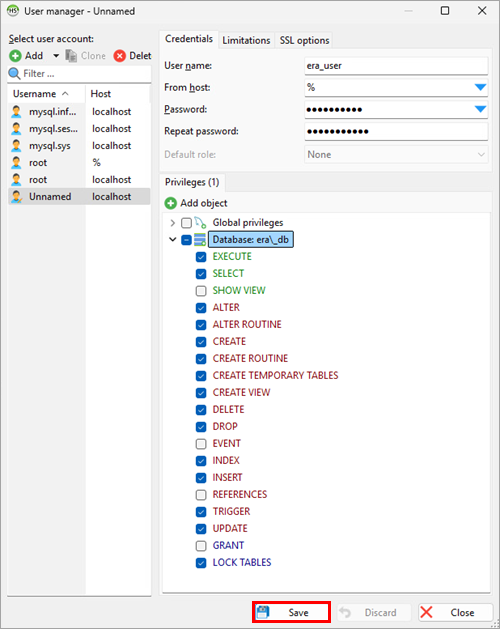
Below Privileges, select the check box next to the created database and deselect
SHOW VIEW,EVENT,REFERENCES, andGRANT, so that the following privileges are selected:EXECUTESELECTALTERALTER ROUTINECREATECREATE ROUTINECREATE TEMPORARY TABLESCREATE VIEWDELETEDROPINDEXINSERTTRIGGERUPDATELOCK TABLES
-
Click Save.
-
Ensure the user you created is selected in the left-side menu and click Clone. For the user to be cloned, in the From host drop-down menu, select Access from server location only or type
localhost. In the Password and Repeat password fields, type the password. Click Save.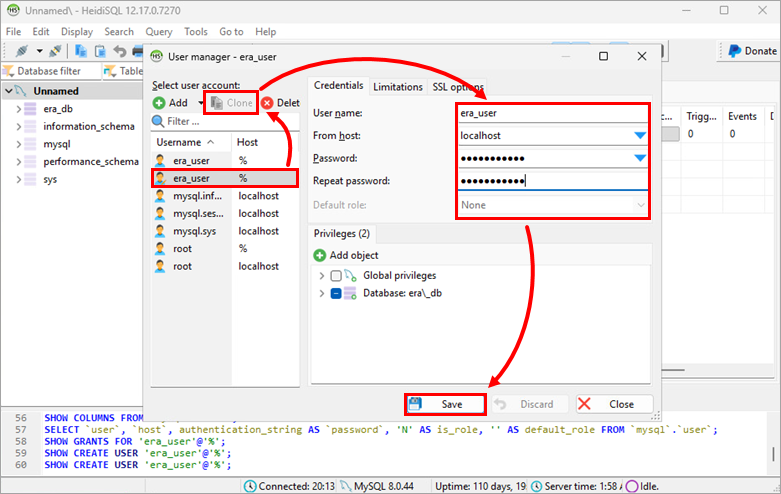
You have created two database users with the same username: one allowing connections from any host and one restricted to localhost only.