Solution
-
Verify that your system meets all requirements and software prerequisites.
-
Extract the setup_x64.zip archive, or mount the all-in-one.iso and run the installer executable Setup.exe.
-
Select a language from the Language drop-down menu and click Next.

-
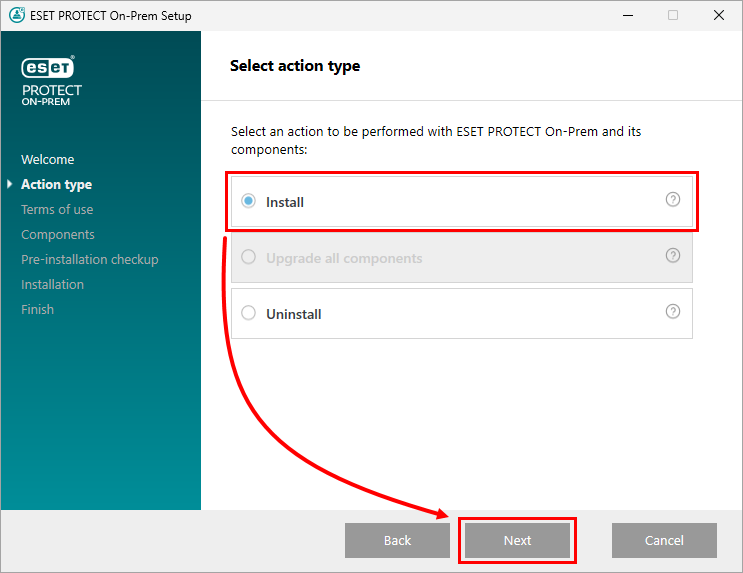
Select Install and click Next.
-
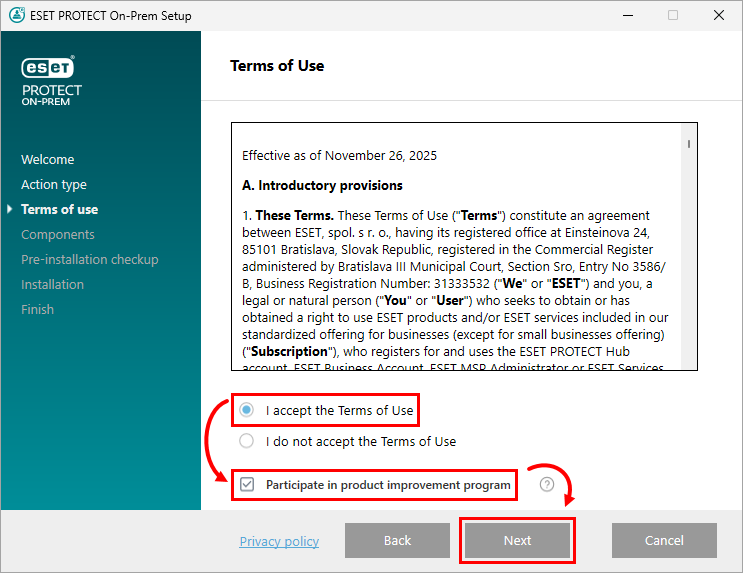
Read the End User License Agreement. If you agree, select I accept the terms in the license agreement. Deselect the check box next to Participate in product improvement program if you do not agree to send crash reports and telemetry data to ESET. If the check box is left selected, telemetry data and crash reports will be sent to ESET. Click Next.
-
Your network architecture will determine which components should be installed. Read the descriptions below and deselect the check box next to any components that you do not want to install. Click Next when you are done selecting components. Installation time will vary depending on your system configuration. If a prerequisite is not satisfied or an error occurs, follow the instructions provided by the installer to resolve the issue.
-
Microsoft SQL Server Express: If you have an existing Microsoft SQL or MySQL database to use for ESET PROTECT On-Prem, deselect this check box. To create a new or update to Microsoft SQL Server Express 2022 database for ESET PROTECT On-Prem, leave this check box selected. The installer generates a random password for database authentication and stores it in:
%PROGRAMDATA%\ESET\RemoteAdministrator\Server\EraServerApplicationData\Configuration\startupconfiguration.ini -
ESET PROTECT Web Console: Installs the Apache Tomcat service necessary for the ESET PROTECT On-Prem Server to manage clients. We strongly recommend that you leave this check box selected. To use a custom HTTPS certificate for the ESET PROTECT Web Console, select the Add custom HTTPS certificate for the Web Console check box. If you do not select this option, a new keystore is generated automatically for Tomcat.
-
Rogue Detection Sensor: ESET Rogue Detection (RD) Sensor will be deprecated (there will be no future updates). Some of its features may not work properly. You can no longer manage RD Sensor configuration via a policy.
-
ESET Bridge Proxy: We recommend deselecting this component if you are unsure whether it is needed on your network. ESET Bridge Proxy can deliver significant performance improvements on networks with roughly 40 or more computers. Using ESET Bridge Proxy will automatically create and apply several proxy-based policies for clients, which can affect your ability to download updates. You can install ESET Bridge Proxy later if you want.

-
-
If Add custom HTTPS certificate for the Web Console was selected, in the Import custom HTTPS certificate window, click Browse... to select the certificate file, and click Next to continue with installation.

-
You will be prompted to install Java or its implementation.
-
If no Java or its implementation is installed on your machine, click Select a Java installation and follow the on-screen instructions. Read more about installing Java or its implementation.

-
If Java or its implementation is already installed on your machine, select the desired installation path and click Install.

-
-
If errors are found during the prerequisites check, address them accordingly. Common errors include:
-
No Java found: see previous installation step 9.
-
Setup is not in valid state/Microsoft SQL Server Express: The installer may display this notification if the installer is corrupted. For example, some installer files are missing. Download and run the All-in-one installer again. It may also occur if the path to the All-in-one installer contains special characters—for example, letters with diacritics. Run the ESET PROTECT All-in-one installer from a path with no special characters.
-
.NET v4 is not installed: Install Microsoft .NET Framework.
-
There is only 32 MB free on a system disk: The installer may display this notification if your system does not have enough disk space for ESET PROTECT. Ensure at least 4,400 MB of free disk space is available to install ESET PROTECT and all its components.
- ESET Remote Administrator 5.x or older is installed on the machine: Direct upgrade from ESET Remote Administrator 5.x/6.x or ESET Security Management Center 7.x to ESET PROTECT On-Prem 13.0 is not supported—Perform a clean installation of ESET PROTECT On-Prem 13.0.
-
-
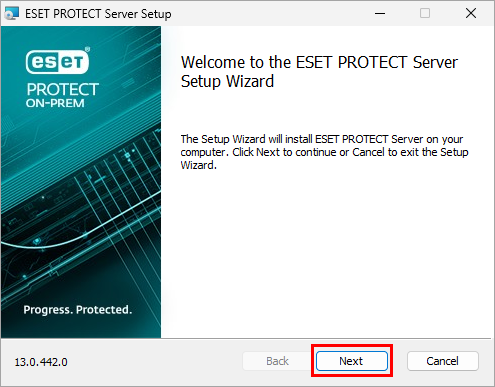
Wait for the installation to complete. In the ESET PROTECT Server Setup window, click Next.
-
If you chose to install Microsoft SQL Server Express in step 6, click Next to perform a database connection check and continue to step 12.

Users with a pre-existing database:
-
Select the appropriate database type from the Database drop-down menu. Type in the Database name, Hostname, and Port found in the SQL Server Configuration Manager for your database into the appropriate fields. If you are using a Microsoft SQL database, you can also select the Use Named Instance check box. This will allow you to use a custom database instance, including an MS SQL database installed in a Failover Cluster. For more information about the database, read the following Knowledgebase article: Create databases and database user accounts for ESET PROTECT On-Prem (Windows). Type in the database administrator account Username and Password, then click Next.

-
You will be prompted if the provided database user account and the database user for ESET PROTECT On-Prem should be the same. If you choose No, on the following screen, select Use existing user, enter the Database username and Password (if one is used), and click Next.

-
-
Type a password for the ESET PROTECT Web Console. Record this password for later use, then click Next.

-
In the Certificate information window, you can customize your Certification Authority. The only mandatory fields are Authority common name and Certificate validity. Type any information about your Certification Authority that you want to add. If you create a password, ensure that you record it because all client computers using this certificate will require that password to use the certificate. Click Next.

-
Click Install.

-
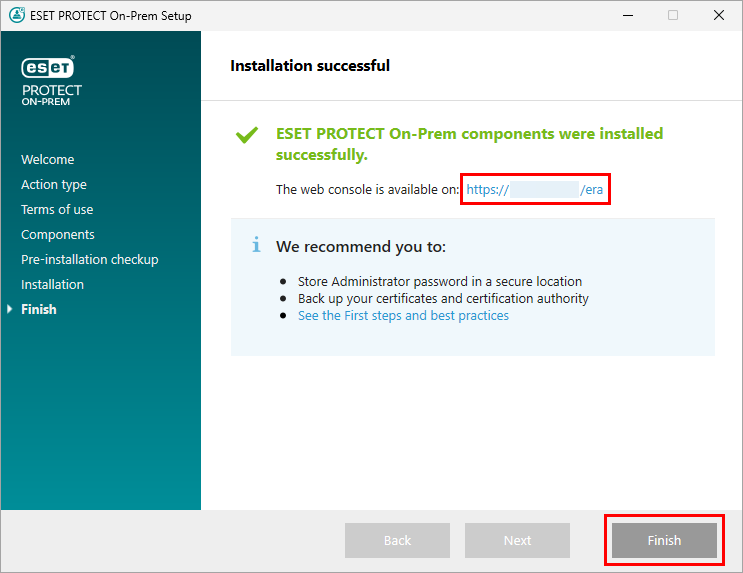
Click Finish.
-
If you selected to install the Rogue Detection Sensor, you will see the Installation Wizard for the WinPcap driver.
-
In the Installation successful window, click the link to open the ESET PROTECT Web Console. We recommend saving the ESET PROTECT Web Console to your browser's favorites. By default, the ESET PROTECT On-Prem installer creates a link to the Web Console on your Start menu. Click Finish to close the ESET PROTECT On-Prem Setup.