Løsning
- Forudsætninger
- Opret et servercertifikat
- Opret og anvend en politik til at omdirigere ESET Management Agents til den nye ESET PTORECT-server
- Migrer ESET PROTECT-databasen til Windows-målserveren
- Konfigurer ESET PROTECT-serveren
I. Forudsætninger
- Bekræft den ESET PROTECT Server-version, der bruges af din Virtual Appliance. Hvis den ikke kører den nyeste version, skal du opgradere den virtuelle appliance.
II. Opret et servercertifikat
-
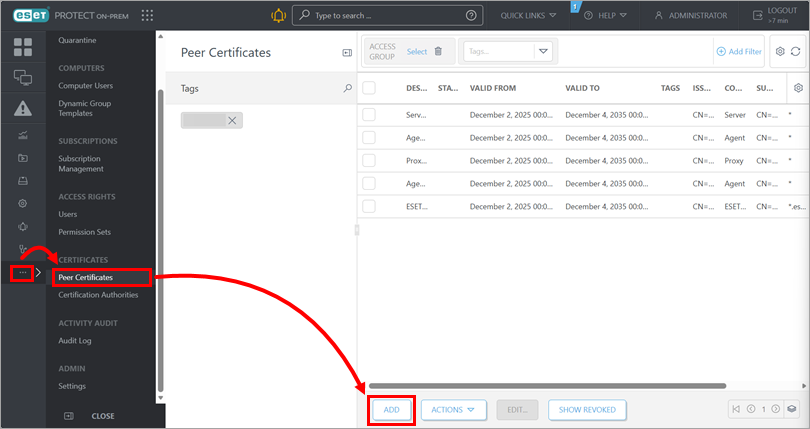
Åbn visningen Peer-certifikater: Klik på Mere → Peer-certifikater. Klik på Tilføj.
-
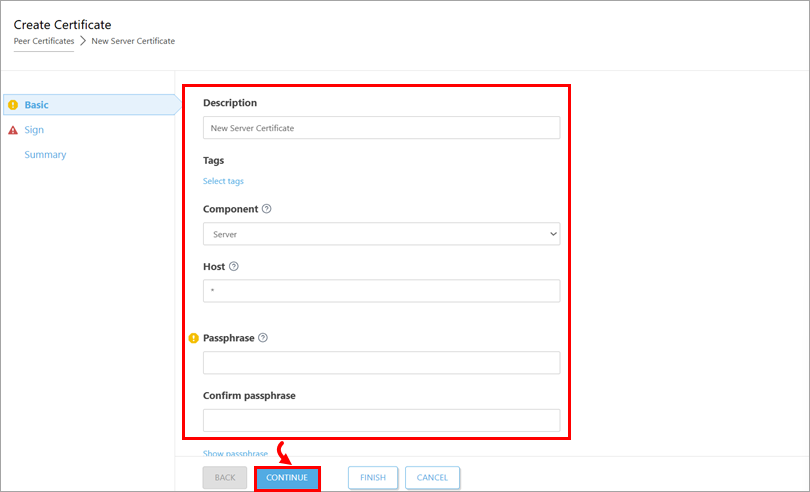
Skriv beskrivelsen af certifikatet under Basic. Vælg Server i rullemenuen Produkt. Lad feltet Host være indstillet til standardværdien (*), og lad felterne Passphrase og Confirm passphrase være tomme. Klik på Fortsæt.
-
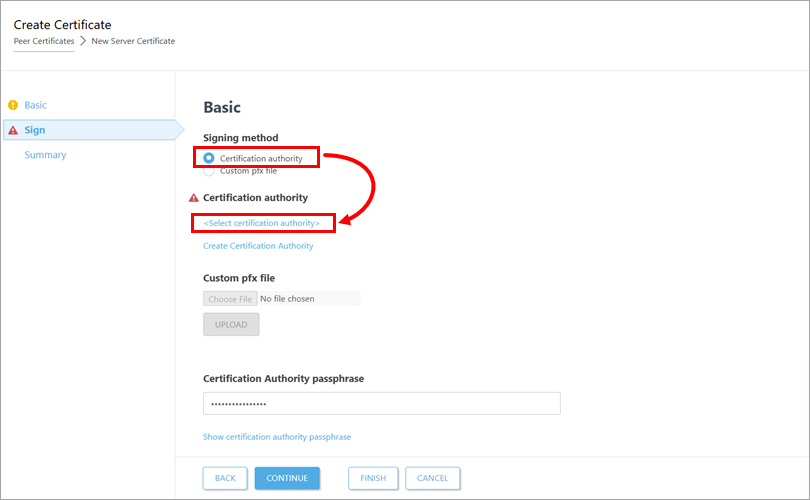
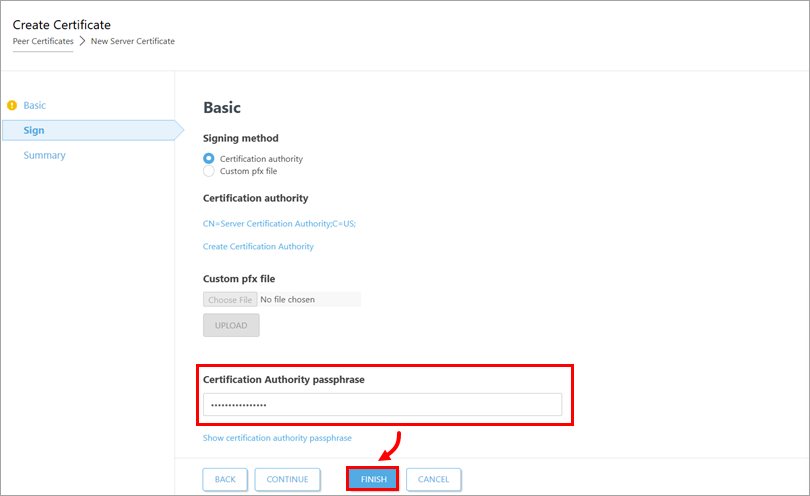
Under Sign. Under Signing method skal du vælge alternativknappen ved siden af Certification authority. Klik på Vælg certificeringsmyndighed under Certificeringsmyndighed.
-
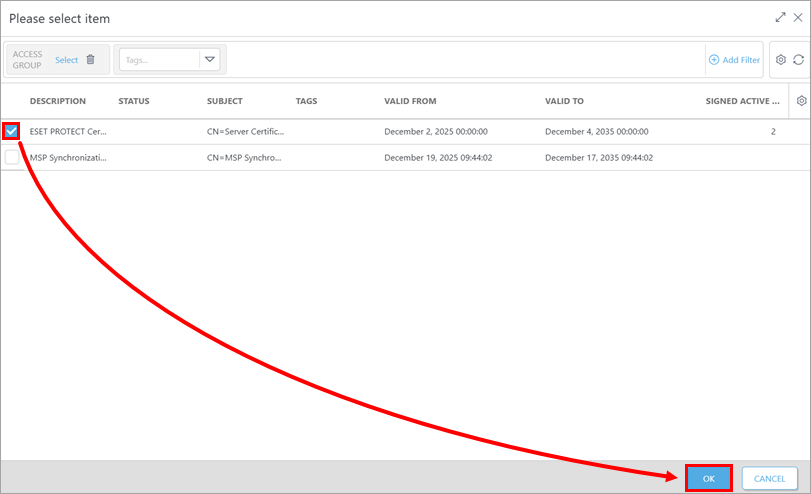
Vælg den certificeringsmyndighed, du vil bruge til at underskrive certifikatet. Klik på OK.
-
Skriv den adgangskode, du bruger til at logge ind på ESET PROTECT Virtual Appliance Web Console, i feltet Passphrase for Certification Authority. Klik på Udfør.
III. Opret og anvend en politik til at omdirigere ESET Management Agents til den nye ESET PTORECT Server
-
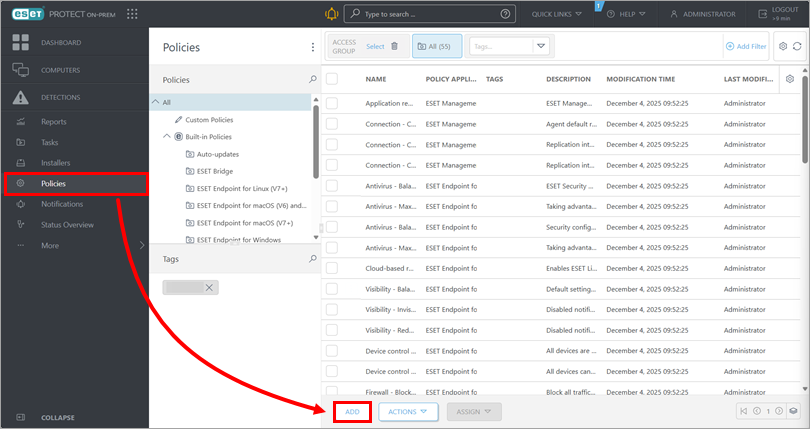
Åbn visningen Politikker: Klik på Politikker. Klik på Tilføj.
-
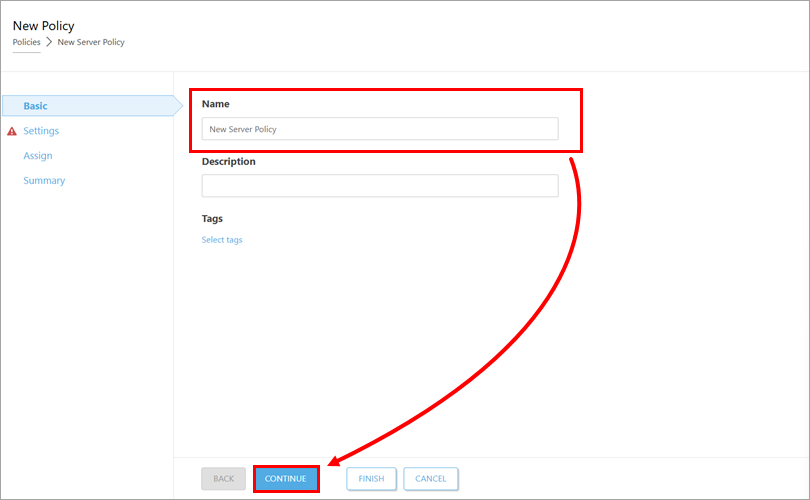
Skriv et navn til politikken under Basic, og klik på Continue.
-
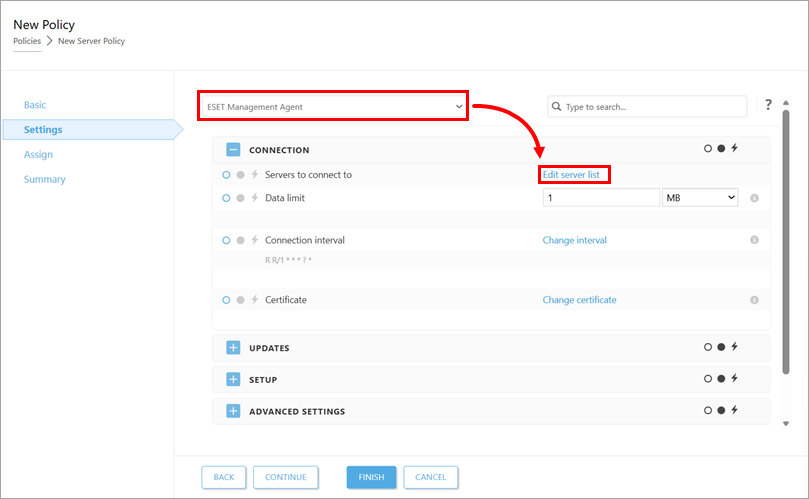
Vælg ESET Management Agent i rullemenuen under Indstillinger, og klik på Rediger serverliste.
-
Klik på Tilføj i dialogboksen Servere . I feltet Host skal du skrive IP-adressen på ESET PROTECT-målserveren; brug formatet
xxx.xxx.xxx.xxx.Hvis du ikke bruger standard ESET PROTECT Server-port 2222, skal du skrive dit eget portnummer i feltet Port. Klik på OK. Sørg for, at den nye ESET PROTECT Server-adresse står først i dialogboksen Server. Klik på Gem.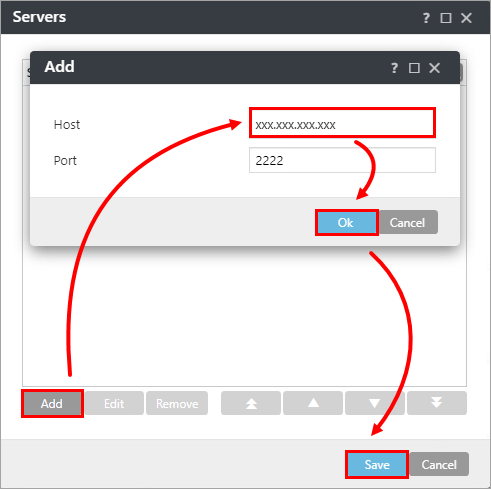
-
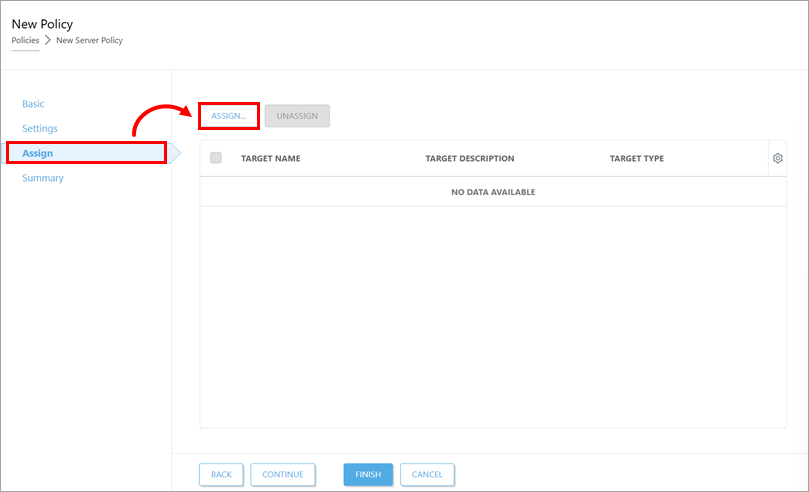
Klik på Tildel → Tildel.
-
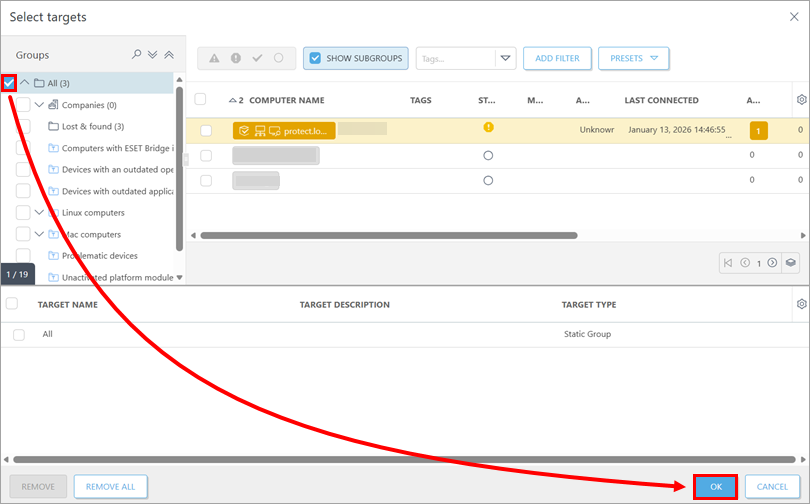
Marker afkrydsningsfeltet ud for Alle på listen Grupper , og klik på OK.
-
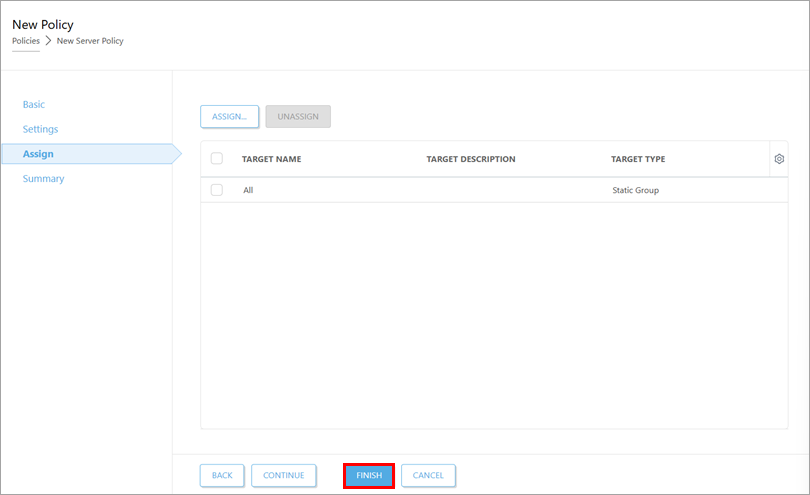
Klik på Udfør.
-
Den tid, det tager at anvende politikken, varierer afhængigt af din ESET PROTECT Server-konfiguration. Når politikken er anvendt, skal du migrere ESET PROTECT-databasen til Windows-målserveren.
IV. Migrer ESET PROTECT-databasen til Windows-målserveren
-
Log ind på ESET PROTECT Virtual Appliance Management Console.
-
Opret en sikkerhedskopi af databasen.
-
Aktivér fjernadgang. Når det er aktiveret, kan du få adgang til Webmin-administrationsgrænsefladen.
-
Opret forbindelse til Webmin-administrationsgrænsefladen: Gå til din ESET PROTECT Virtual Appliance's IP-adresse på port 10000 i webbrowseren (f.eks. https://xxx.
xxx.xxx.xxx:10000), og log ind medroot-brugerenog adgangskoden til din ESET PROTECT Virtual Appliance.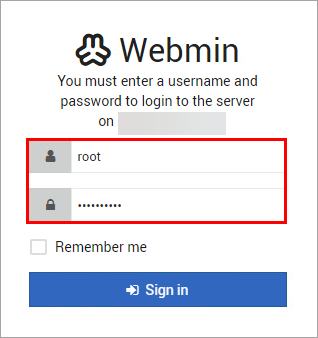
-
I Webmin skal du klikke på Værktøjer →Filhåndtering → opt → appliance → conf. Klik på de tre prikker i rækken med
db-backup.sql-filen, og klik på Download.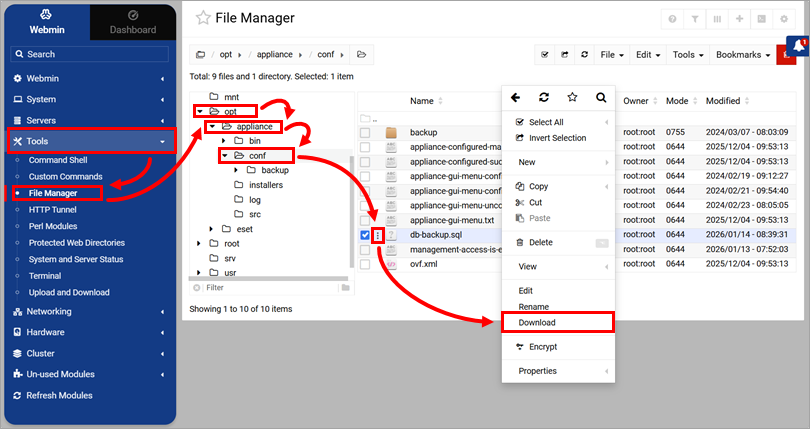
-
Kopier den downloadede
db-backup.sql-fil til en placering, der er tilgængelig fra Windows-målserveren. -
Log ind på ESET PROTECT Virtual Appliance Management Console. Vælg Luk systemet ned → Ja.
-
Medmindre det allerede er forberedt, skal du installere og konfigurere MySQL Server på Windows-målserveren. Til
root-brugerenanbefaler vi at bruge den samme adgangskode, som du bruger til ESET PROTECT Virtual Appliance. -
Medmindre den allerede
eroprettet, skal du oprette en tom database med navnetera_dbpå mål-MySQL-serveren. Kør i kommandoprompten:cd C:\Program Files\MySQL\MySQL Server x.x\bin mysql --host TARGETHOST -u root -p "--execute=CREATE DATABASE era_db /*!40100 DEFAULT CHARACTER SET utf8 */;"Erstat
C:\Program Files\MySQL\MySQL Server x.x\binmed den korrekte sti til din MySQL-serversbin-mappeogTARGETHOSTmed værtsnavnet eller IP-adressen på måldatabaseserveren. -
Gendan databasen. Kør i kommandoprompten:
mysql --host TARGETHOST -u root -p era_db < PATHTOBACKUPFILEErstat
PATHTOBACKUPFILEmed stien til databasens backup-fil (f.eks.C:\db-backup.sql). -
Opret en MySQL-konto, der giver
root-brugerenmulighed for at få fjernadgang til databasen. Kør i kommandoprompten:mysql --host TARGETHOST -u root -p "--execute=CREATE USER root@'%' IDENTIFIED BY 'TARGETERAPASSWD';"Erstat
TARGETHOSTmed værtsnavnet eller IP-adressen på måldatabaseserveren ogTARGETERAPASSWDmed den adgangskode, der skal bruges til kontoen. Vi anbefaler, at du bruger den adgangskode, som du bruger til ESET PROTECT Virtual Appliance. -
Giv fuld adgang til
era_db-databasenforroot-brugeren. Kør i kommandoprompten:mysql --host TARGETHOST -u root -p "--execute=GRANT ALL ON era_db.* TO root;"Erstat
TARGETHOSTmed værtsnavnet eller IP-adressen på måldatabaseserveren.
V. Opsætning af ESET PROTECT Server
-
Download ESET PROTECT Server standalone-installationsprogrammet. Kør det downloadede installationsprogram.
-
På skærmbilledet Database server connection skal du kontrollere, at MySQL-serveren og MySQL ODBC-driveren er registreret korrekt, og at databasenavnet
er era_db. I afsnittet Database account skal du skriverooti feltet Username og adgangskoden til kontoen i feltet Password. Hvis du fulgte anbefalingerne til adgangskoden i afsnittetMigrer ESET PROTECT-databasen til Windows-målserveren, skal adgangskoden være den samme som den, du bruger til ESET PROTECT Virtual Appliance.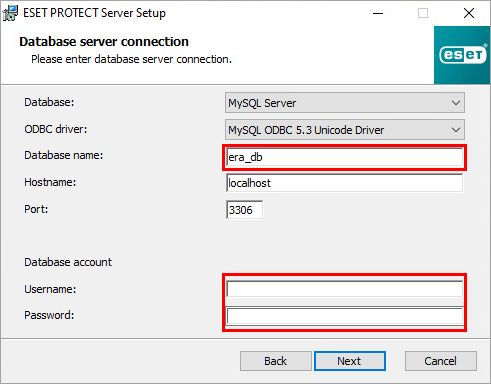
-
Klik på Næste. I dialogboksen Databasebruger skal du klikke på Ja for at bekræfte brugen af den angivne
rodkontosom databasekonto for ESET PROTECT On-Prem. -
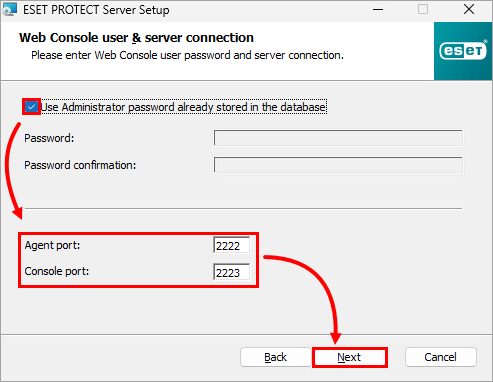
På skærmen Web Console user & server connection skal du markere afkrydsningsfeltet ud for Use Administrator password already stored in the database og kontrollere, at agent- og konsolportene stemmer overens med indstillingerne i ESET PROTECT Virtual Appliance. Standardporten for agenten er 2222, og standardporten for konsollen er 2223. Klik på Næste.
-
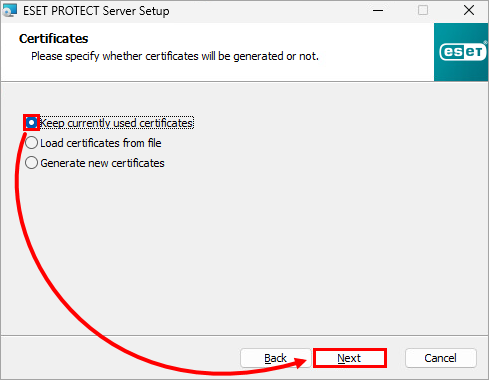
På skærmen Certifikater skal du vælge alternativknappen ved siden af Behold aktuelt anvendte certifikater og klikke på Næste.
-
Fortsæt gennem installationsprogrammet, og afslut installationen.
-
Når installationen er færdig, skal du installere ESET PROTECT On-Prem Web Console.
-
Når den er installeret, skal du åbne ESET PROTECT On-Prem Web Console. Brug din adgangskode til ESET PROTECT Virtual Appliance. Kontrollér, at agenterne er blevet migreret, og at de opretter forbindelse til den nye server. Du må ikke afinstallere din gamle ESET PROTECT Virtual Appliance, før du har kontrolleret, at migreringen var vellykket.