Solution
- Install the new ESET PROTECT Server
- Export the Agent certificate .pfx file from the new ESET PROTECT Server
- Export the Certification Authority .der file from the new ESET PROTECT Server
- Import the Certification Authority .der file exported from the new ESET PROTECT Server to the current one
- Migrate client devices from the current ESET PROTECT Server to the new one
I. Install the new ESET PROTECT Server
-
Install ESET PROTECT Server using the ESET PROTECT On-Prem All-in-one installer or ESET PROTECT Server standalone installer.
-
Import all required ESET subscriptions to ESET PROTECT On-Prem.
II. Export the Agent certificate .pfx file from the new ESET PROTECT Server
-
Log in to the ESET PROTECT On-Prem Web Console of the new ESET PROTECT Server.
-
Click More → Peer Certificates → Agent certificate → Export. Save the exported
.pfxfile to a location accessible from the current ESET PROTECT Server.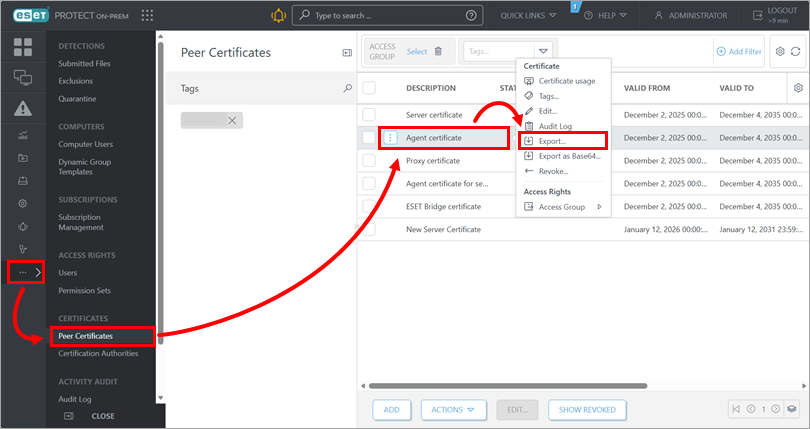
III. Export the Certification Authority .der file from the new ESET PROTECT Server
-
Log in to the ESET PROTECT On-Prem Web Console of the new ESET PROTECT Server.
-
Click More → Certification Authorities → ESET PROTECT Certification Authority → Export Public Key. Save the exported
.derfile to a location accessible from the current ESET PROTECT Server.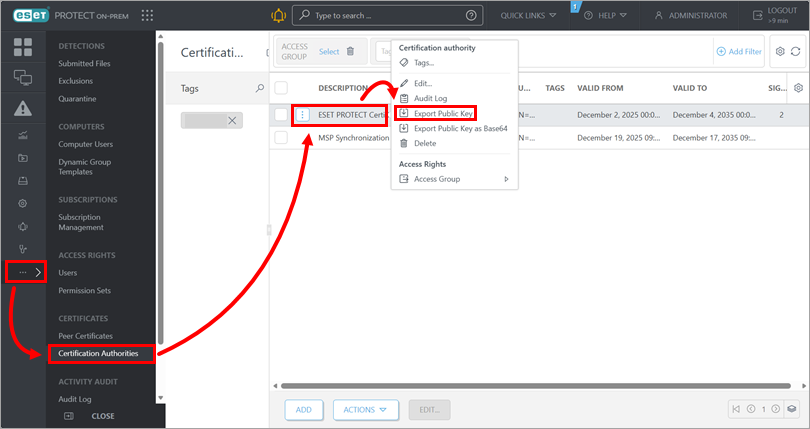
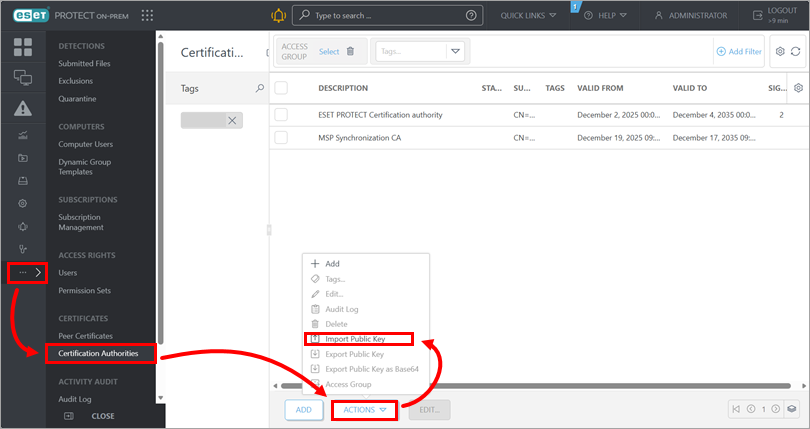
IV. Import the Certification Authority .der file exported from the new ESET PROTECT Server to the current one
-
Log in to the ESET PROTECT On-Prem Web Console of the current ESET PROTECT Server.
-
Click More → Certification Authorities → Actions → Import Public Key.
-
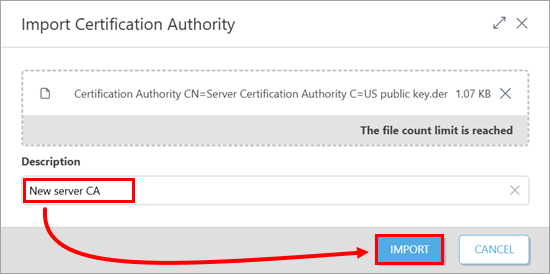
Click Choose file to upload, navigate to the location with the Certification Authority
.derfile exported from the new ESET PROTECT Server, select the file and click Open.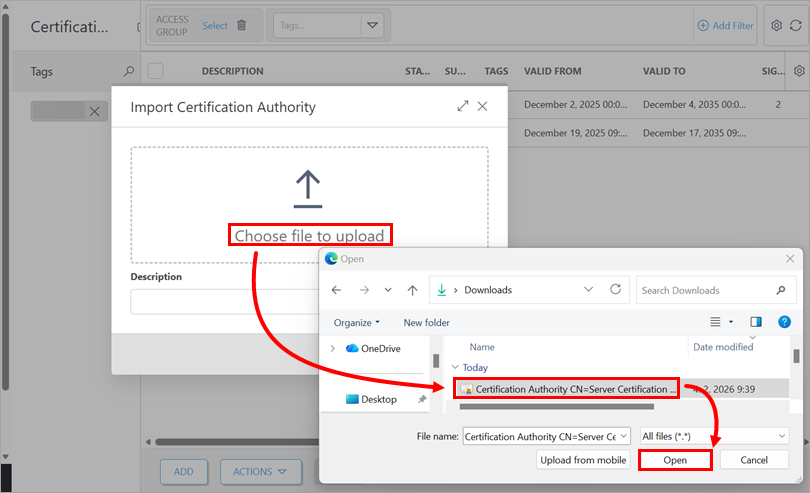
-
Type a Description for the Certification Authority and click Import.
V. Migrate client devices from the current ESET PROTECT Server to the new one
-
Log in to the ESET PROTECT On-Prem Web Console of the current ESET PROTECT Server.
-
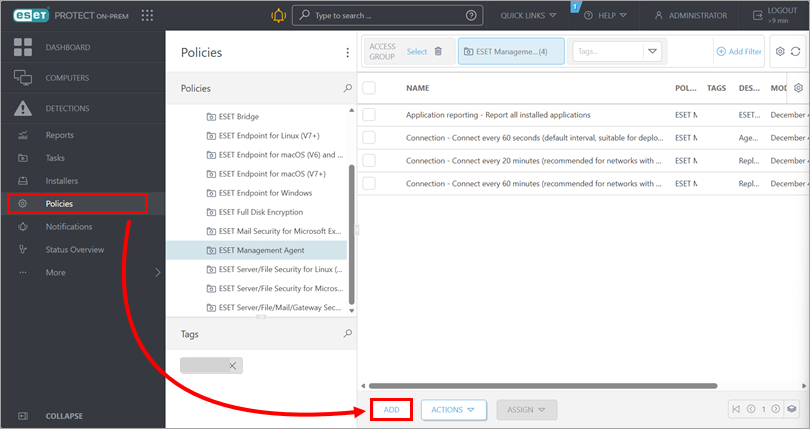
Click Policies → Add.
-
Type a Name and optional Description for the policy.

-
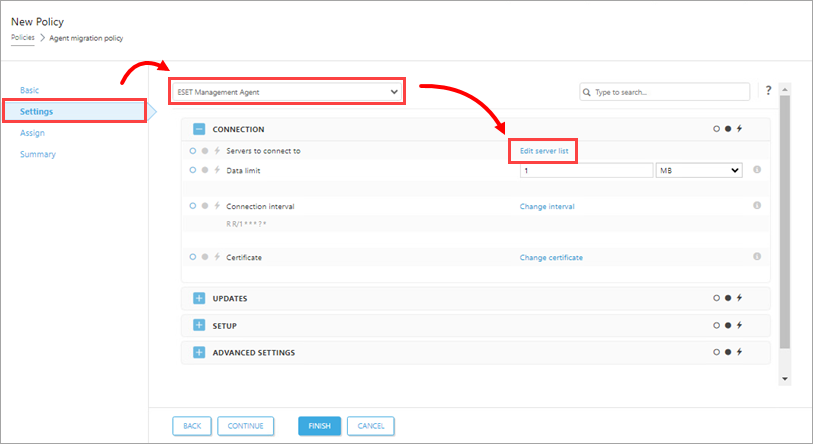
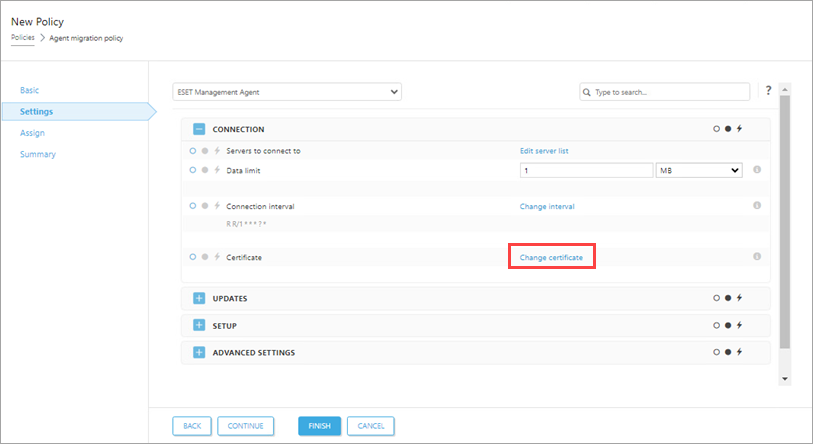
Click Settings, select ESET Management Agent from the drop-down menu and click Edit server list.
-
In the Servers dialog box, click Add. In the Host field, type the IP address of the new ESET PROTECT Server; use the format
xxx.xxx.xxx.xxx. If you do not use the default ESET PROTECT Server port 2222, type your custom port number in the Port field. Click OK. Ensure that the new ESET PROTECT Server address is listed first in the Server dialog box. Click Save.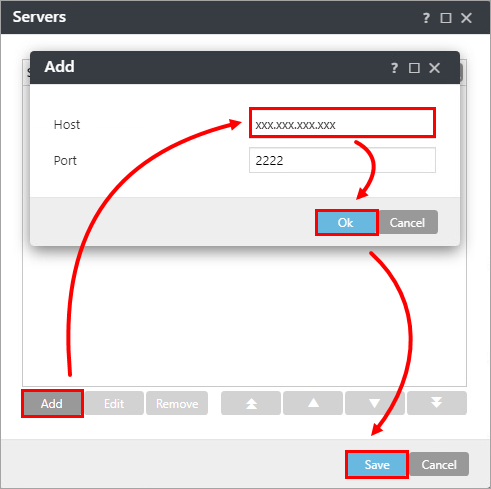
-
Click Change certificate.
-
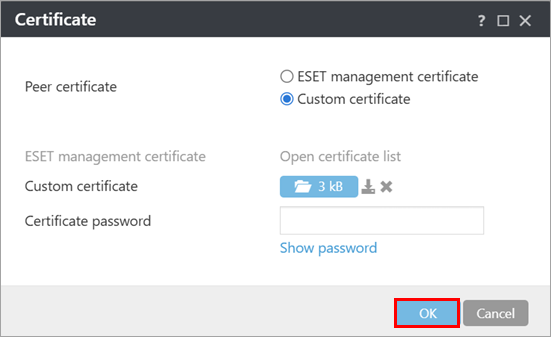
In the Certificate dialog box, select Custom certificate and click the folder icon. Navigate to the location with the Agent certificate
.pfxfile exported from the new ESET PROTECT Server, select the file and click Open.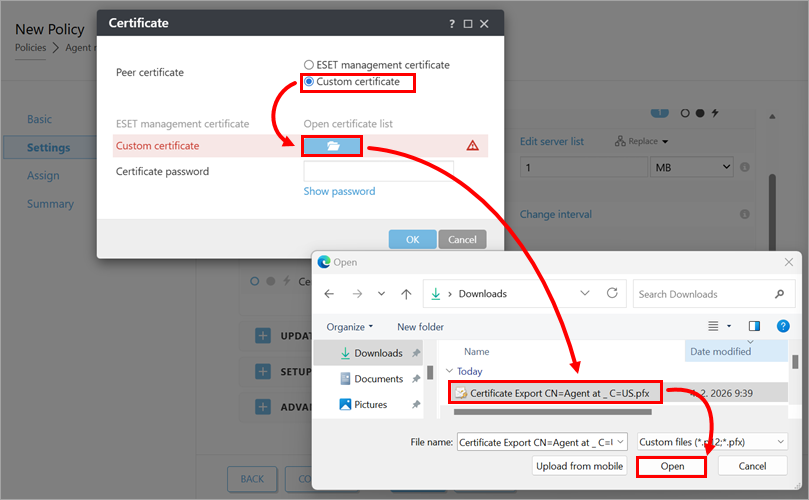
-
Click OK.
-
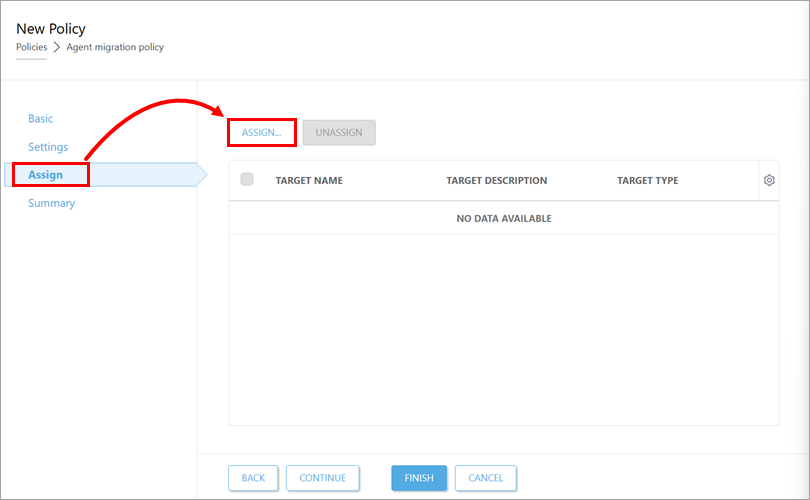
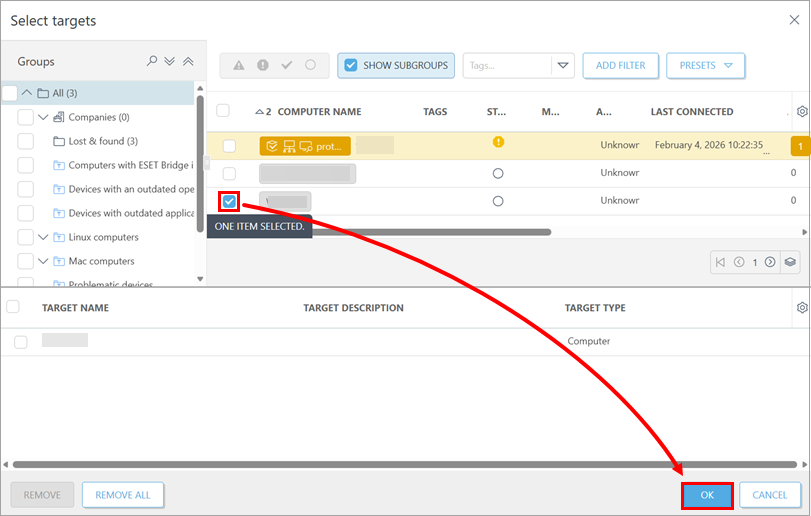
Click Assign → Assign.
-
Select one test client device to be migrated to the new ESET PROTECT Server and click OK.
-
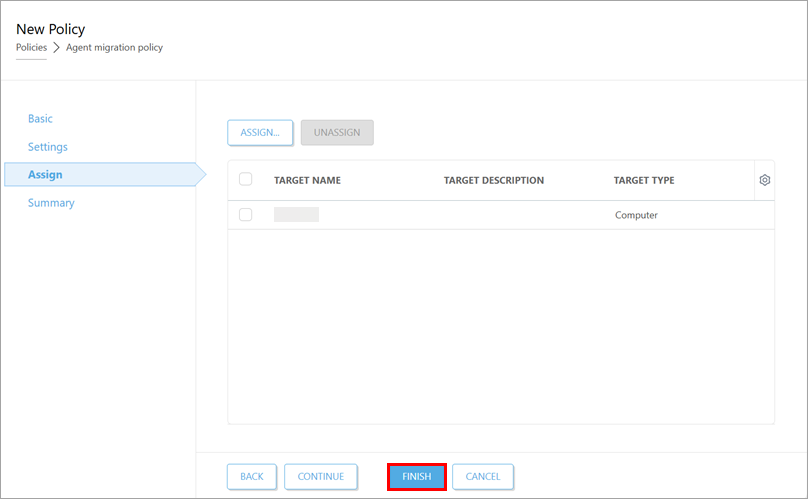
Click Finish.
-
Verify that the test client device is connected to the new ESET PROTECT Server with the correct policy using the correct Agent certificate.
-
After you confirm that the test client device is migrated successfully, assign the migration policy you created to the rest of the client devices. After you assign the policy to the the client devices, they should connect to the new ESET PROTECT Server. If they are not connecting, troubleshoot the migration process.
-
After all devices are migrated successfully, decommission the ESET PROTECT Server you used previously.