Issue
- You have enabled advanced security, your certificates are expiring, or you forgot your Certification Authority passphrase, and need to create a new Certification Authority
Details
Click to expand
Certificates are used to authenticate products distributed under your subscription and identify computers on your network to help ensure secure communication between your ESET PROTECT Server and clients.
Solution
I. Create a new Certification Authority
-
Open the ESET PROTECT On-Prem Web Console in your web browser and log in.
-
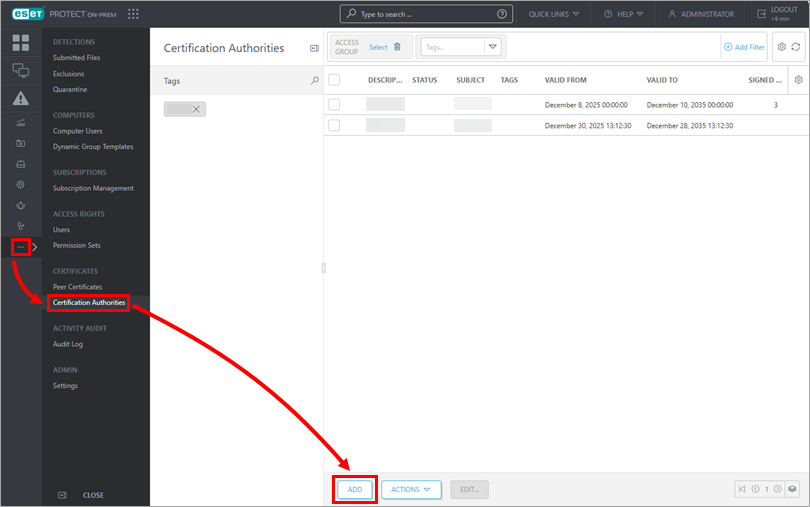
Click More → Certification Authorities → Add.
-
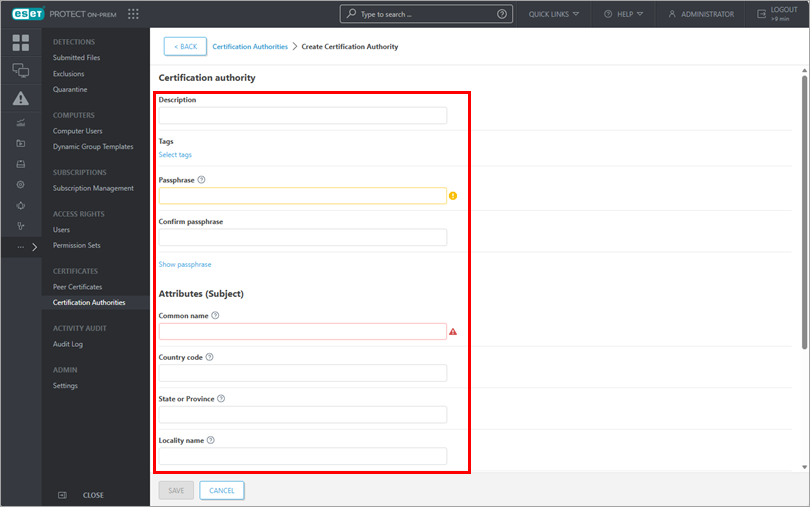
Set the following basic settings for the Certification Authority:
- Description: Type a description for the Certification Authority.
- Passphrase & Confirm passphrase: You can set a passphrase for your Certification Authority according to your preference, but it is not required.
- Attributes: The Common name field is mandatory, and will be used to refer to this Certification Authority in the future.
- Validity: Set the Certification Authority validity dates using the Valid from and Valid to fields.
-
Click Save to save your new Certification Authority. It will be listed in the Certification Authority list and ready for use.
II. Create a new Peer Certificate
-
Click More → Peer Certificates → Add.

-
In the Basic section, check the mandatory fields for the certificate:
- Component: Select the type of certificate you want to create from the drop-down menu.
- Host: Leave the default value (an asterisk) in the Host field to allow for distribution of this certificate with no association to a specific DNS name or IP address.
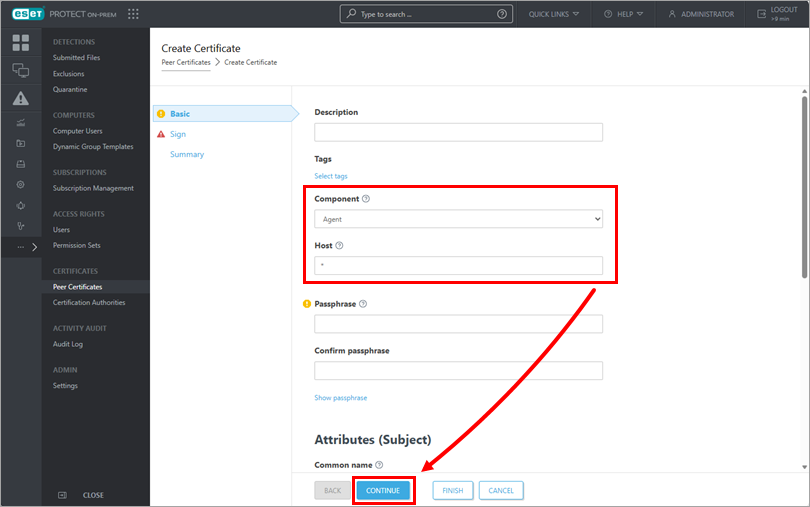
You can also fill in these optional fields for the certificate:
- Passphrase: We recommend that you leave this field blank, but if desired, you can set a passphrase for the certificate that will be required when clients attempt to activate.
- Attributes: You can use these fields to include more detailed information about this certificate.
-
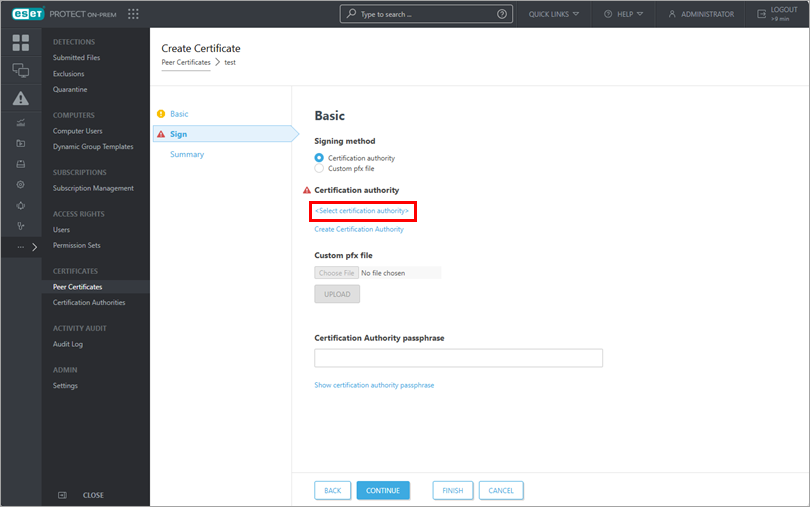
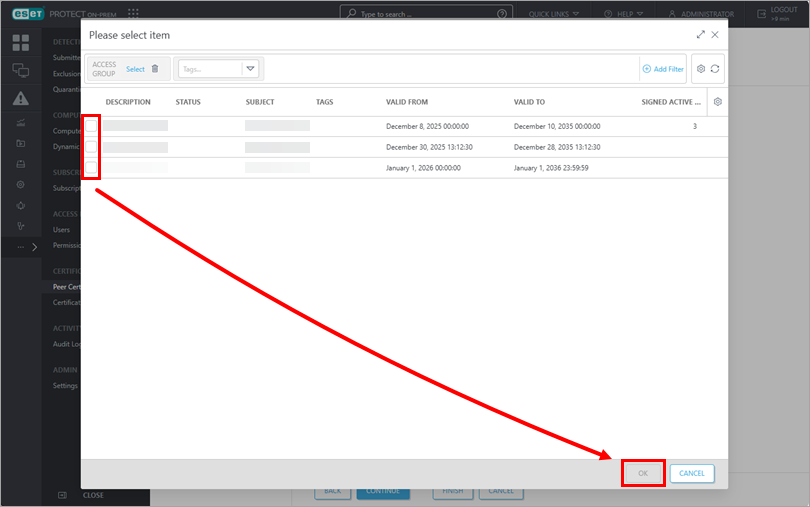
Click Continue, then click Select certification authority.
-
Select the desired Certification Authority and click OK, then click Continue.
-
View details about the certificate and click Finish. Your new peer certificate will be displayed in the list of peer certificates.