Issue
- Add an IP address to the IDS exception list from the "Network threat blocked" notification that appears when the connection is blocked
- Manually exclude an IP address from IDS
- Stop internal IP traffic from being detected as a threat by the ESET firewall
- ESET is detecting known safe internal IP traffic as a threat
- Examples of internal IP address ranges known to be safe (where "x" is 0-255):
- 172.16.x.x - 172.31.x.x
- 192.168.x.x
- 10.x.x.x
Details
Click to expand
This article applies to the following products:
- ESET Security Ultimate
- ESET Smart Security Premium
- ESET Internet Security
- ESET Small Business Security
- ESET Safe Server
In certain situations, the Intrusion Detection Service (IDS) may detect communication between routers or other internal networking devices as a potential security threat. You can add the known safe address to the Addresses excluded from IDS zone to bypass the IDS.
Solution
Add an IP address to the IDS exception list from the "Network threat blocked" notification that appears when the connection is blocked
If you are not receiving "Network threat blocked" notifications, proceed to section 2 to manually exclude IP addresses from IDS.
-
Click Change handling of this threat in the notification window.
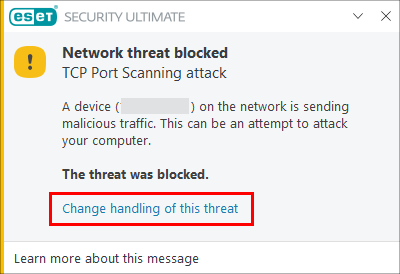
Figure 1-1 -
Click Allow.
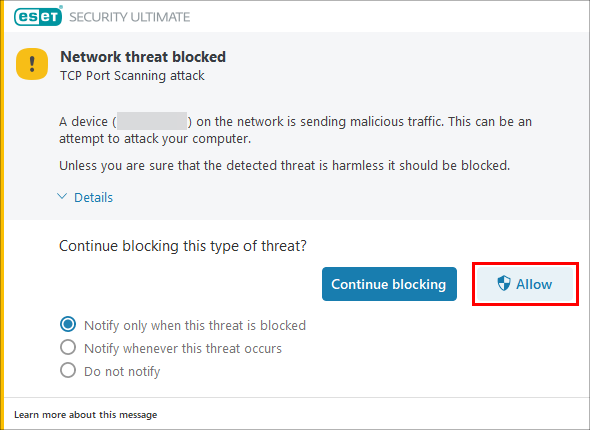
Figure 1-2 -
The IP address is excluded. To view the new exception, click Open IDS exception editor or press the F5 key to open Advanced setup, click Personal Firewall, expand Advanced and then click Edit next to IDS exceptions.
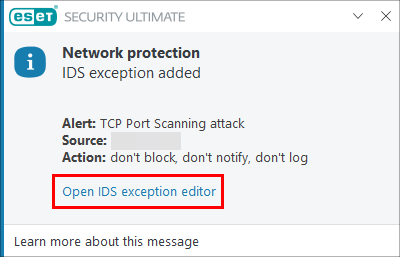
Figure 1-3 -
The new IDS exception is in the list.
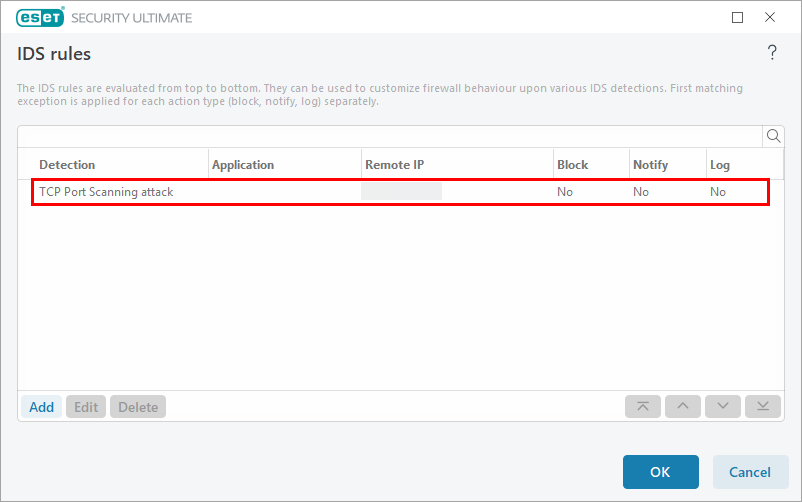
Figure 1-4
Manually exclude an IP address from IDS
-
Press the F5 key to open Advanced Setup.
-
Click Protections → Network access protection, expand Network access protection, and then click Edit next to IP sets.
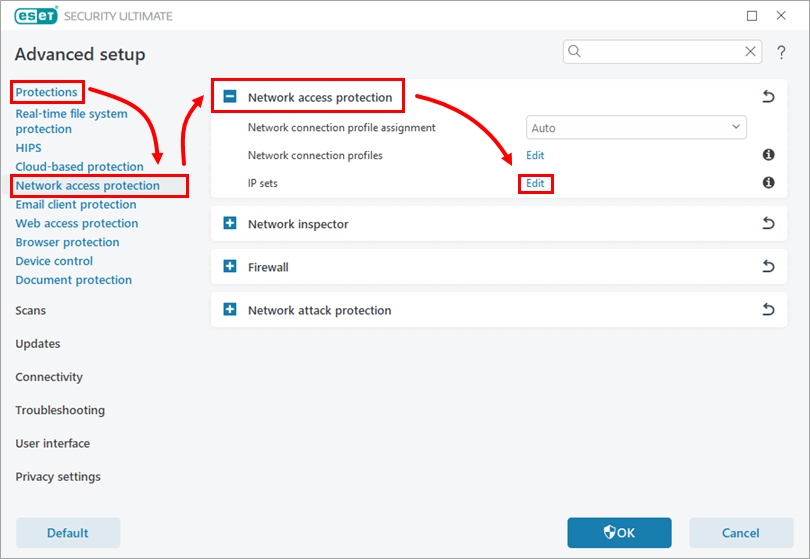
Figure 2-1 -
Select Addresses excluded from IDS and click Edit.
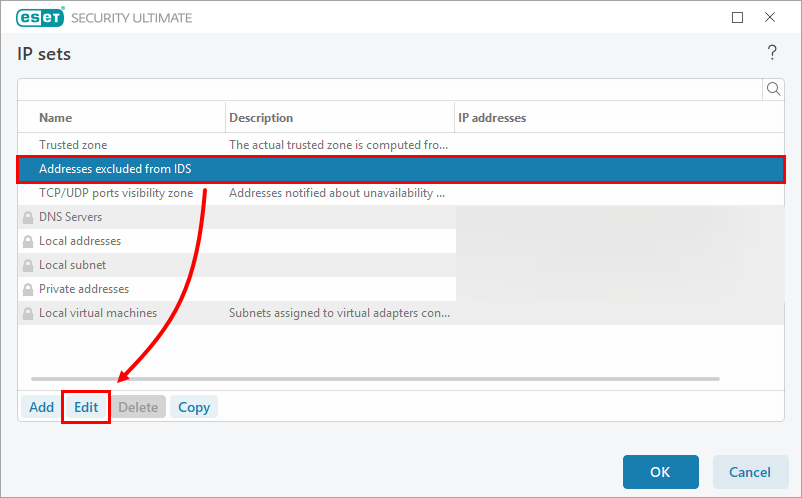
Figure 2-2 -
In the Edit IP set window, type the IP address of the device being incorrectly detected as a threat in the Remote computer address (IPv4, IPv6, range, mask) field and then click OK.
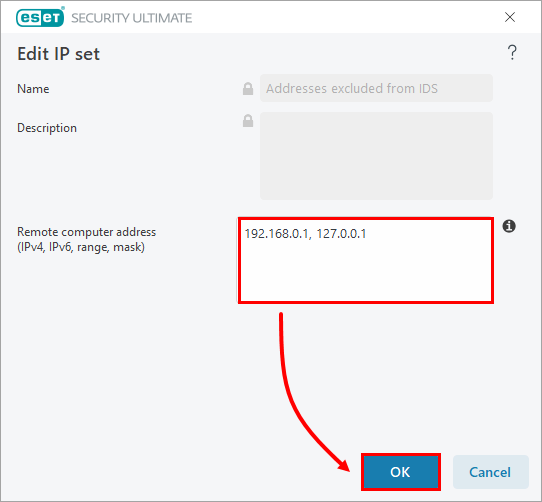
Figure 2-3 -
The IP address you just added will be visible in the IP sets window. Click OK twice to save your changes and exit Advanced setup.
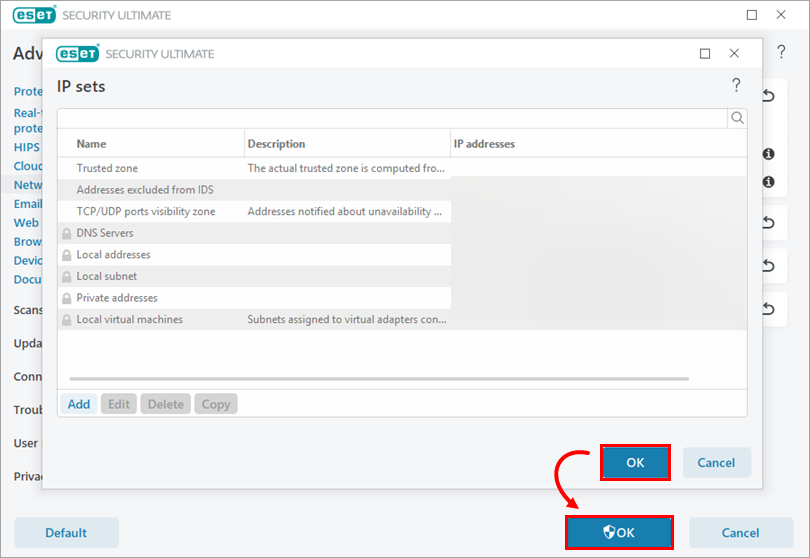
Figure 2-4 -
Your device can now connect to your home network, and you should no longer see notifications about attacks coming from an internal IP address that you know is safe.