Issue
- Start Windows 11 in Safe Mode or Safe Mode with Networking
- Start Windows 11 in Safe Mode or Safe Mode with Networking using the command prompt
Solution
Safe Mode is a troubleshooting option that limits Windows operations to basic functions.
- Safe Mode starts Windows with only core drivers and services.
- Safe Mode with Networking starts Windows with only core drivers plus networking support.
To start your computer in Safe Mode or Safe Mode with Networking, follow the instructions below.
Start Windows 11 in Safe Mode or Safe Mode with Networking
Click Start → Power, hold the Shift key and click Restart.
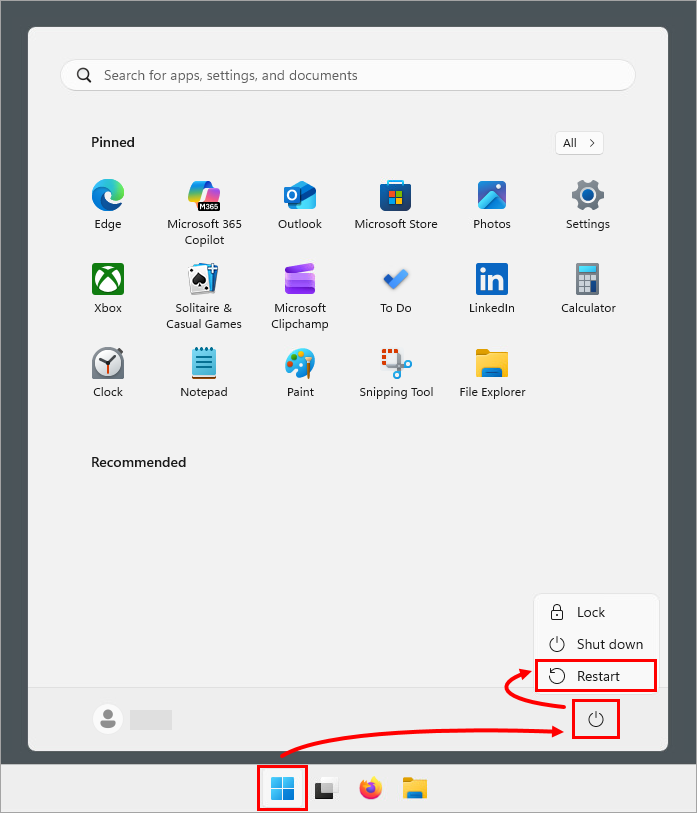
Figure 1-1
Click Troubleshoot.

Figure 1-2
Click Advanced options.
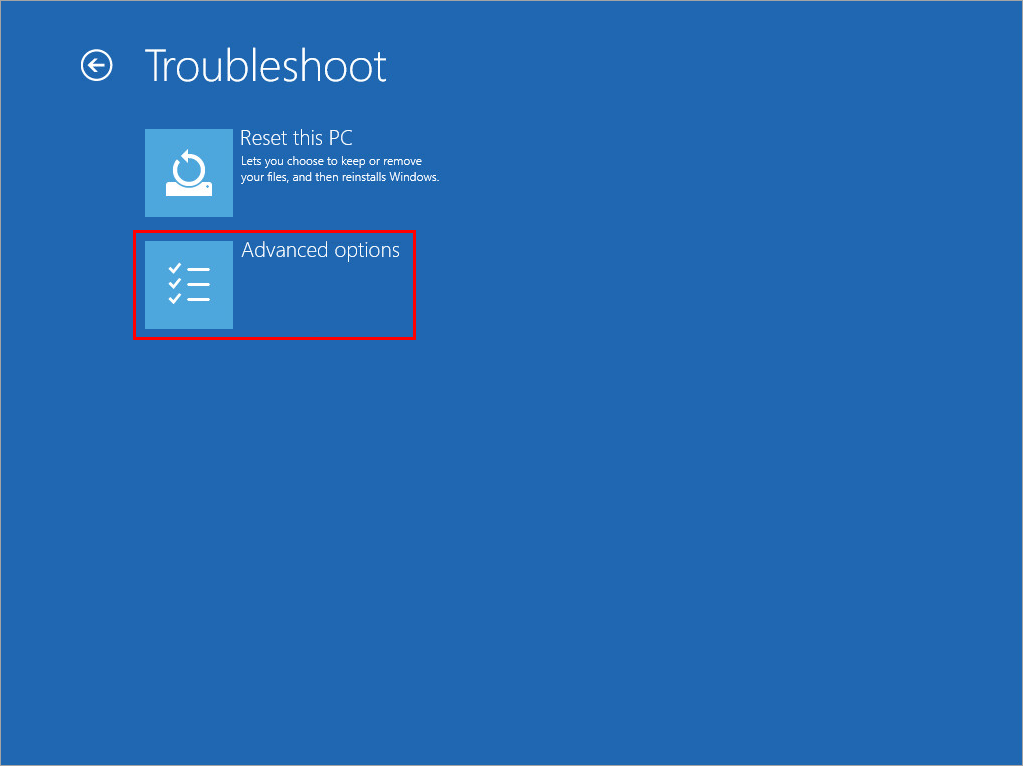
Figure 1-3
Click Startup Settings.

Figure 1-4
Click Restart.
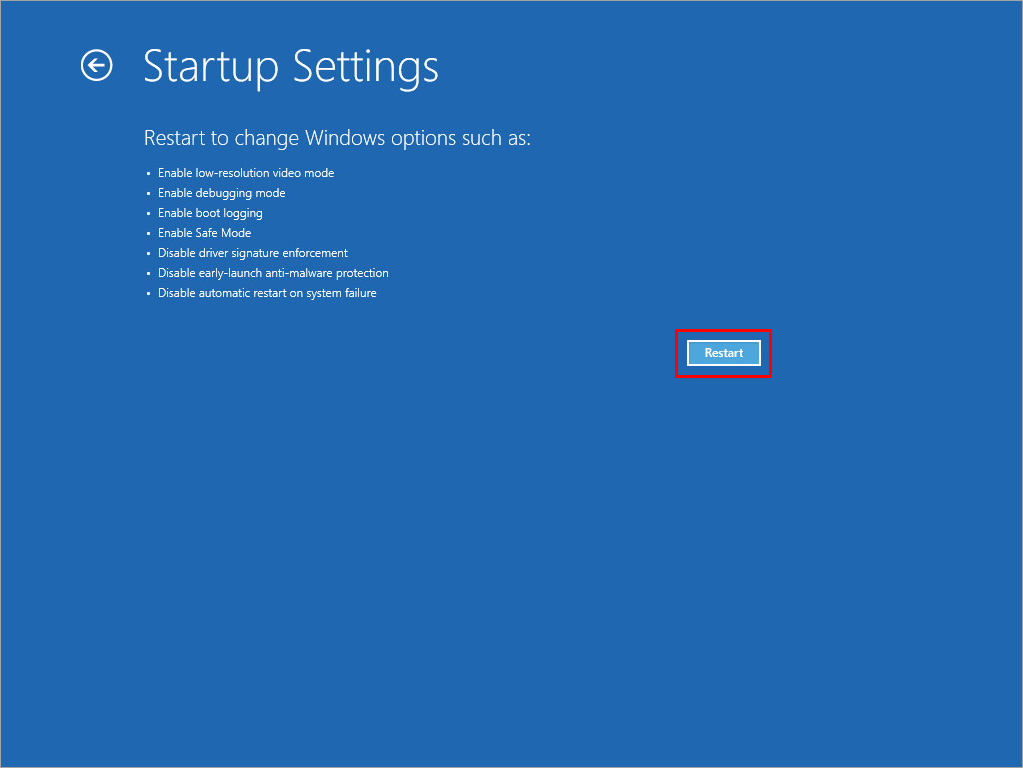
Figure 1-5
After your computer restarts, press 4 or 5 on your keyboard to select Safe Mode or Safe Mode with Networking, respectively.
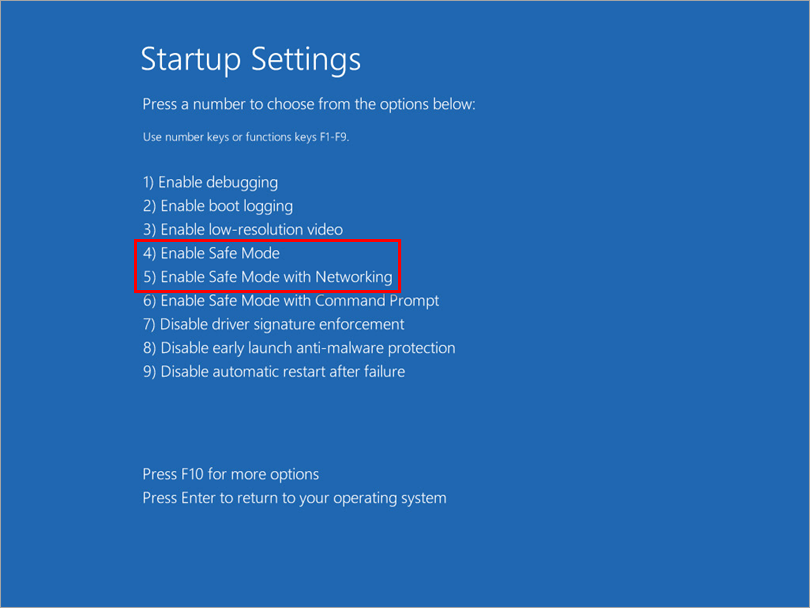
Figure 1-6 Type in your credentials to start Windows in Safe Mode or Safe Mode with Networking.
To exit the Safe Mode or Safe Mode with Networking, click Start, click the Power button and click Restart to return to your normal Windows configuration.
Start Windows 11 in Safe Mode or Safe Mode with Networking using the command prompt
Click Start, start typing cmd, right-click Command Prompt and click Run as administrator.
For a Safe Mode, run the following command:
bcdedit /set {current} safeboot minimalFor a Safe Mode with Networking, run the following command:
bcdedit /set {current} safeboot networkTo start Windows in Safe Mode or Safe Mode with Networking, restart your computer using the following command:
shutdown /rAfter restart, log in.
To exit the Safe Mode or Safe Mode with Networking and start your normal Windows configuration:
Click Start, start typing cmd, right-click Command Prompt and click Run as administrator.
Run the following command:
bcdedit /deletevalue {current} safebootRestart your computer using the following command:
shutdown /r