Solution
-
Click Policies → New Policy.
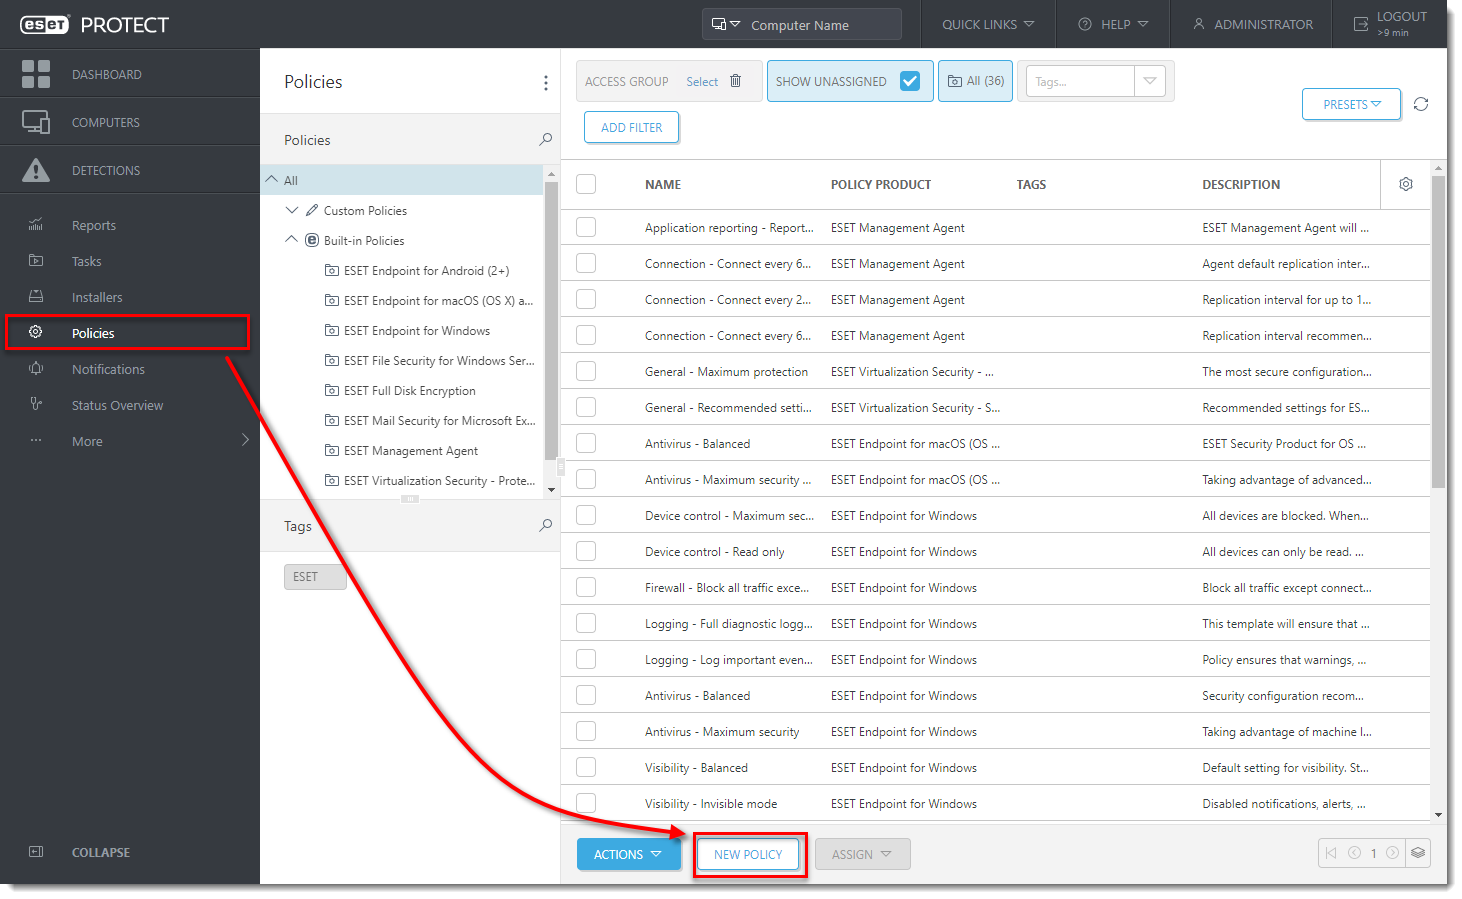
Figure 1-1 -
Type a name for the new policy in the Name field. Optionally, type a description in the Description field.
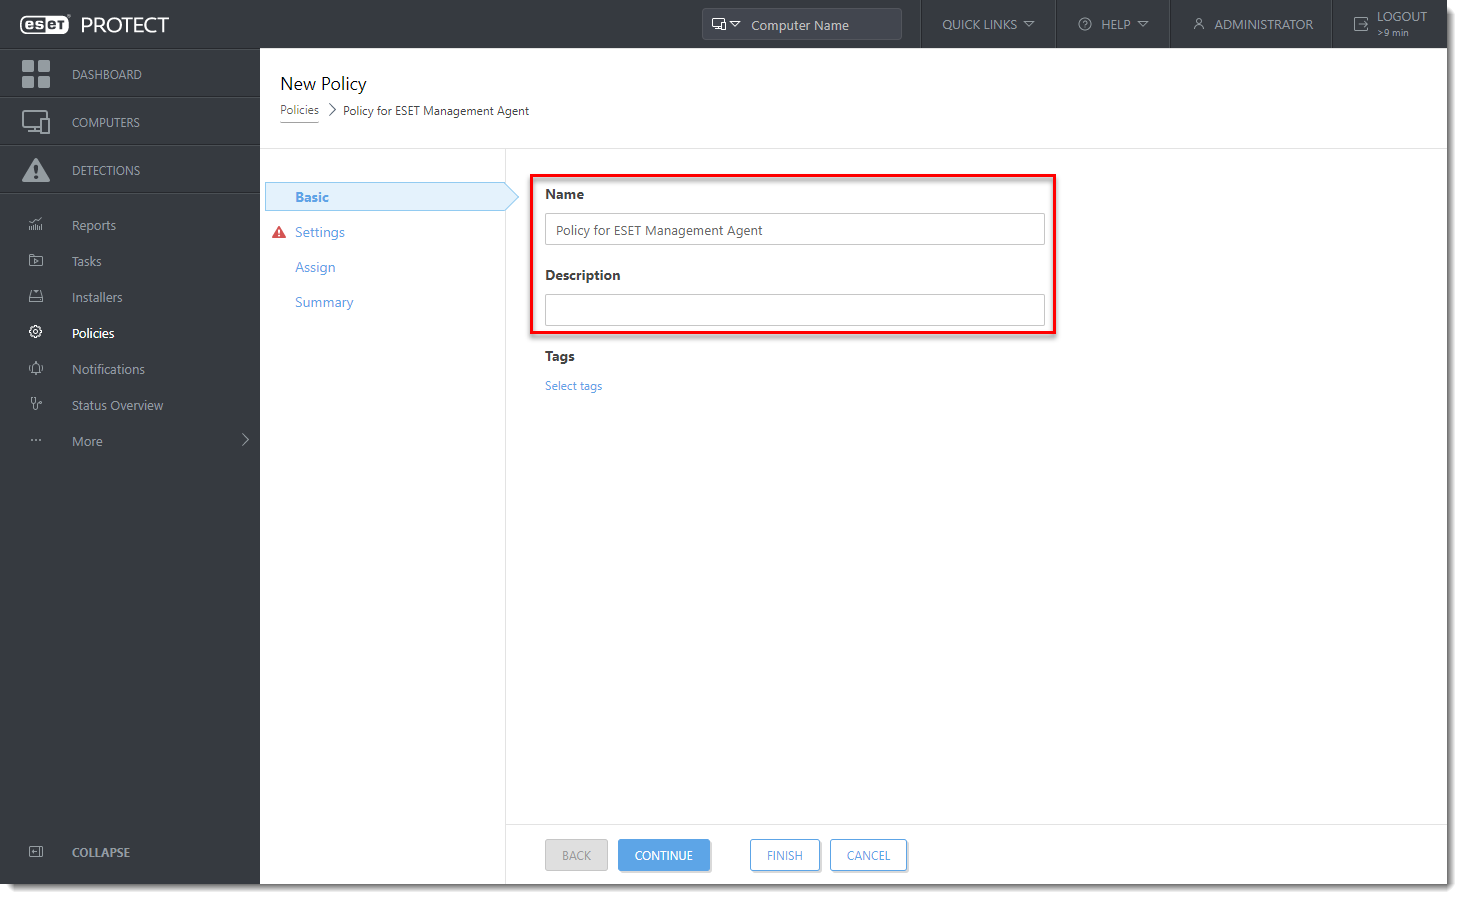
Figure 1-2 -
Click Settings and select ESET Management Agent from the drop-down menu.
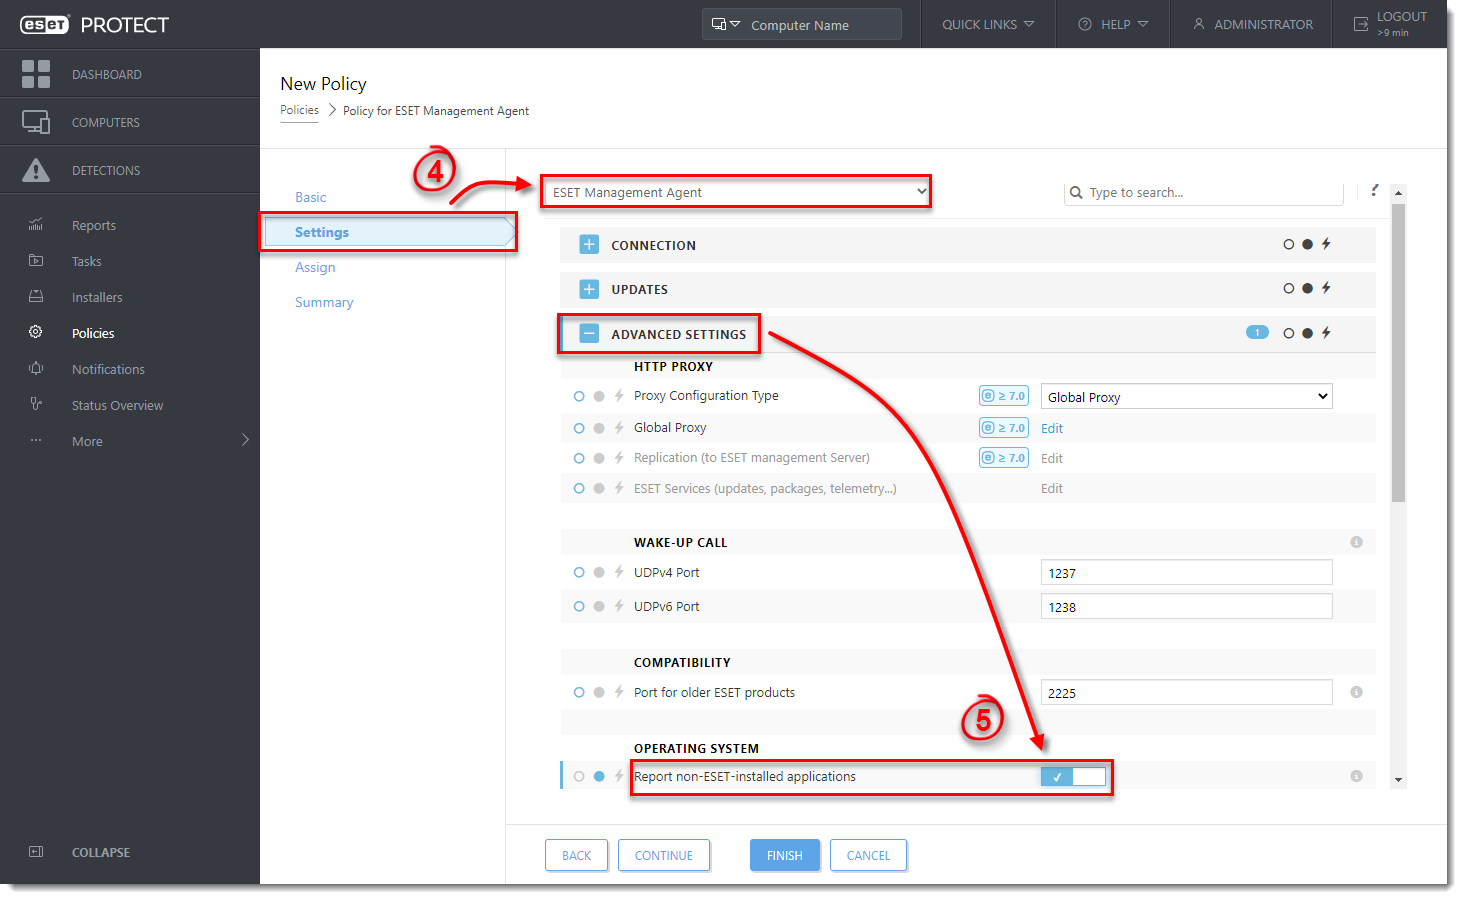
Figure 1-3 -
Expand Advanced Settings, scroll down to the Operating System section and click the toggle next to Report non-ESET-installed applications to enable it.
-
In the Assign section click Assign. Select the check box next to each static or dynamic group that this policy will be assigned to and click OK. Click Finish to save the policy. Agents running on client computers will receive the new policy the next time they check in (the default check in interval is 20 minutes). Alternatively, you can send a wake-up call to client computers so they receive the changes sooner.
-
Click Reports → Computers → scroll down to Installed applications → click the gear icon and then click Generate now.
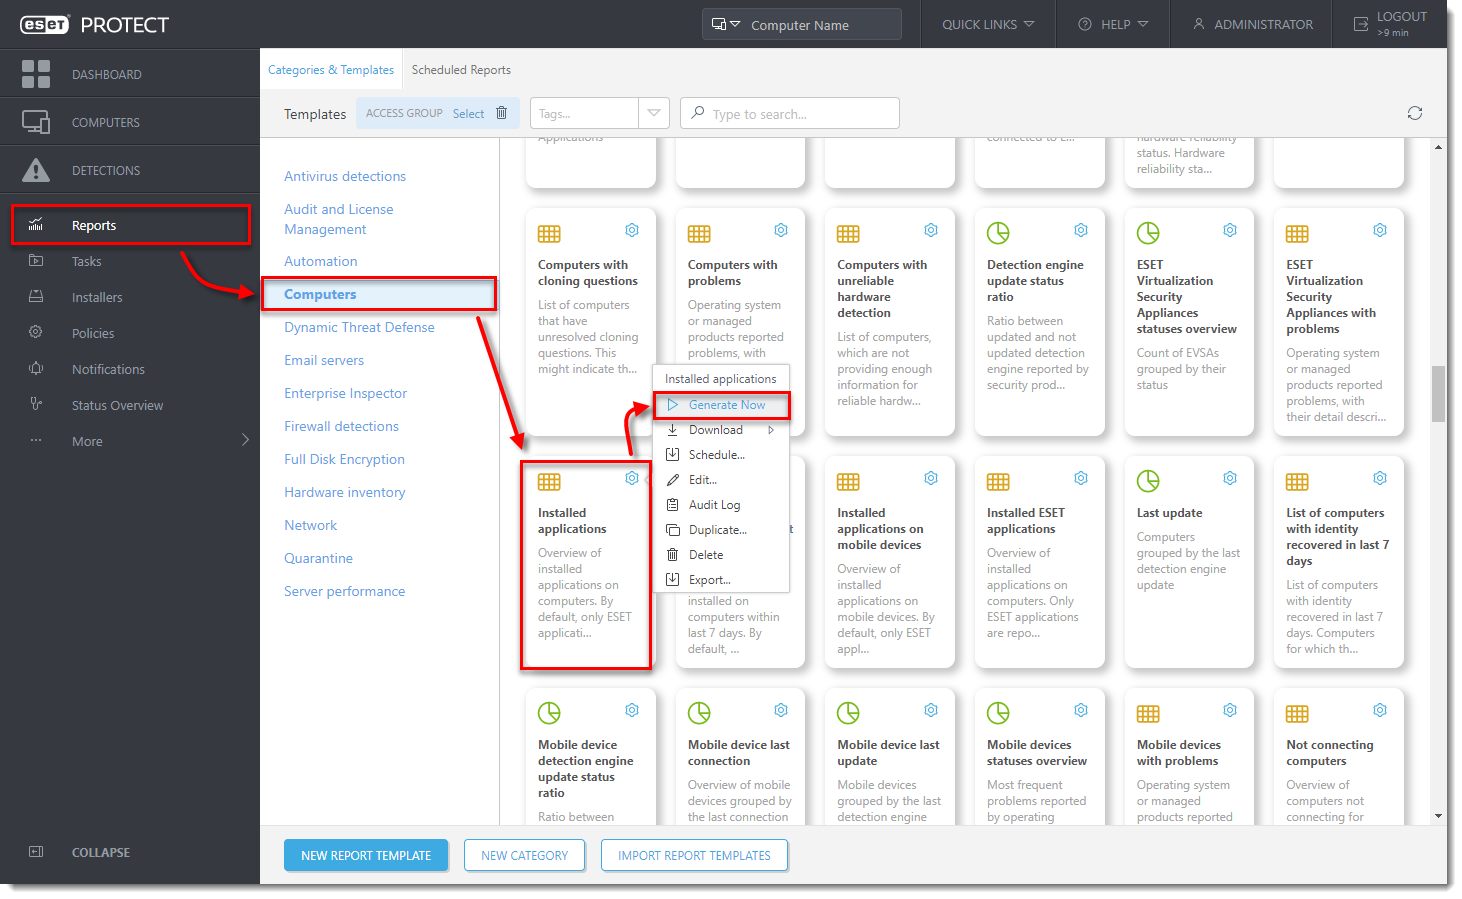
Figure 1-4 -
Verify that the third-party antivirus program and version you want to remove is listed in the report.
-
Click Tasks → New → Client Task.
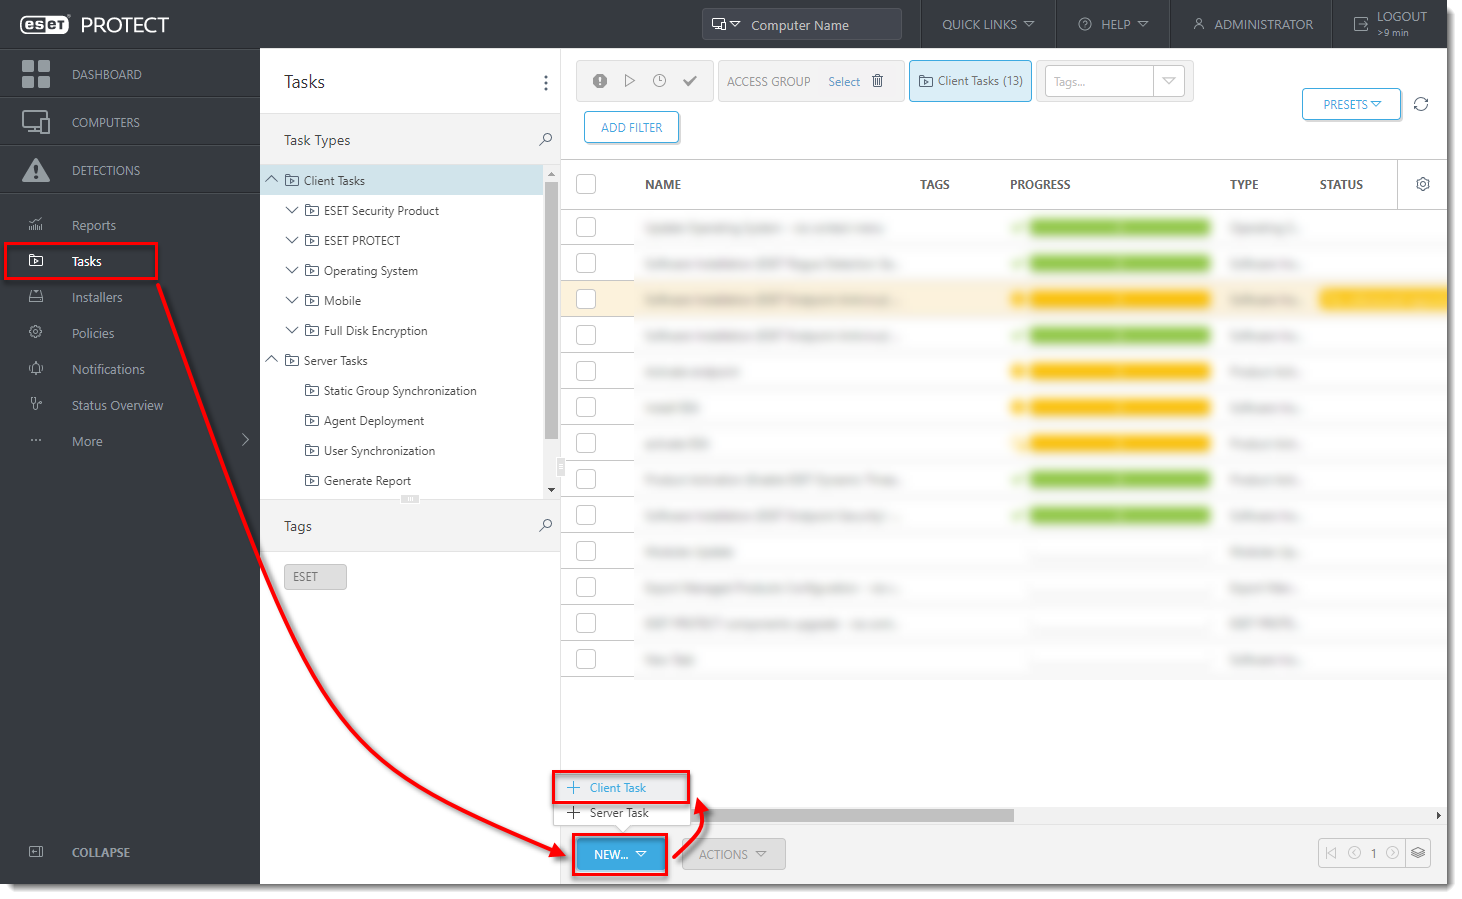
Figure 1-5 -
Type a name for the new task in the Name field and then select Software Uninstall from the Task drop-down menu.
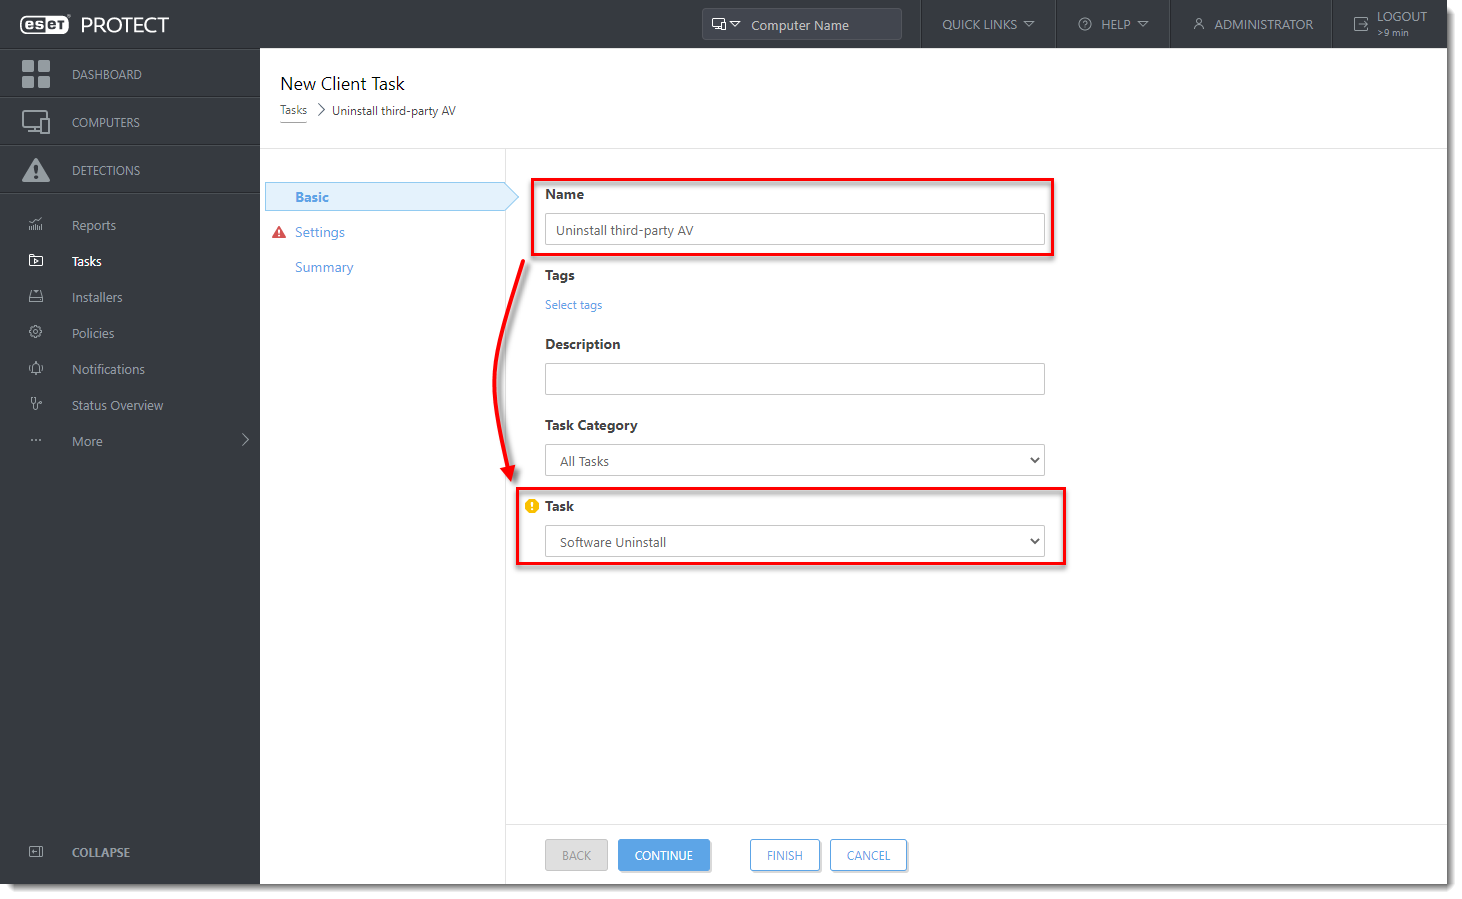
Figure 1-6 -
Click Settings and select Third-party antivirus software (Built with OPSWAT) from the drop-down menu. See the list of removable applications.
-
Click Finish when you are finished making changes to your task.
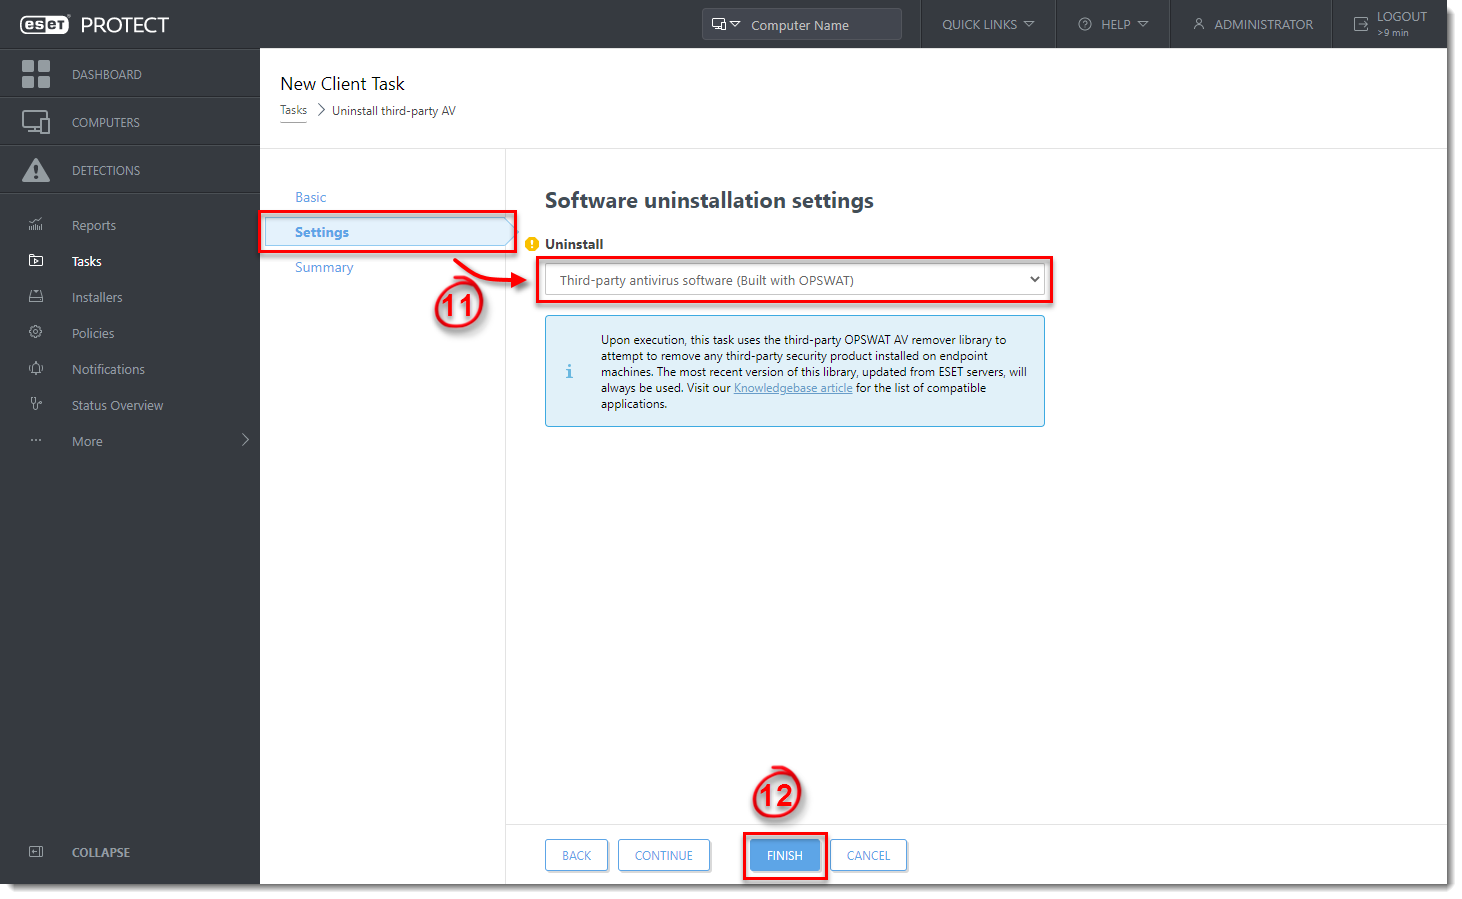
Figure 1-7 -
Click Create Trigger when you are asked to add a trigger for the client task.