Issue
- My ESET business products are not being updated automatically to the latest version
- My ESET business products are not on the latest versions
- I use ESET PROTECT or ESET PROTECT On-Prem
- I do not use a Web Console
Solution
Auto-updates are enabled by default for new ESET PROTECT and ESET business product users. In case you modified any of the auto-updates settings, you can review the settings and extend the auto-update to a larger part of your network.
I use ESET PROTECT or ESET PROTECT On-Prem

Edit an existing policy to enable auto-updates
-
Click Policies → Built-in policies, click the desired policy (for example, the Common features policy), then click Enable product auto-update and select Change Assignments.
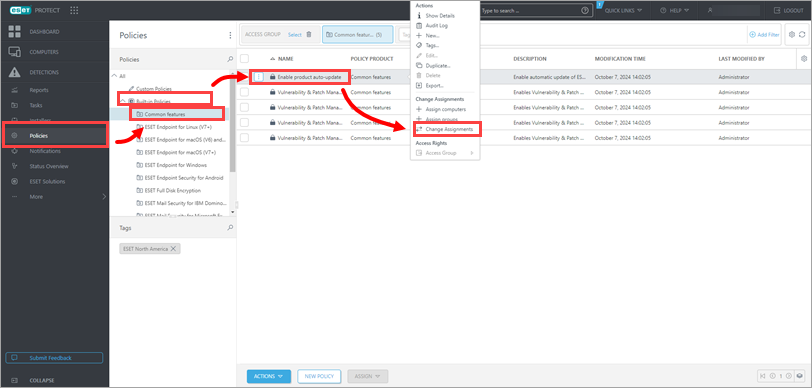
Figure 1-1 -
Review the policy target and verify the toggle next to auto-updates is enabled for all the computers you want to have automatically updated.
-
Click Assign.
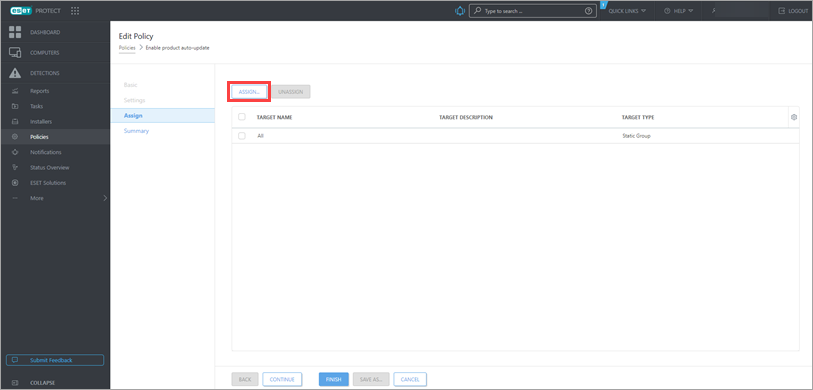
Figure 1-2 -
Select the check box next to All to enable auto-updates for all computers in the policy and click OK → Finish.
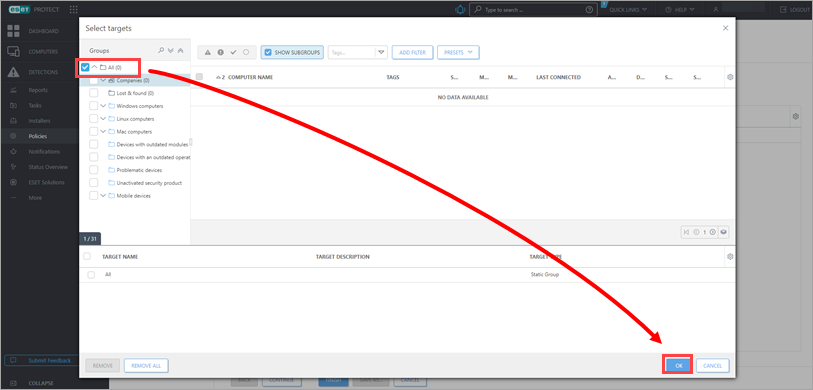
Figure 1-3
Create a new policy to enable forced auto-updates
-
Click Policies → New Policy.
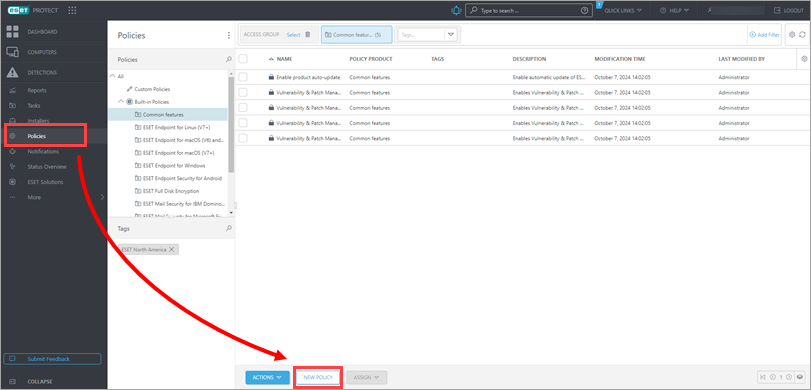
Figure 2-1 -
Fill in a Name and Description for the policy and click Continue.
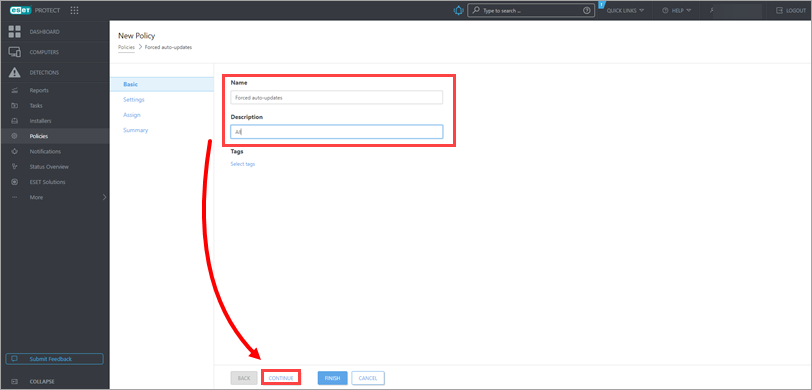
Figure 2-2 -
In the Settings section, select Common features, click Update, then next to Auto-updates click the toggle to enable it and click the lightning bolt icon to enable forced auto-updates.
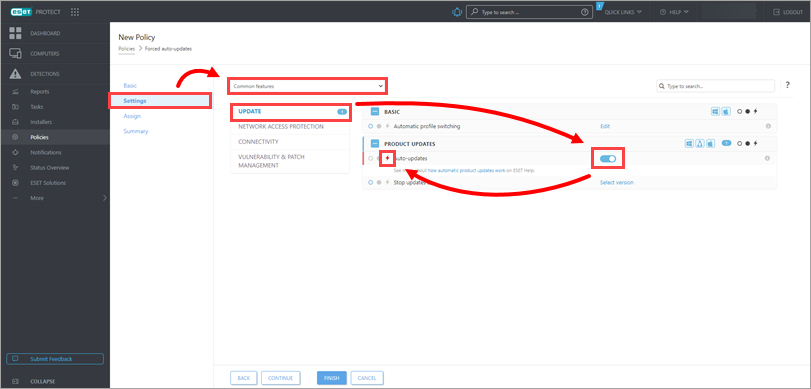
Figure 2-3 -
Click Assign → Assign.
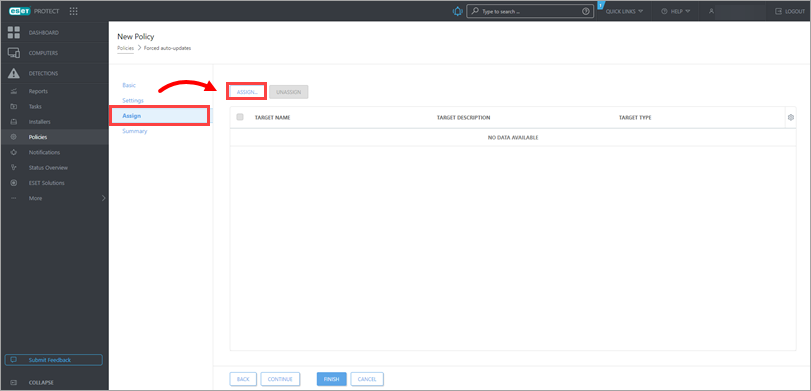
Figure 2-4 -
Select the check box next to All to enable forced auto-updates for all computers in the policy. Click OK → Finish.
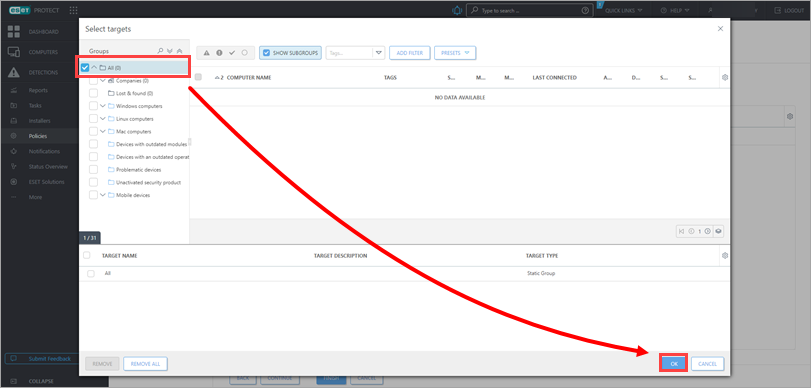
Figure 2-5
Review existing update policies
-
Click Policies, type update into the search bar at the top and press Enter on your keyboard.
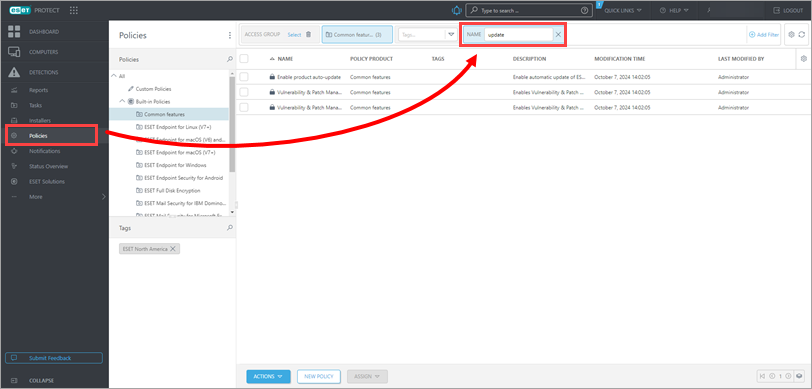
Figure 3-1 -
Select the relevant policy and click Edit.
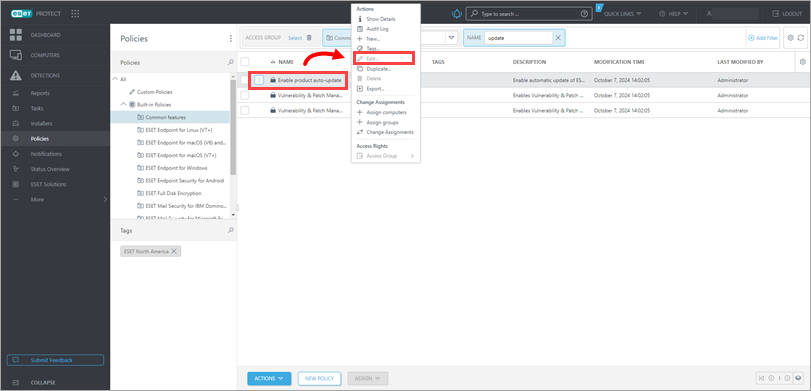
Figure 3-2 -
Click Settings → Update and verify the toggle next to Auto-updates is enabled.
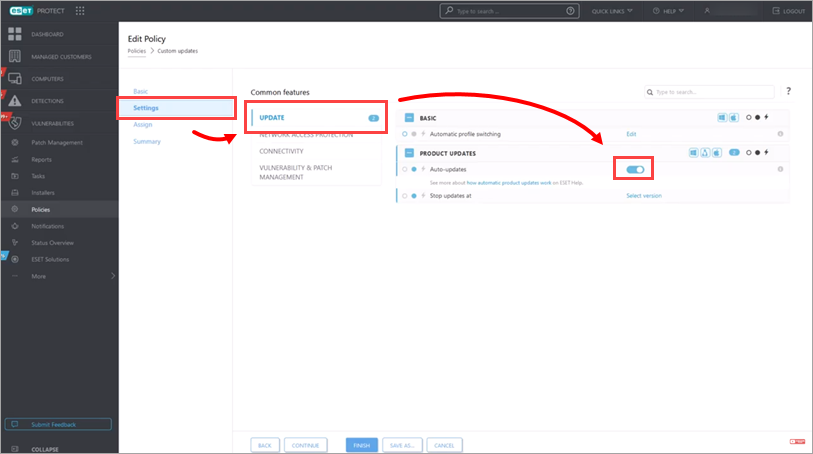
Figure 3-3 -
Next to Stop updates at, click Select version.
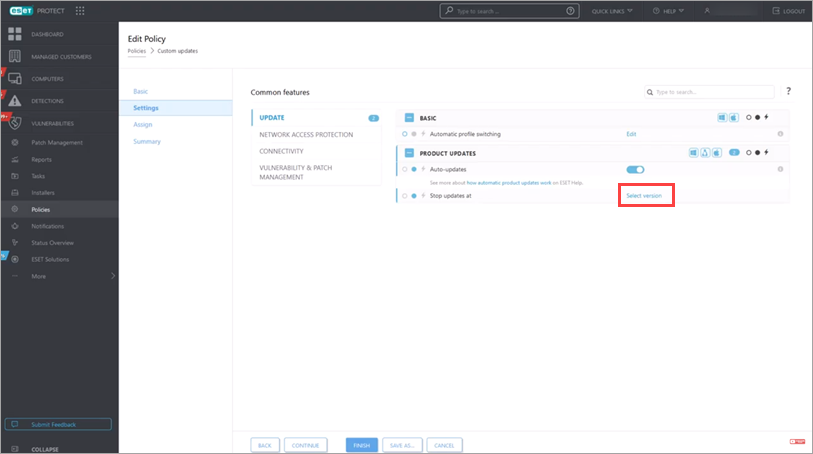
Figure 3-4 -
Remove the version number next to any products you no longer want to limit auto-updates for and click OK.
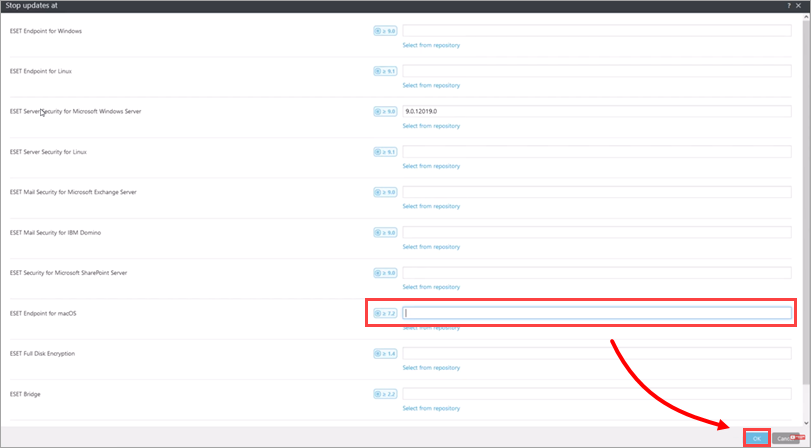
Figure 3-5 -
Click Assign, select the check box next to any computers you no longer want to limit auto-updates for and click Unassign → Finish.
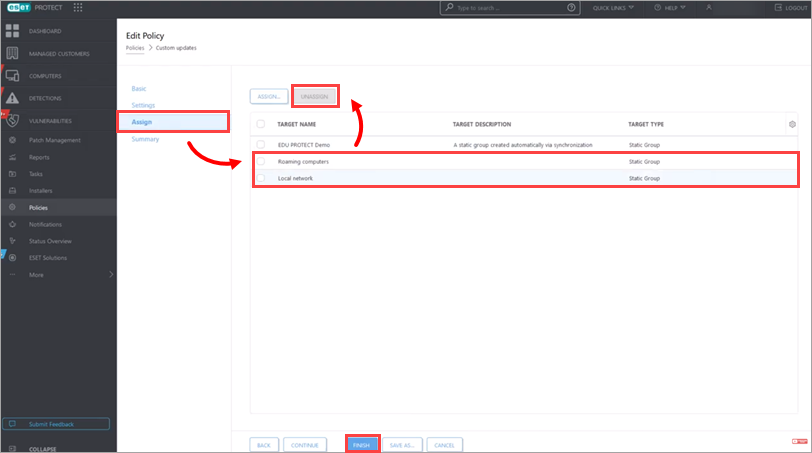
Figure 3-6 -
Repeat this for the remaining policies that may modify update settings in your network. You can also delete any custom policies you no longer need.
I do not use a Web Console
-
We recommend using a Web Console.
-
Open your ESET business product (for example, ESET Endpoint Security for Windows).
-
Click Setup → Advanced Setup.
-
Click Updates and next to Product updates, click the toggle next to Auto-updates to enable it. See our Online Help topic for more information.
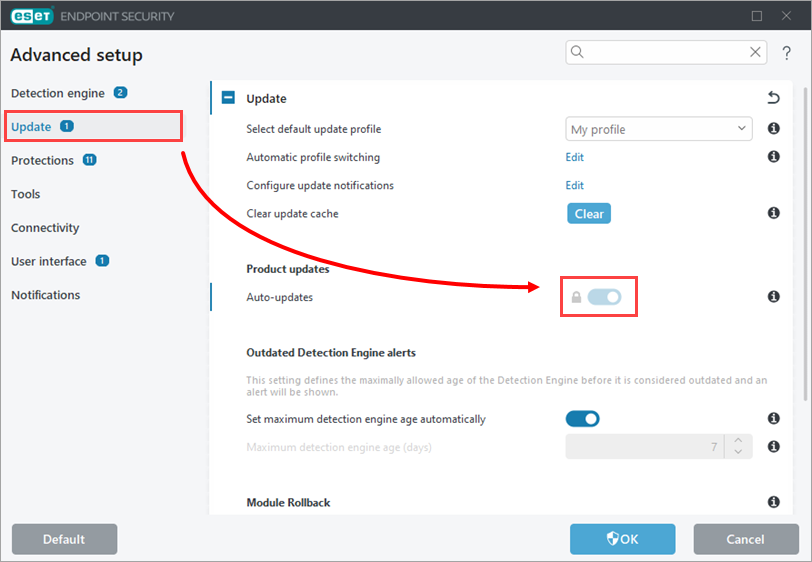
Figure 4-1 -
Scroll down, expand Profiles, and in the Auto-updates settings, review all profiles from the List of profiles. See our Online Help topic for more information.
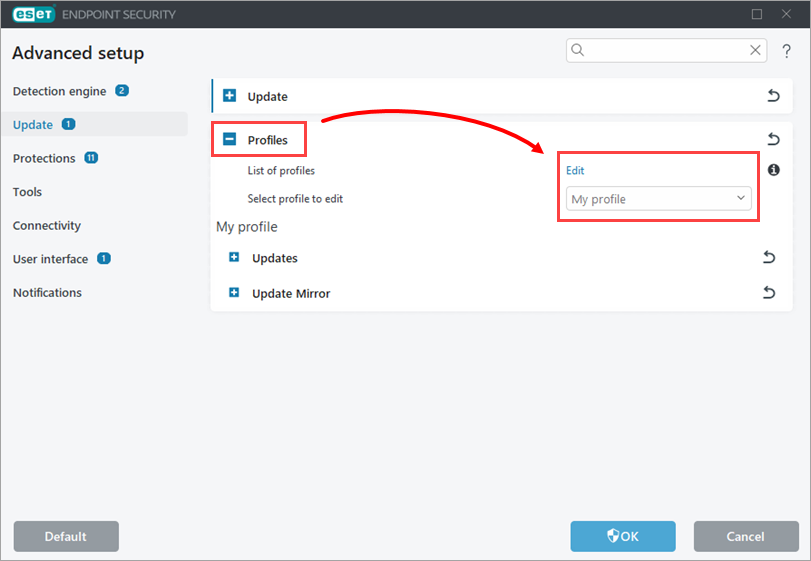
Figure 4-2 -
Scroll down and expand Updates. Click the toggle next to Ask before downloading update to disable it. See our Online Help topic for more information.
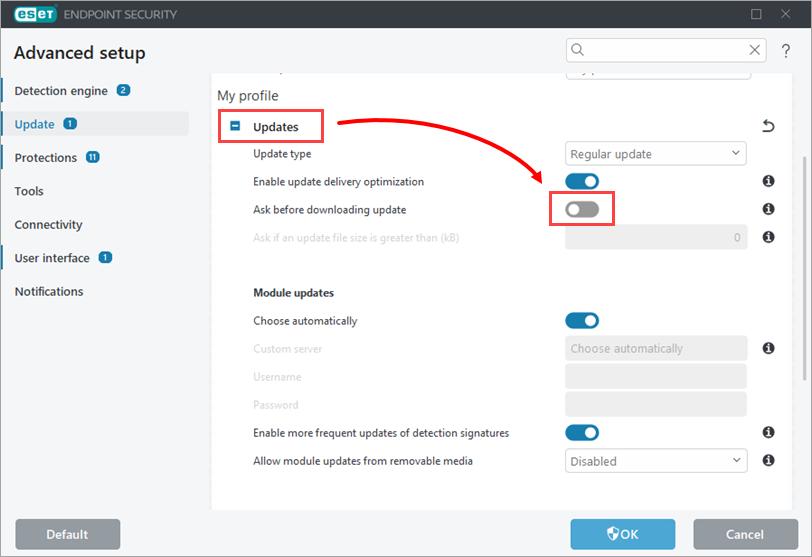
Figure 4-3 -
Scroll down to product updates, click the toggle next to Pause auto-updates to disable it and click OK.
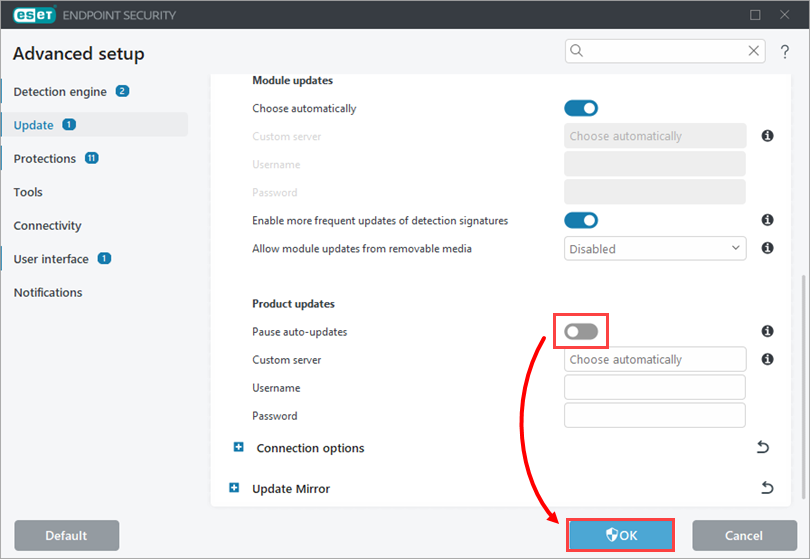
Figure 4-4


