Issue
- You received an error during ESET Management Agent installation when using the new Rocky Linux ESET PROTECT Virtual Appliance
- You received the following error message: ERROR: (ConfigInsertPeerCertContent) Checking certificate ended with the error 'ParsePfxCertificate: PFXImportCertStore failed with The specified network password is not correct. Error code: 0x56'
- Install the ESET Management Agent manually with the exported peer certificate
Details
Click to expand
In the latest ESET PROTECT Virtual Appliance (Rocky Linux), the ESET Management Agent certificates are exported with the PKCS7 container. Such encryption is not supported by Windows Server 2016 and earlier, and causes the ESET Management Agent installation to fail.
Solution
-
Click More → Peer Certificates, click the appropriate certificate and click Export to download the certificate.
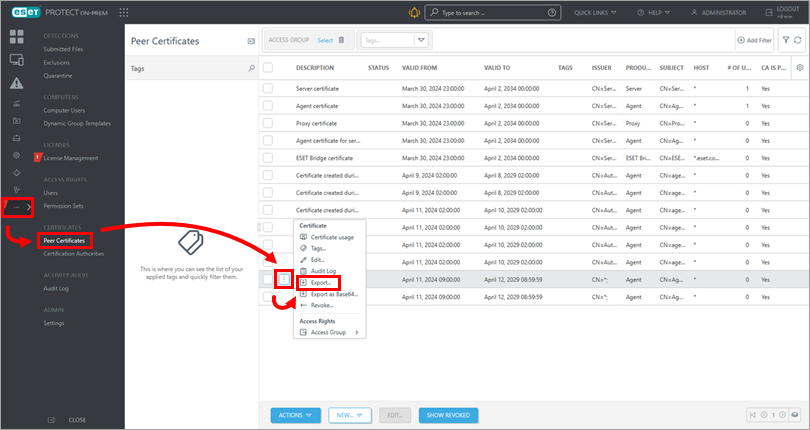
Figure 1-1 -
Double-click the exported certificate
.pfxfile on the endpoint computer with Windows 11 and later or Windows Server 2019 and later. -
In the Certificate Import Wizard, select Local Machine and click Next.
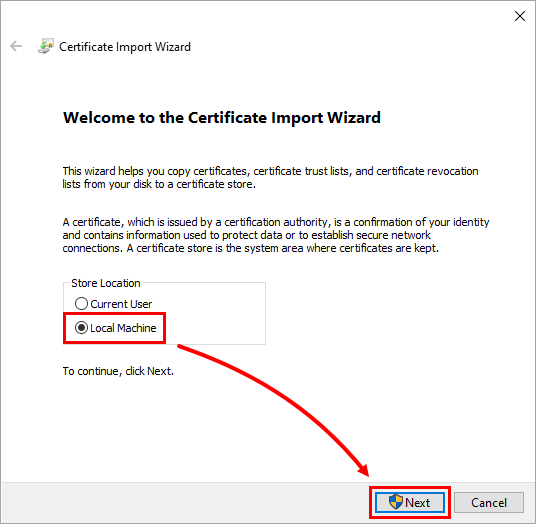
Figure 1-2 -
Verify that the correct certificate file is selected and click Next.
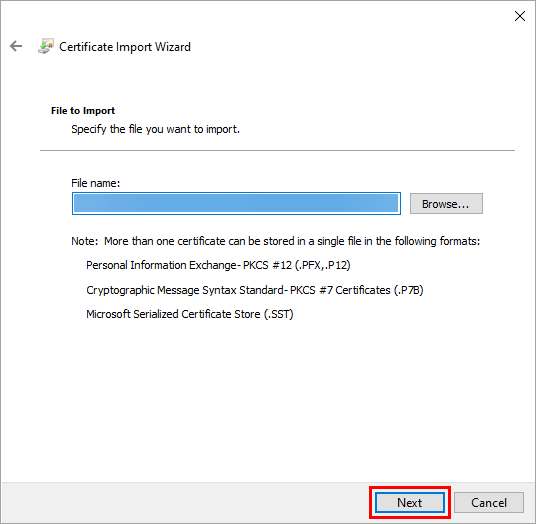
Figure 1-3 -
Verify that Mark this key as exportable and Include all extended properties check boxes are selected and click Next.
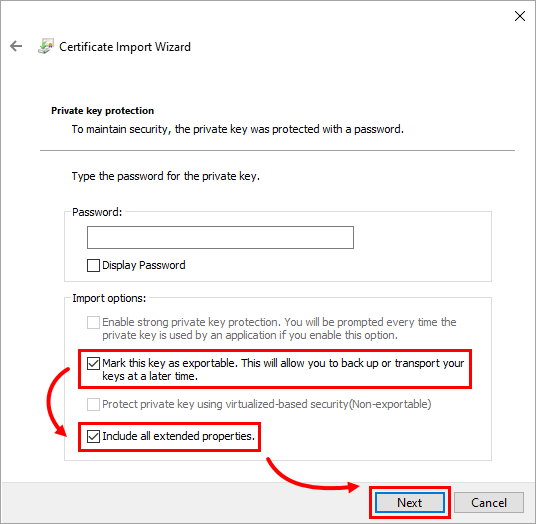
Figure 1-4 -
Select Place all certificates in the following store, click Browse, select Personal and click Next.
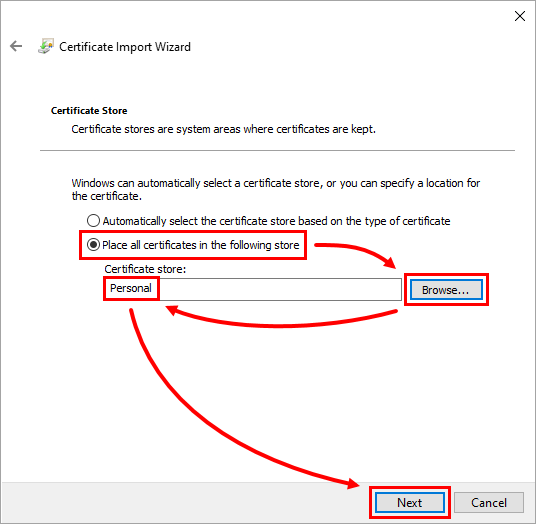
Figure 1-5 -
Click Finish.
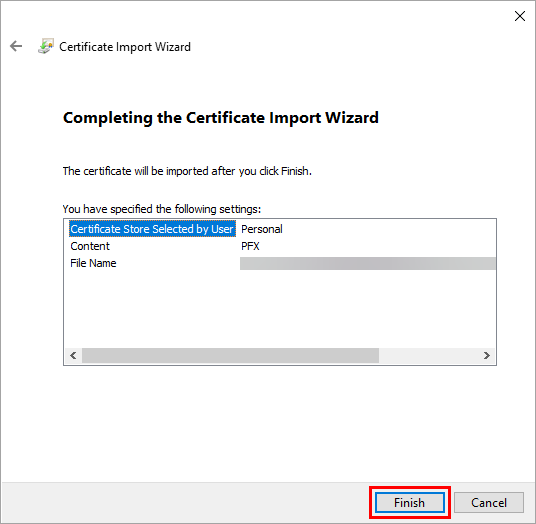
Figure 1-6 -
Click the Windows icon on your taskbar, type manage computer certificates and press the Enter key.
-
Click Personal → Certificates. Right-click Agent certificate for host and click All tasks → Export.
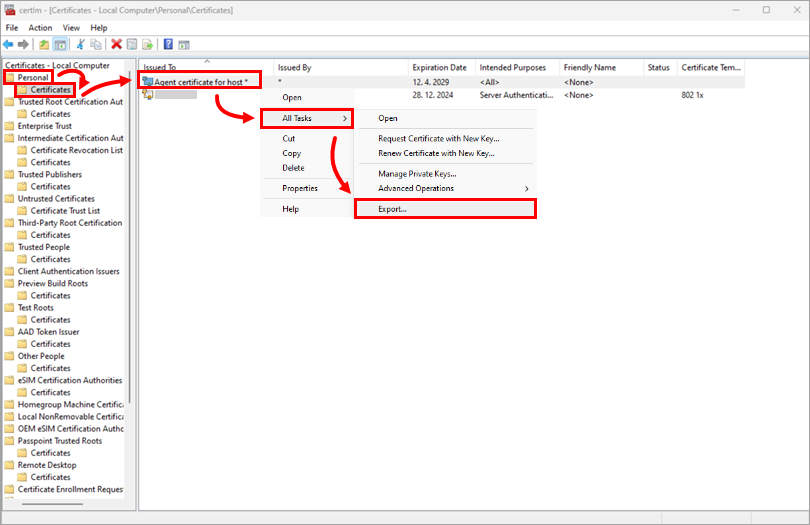
Figure 1-8 -
In the Certificate Export Wizard, click Next.
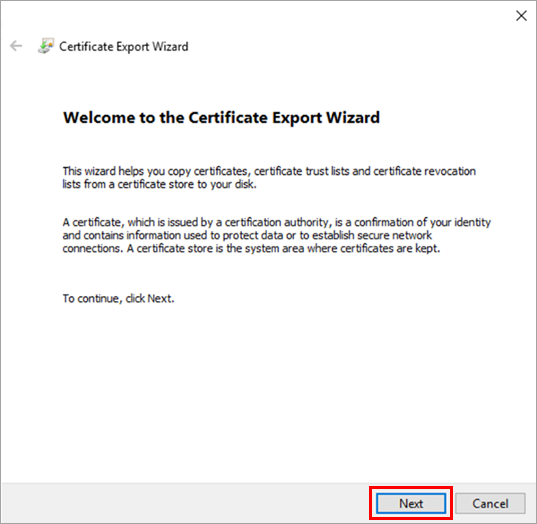
Figure 1-9 -
Verify that the Yes, export the private key option is selected and click Next.
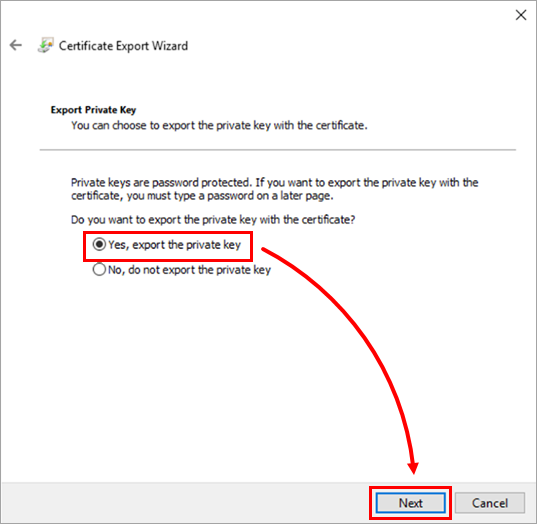
Figure 1-10 -
Verify that Include all certificates in the certification path if possible, Export all extended properties, and Enable certificate privacy check boxes are selected and click Next.
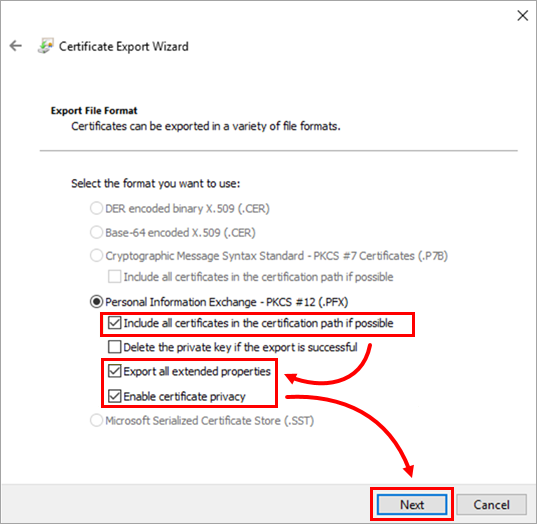
Figure 1-11 -
Select the check box next to Password, type your password and confirm it. Select TripleDES-SHA1 from the Encryption drop-down menu and click Next.
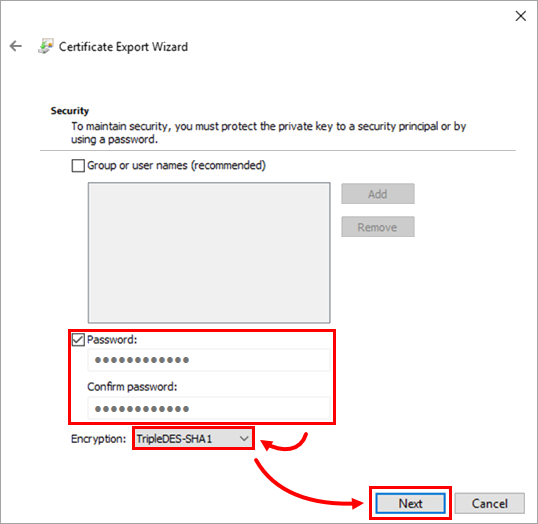
Figure 1-12 -
Verify that the correct certificate file is selected and click Next.
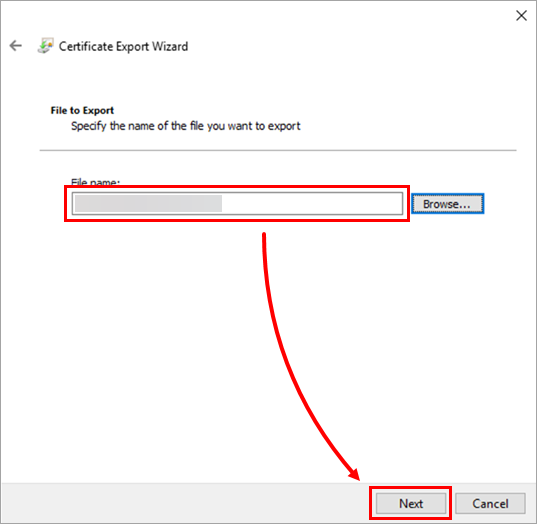
Figure 1-13 -
Click Finish.
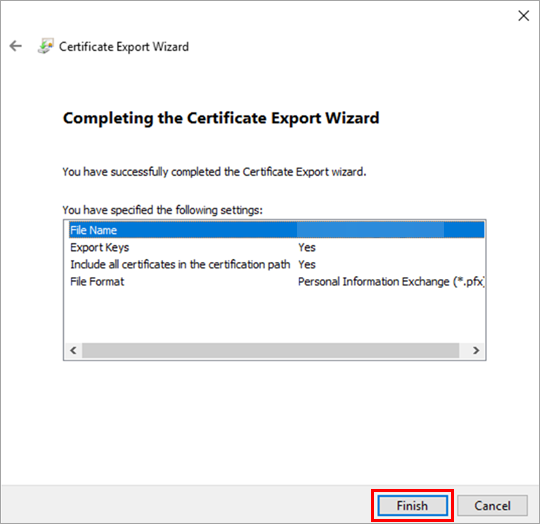
Figure 1-14 -
On the endpoint computer, navigate to ESET PROTECT download page to download the ESET Management Agent installer.
-
Select Agent from the Component drop-down menu, select the appropriate operating system and bitness, and click Download.
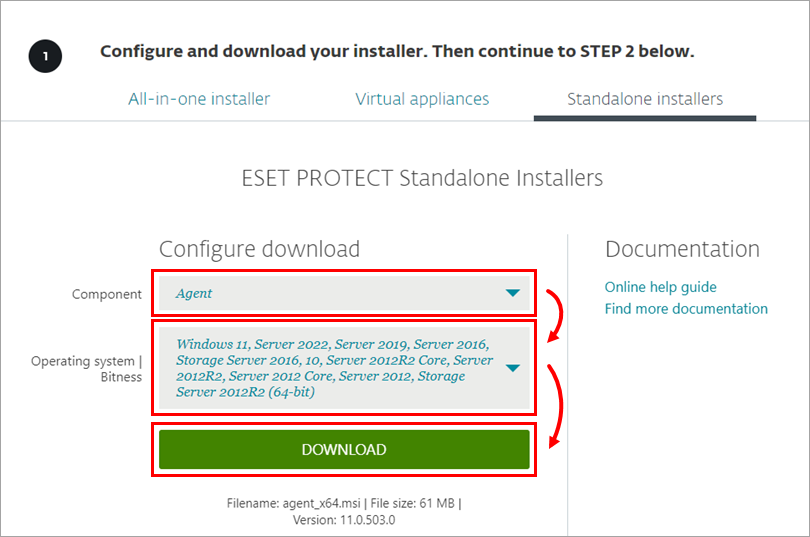
Figure 1-15 -
Click More → Certification Authorities, click the appropriate Certification Authority and click Export Public Key to download the Certification Authority Public Key. Move the exported Certification Authority Public Key to the endpoint computer where you want to install ESET Management Agent.
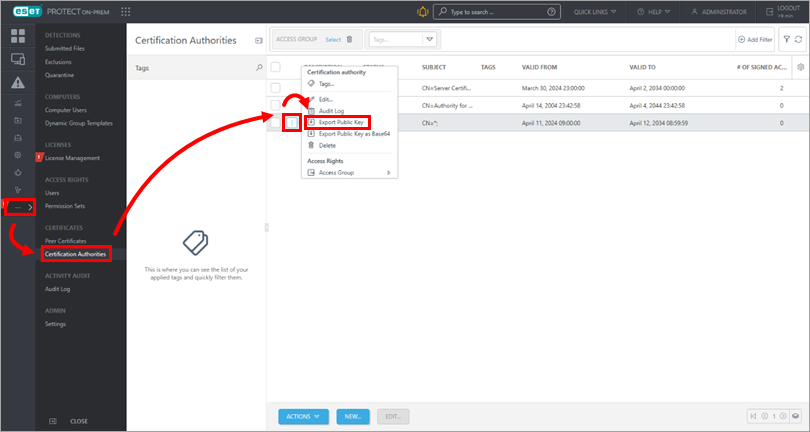
Figure 1-16 -
On the endpoint computer, double-click the downloaded ESET Management Agent installer and follow the installation procedure for offline installation using the SHA-1 peer certificate and exported Certification Authority Public Key.
-
In the Offline installation expander, skip steps b and c as you already exported the SHA-1 peer certificate and Certification Authority Public Key.
-
-
Finish the installation. The ESET Management Agent should now be installed without any issues.