Issue
- Open Web control settings in ESET PROTECT or ESET PROTECT On-Prem
- Enable Web control
- Manage URL rules
- Manage category-based rules
- Customize the blocked webpage message and graphic
Details
Click to expand
Web Control helps protect your organization by regulating access to websites that may pose legal, security, or productivity risks. It allows administrators to block pages containing offensive, inappropriate, or harmful content, as well as sites that violate intellectual property rights, helping maintain a safer, more productive work environment.
For more information, see Web control (ESET Endpoint Security) or Web control (ESET Server Security).
Solution
Related solutions: Non-managed users | Android users
Open Web control settings in ESET PROTECT or ESET PROTECT On-Prem
-
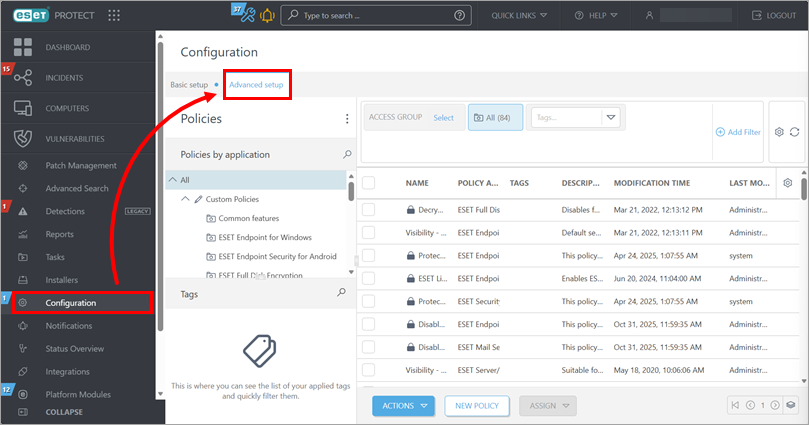
Open policies overview.
ESET PROTECT
Click Configuration → Advanced setup.
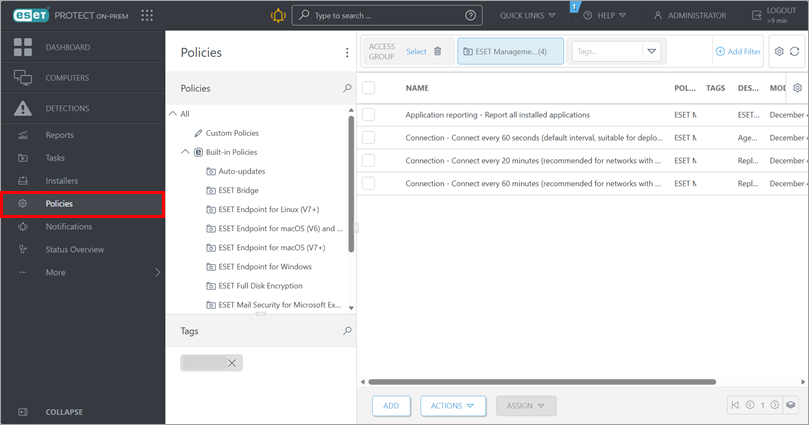
ESET PROTECT On-Prem
Click Policies.
-
Select the policy that is applied to the devices where you want to manage the Web control settings: below Policies, click the respective policy category, click the policy and click Edit.
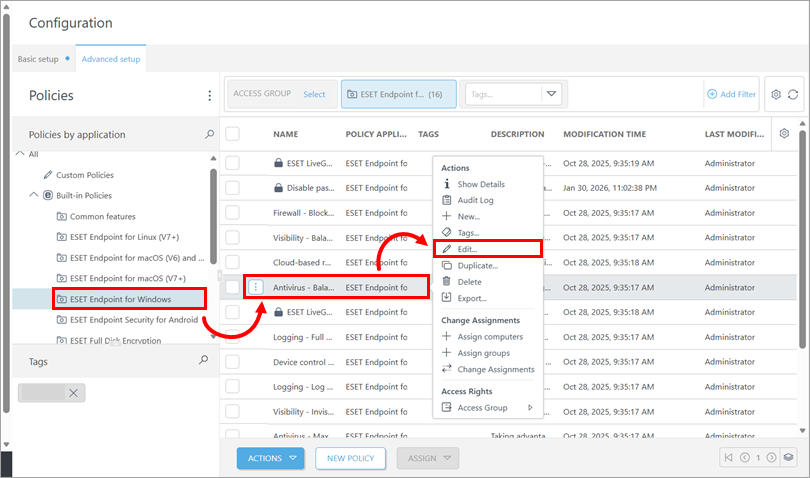
-
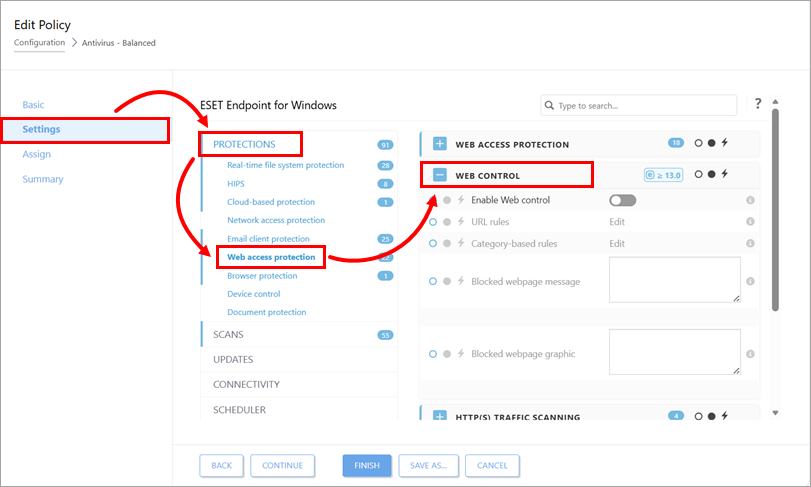
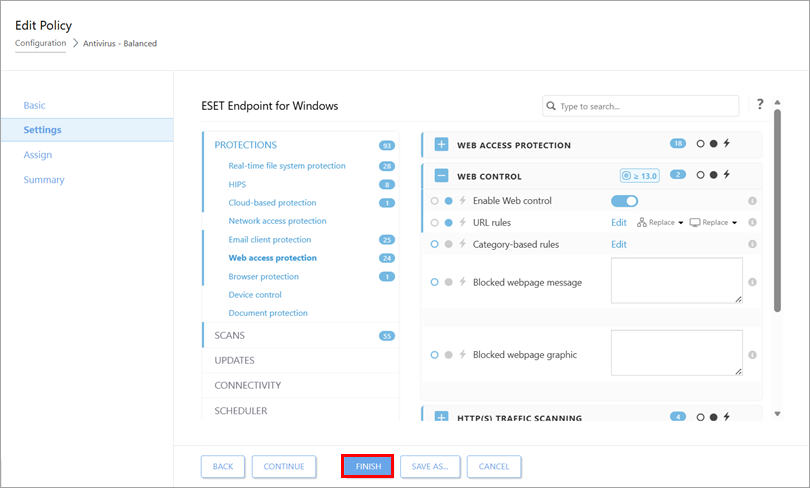
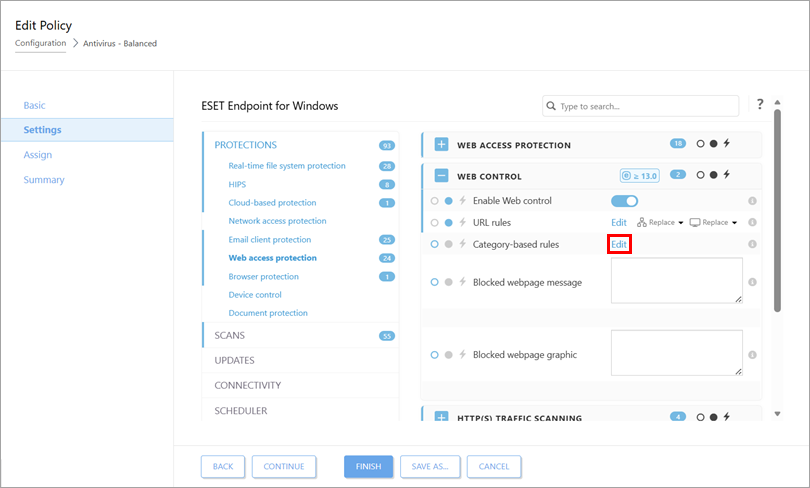
Click Settings, expand Protections, click Web access protection and expand Web control.
Enable Web control
-
Open Web control settings in ESET PROTECT or ESET PROTECT On-Prem.
-
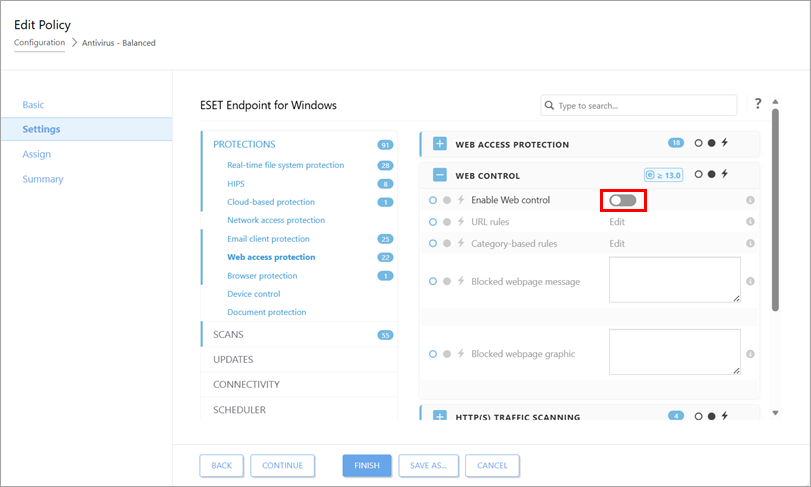
Enable the toggle next to Enable Web control.
Manage URL rules
-
Open Web control settings in ESET PROTECT or ESET PROTECT On-Prem.
-
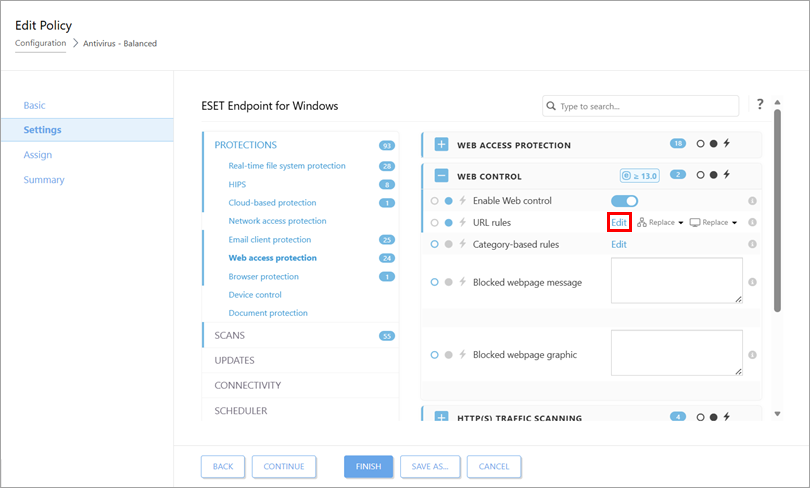
Click Edit next to URL rules.
-
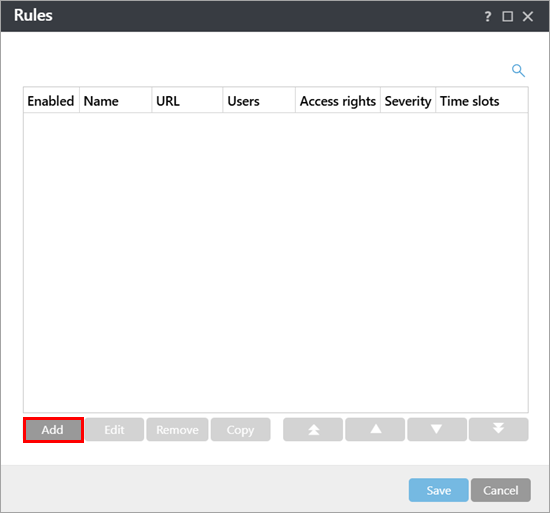
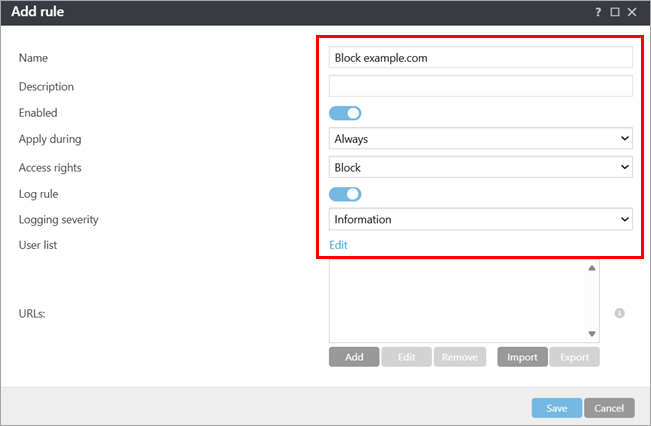
To create a rule, click Add. Alternatively, select a rule and click Edit, Remove, Copy, or the arrows to perform the action you want.
-
Define the rule settings. For more information, see Adding Web control rules (ESET Endpoint Security) or Add or edit Web control rules (ESET Server Security).
-
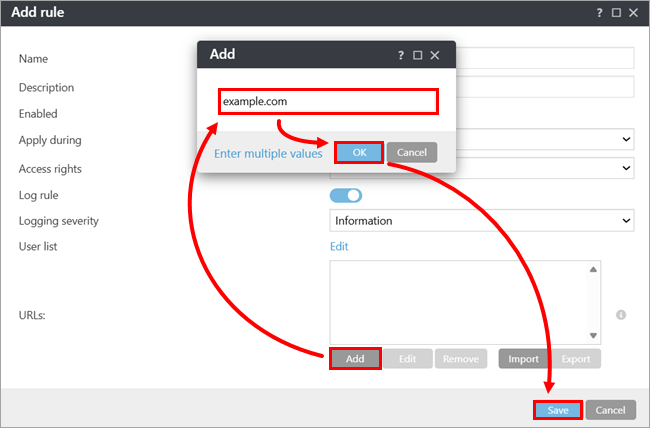
Next to URLs, click Add and type or copy/paste the website address to which the rule should apply. To add multiple website addresses, click Enter multiple values, type or copy/paste the website addresses and select a separator for multiple values. Click OK → Save.
-
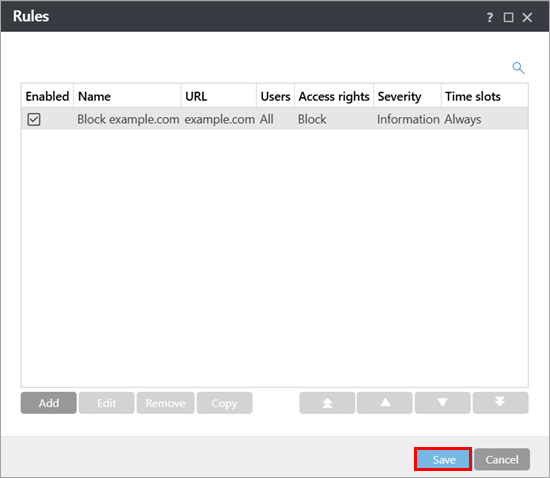
Click Save.
-
Click Finish.
Manage category-based rules
-
Open Web control settings in ESET PROTECT or ESET PROTECT On-Prem.
-
Click Edit next to Category-based rules.
-
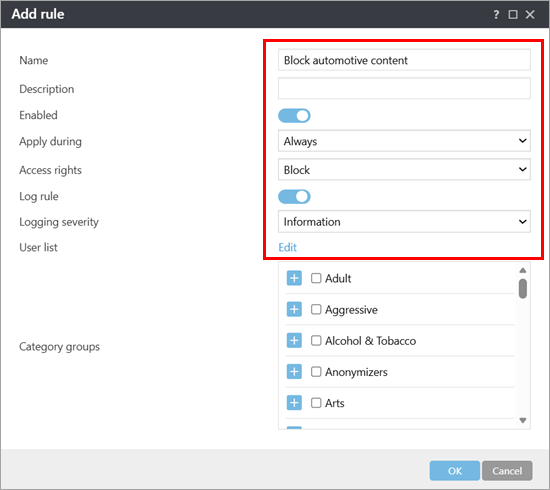
To create a rule, click Add. Alternatively, select a rule and click Edit, Remove, Copy, or the arrows to perform the action you want.
-
Define the rule settings. For more information, see Adding Web control rules (ESET Endpoint Security) or Add or edit Web control rules (ESET Server Security).
-
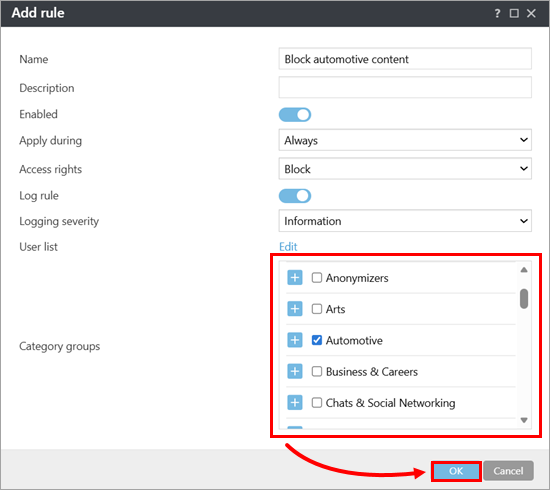
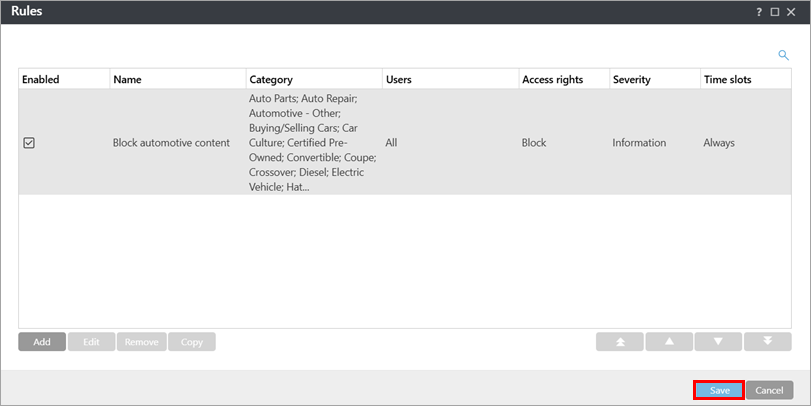
Next to Category groups, select the category groups to which the rule should apply. If needed, expand a category to view and select individual sub-categories. Click OK.
-
Click Save.
-
Click Finish.
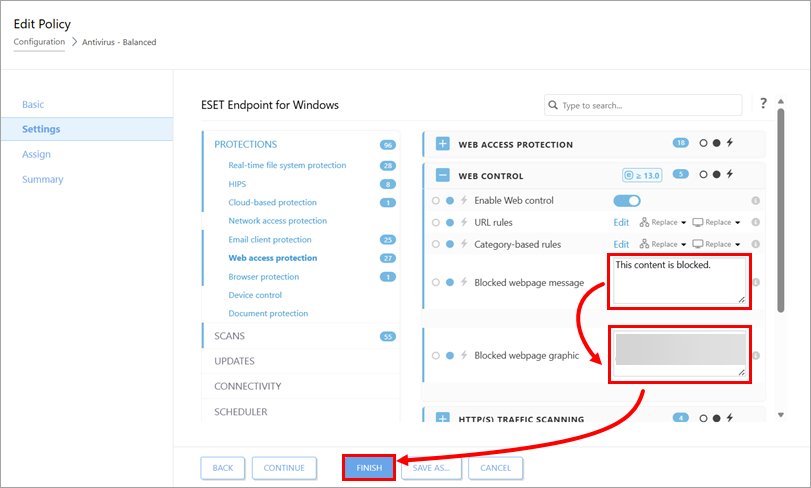
Customize the blocked webpage message and graphic
-
Open Web control settings in ESET PROTECT or ESET PROTECT On-Prem.
-
In the field next to Blocked webpage message, type the message that you want to display when a client device attempts to access blocked content. In the field next to Blocked webpage graphic, type or copy/paste the link to the image that you want to display along with the blocked webpage message. Click Finish.