Issue
Solution
Enable web control options
-
Press the F5 key to access Advanced setup.
-
Click Protections → Web access protection, expand Web control and enable the toggle next to Enable Web control.
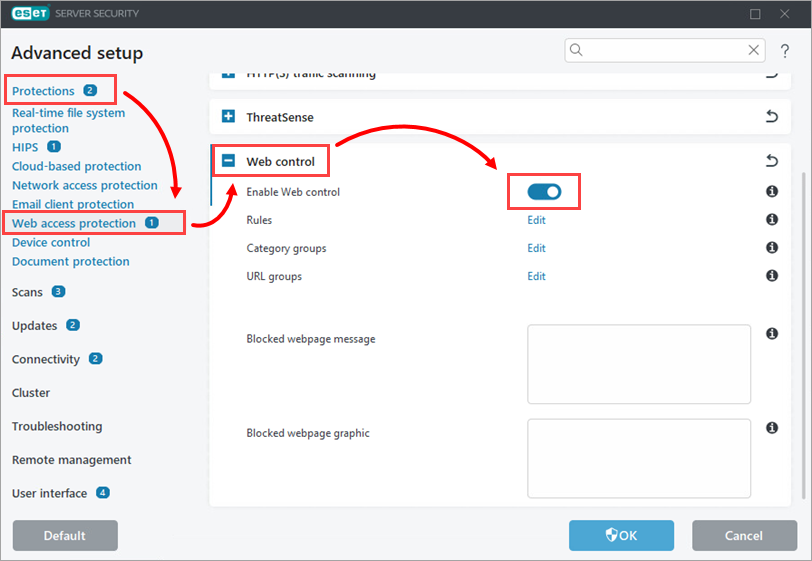
Figure 1-1
-
To edit Web control settings, click Edit next to the applicable setting (Rules, Category groups, or URL groups) you want to modify and fill the Blocked webpage message and Blocked webpage graphic to customize the displayed message when a website is blocked.
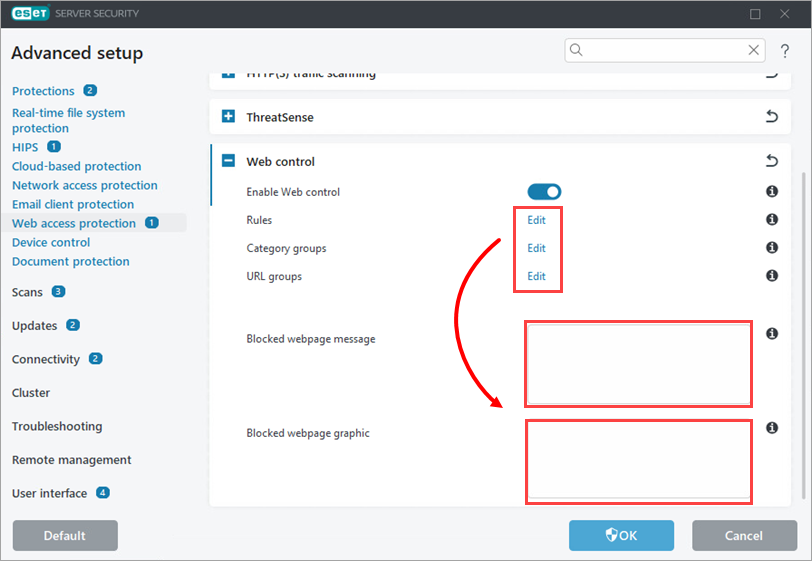
Figure 1-2
-
Follow the sections below for a description of each setting and how to use it.
Rules
Manage the rules for a specific URL or category of web content.
-
Click Edit next to Rules.
-
Click Add to create a new rule (alternatively, select an existing rule and click Edit to modify that rule), add URL to the URL field and modify the settings according to your preferences. Click OK. Read more about Web control rules and adding Web control rules.
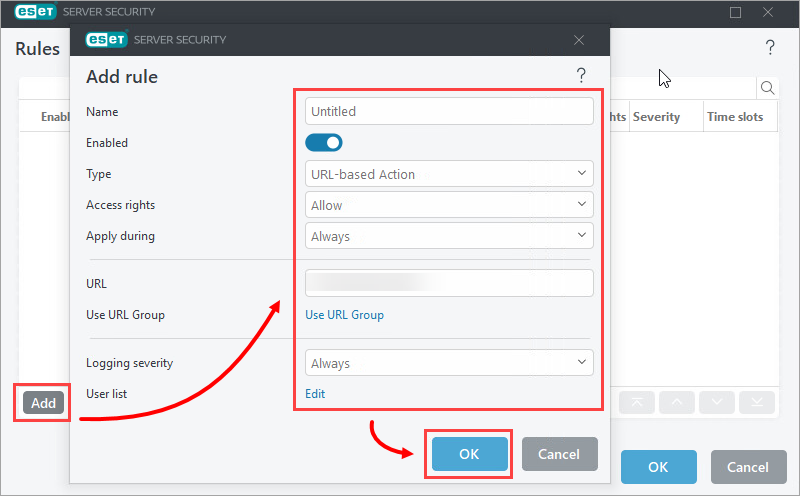
Fiigure 2-1
Category groups
You can manage Category groups with list of website categories to use in Web control rules.
-
Click Edit next to Category groups.
-
Click Add (alternatively, select an existing category group and click Edit or Delete to modify or delete that category group), type a name for your category group and click OK.
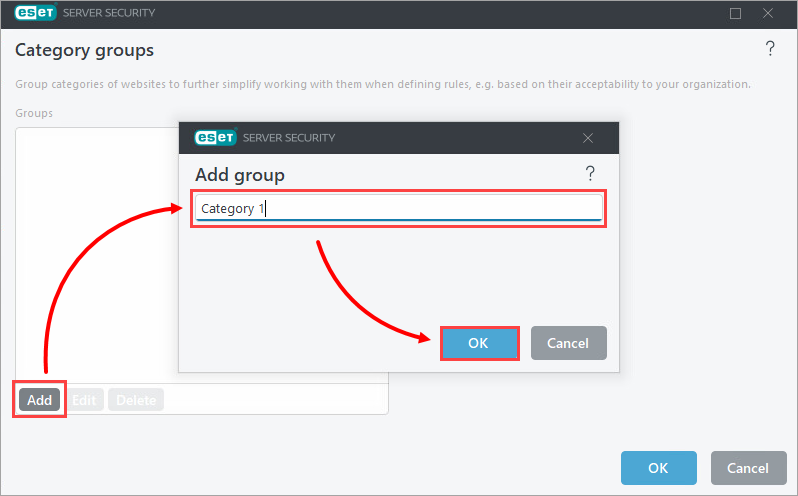
Figure 3-1
-
Select the group you created and select or deselect the check box next to a given category. Click the + expander next to a category to display sub-categories that can be included or excluded using their corresponding check boxes. Click OK. See the detailed description of Category groups.
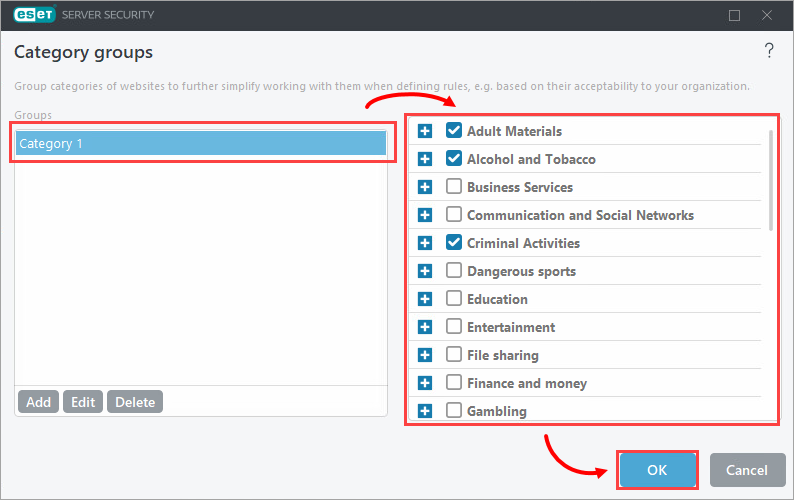
Figure 3-2
URL groups
You can create a group that contains several URL links for which you want to create a rule (allow/disallow specific websites). ESET Endpoint products do not include any URL groups by default.
-
Click Edit next to URL groups.
-
Click Add to create a new group (alternatively, select a group and click Edit or Delete to modify or delete that URL group), type the URL you want to include in your new URL group and click OK.
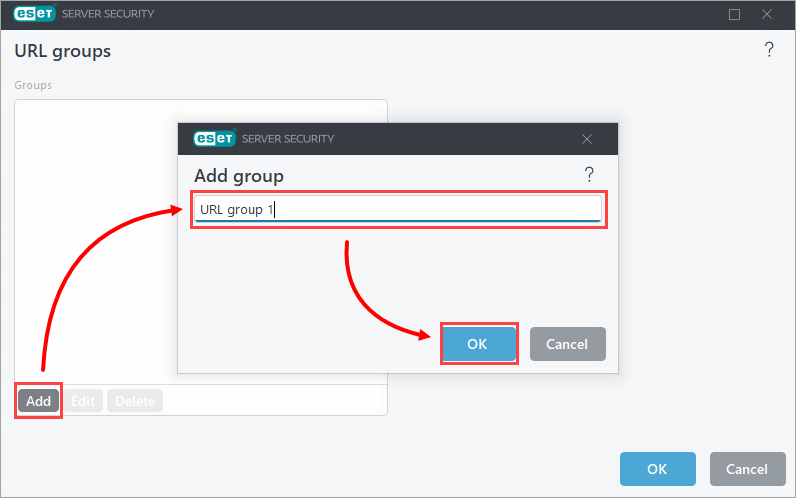
Figure 4-1
-
Select your URL group and click Add on the right side of the window. Type a URL and click OK → OK → OK. See the detailed description of URL groups.
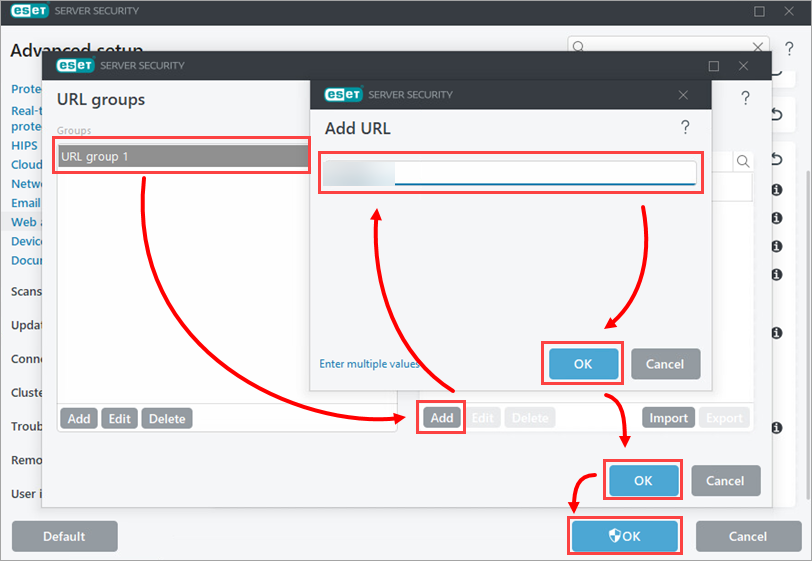
Figure 4-2
Blocked webpage message and Blocked webpage graphic
Blocked webpage message and Blocked webpage graphic fields enable you to easily customize the displayed message when a website is blocked.
-
Type the message you want to display when a client computer attempts to access blocked content in the Blocked webpage message field. To display a graphic with your blocked content message, type the URL for the image into the Blocked webpage graphic field. Click OK to save your changes and exit Advanced setup.
See the instructions on how to customize the Blocked webpage message.
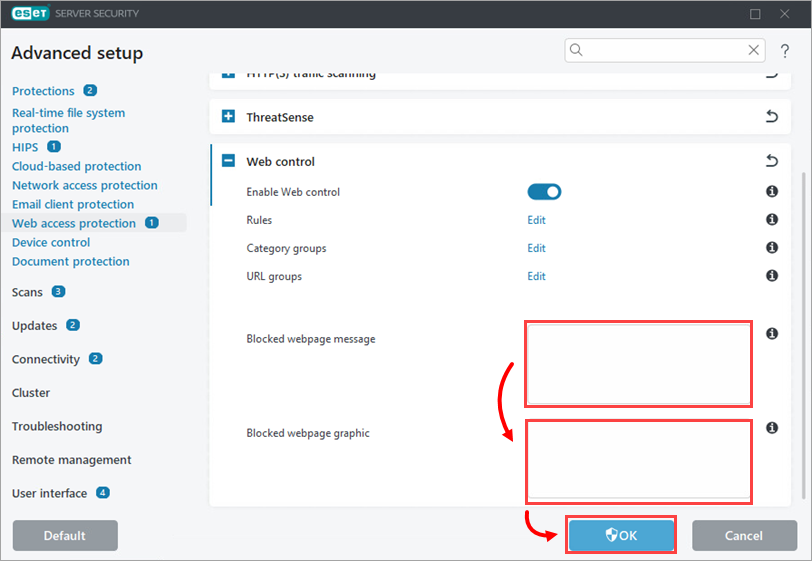
Figure 5-1