Issue
- Generate a HAR log file to include in your support ticket
- Generate HAR log file in Google Chrome
- Generate HAR log file in Firefox
- Generate HAR log file in Safari
Details
Click to expand
A HAR (HTTP Archive format) file stores the logs of a web browser's interaction with a website.
ESET Technical Support may request that you generate and submit a HAR log file when an issue occurs while visiting a website.
Solution
Generate HAR log file in Google Chrome
-
Open Google Chrome, click the Menu (three dots)
 icon at the top right corner and click New incognito window. In the new Incognito window of Google Chrome, navigate to the website where the issue occurs.
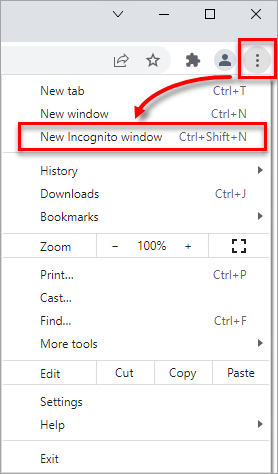
Figure 1-1 -
Click the Menu (three dots)
 icon in the top right corner and click More Tools → Developer Tools.
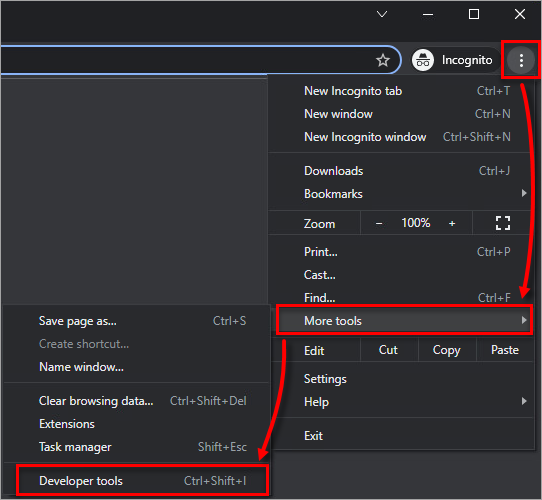
Figure 1-2 -
Click the Network tab.
-
Click the Clear
 icon to clear any existing logs and select the check box next to Preserve log. Confirm the Record
  icon is red. If it is gray, click the gray Record icon to start recording.
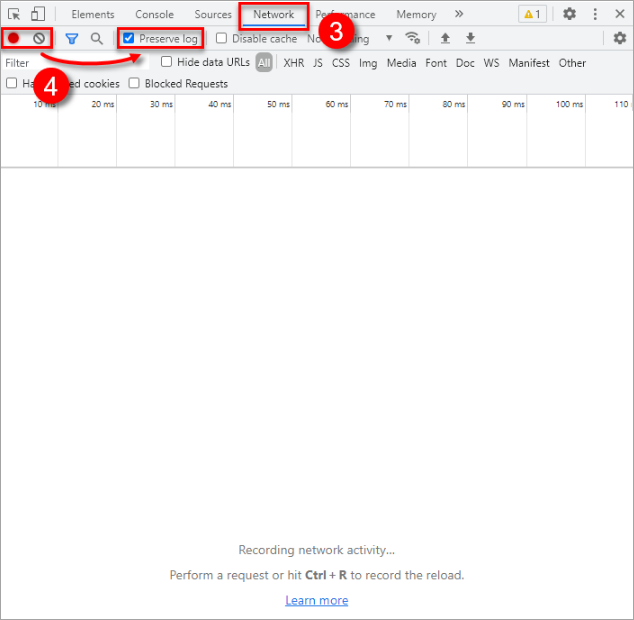
Figure 1-3 -
From the Developer Tools panel, click the Settings icon → Preferences. Under Network, select the check box next to Allow to generate HAR with sensitive data.
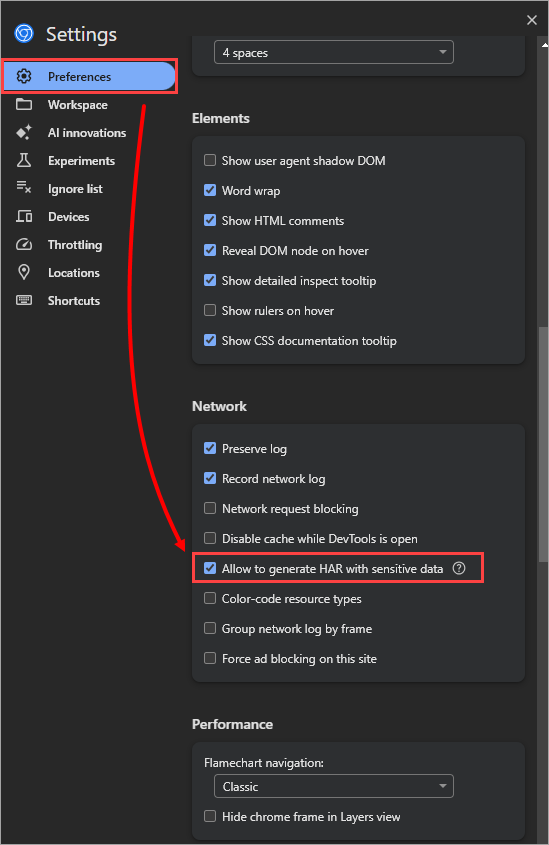
Figure 1-4 -
Recreate the issue in your web browser.
-
After the issue is recreated, click the Record
 icon to stop recording and click the gear icon.
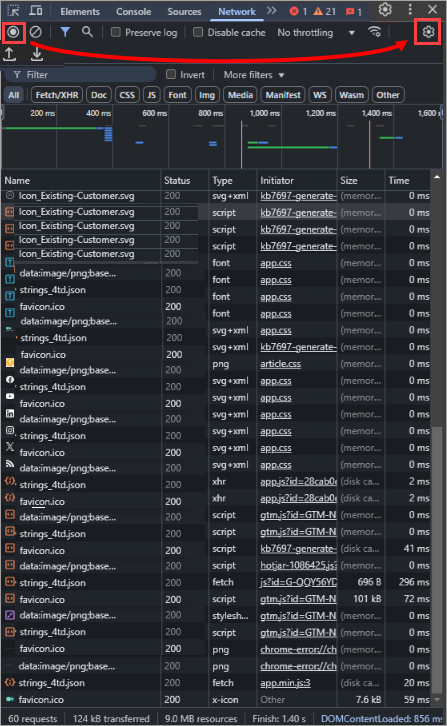
Figure 1-5
-
Click the download icon and select Export HAR (sanitized) or Export HAR (with sensitive data).
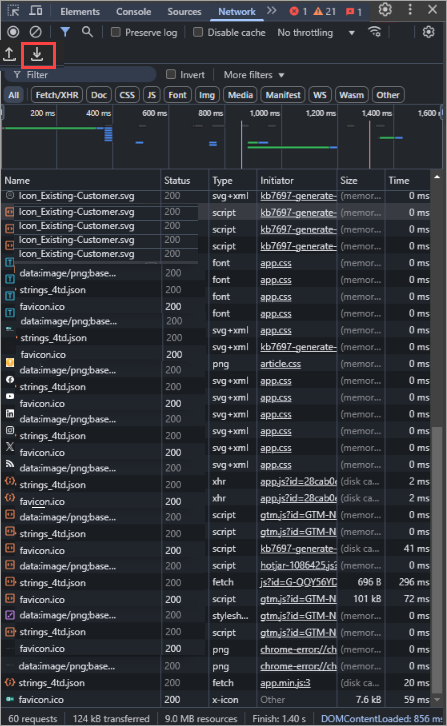
Figure 1-6 -
Select a file path, type a name for the file and click Save.
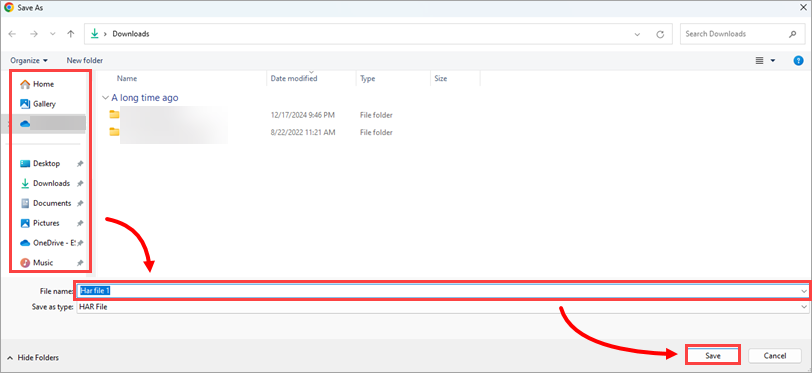
Figure 1-7 -
Upload the HAR file to your support ticket.
Generate HAR log file in Firefox
-
Open Firefox and disable the response limit:
-
In the address bar, type
about:configand press Enter. -
In the search bar, type or copy/paste
devtools.netmonitor.responseBodyLimit. -
Click the Edit (pencil) icon, set the value to 0 and click the Check mark icon to confirm the change.
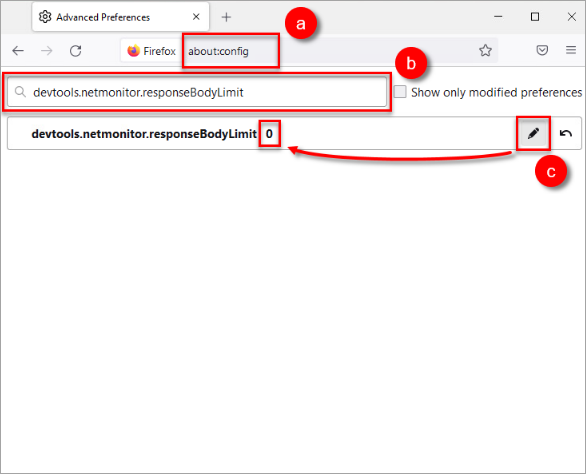
Figure 2-1 -
-
Click the Menu
 icon in the top right corner and click New private window. In the new private window of Firefox, navigate to the website where the issue occurs.
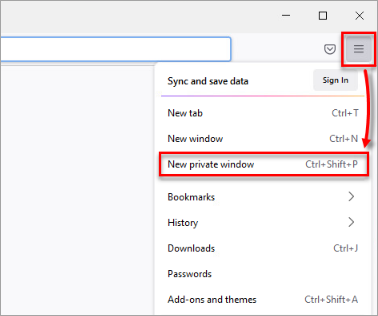
Figure 2-2 -
Click the Menu
 icon in the top right corner and click More Tools.
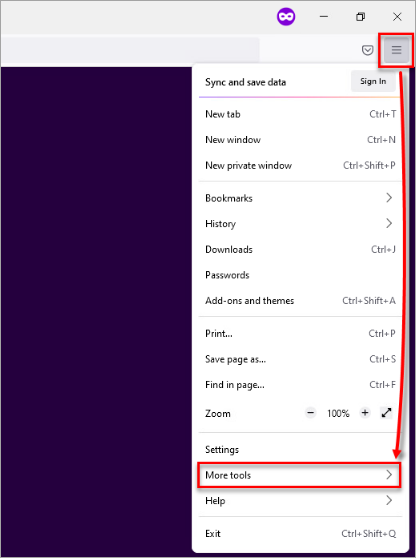
Figure 2-3 -
Click Web Developer Tools.
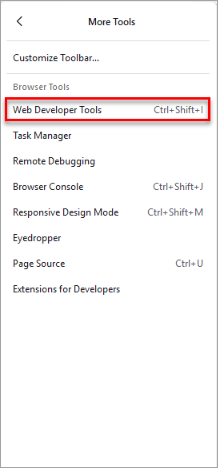
Figure 2-4 -
Click Network and click the Clear
 icon to clear any existing logs.
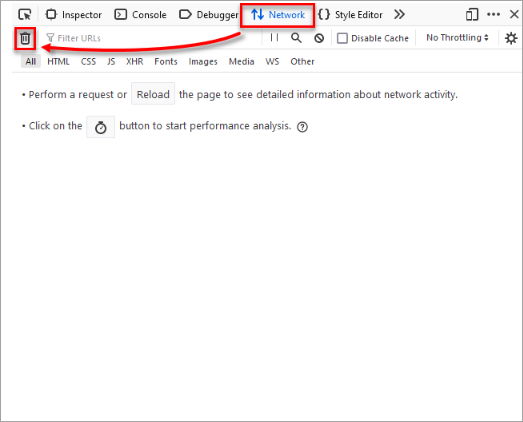
Figure 2-5 -
Click the Gear icon and select Persist Logs.
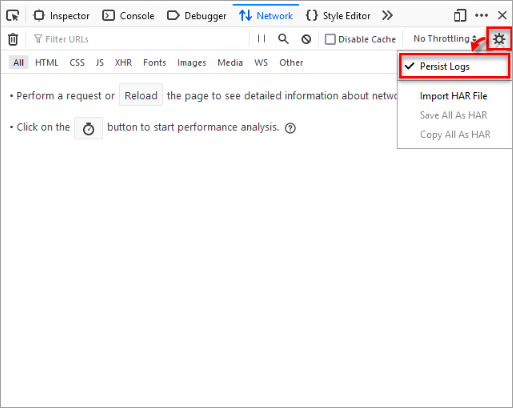
Figure 2-6 -
Recreate the issue in your web browser. Firefox starts logging automatically.
-
After the issue is recreated, click the Pause recording
 icon to stop further recording. Right-click anywhere on the log and click Save all as HAR.
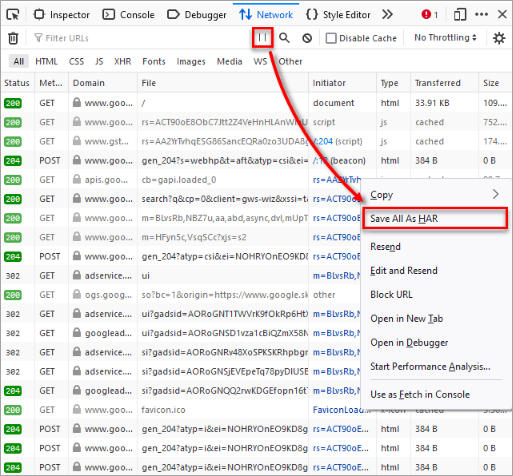
Figure 2-7 -
Select a file path, type a name for the file and click Save.

Figure 2-8 -
Upload the HAR log file to your support ticket.
Generate HAR log file in Safari
-
Open Safari and click File → New Private Window. In the private window, navigate to the website where the issue is occurring.
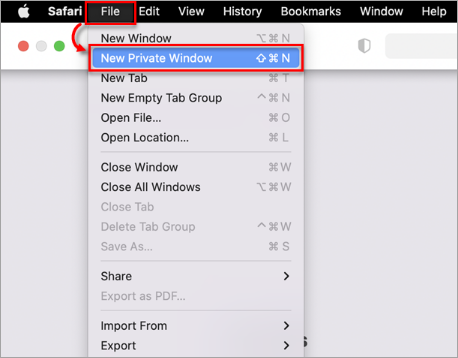
Figure 3-1 -
In the menu bar, click Safari → Settings.
-
In the dialog box, click Advanced and select the check box next to Show features for web developers.
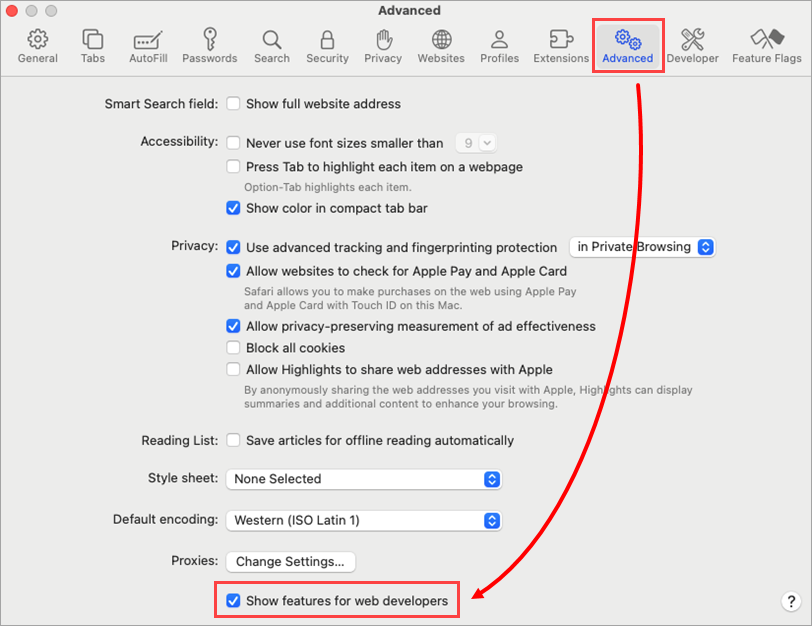
Figure 3-2 -
In the menu bar, click Develop and click Show Web Inspector.
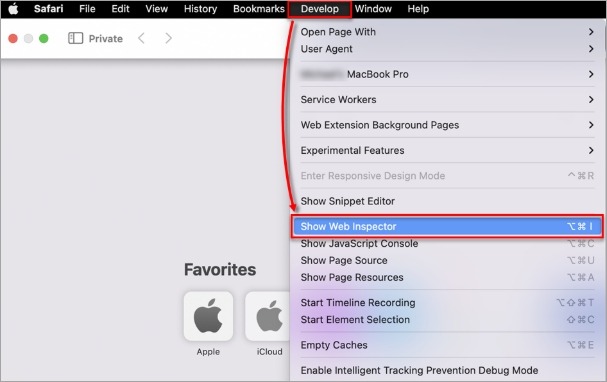
Figure 3-3 -
Click Network and click the other filters icon, then select Preserve Log to enable it.
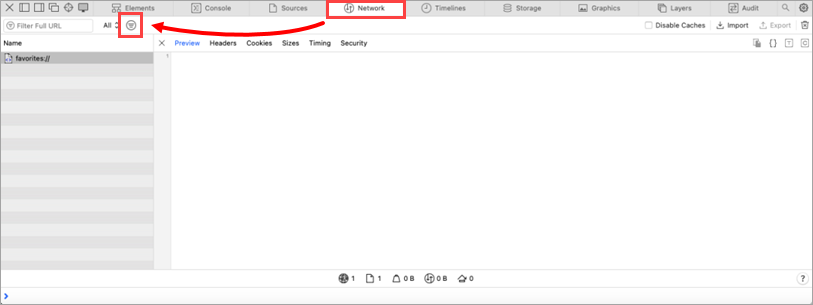
Figure 3-4
-
Recreate the issue in your web browser.
-
After the issue is recreated, click Export.
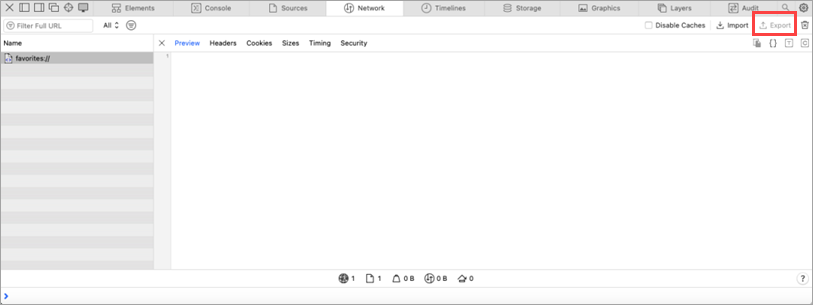
Figure 3-5 -
Type a name for the file and click Save.
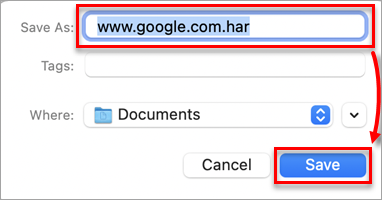
Figure 3-6 -
Upload the HAR log file to your support ticket.