Issue
- Deploy ESET Management Agent using Group Policy Object (GPO) in enterprise environments or environments with a high number of client computers
- Create and download the ESET Management Agent installer file in ESET PROTECT or ESET PROTECT On-Prem
- Deploy ESET Management Agent using GPO
- Update ESET Management Agent using GPO
Solution
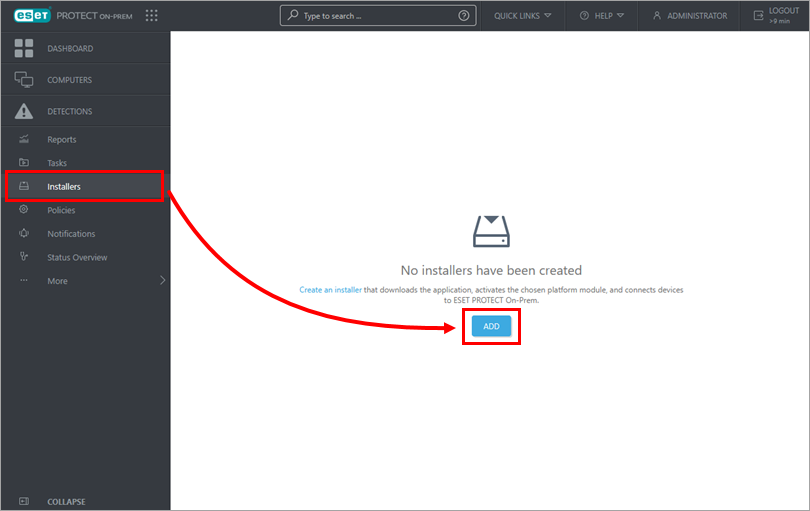
Create and download the ESET Management Agent installer file in ESET PROTECT or ESET PROTECT On-Prem
Create the installer file and a configuration script containing the parameters for the ESET Management Agent to communicate with ESET PROTECT or ESET PROTECT On-Prem Server, which will be used during ESET Management Agent deployment.
-
Click Installers → Add.
-
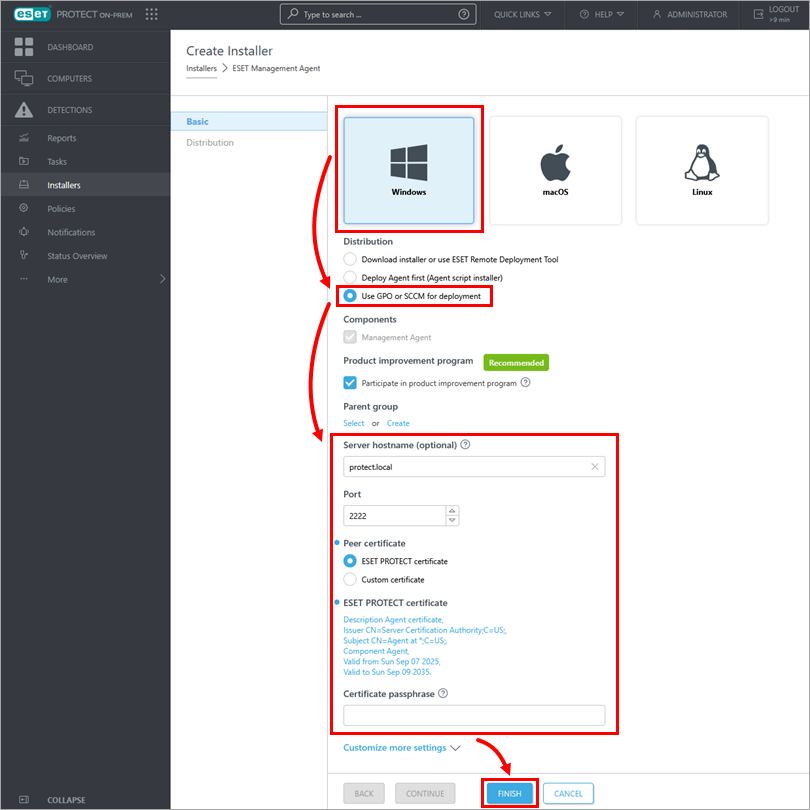
Click Windows and in the Distribution list, select Use GPO or SCCM for deployment. Edit Server hostname, Port and certificates if you need to change the automatically pre-filled values based on your ESET PROTECT or ESET PROTECT On-Prem Server configuration. Click Finish.
-
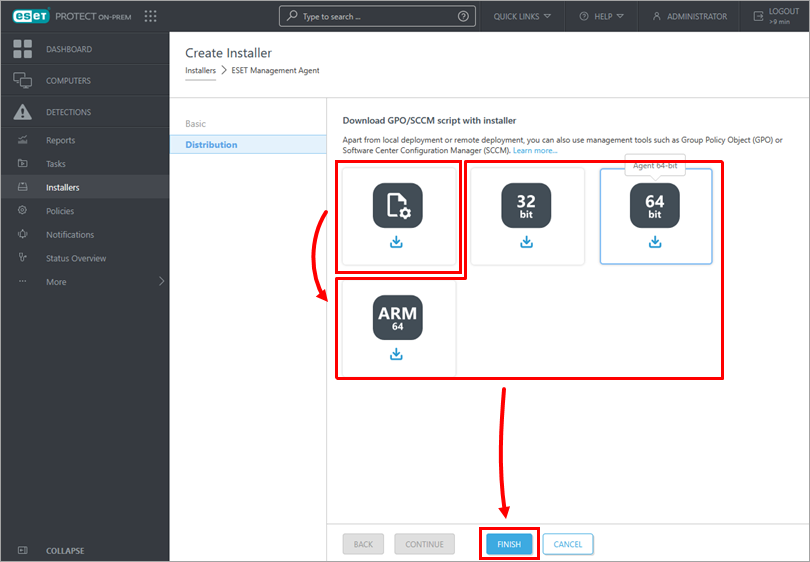
Click the GPO/SCCM configuration script icon to download the install_config.ini and click your preferred ESET Management Agent version to download the correct installer file. When the downloads are complete, click Finish. Alternatively, you can download the ESET Management Agent installer .msi file from the ESET download page.
-
Save the Agent installer file and the install_config.ini file to a shared folder on the domain controller so all your client computers can access it with read and execute permissions.
Deploy ESET Management Agent using GPO
-
Open Group Policy Management. Press the Windows key + R, type gpmc.msc, and click OK. If you do not have Group Policy Management installed, install Microsoft Group Policy Management Console (GPMC) on your Domain Controller server.
-
Create a new Group Policy Object (GPO). Click your domain Forest → Domains → your domain. Right-click Group Policy Objects and click New.
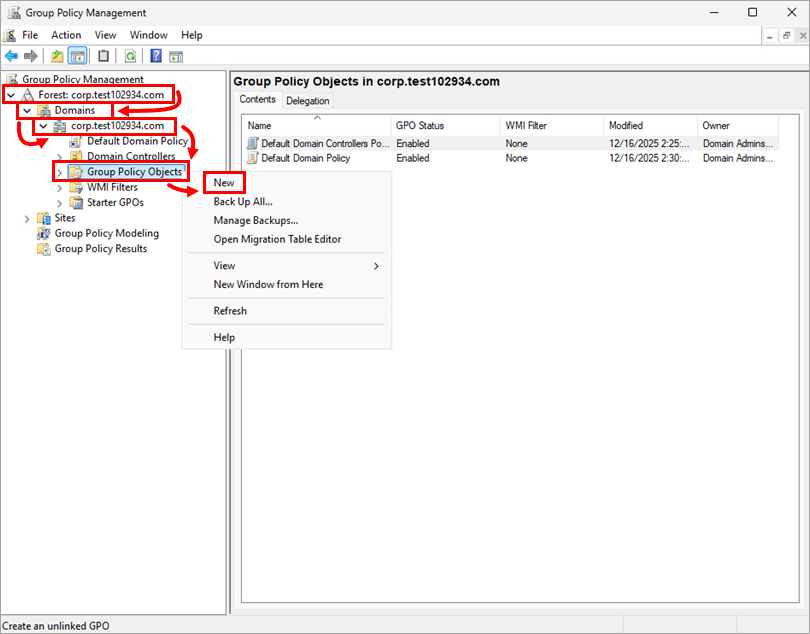
-
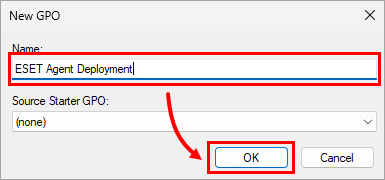
Type a name for the new GPO into the Name field (for example, ESET Agent deployment) and click OK.
-
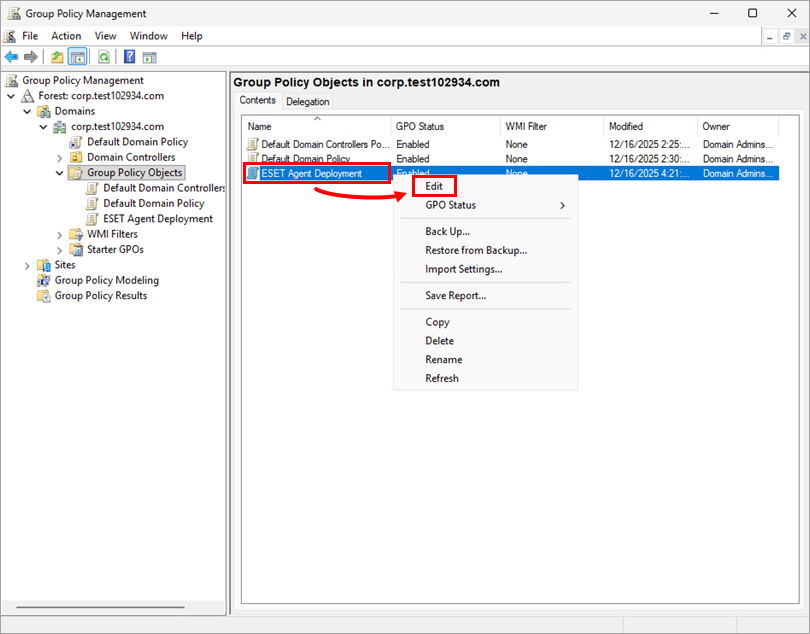
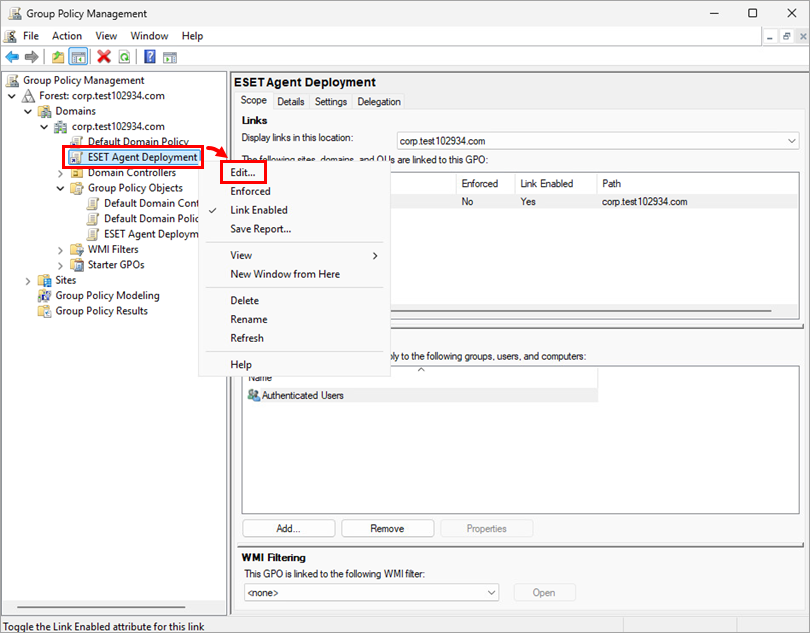
Right-click the newly created GPO and click Edit.
-
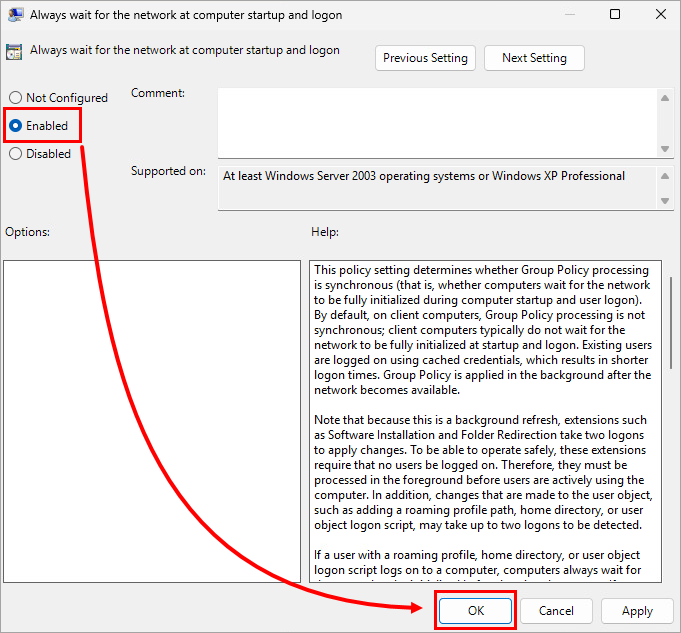
In the Group Policy Management Editor window, expand Policies → Administrative Templates: Policy definitions (ADMX files) retrieved from the local computer → System and click Logon. Double-click Always wait for the network at computer startup and logon.
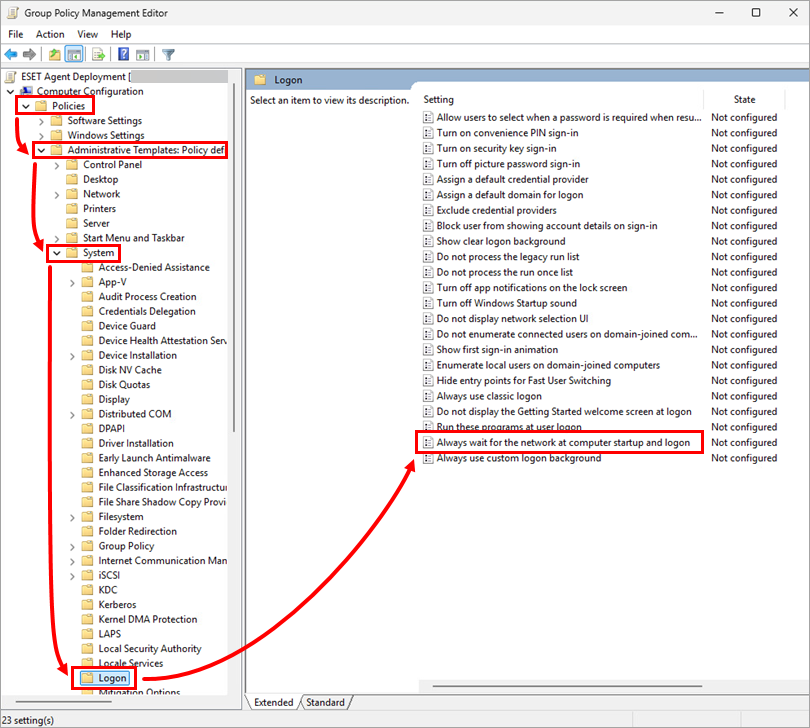
-
Select Enabled and click OK.
-
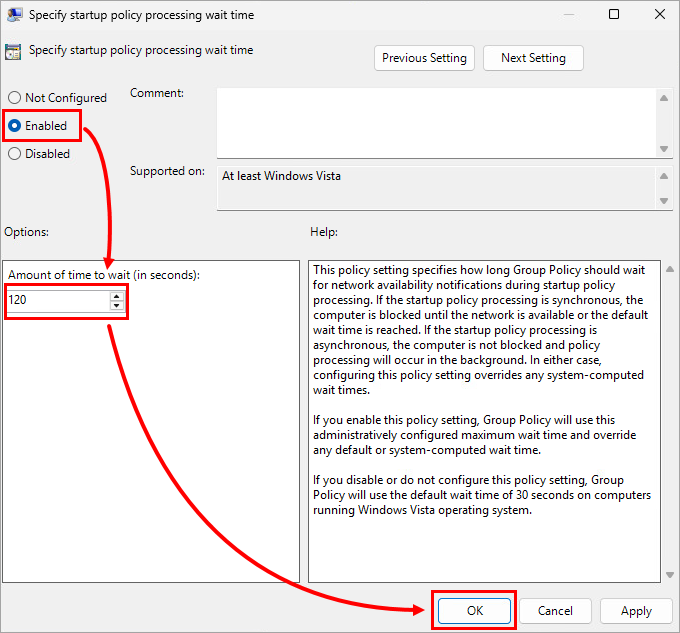
In the Group Policy Management Editor window, click Group Policy and double-click Specify startup policy processing wait time.

-
Select Enabled. You can change the pre-defined Amount of time to wait from the 120 seconds, but we recommend at least 30 seconds. Click OK.
-
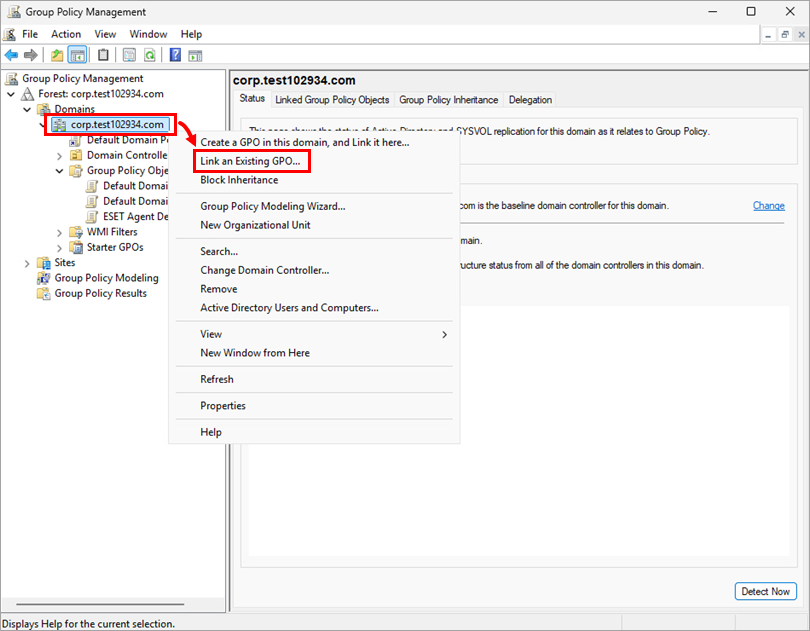
In the Group Policy Management window, right-click your domain and click Link an Existing GPO.
-
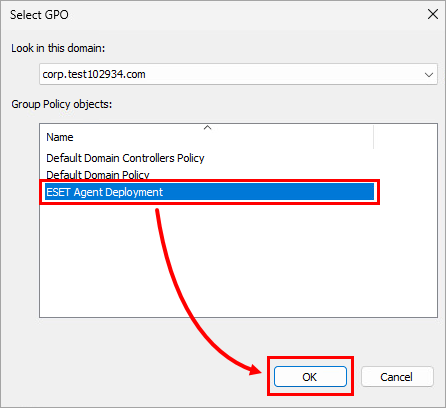
In the Group Policy objects list select the new GPO you created and click OK.
-
Right-click the new GPO and click Edit.
-
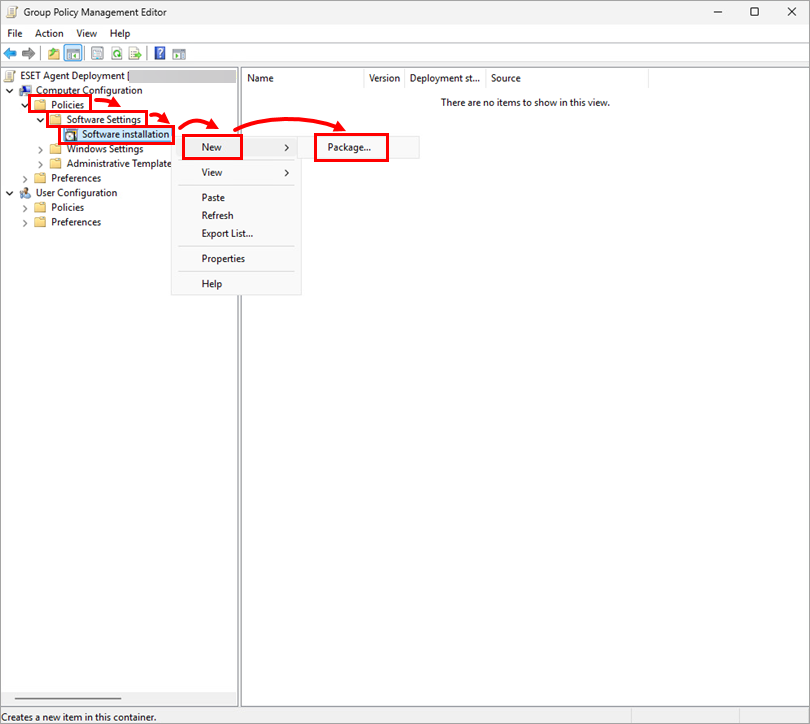
In the Group Policy Management Editor window, expand Policies → Software settings. Right-click Software installation and click New → Package.
-
Navigate to the location where you saved the Agent installer file and the install_config.ini file. Type the full Universal Naming Convention (UNC) path of the shared folder, select the ESET Management Agent package, and click Open. See the example below:
\\DCWIN2025\shared\ESET Management Agent installer\agent_x64.msi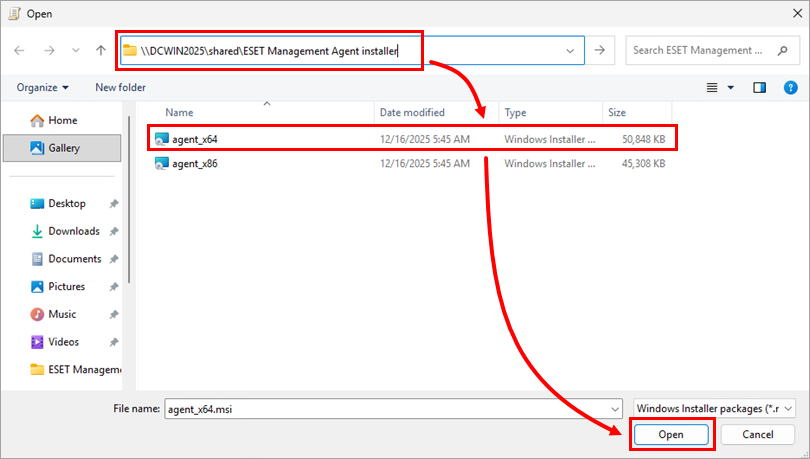
-
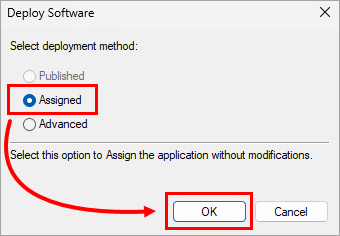
Ensure Assigned is selected and click OK.
If you are deploying both 64-bit and 32-bit ESET Management Agents, click here
If you are deploying both 64-bit and 32-bit ESET Management Agents, follow steps 12–14 above for the other ESET Management Agent installer file (agent_x64.msi or agent_x86.msi) and then continue.-
Right-click the 32-bit installer file (agent_x86.msi) and click Properties.
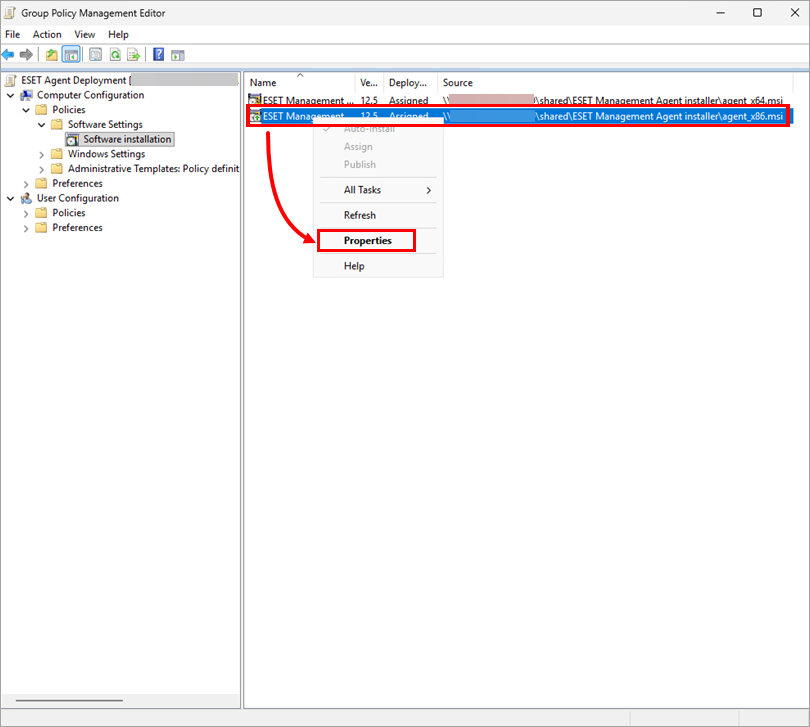
-
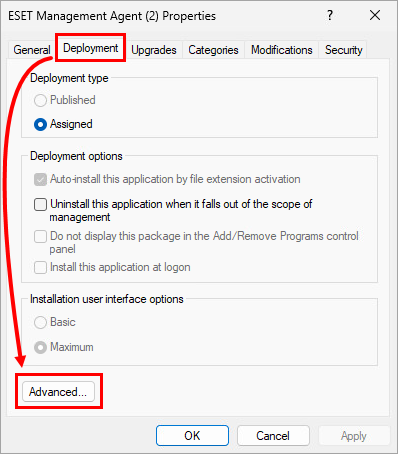
Click Deployment → Advanced.
-
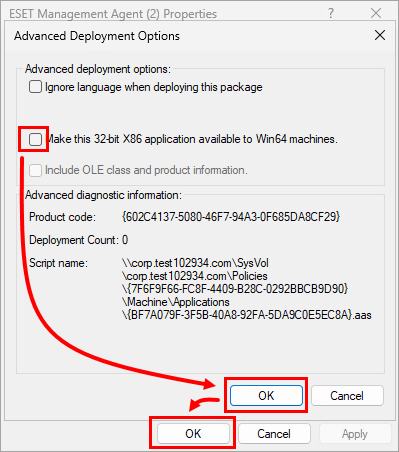
Deselect the check box next to Make this 32-bit X86 application available to Win64 machines and click OK → OK.
-
-
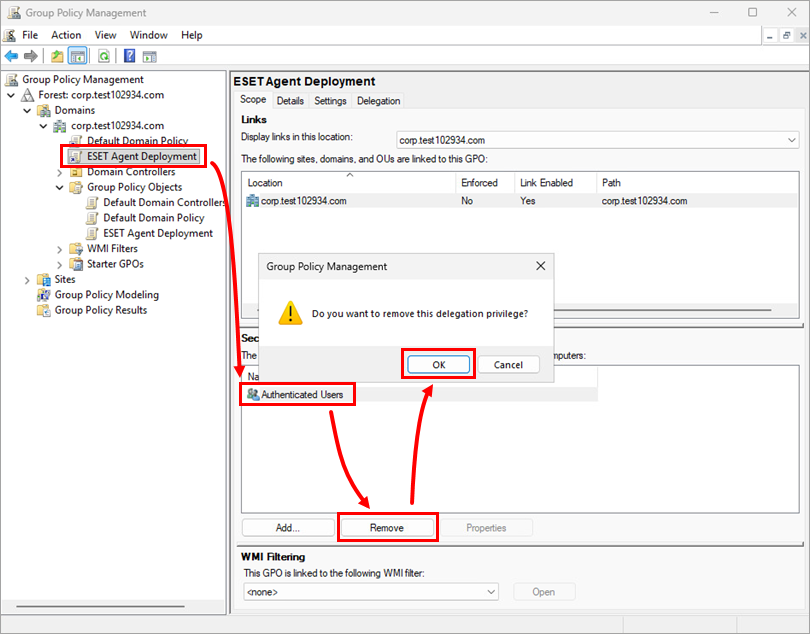
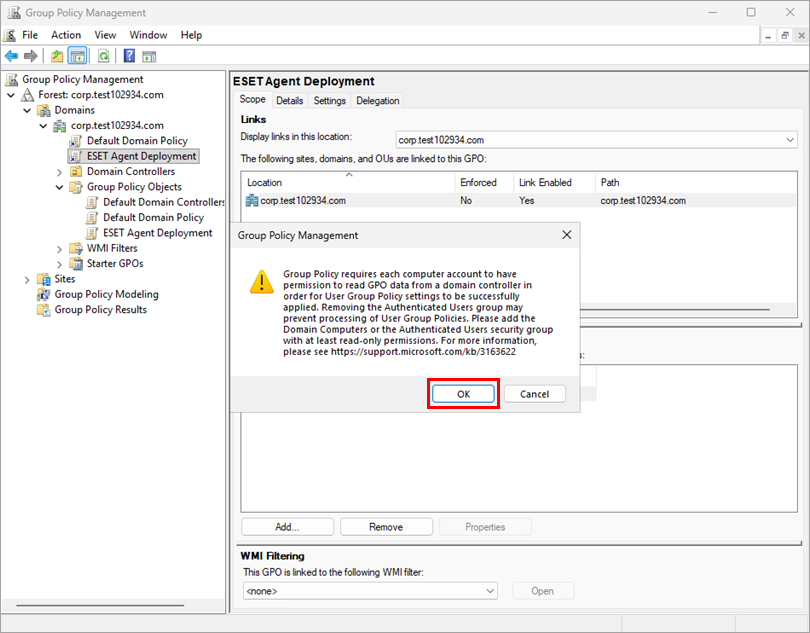
In the Group Policy Management window, click the new GPO. In the Security Filtering list select Authenticated Users and click Remove → OK.
-
Click OK.
-
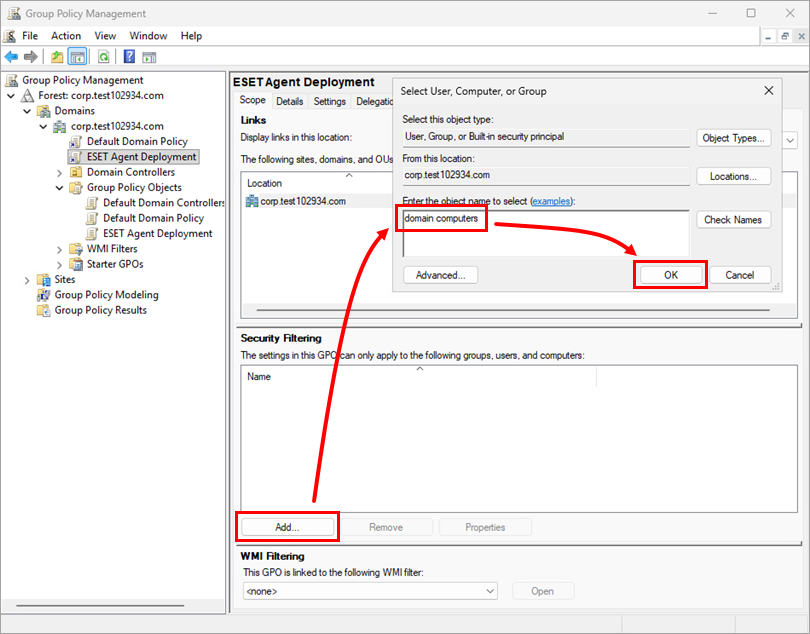
Assign the new GPO to client computers:
-
Assign the new GPO to all Domain computers: Click Add, type domain computers, and click OK.
-
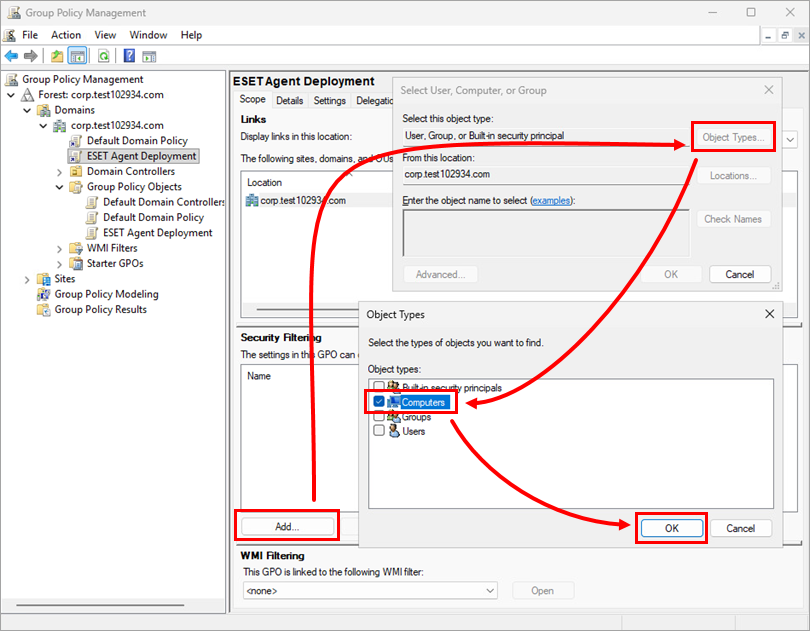
Assign the new GPO to selected computers only:
-
Click Add → Object Types, ensure the only selected check box is next to Computers, and click OK.
-
Type the name of the computer and click OK.

-
-
-
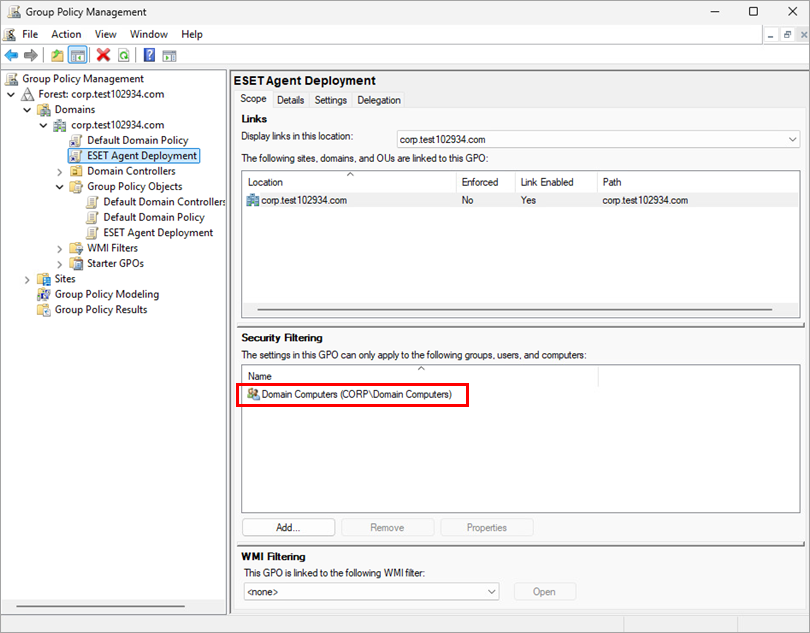
The new GPO is now assigned to the selected computers. When the chosen computers start, ESET Management Agent will be automatically installed.
See the Microsoft Knowledgebase for more information about using Group Policy to remotely install software.
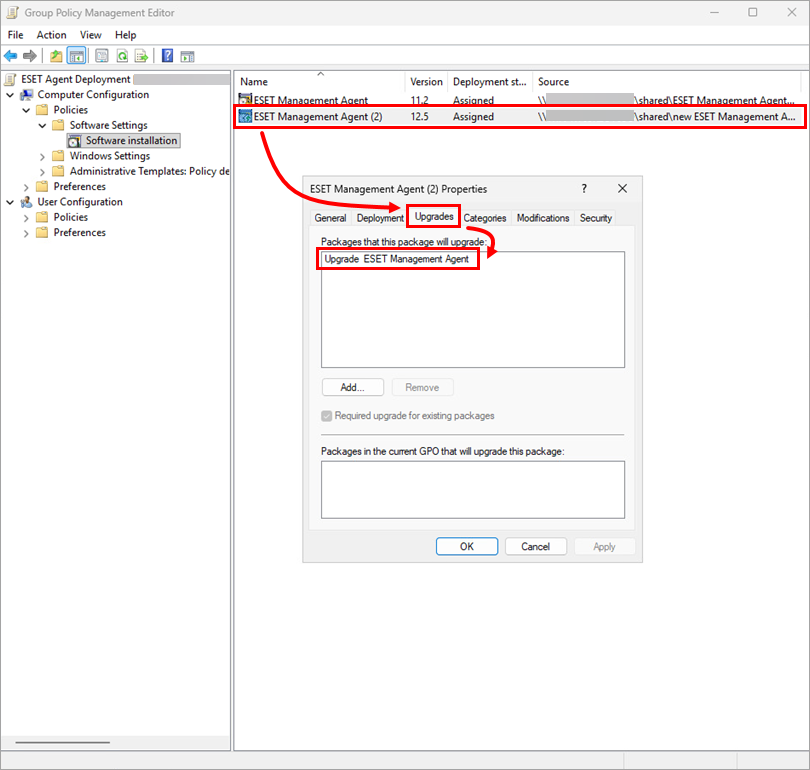
Update ESET Management Agent using GPO
-
Create a new shared folder at a shared location that can be accessed by domain computers (for example, ESET Management Agent version xx). Move the new ESET Management Agent installer file and install_config.ini file to the new folder.
-
Follow steps 12–14 above to add a new installation package. Select the location that uses the latest version of ESET Management Agent.
-
When you add a new installation package, GPO automatically detects the installer's version number. To confirm that the latest installation package upgrades the earlier version, double-click the latest installation package, click Upgrade, and verify that the earlier installation package name is listed.