Issue
- Create a policy to exclude potentially unwanted applications (PUAs) by their hash value in ESET PROTECT On-Prem
Solution
On the client machine that has already detected the PUA, open your ESET endpoint product and click Tools → Quarantine. Verify that the PUA is listed in the Quarantine list.
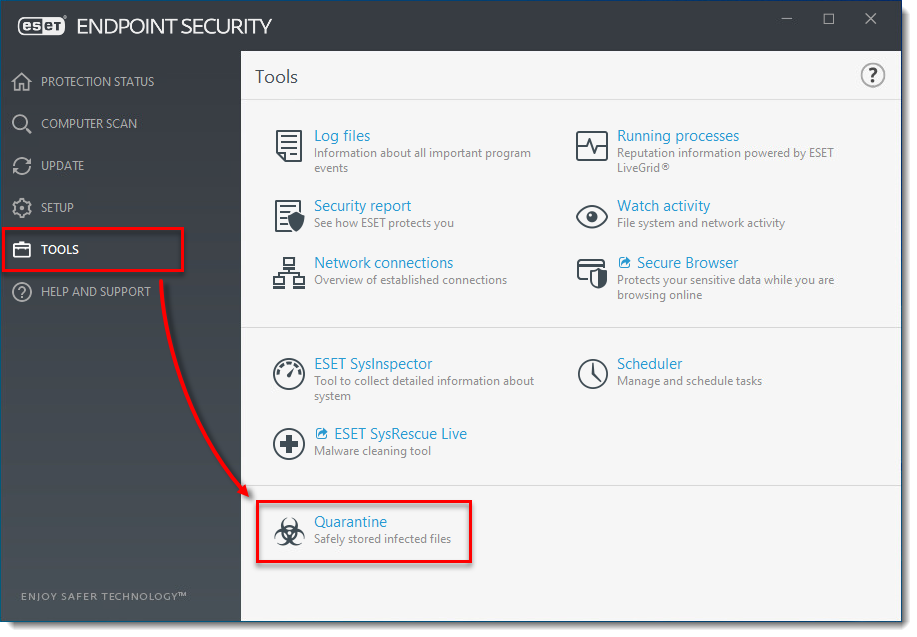
Figure 1-1
Click the image to view larger in new windowClick More → Quarantine. Verify that the PUA found on the client machine is listed in the Quarantine list.
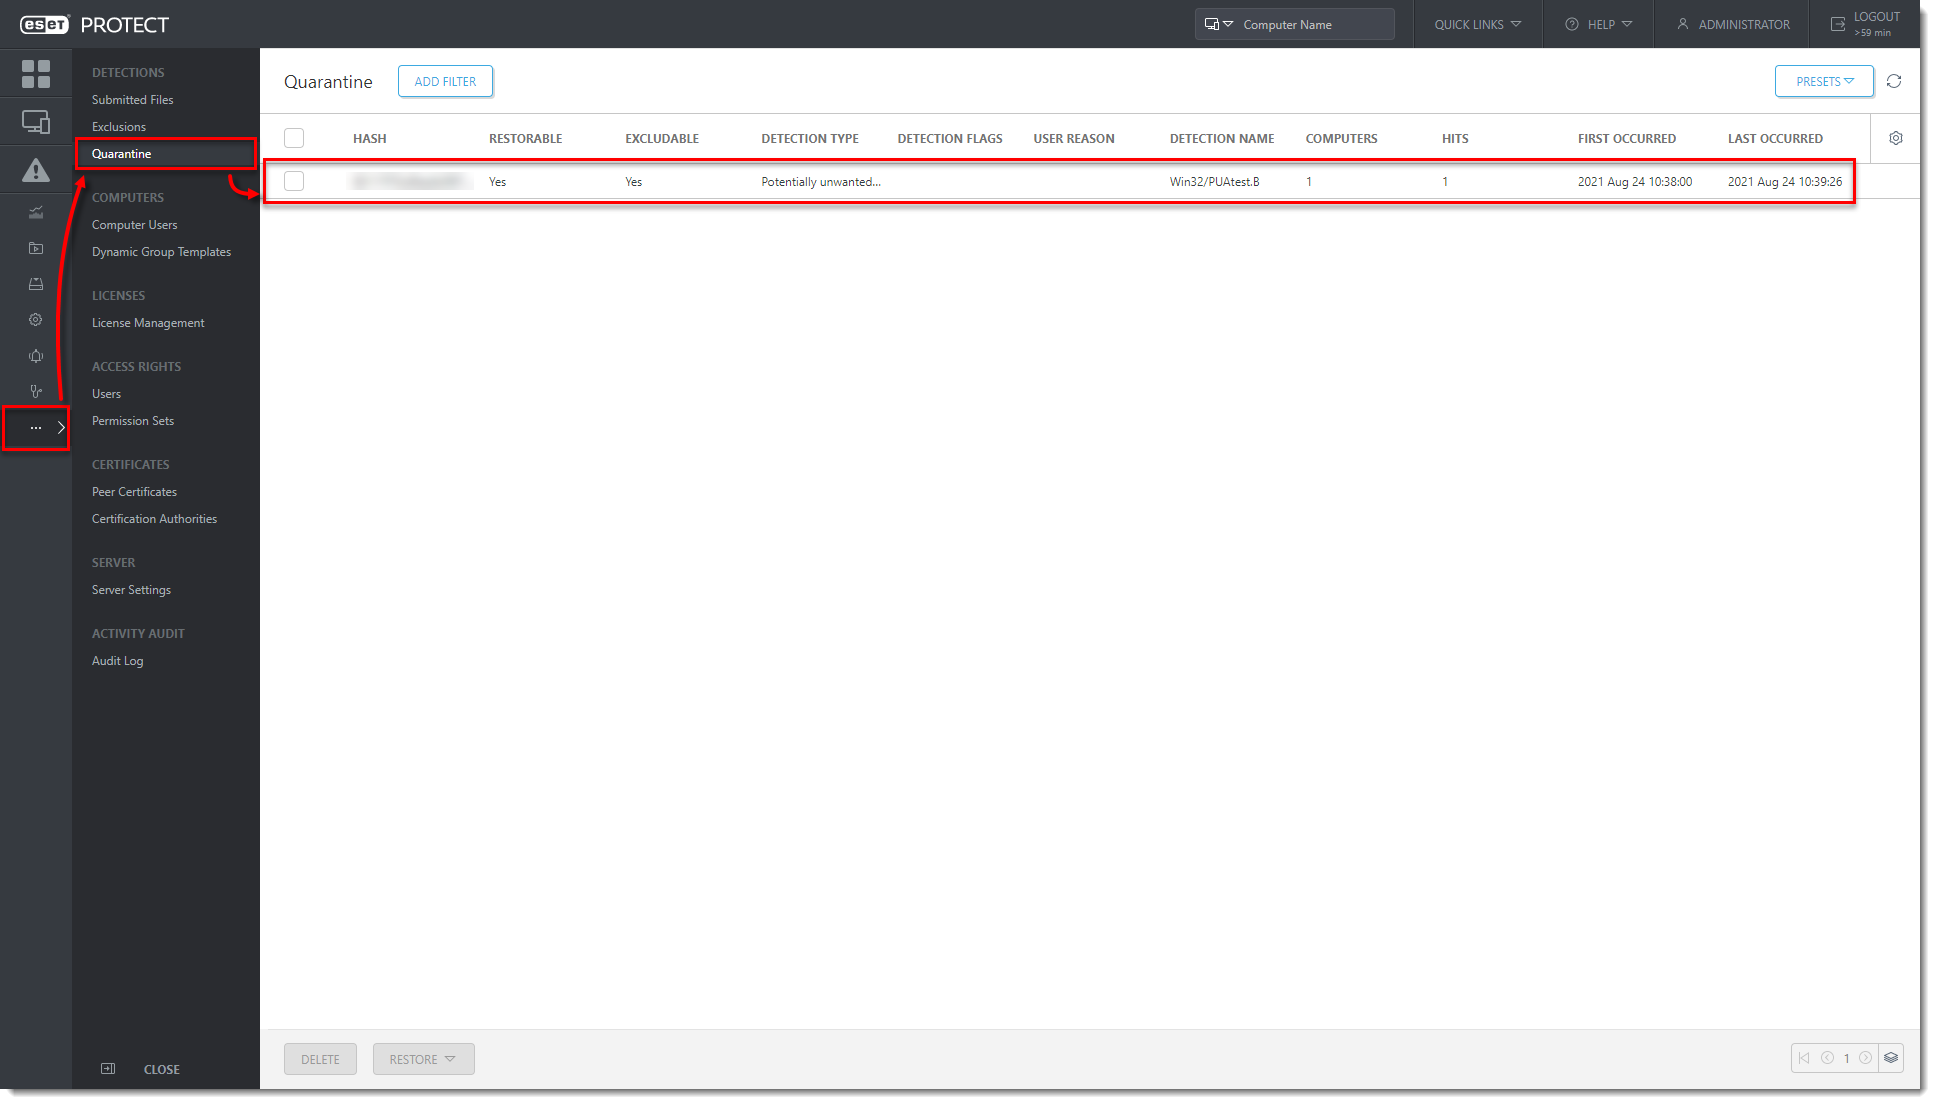
Figure 1-2
Click the image to view larger in new windowClick Tasks → Client Tasks → ESET Security Product → Quarantine Management → New → Client Task.
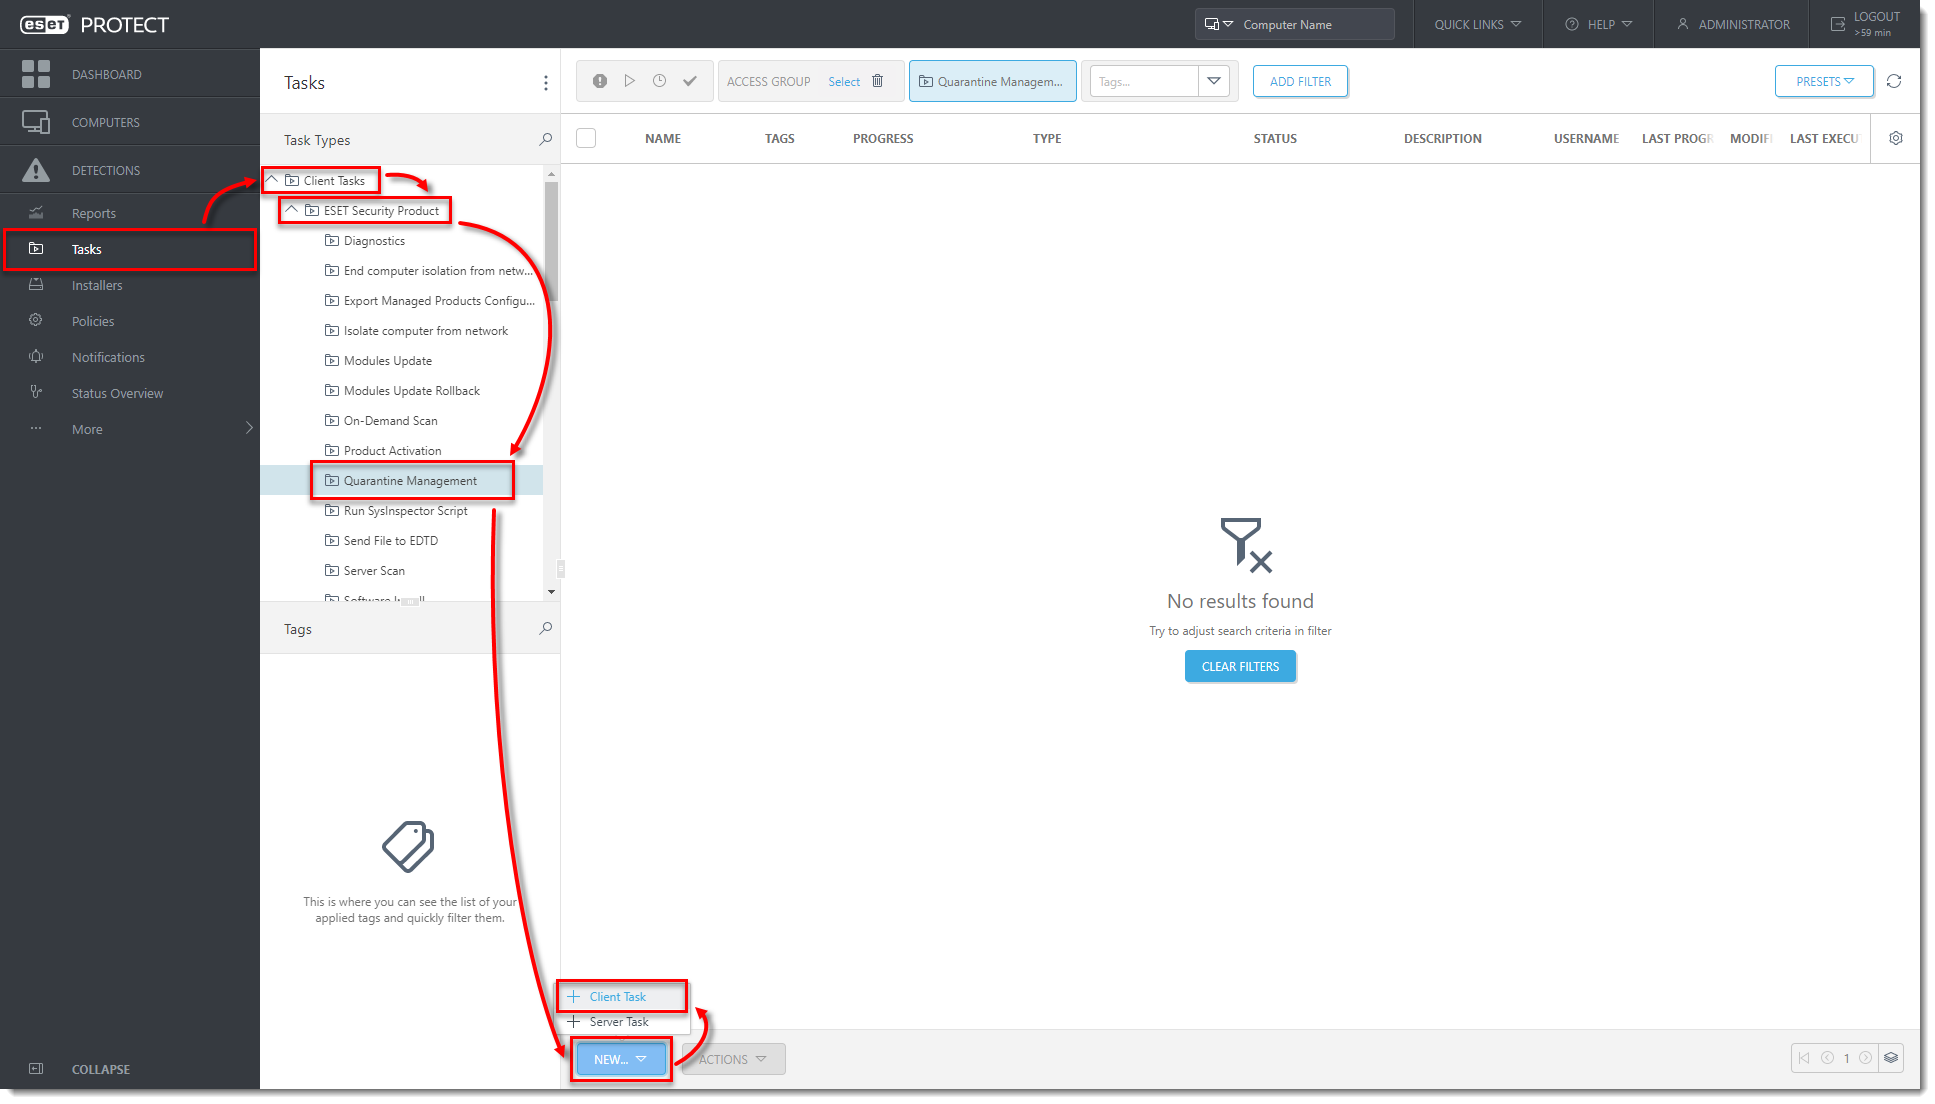
Figure 1-3
Click the image to view larger in new windowIn the Basic section, type the name for the task. Click Settings and from the Action drop-down menu select Restore Object(s) and Exclude in Future. From the Filter type drop-down menu, select Hash items. In the Hash item(s) section, click Add.
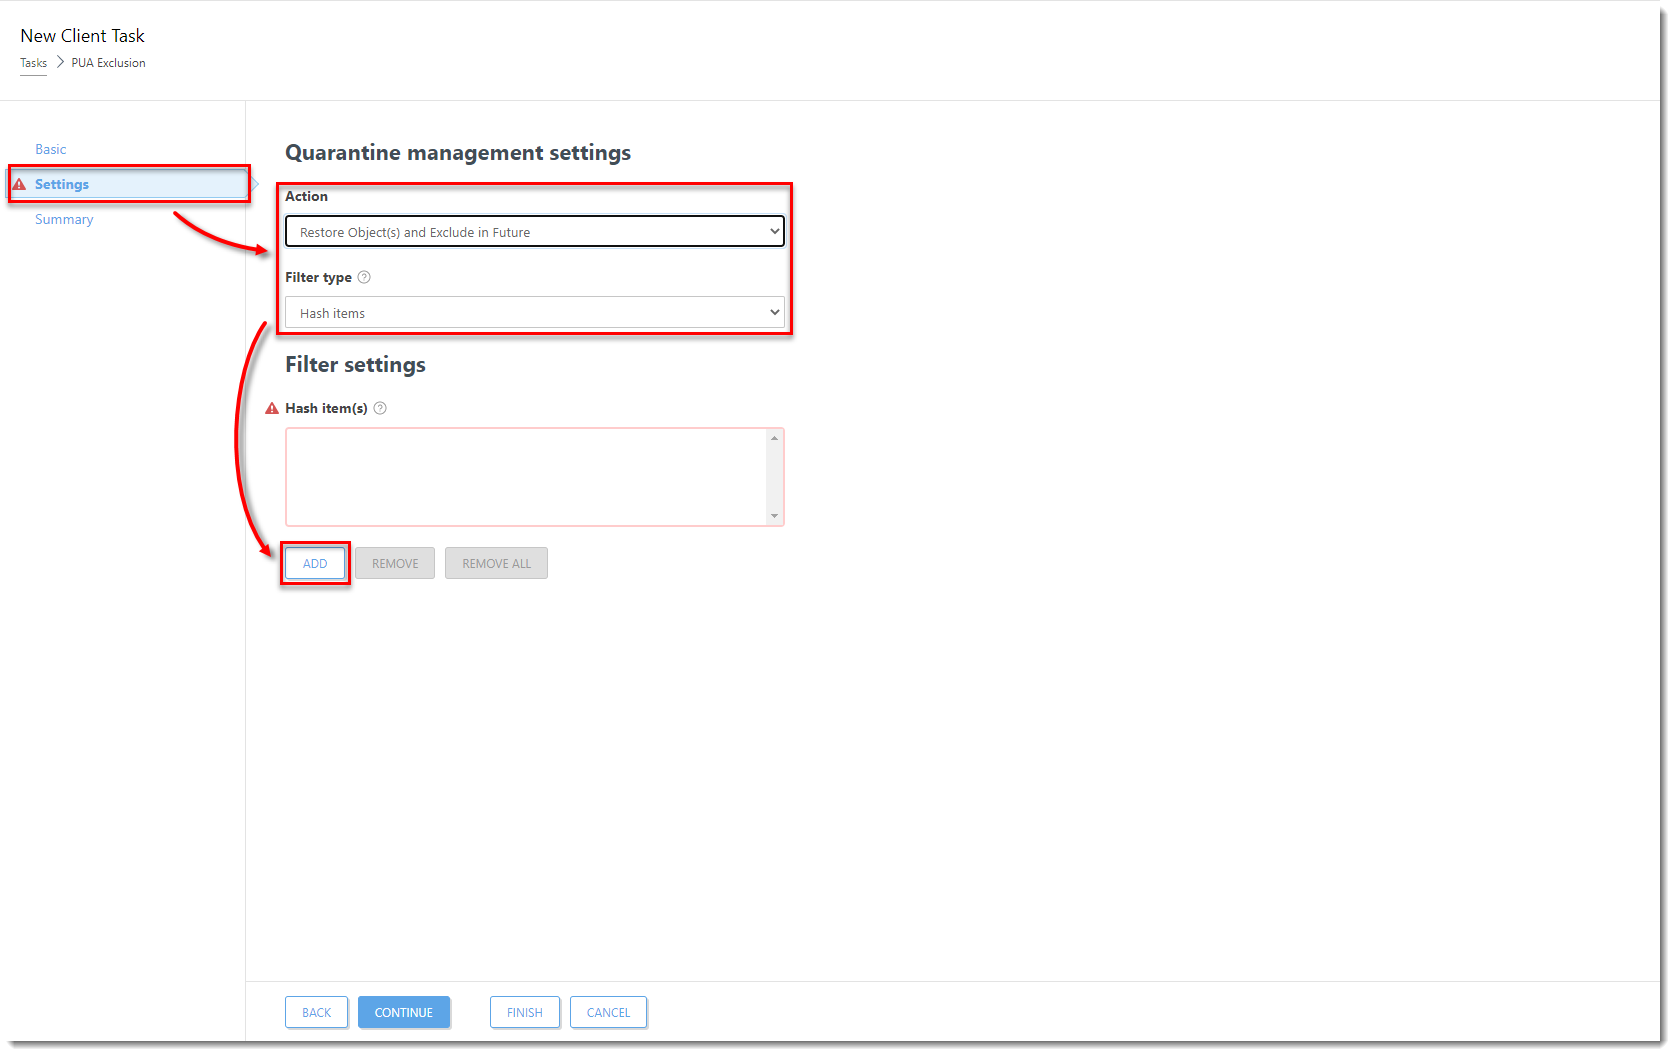
Figure 1-4
Click the image to view larger in new windowSelect the check boxes next to the PUAs that you want to create an exclusion for and click OK.

Figure 1-5
Click the image to view larger in new windowClick Finish to complete the task and create a Trigger for this Client Task.
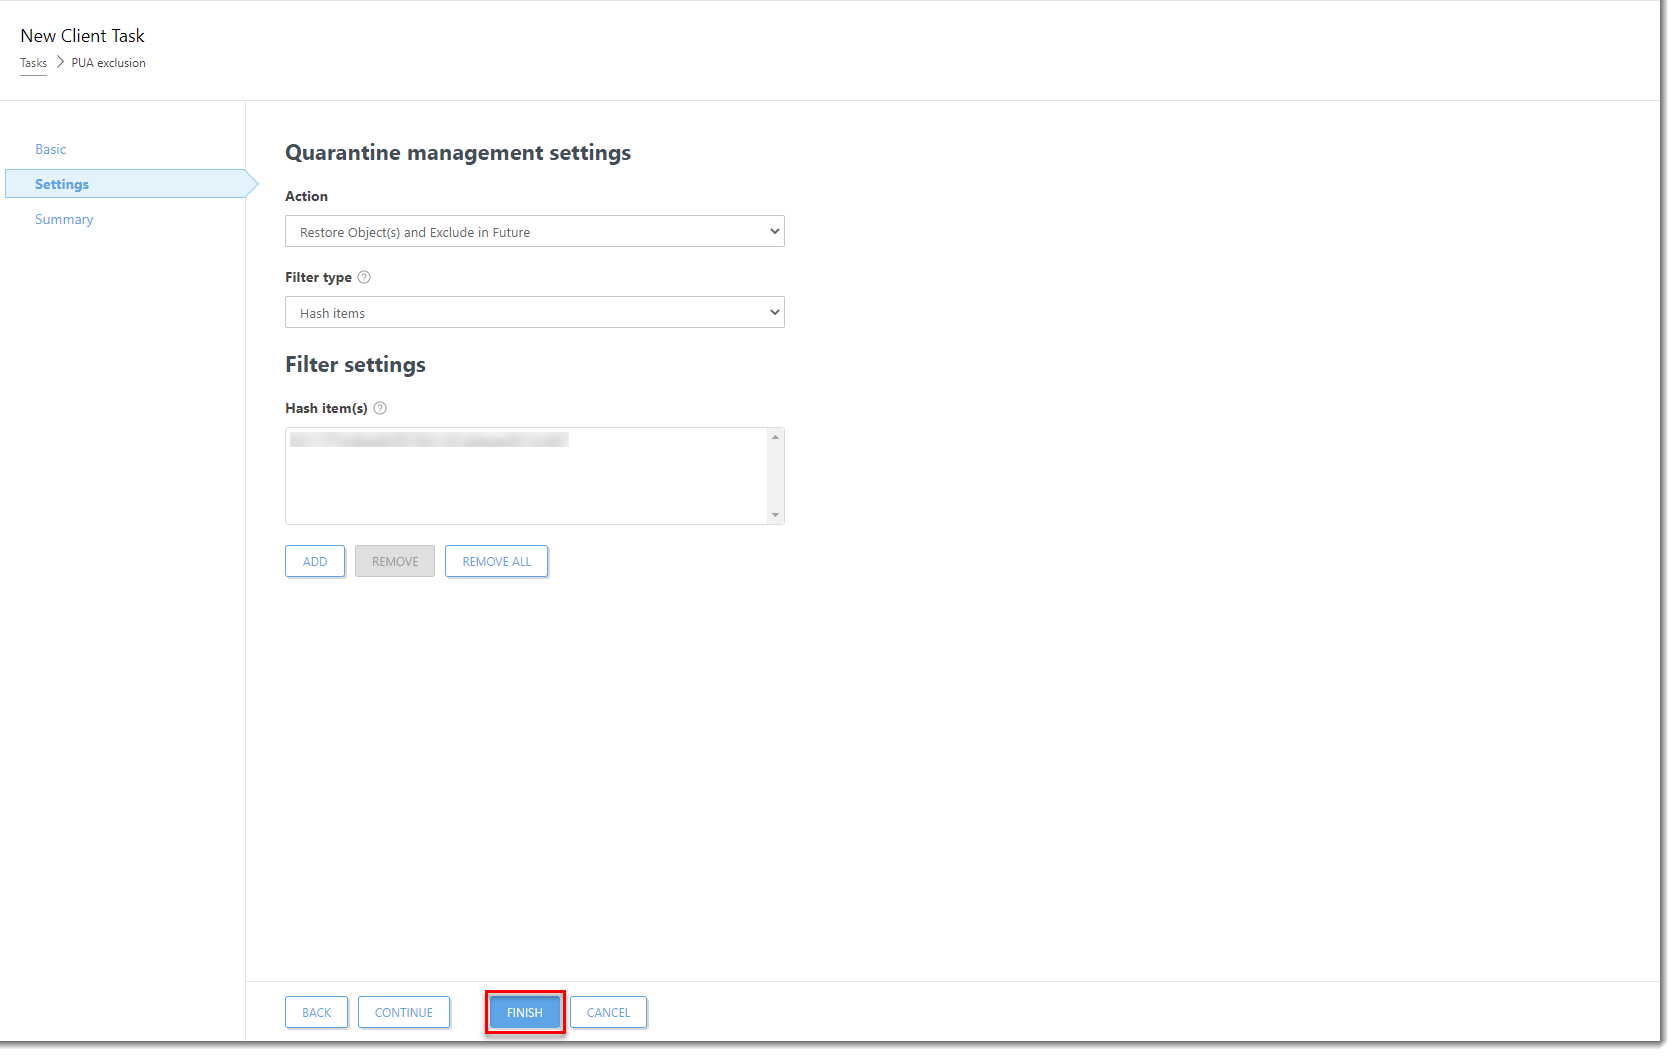
Figure 1-6
Click the image to view larger in new windowOn the client machine, open the main program window of your Windows ESET endpoint product. Press the F5 key on your keyboard to open Advanced Setup.
Click Detection Engine, expand Exclusions, and click Edit next to Detection exclusions. The PUA is now listed as an exclusion in the Exclusions list.
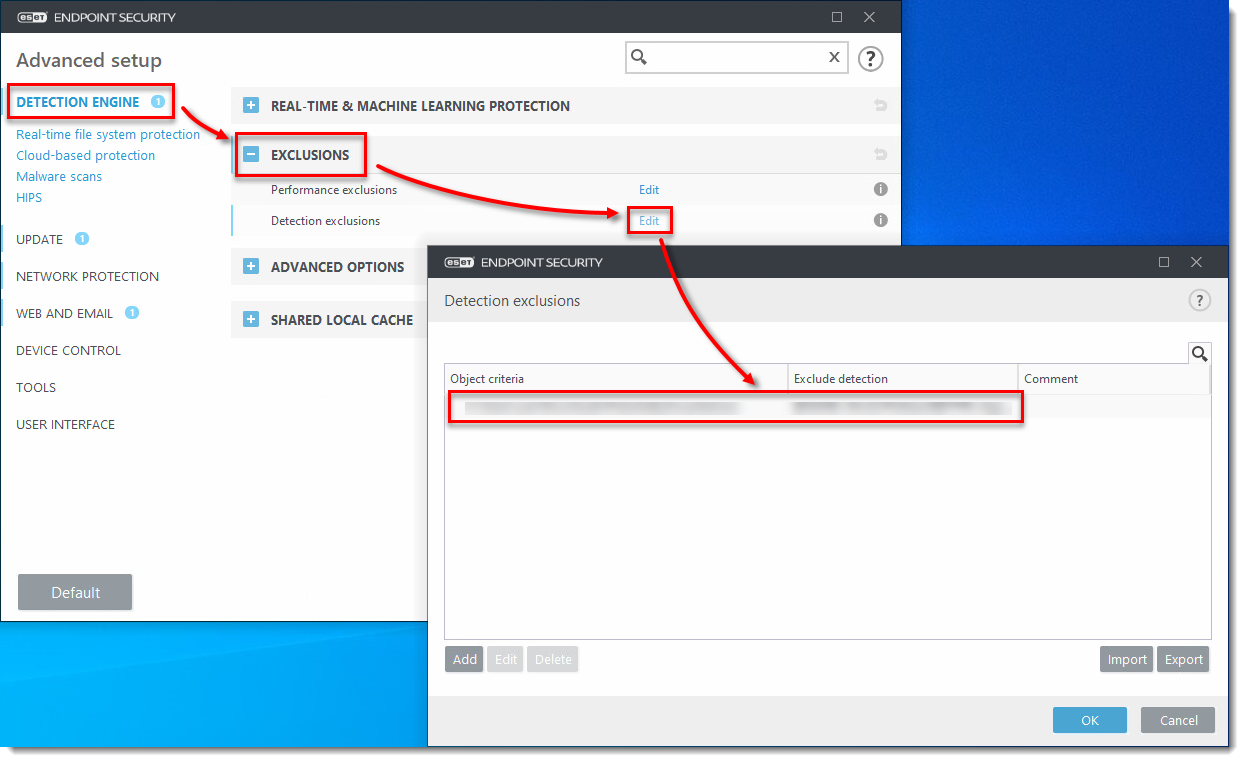
Figure 1-7
Click the image to view larger in new windowIn the ESET PROTECT On-Prem Web Console, click Computers, select the client computer and click Actions → Show Details.
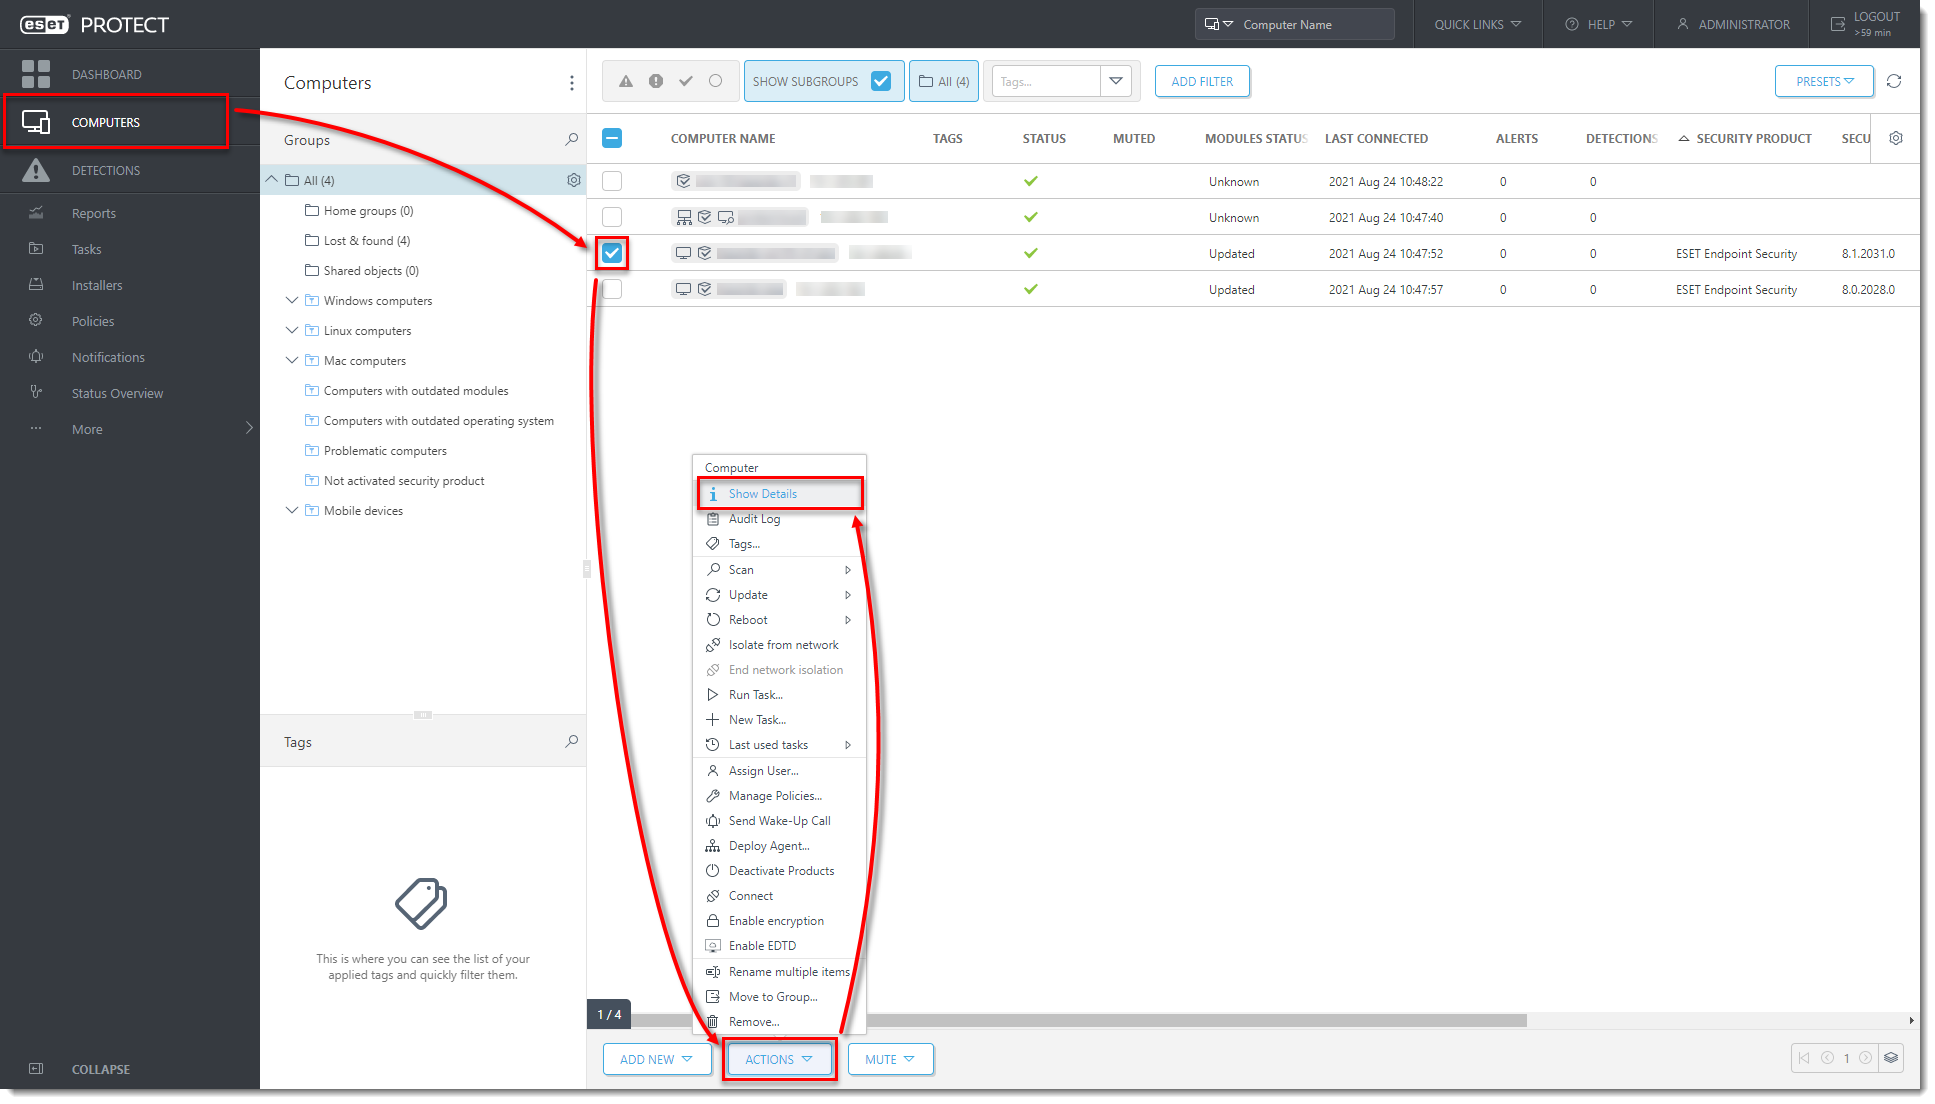
Figure 1-8
Click the image to view larger in new windowClick Request Configuration. When the configuration opens, click Security product → Open configuration.
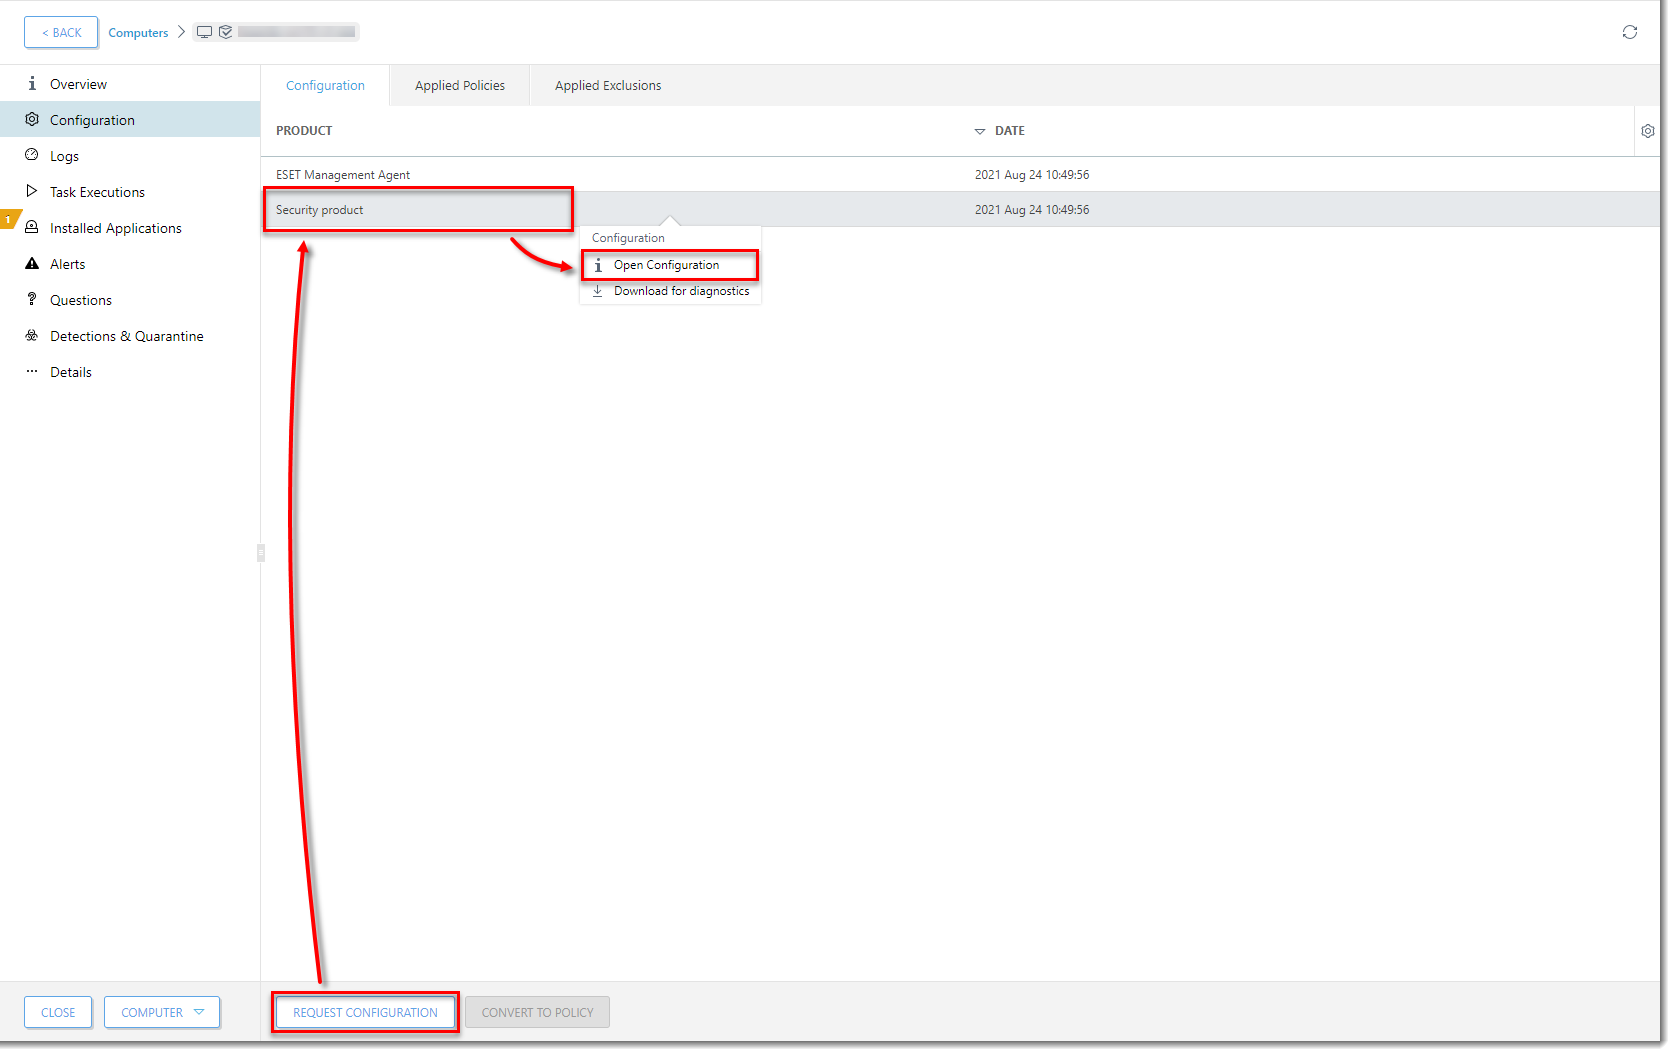
Figure 1-9
Click the image to view larger in new windowClick Convert to Policy.
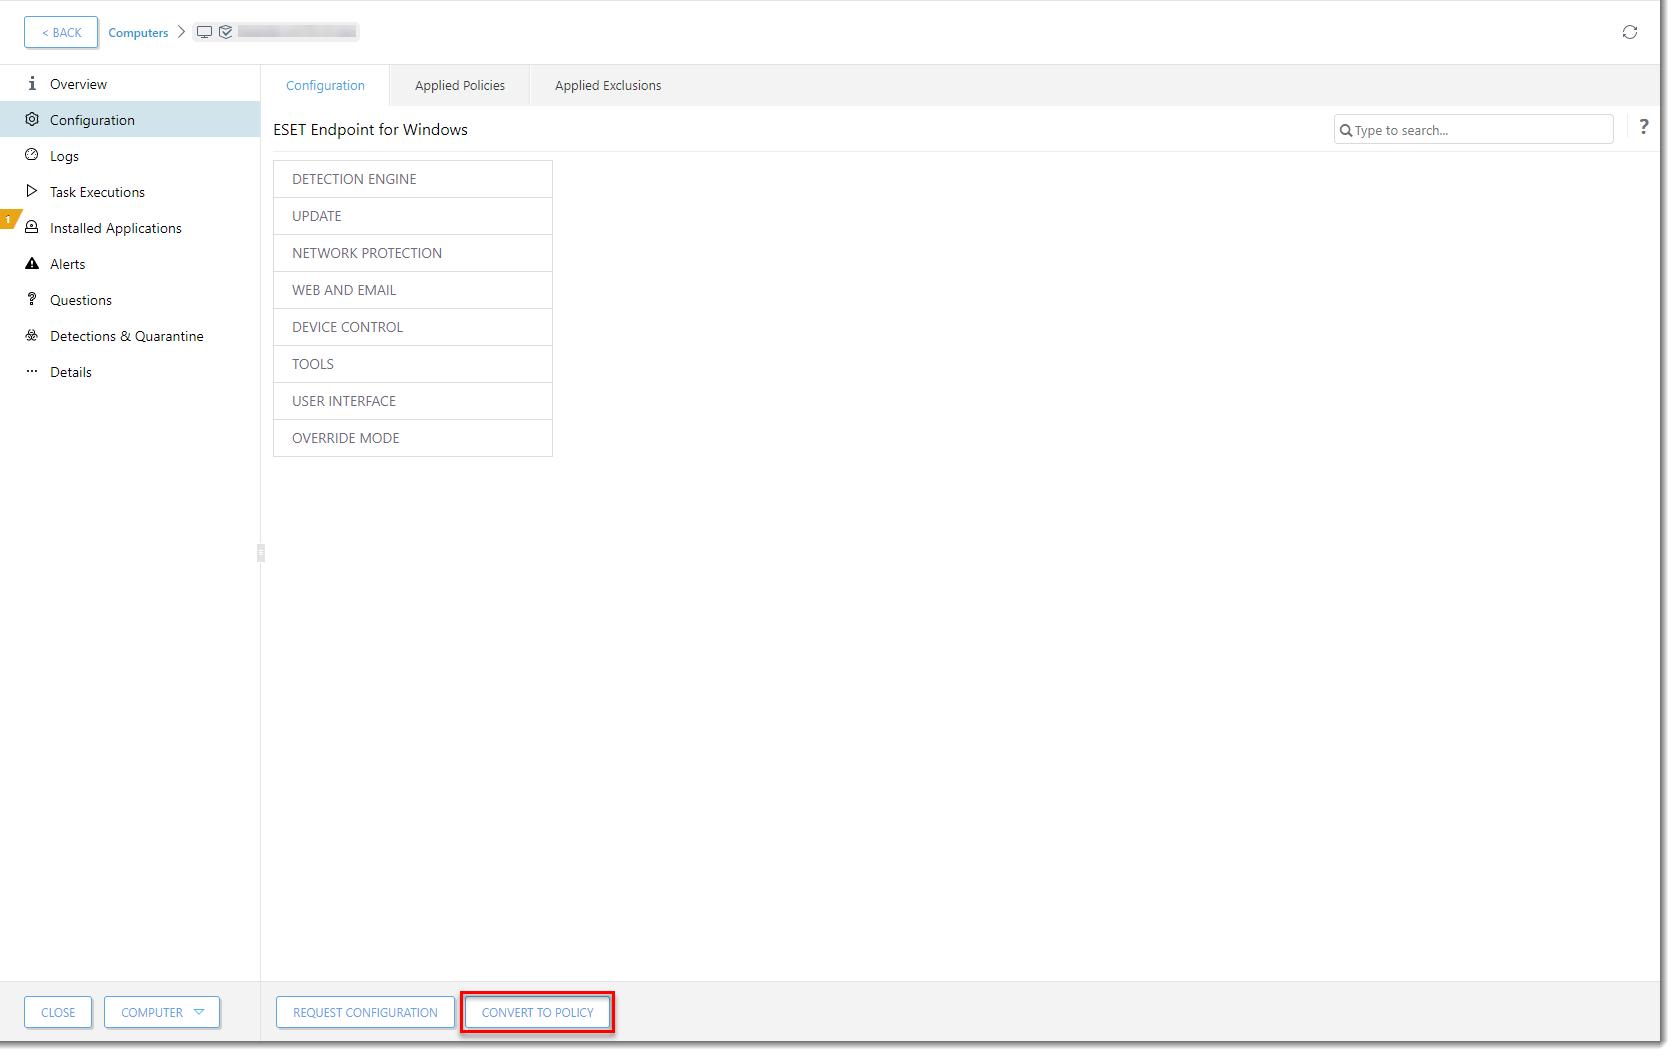
Figure 1-10
Click the image to view larger in new windowIn the Name field, type a name for your policy and click Finish. The policy with this excluded PUA is now available to use for any client computer.
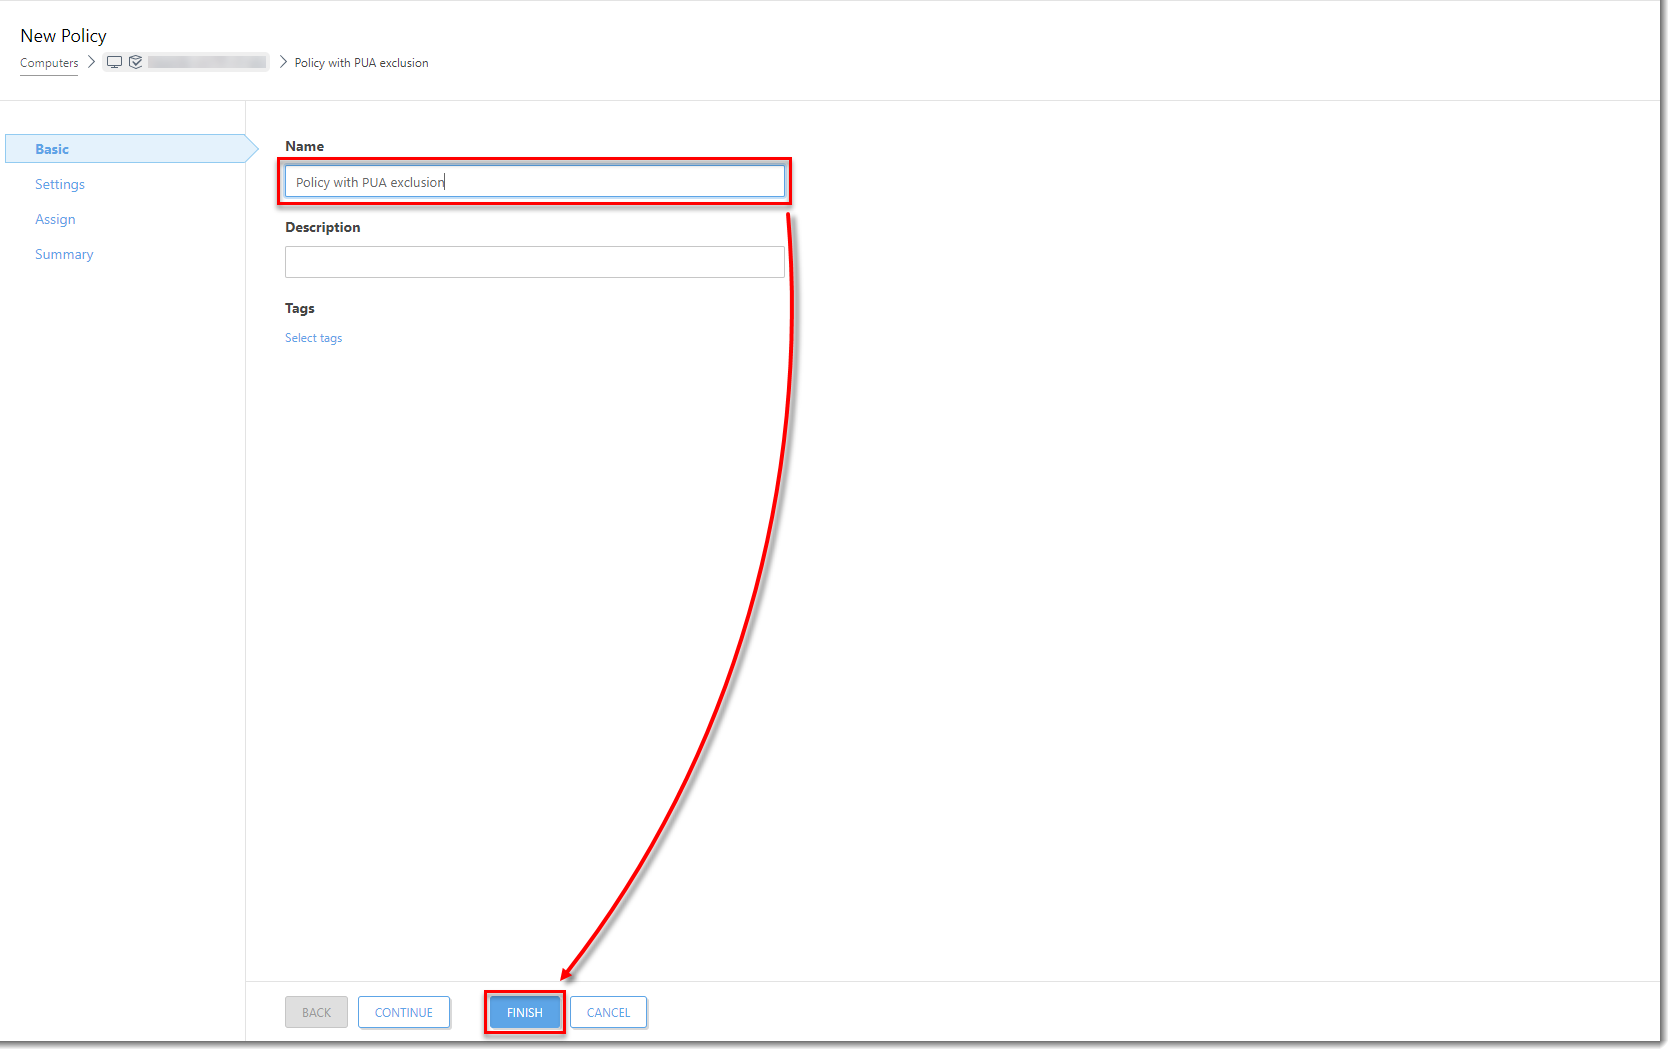
Figure 1-11
Click the image to view larger in new windowAssign the policy with the PUA exclusion to other computers.