Issue
- Schedule a weekly In-depth scan of your system (recommended)
Details
Click to expand
A scheduled scan will run at the time and frequency you configure. However, if the computer is in sleep mode or any other power-saving state at that time, the scan will not occur. The computer must be fully powered on.
Solution
Click Tools → Scheduler.
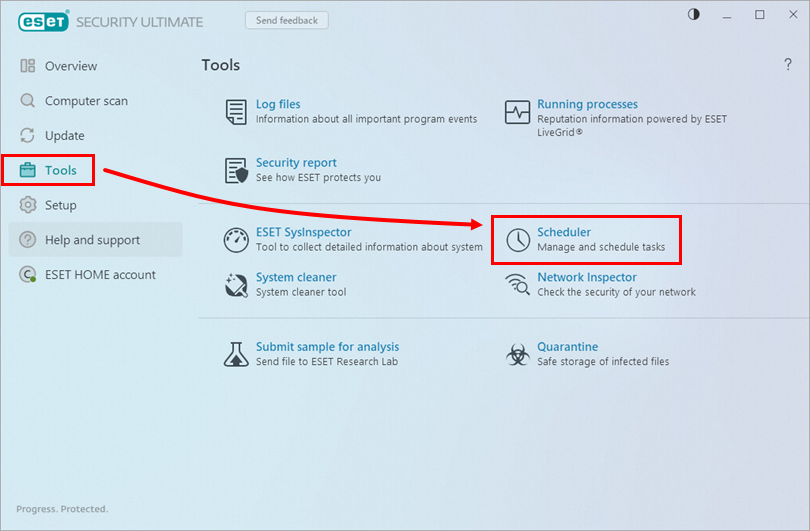
Figure 1-1 Click Add task.
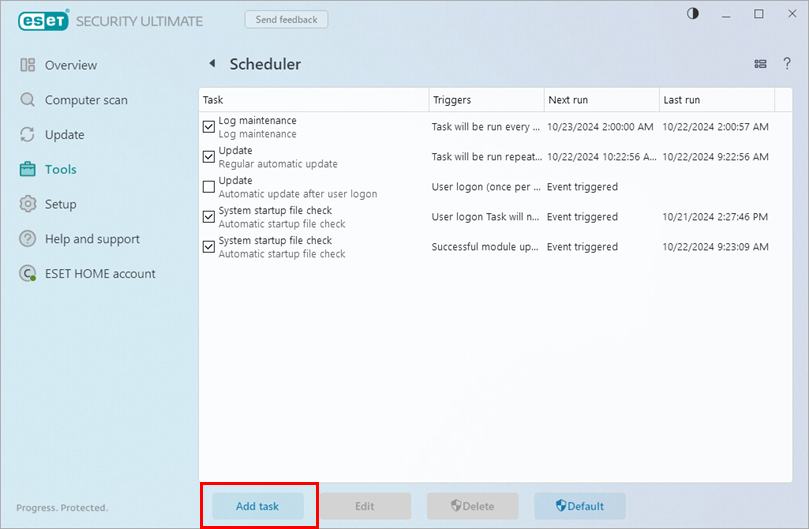
Figure 1-2 In the Task name field, type a name for your new task. In the Task type drop-down menu, select On-demand computer scan and click Next.
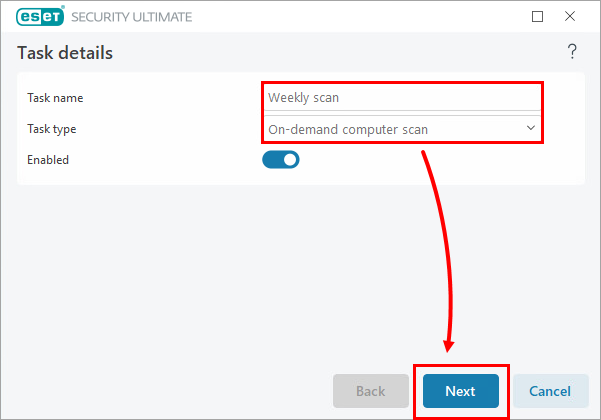
Figure 1-3 Next to Schedule task to run, select the applicable interval and click Next.
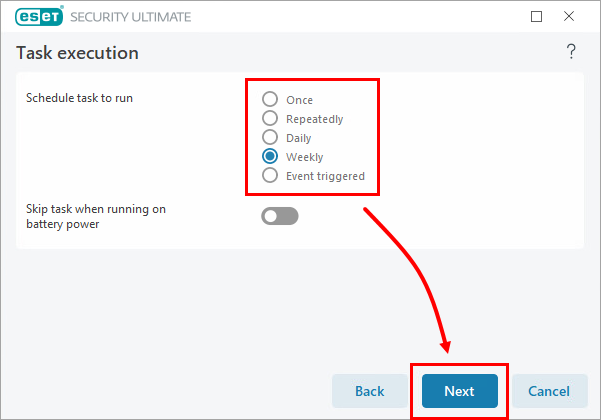
Figure 1-4 In the Task timing window, specify the time and date of the scheduled scan. To minimize the chance of an interruption, it is best to select a time when users are away from their computers. Click Next.
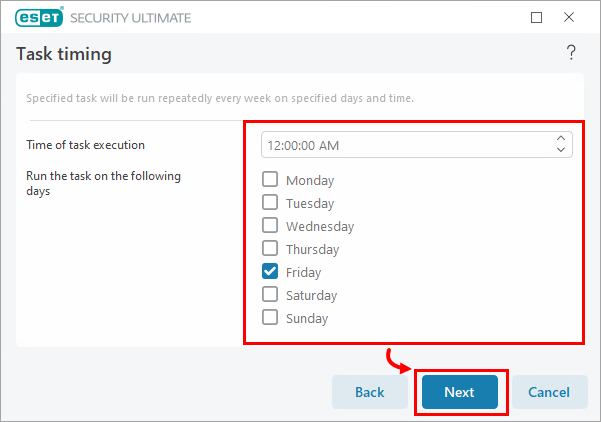
Figure 1-5 Specify an alternate time for the task to run in the event it does not run at the scheduled time (for example, if the computer is off). To prevent instances of the same task types from running on top of each other, we recommend you select Immediately, if time since last run exceeds a specified value. In the Time since last run (hours) field, type
24and click Next.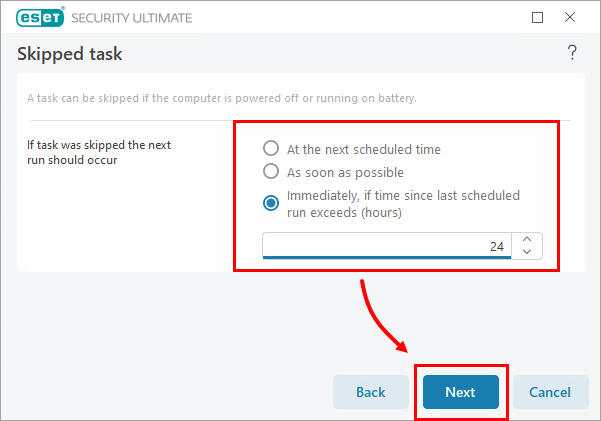
Figure 1-6 In the Profile drop-down menu, select In-depth scan and select the applicable scan targets. We recommend that you select This PC or Computer, depending on your Windows version, to scan all objects. Click OK.
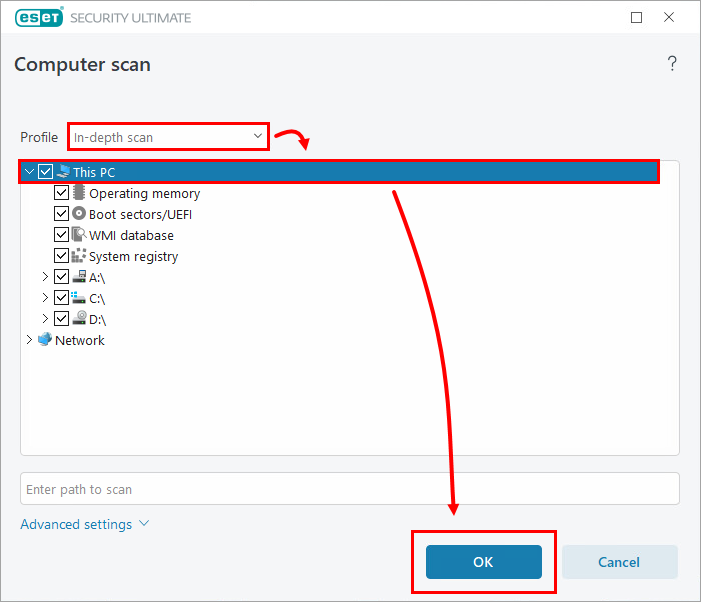
Figure 1-7 Click Finish.
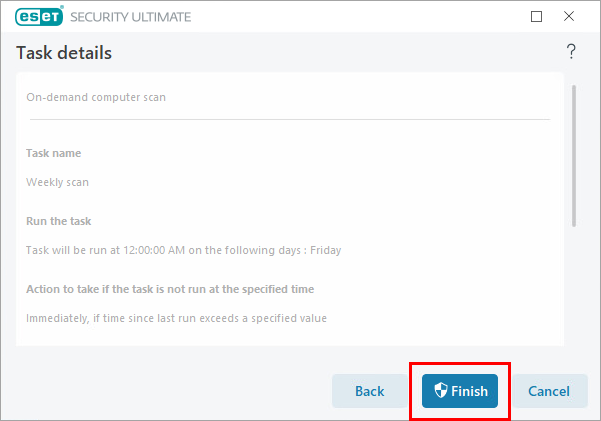
Figure 1-8 The scheduled scan appears in the Scheduler window. From this point forward, the scan will run at the time and frequency you configured. If the computer is in sleep mode or any other power-saving state, the scan will not occur. The computer must be fully powered on.
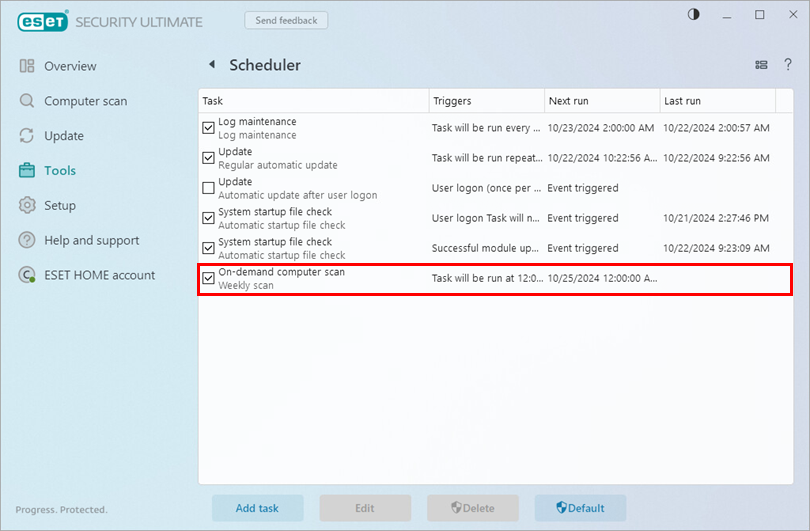
Figure 1-9