Издание
- Създаване на база данни в Microsoft SQL или MySQL за инсталацията на ESET PROTECT Server
- Създаване на специален потребител на база данни за Microsoft SQL или MySQL
Детайли
Натиснете, за да разширите
Препоръчваме ви да създадете специална база данни и специален потребител на базата данни за ESET PROTECT Server. Не се препоръчва използването на администраторски акаунти за бази данни с високи права, като например sa (Microsoft SQL) или root (MySQL), тъй като ESET PROTECT не изисква пълен административен достъп. Специалният потребител и базата данни осигуряват по-ясна, по-безопасна и поддържана настройка за свързване на ESET PROTECT Server към неговата база данни.
Решение
- Създаване на специална база данни и потребител на база данни за ESET PROTECT On-Prem в Microsoft SQL
- Създаване на специална база данни и потребител на база данни за ESET PROTECT On-Prem в MySQL
Създаване на специална база данни и потребител на база данни за ESET PROTECT On-Prem в Microsoft SQL
Предварителни условия
- Административен достъп до операционната система
- Инсталиран и правилно конфигуриран поддържан Microsoft SQL Server
- Инсталирано Microsoft SQL Server Management Studio
- Достъп до администраторски акаунт в Microsoft SQL и Microsoft SQL Server Management Studio
Създаване на база данни за ESET PROTECT On-Prem в Microsoft SQL
-
Отворете Microsoft SQL Server Management Studio и влезте в него с вашия администраторски акаунт.
-
В Object Explorer щракнете с десния бутон на мишката върху Databases (Бази данни) и изберете New Database (Нова база данни) от контекстното меню.
-
В полето Database name (Име на базата данни) въведете името на базата данни. Например, използвайте името на базата данни по подразбиране на ESET PROTECT On-Prem
era_db. -
Натиснете OK.
Създайте специален потребител на базата данни за ESET PROTECT On-Prem в Microsoft SQL и го назначете към специалната база данни
-
Отворете Microsoft SQL Server Management Studio и влезте в системата с вашия администраторски акаунт.
-
В Object Explorer щракнете с десния бутон на мишката върху Security (Сигурност) и щракнете върху New (Нов) → Login (Вход).
-
В полето Login name (Име на вход) въведете името на потребителския акаунт. Например, използвайте потребителското име на базата данни на ESET PROTECT On-Prem
era_userпо подразбиране. -
Изберете SQL удостоверяване и въведете и потвърдете паролата на потребителския акаунт.
-
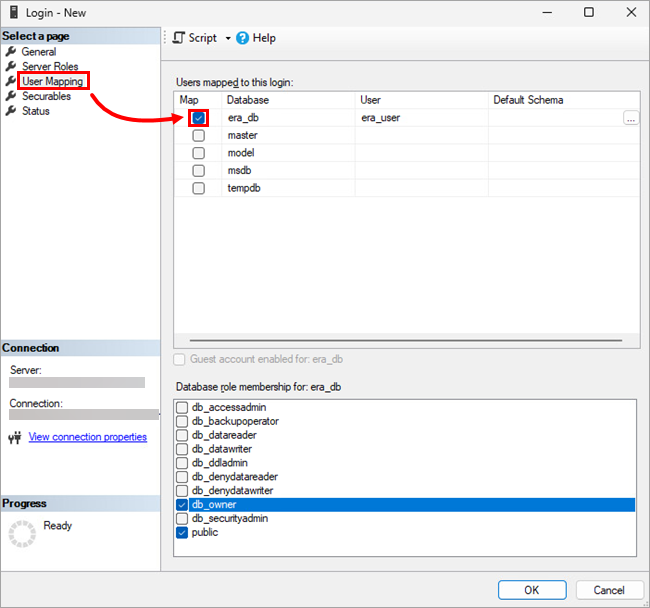
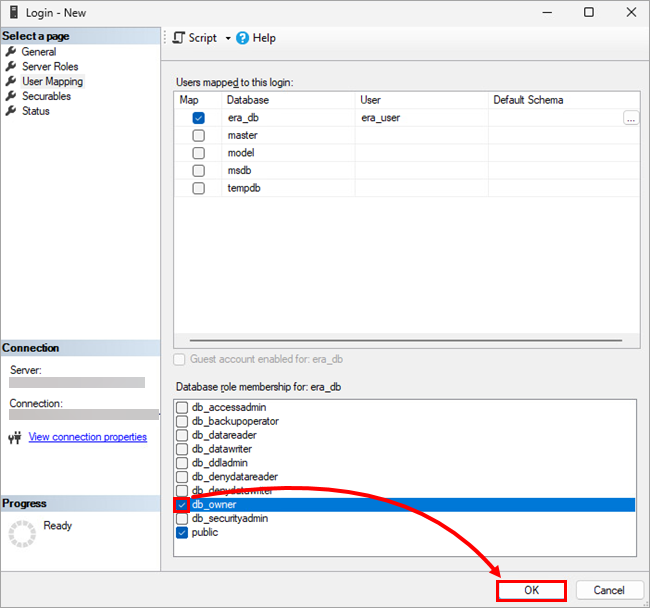
В менюто от лявата страна щракнете върху User Mapping (Картографиране на потребители) и поставете отметка в квадратчето до базата данни, която сте създали. Името на потребителския акаунт трябва да се появи в колоната User (Потребител) до избраната база данни.
-
Под Database role membership (Членство в роля на база данни) изберете квадратчето за отметка до db_owner (Собственик на база данни) и щракнете върху OK.
Създаване на специална база данни и потребител на базата данни за ESET PROTECT On-Prem в MySQL
Предварителни условия
- Административен достъп до операционната система
- Инсталиран и правилно конфигуриран поддържан MySQL сървър
- Достъп до MySQL администраторски акаунт; в тази статия се използва HeidiSQL като инструмент за администриране, но можете да използвате друг MySQL клиент или командния ред
Създаване на база данни за ESET PROTECT On-Prem в MySQL
-
Отворете вашия инструмент за администриране на MySQL и влезте в локалната база данни, като използвате root акаунт и парола. Задайте името на хоста на
127.0.0.1. Щракнете върху Отвори. -
Щракнете с десния бутон на мишката върху коренната база данни и изберете Създаване на нова → База данни от контекстното меню.
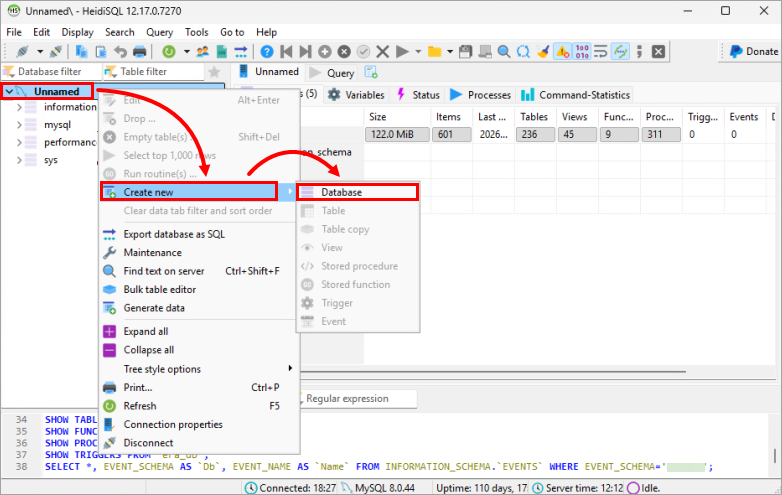
- В полето Name (Име) въведете името на базата данни. Например, използвайте името на базата данни по подразбиране на ESET PROTECT On-Prem
era_db. Щракнете върху OK.
Създайте специален потребител на базата данни за ESET PROTECT On-Prem в MySQL и го назначете към специалната база данни
-
Отворете вашия инструмент за администриране на MySQL и влезте в локалната база данни, като използвате акаунта и паролата на root. Задайте името на хоста на
127.0.0.1. Щракнете върху Отвори. -
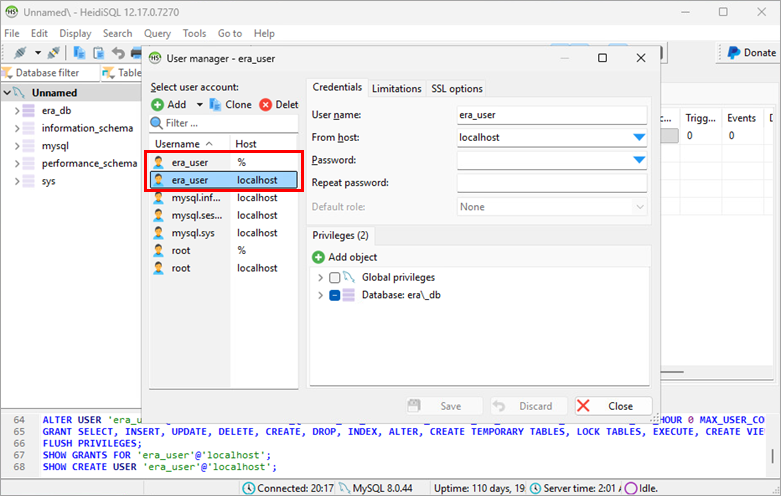
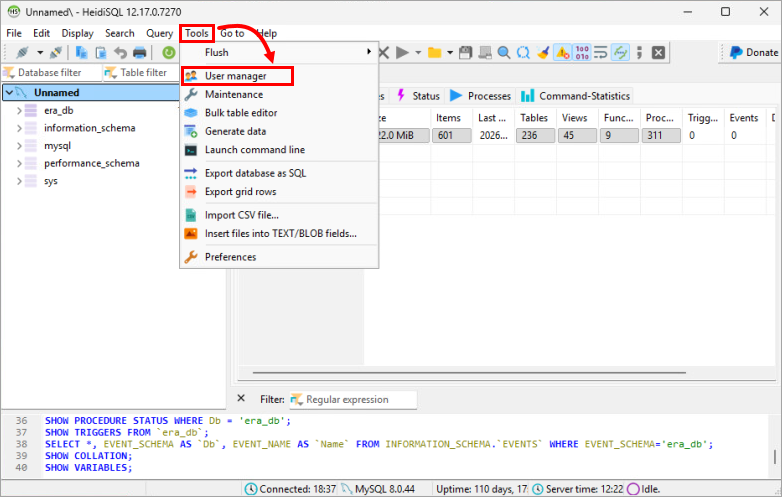
Щракнете върху Инструменти → Потребителски мениджър.
-
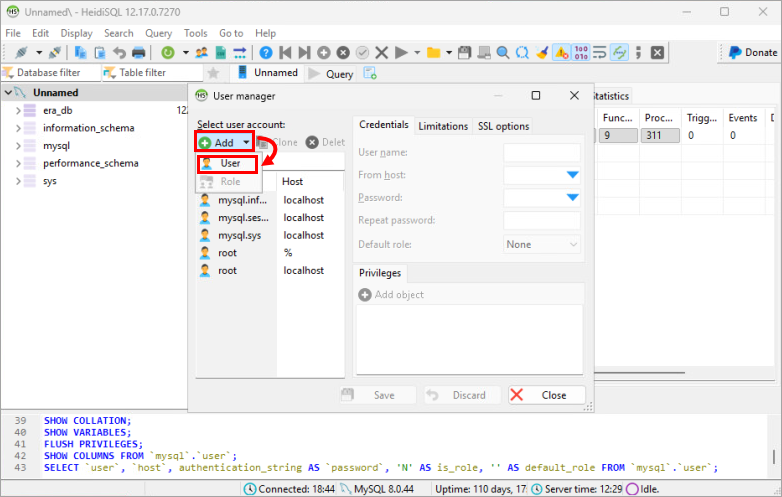
Щракнете върху Добавяне → Потребител.
-
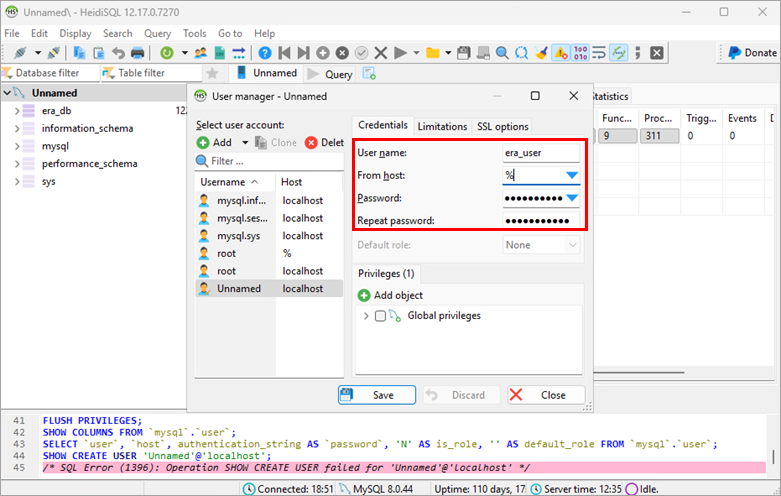
Въведете данните на потребителя:
- В полето User name (Потребителско име) въведете потребителското име. Например, използвайте потребителското име по подразбиране на базата данни на ESET PROTECT On-Prem
era_user. - В падащото меню From host (От хоста) изберете Access from everywhere (Достъп отвсякъде ) или въведете
%. - В полетата Password (Парола) и Repeat password (Повторение на паролата ) въведете паролата.
- В полето User name (Потребителско име) въведете потребителското име. Например, използвайте потребителското име по подразбиране на базата данни на ESET PROTECT On-Prem
-
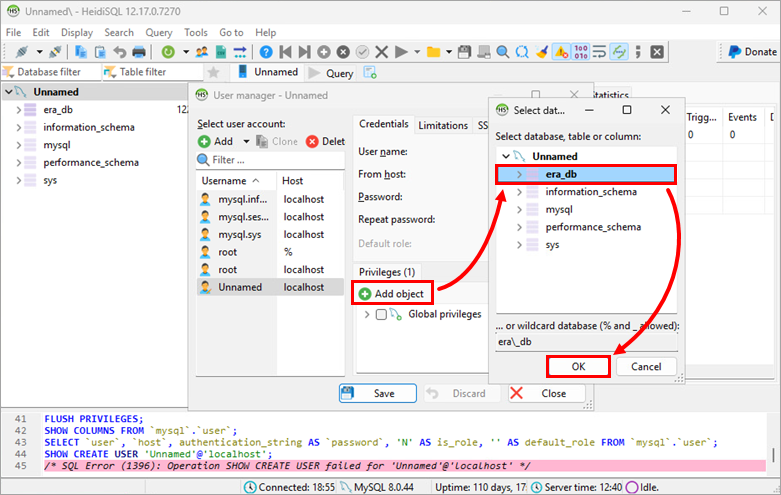
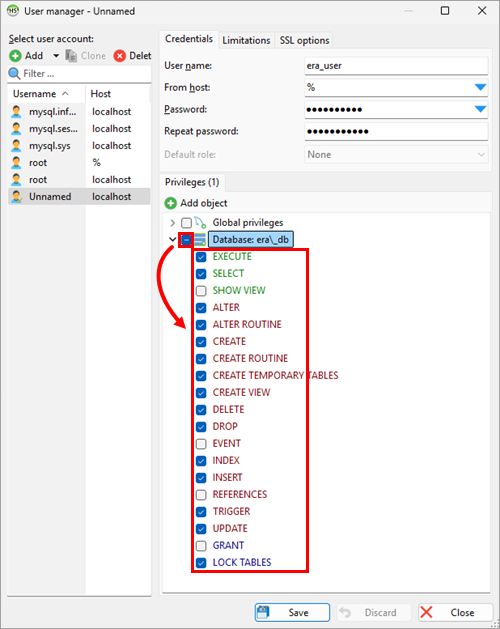
Щракнете върху Добавяне на обект, изберете създадената база данни и щракнете върху OK.
-
Под Privileges (Привилегии) изберете квадратчето до създадената база данни и премахнете отметката от
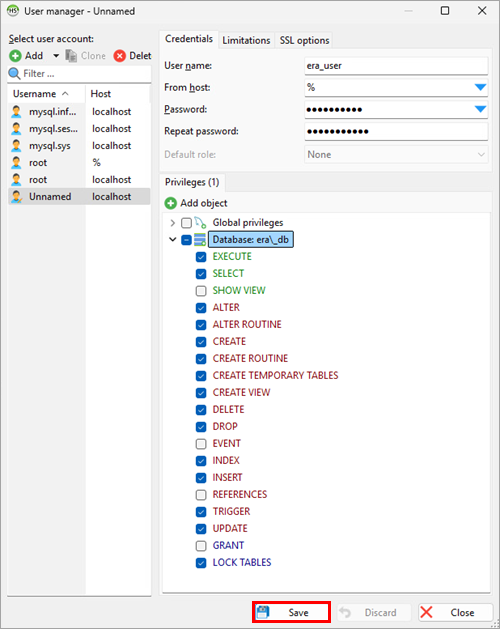
SHOW VIEW (Покажи преглед),EVENT (Събитие),REFERENCES (Референции)иGRANT (Предоставяне), така че да бъдат избрани следните привилегии:EXECUTESELECTALTERALTER ROUTINECREATECREATE ROUTINEСЪЗДАВАНЕ НА ВРЕМЕННИ ТАБЛИЦИСЪЗДАВАНЕ НА ИЗГЛЕДDELETEDROPINDEXINSERTTRIGGERUPDATEЗАКЛЮЧВАНЕ НА ТАБЛИЦИ
-
Щракнете върху Записване.
-
Уверете се, че създаденият потребител е избран в менюто от лявата страна, и щракнете върху Clone (Клониране). За потребителя, който трябва да бъде клониран, в падащото меню From host (От хост) изберете Access from server location only (Достъп само от местоположението на сървъра ) или въведете
localhost. В полетата Password (Парола) и Repeat password (Повторение на паролата ) въведете паролата. Щракнете върху Запазване.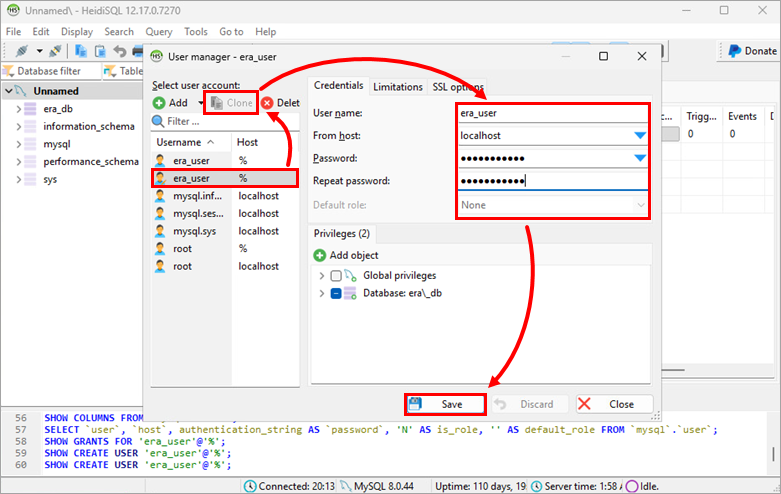
Създали сте двама потребители на бази данни с едно и също потребителско име: един, позволяващ връзки от всеки хост, и един, ограничен само до localhost.