Issue
- Manage computers with earlier unsupported operating systems (for example, Windows Vista or Windows XP) in ESET PROTECT On-Prem
Solution
If you use ESET PROTECT On-Prem and want to manage computers running unsupported operating systems, follow the instructions below:
- Create a dynamic group template for computers running ESET Management Agent 10.1
- Assign computers running ESET Management Agent 10.1 to a dynamic group
- Download and install ESET Management Agent on your computers
- Install security products via a software install task
I. Create a dynamic group template for computers running ESET Management Agent 10.1
Click More → Dynamic Group Templates → New Template.
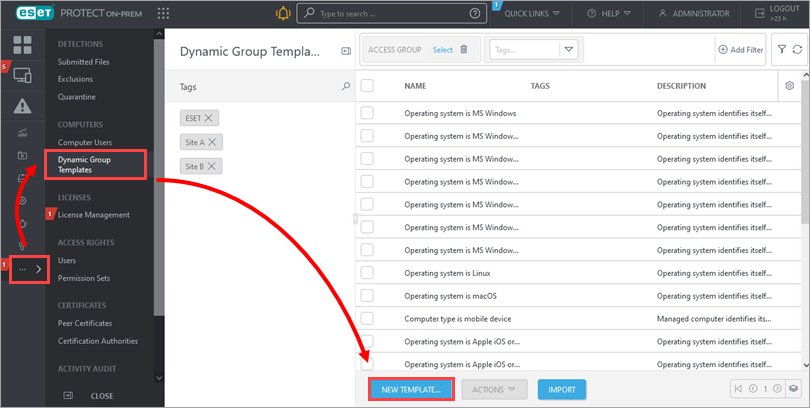
Figure 1-1 Type a Name for your Dynamic Group Template and click Continue.
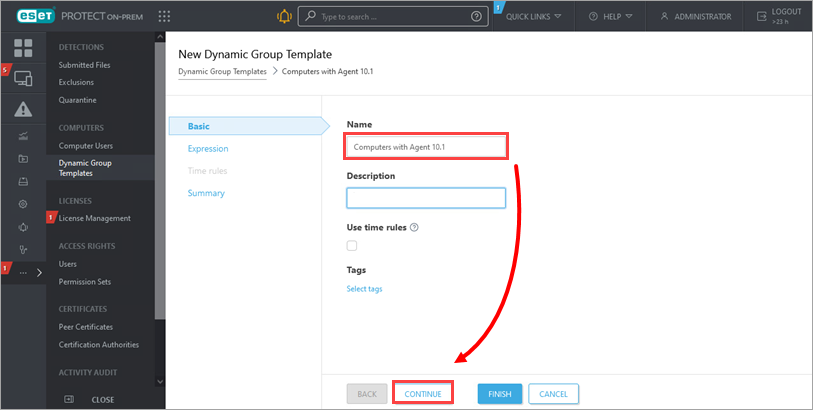
Figure 1-2 Click Add Rule.
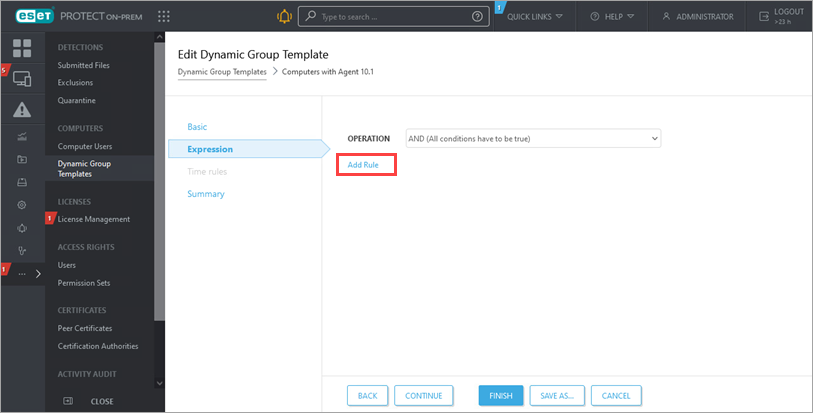
Figure 1-3 Expand Installed software, select Application name and click OK.
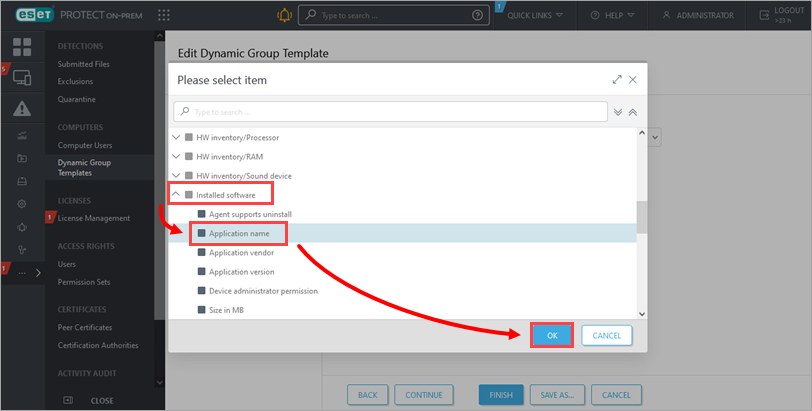
Figure 1-4 Click Add Rule, expand Installed software, select Application version and click OK.
Click the empty field next to Application name and select ESET Management Agent.
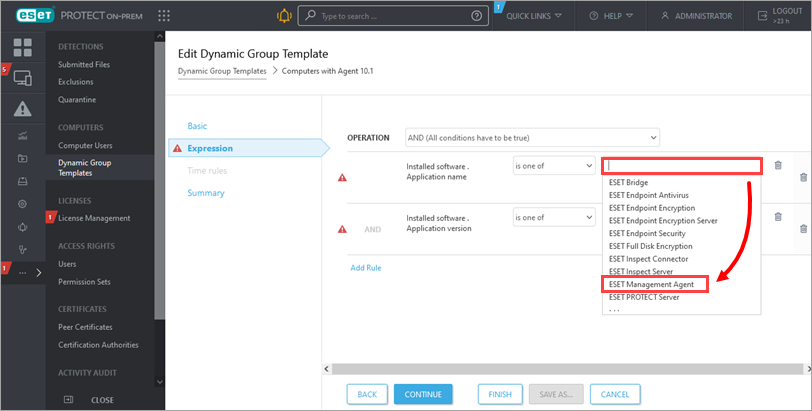
Figure 1-5 Click the empty field next to Application version, type
10.1and then click Finish.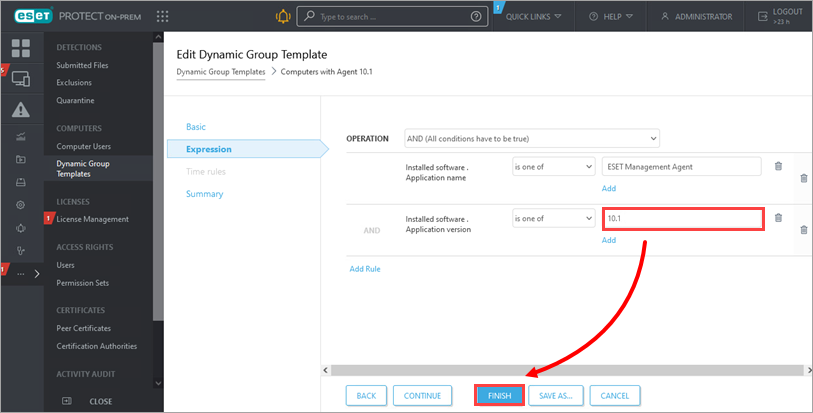
Figure 1-6
II. Assign computers running ESET Management Agent 10.1 to a dynamic group
Create a new Dynamic Group under the All Static Group and assign to it the Dynamic Group Template created in section I.
Click Computers, click the gear icon and click New Dynamic Group.
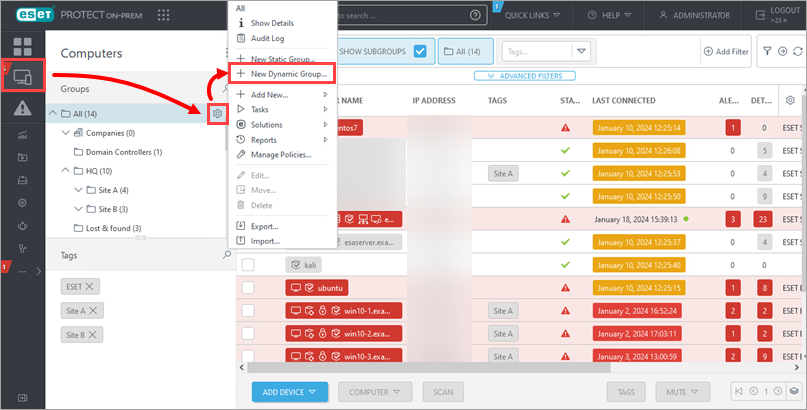
Figure 2-1 Type a Name for your Dynamic Group and click Continue.
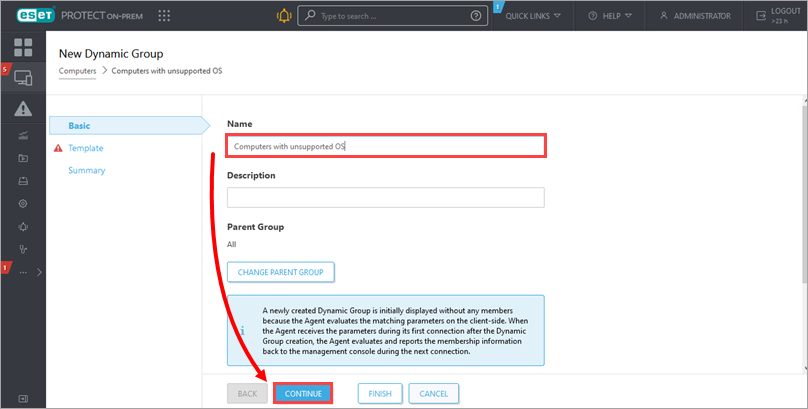
Figure 2-2 Click Choose Existing.
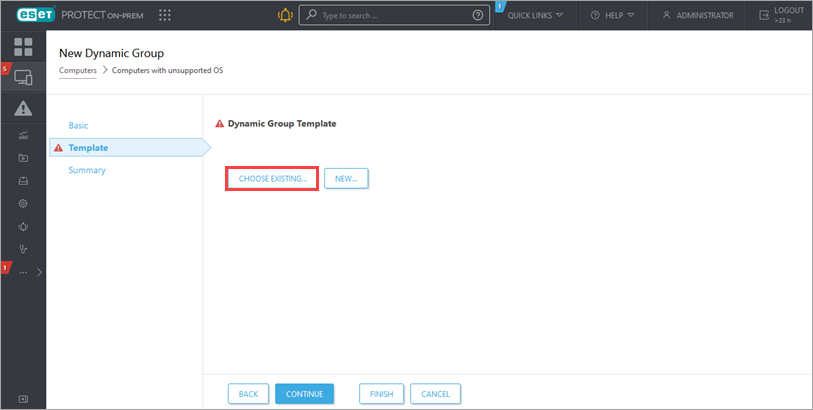
Figure 2-3 Select the check box next to the Dynamic Group you created in section I and click OK. Click Finish.
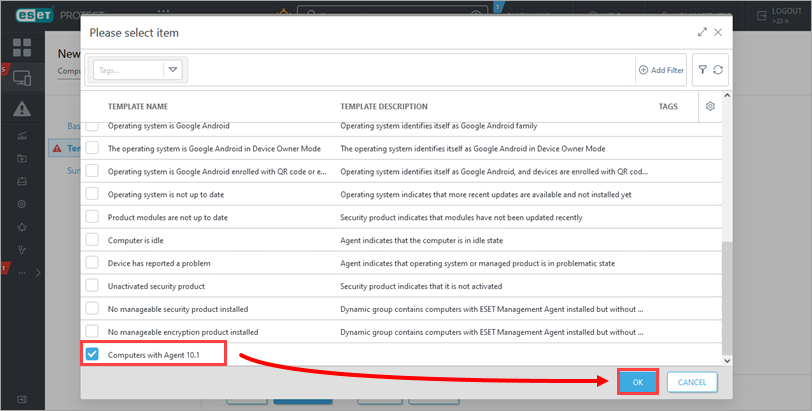
Figure 2-4 To view the list of computers in this Dynamic Group, click Computers and click the Dynamic Group. If the group includes computers running supported operating systems, manually upgrade them to the latest version of ESET Management Agent.
If some of your computers do not show in ESET PROTECT On-Prem, download and install ESET Management Agent version 10.1 on those computers to add them to the dynamic group in ESET PROTECT On-Prem.
III. Download and install ESET Management Agent on your computers
Download ESET Management Agent 10.1 for Windows:
Install the Agent locally on the computers you want to manage. The computers will show in ESET PROTECT On-Prem the next time you log in.
Alternatively, if you need to install the Agent on several computers, you can generate a configuration script and deploy the Agent locally with the script in the same folder.
IV. Install security products via a software install task
Click Tasks → New → Client Task.
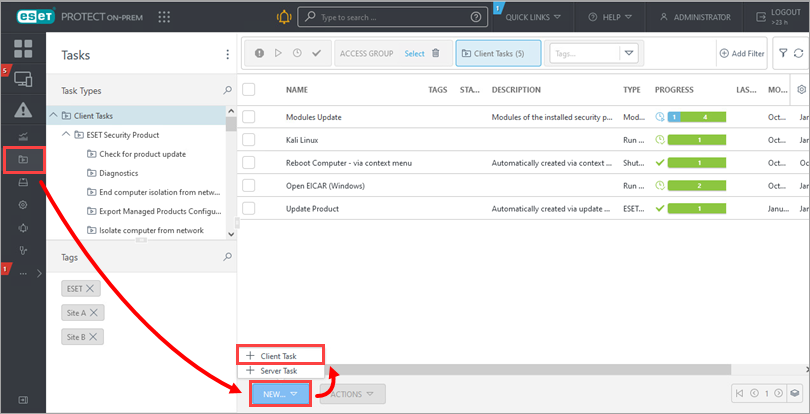
Figure 3-1 Type a Name for your task. In the Task drop-down menu select Software Install and click Continue.
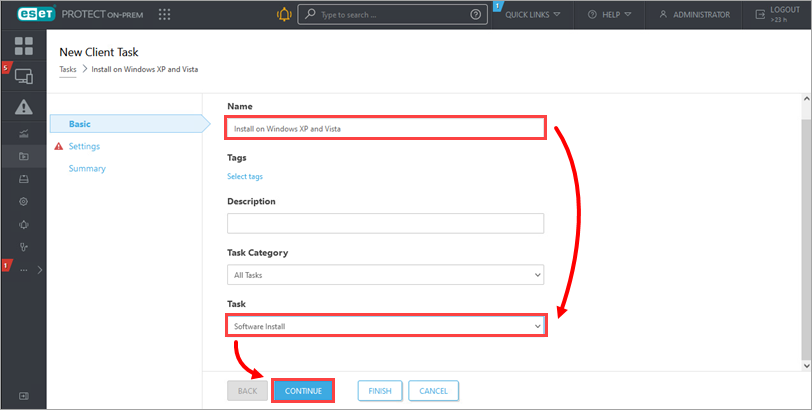
Figure 3-2 Select Install by direct package URL and get the path to the installer package:
From the respective drop-down menus, select the ESET endpoint product, select the bit version and select the language of the software you want to install. Click Copy Link. Optionally, click Download and provide the local file path to the installer.
Paste the link you copied in step 4 of this section to the field next to Install by direct package URL. Select the check box next to I accept the End User License Agreement and click Finish.
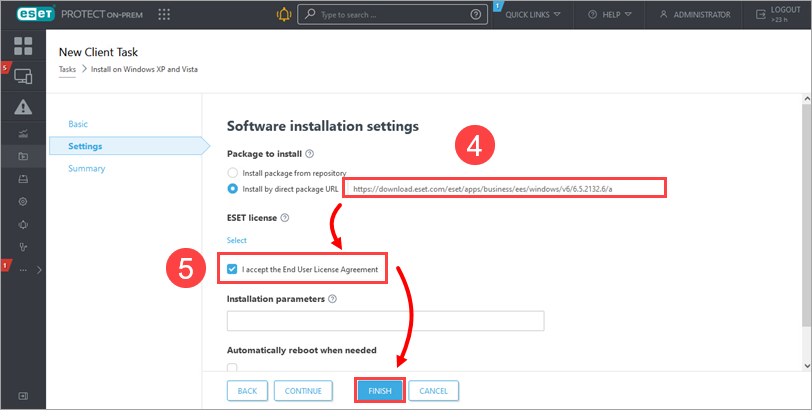
Figure 3-3 Click Create Trigger.
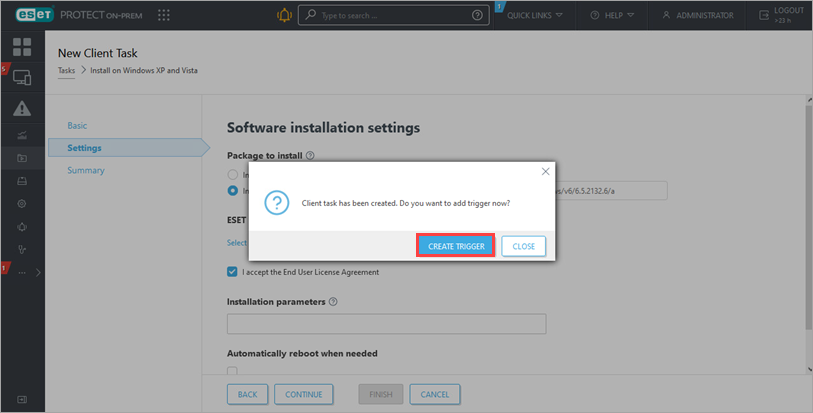
Figure 3-4 Type a Trigger Description and click Target.
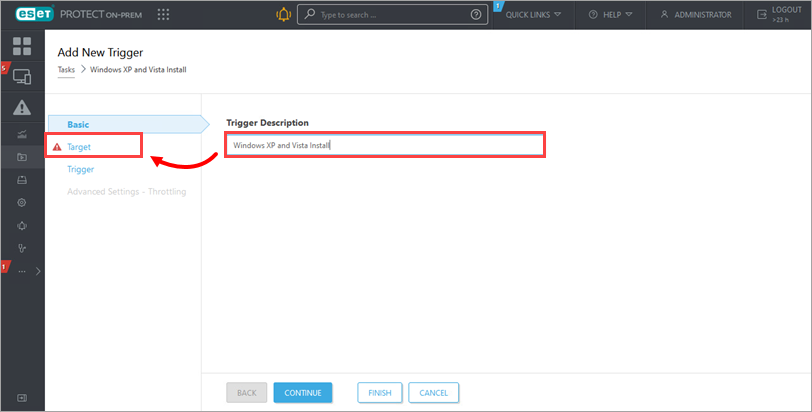
Figure 3-5 Click Add Targets.
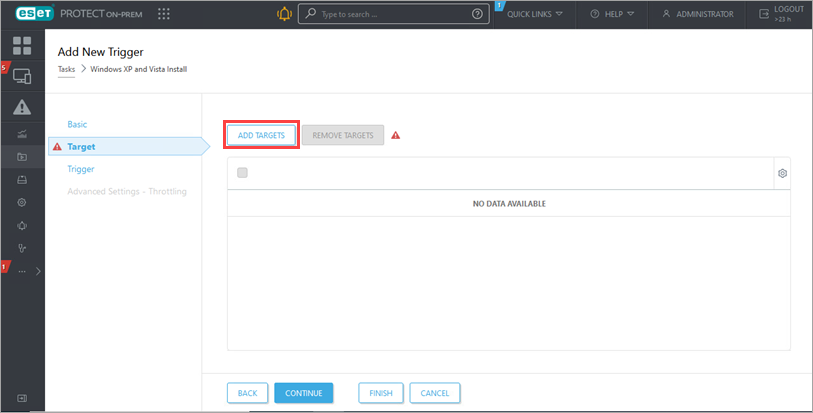
Figure 3-6 Select the Dynamic Group with computers running unsupported OS.
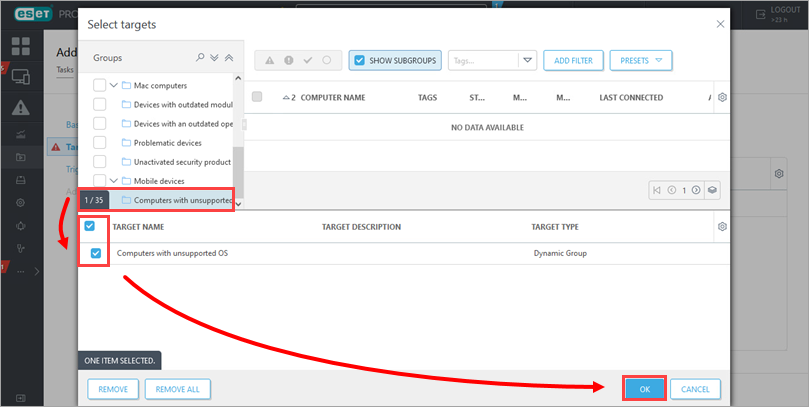
Figure 3-7 Click Finish. Optionally, click Trigger and adjust the trigger type. When the Software Install task finishes, computers running Windows XP/Vista are protected by the ESET security product.
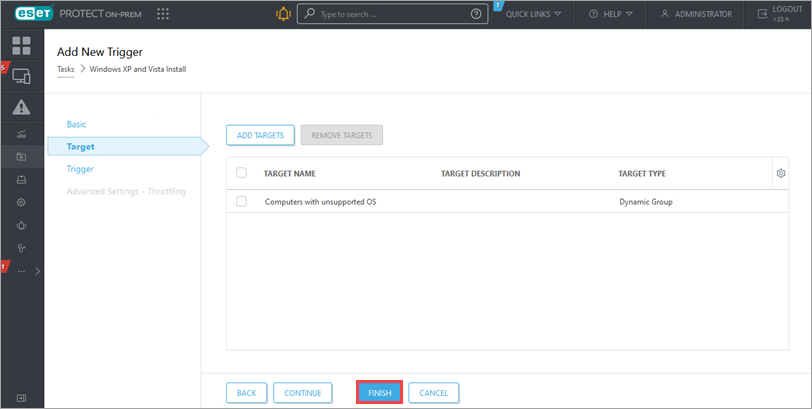
Figure 3-8