Issue
- You are unable to connect to workstations via Remote Desktop Protocol (RDP) with the ESET Endpoint Security firewall enabled
Solution
Security recommendations
- Allow RDP connections only over the local area network. The recommended action would be to have employees VPN into the network first before establishing the RDP connection.
- Harden RDP access by adding multi-factor authentication to RDP (ESET Secure Authentication can accomplish this).
- Harden RDP access by limiting RDP login attempts via Group Policy Object (GPO).
-
-
Click Policies, select the desired Built-in policy, click the policy you want to modify and click Edit. Select your specific product policy; this example uses ESET Endpoint for Windows.
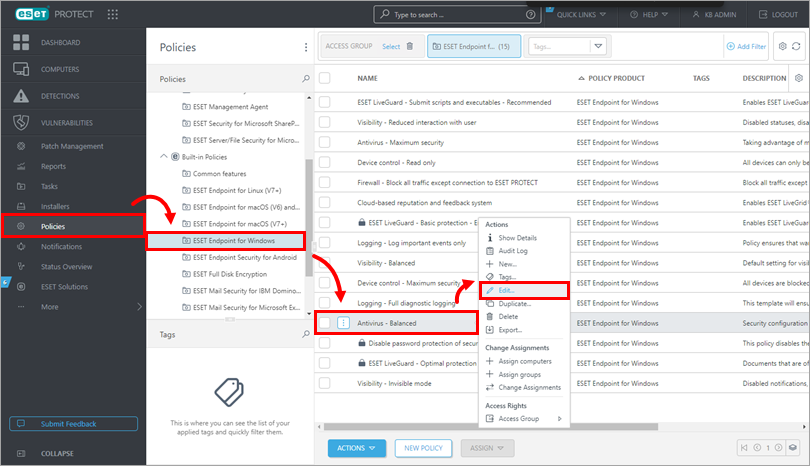
Figure 1-1 -
To apply a rule, click Settings, expand Protections, click Network access protection, expand Firewall and click Edit next to Rules.
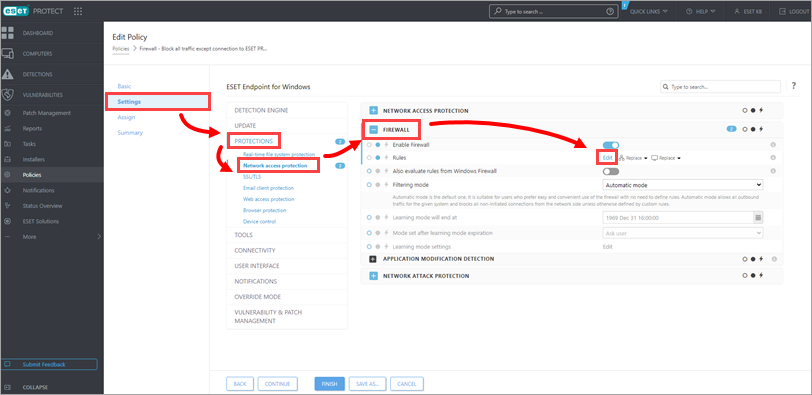
Figure 1-2 -
Click Add.
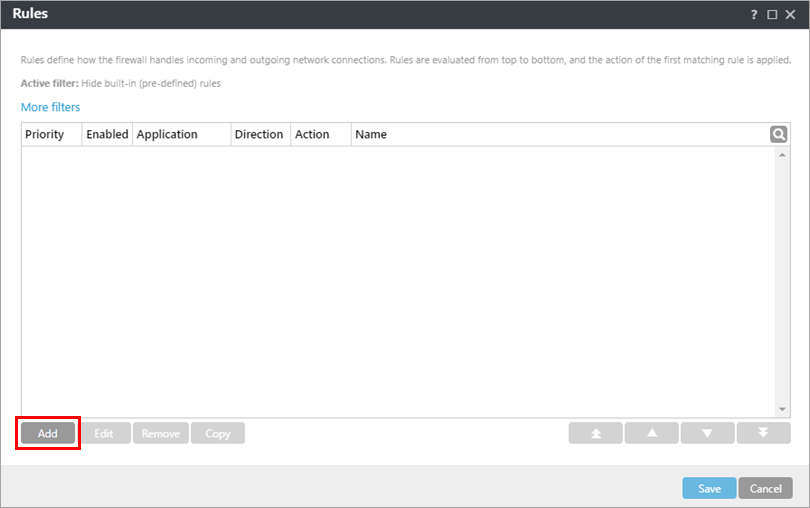
Figure 1-3 -
Type a name for a rule and ensure that the Enabled toggle is enabled. Expand the Action section and select Allow. Expand the rest of the sections to set parameters to define your new rule. When you are finished setting the parameters for a rule, click Save.
- In the Direction section, select In.
- In the IP protocol section, select TCP.
- In the Local port section, type 3389.
- Optionally, in the Remote host section, type or copy/paste the appropriate IP addresses, address ranges or subnets.
See the detailed description of the Firewall rules parameters.
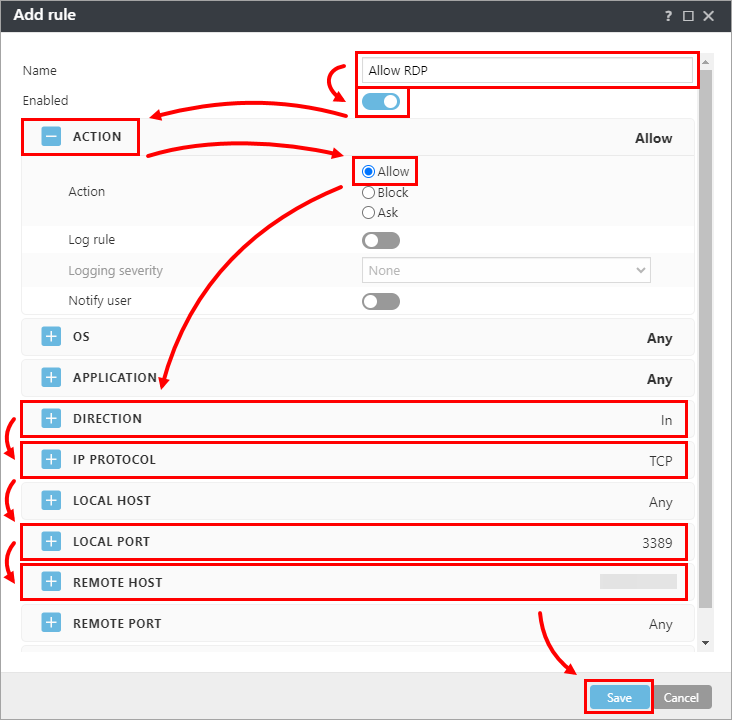
Figure 1-4
-
When you are finished making changes to rule parameters, click OK. Your new rule will appear in the Rules window. Click Save again to close the Rules window.
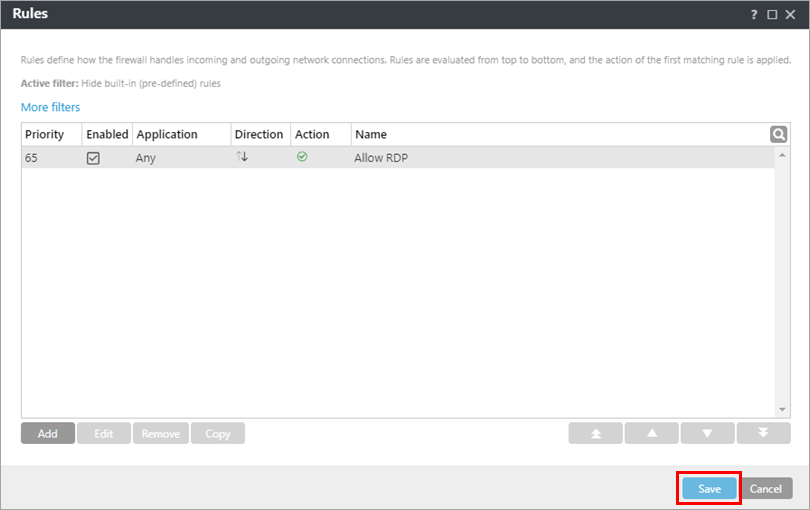
Figure 1-5 -
Click Assign → Assign.
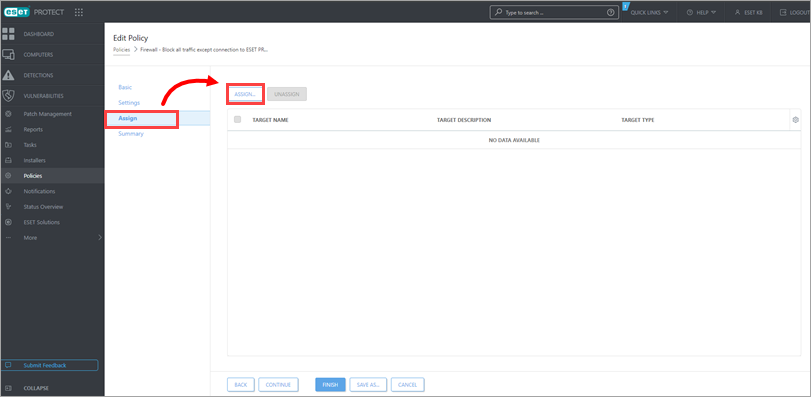
Figure 1-6 -
Select the check box next to each static or dynamic group you want this policy assigned to and click OK.
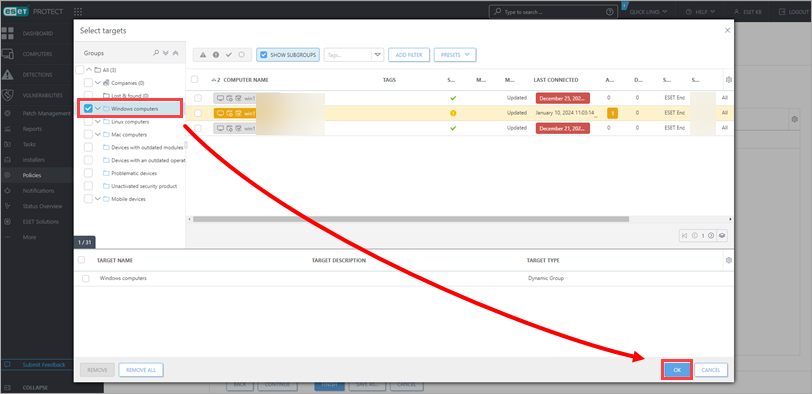
Figure 1-7 -
Click Finish to save your policy. Your policy settings will be applied to the target groups or client computers.
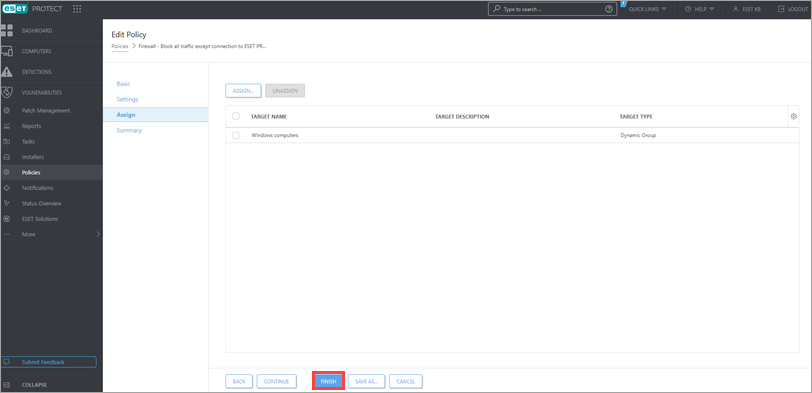
Figure 1-8 -
To see the policies that are assigned to each group, click Computers, click the gear icon next to the group and select Manage Policies from the drop-down menu. Read more about Policies.

Figure 1-9