Issue
- Synchronize the ESET PROTECT Virtual Appliance or ESET PROTECT On-Prem for Linux with Active Directory
- Synchronize ESET PROTECT On-Prem with Active Directory after automatic synchronization fails
- Configure communication between the ESET PROTECT Virtual Appliance and Active Directory
- Fix connection issues indicated by the "No agent" icon displayed next to a computer name
- Prerequisites
- Create and run an Active Directory synchronization task in ESET PROTECT On-Prem
Solution
Prerequisites
Before creating the Active Directory synchronization task, ensure that all Active Directory objects to be synced have the correct DNS and reverse DNS records on all servers. Incorrect or inconsistent records can result in improper object sorting or cause objects to be placed in the Lost and Found group.
Create and run an Active Directory synchronization task in ESET PROTECT On-Prem
-
Open the Tasks view: click the expand icon (
 ) at the bottom left of the page to expand the navigation panel. Click Tasks. Under Server Tasks, click Static Group Synchronization → Add → Server Task.
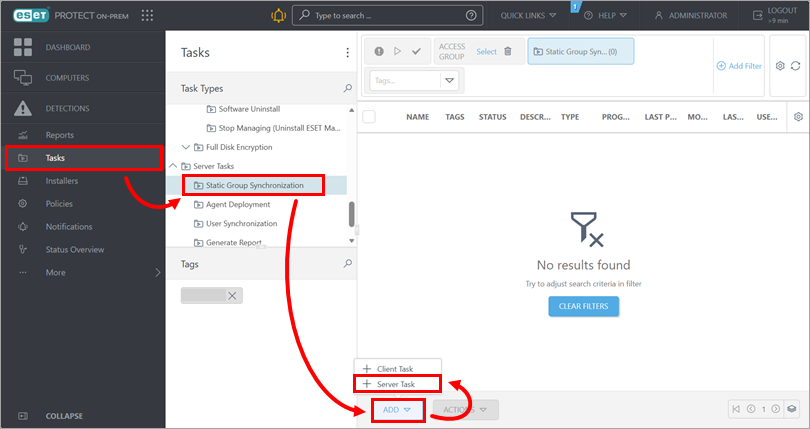
-
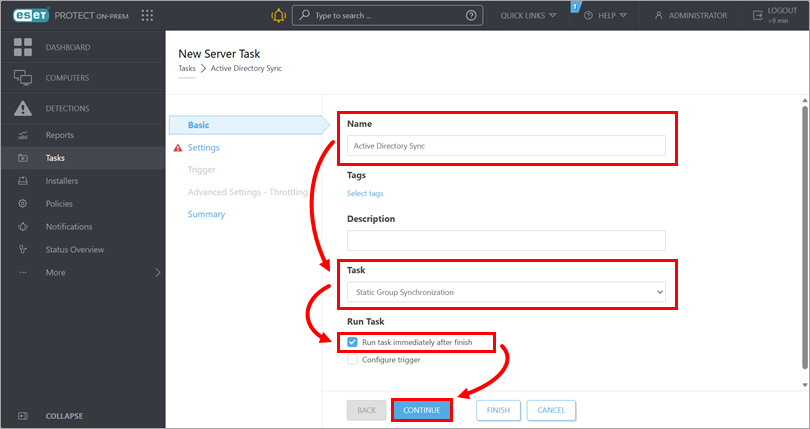
Under Basic, type a name for the task, verify that Static Group Synchronization is selected in the Task drop-down menu, select the check box next to Run task immediately after finish, and click Continue.
-
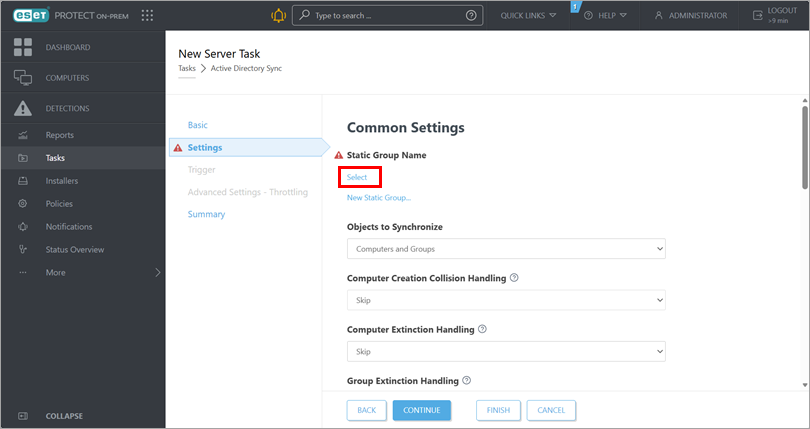
Under Settings, click Select below Static Group Name. Alternatively, click New Static Group to create a new static group.
-
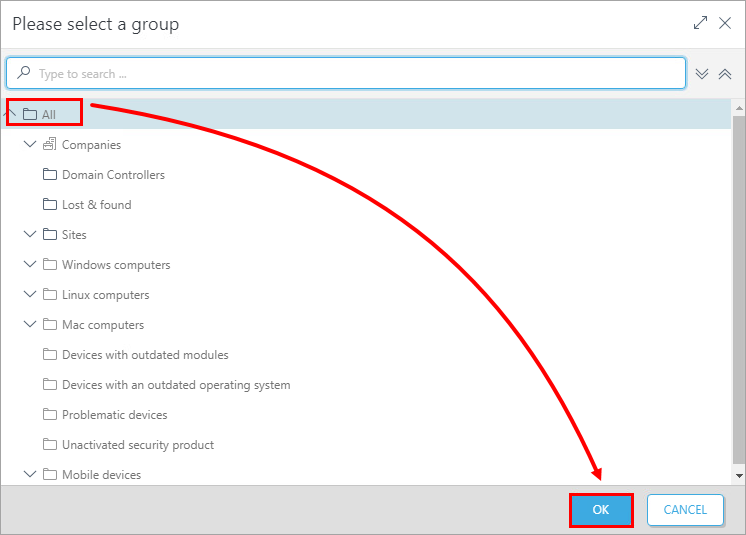
Select the target static group for the computers to be added and click OK.
-
Below Common Settings, define the synchronization behavior.

-
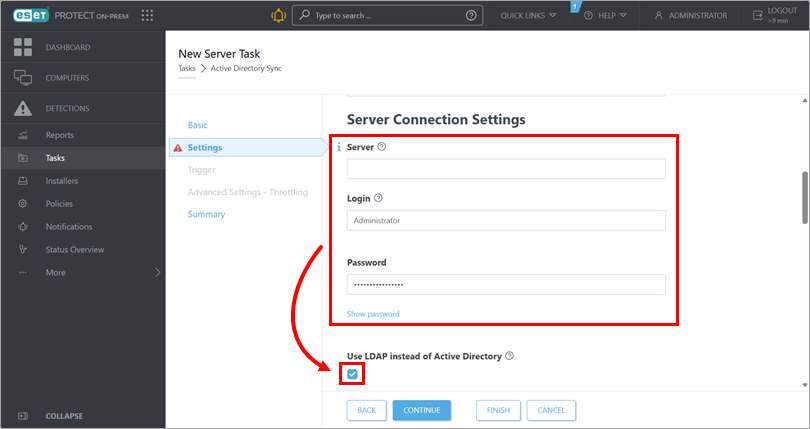
Scroll down to Server Connection Settings, type the connection information and select the check box next to Use LDAP instead of Active Directory. The LDAP Parameters settings will appear below.
-
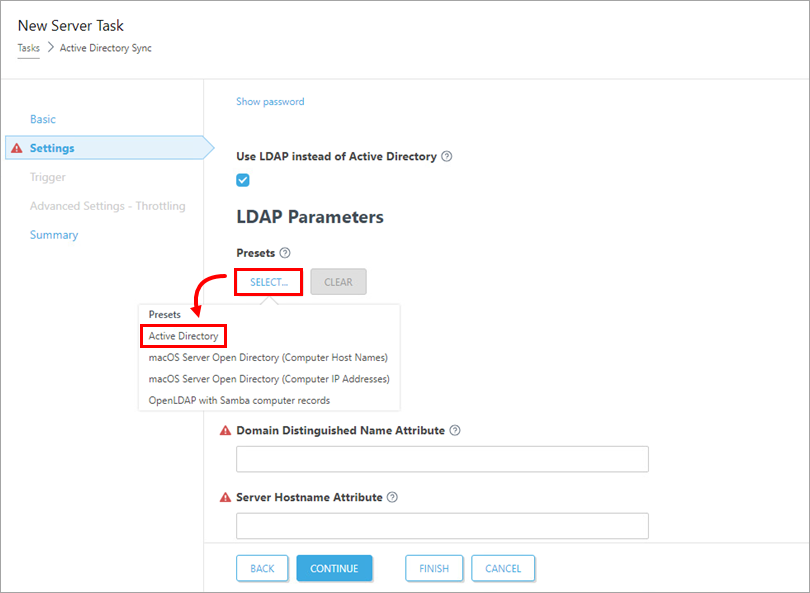
In the LDAP Parameters settings, below Presets, click Select → Active Directory.
-
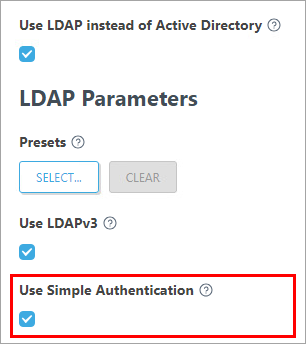
Select the check box below Use Simple Authentication.
-
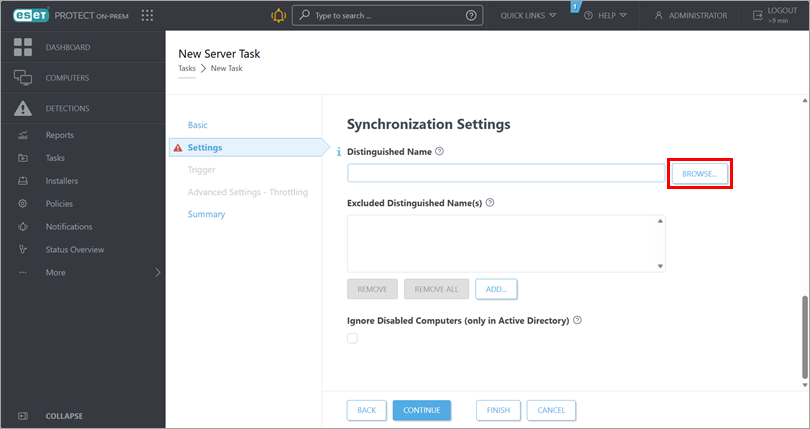
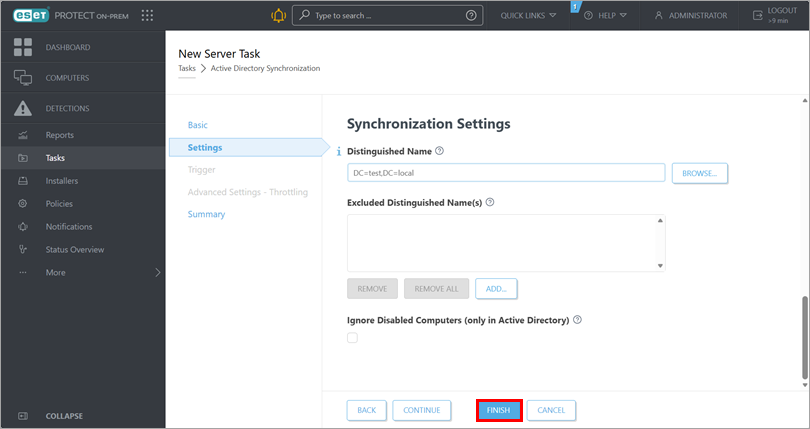
Scroll down to Synchronization Settings, click Browse next to the Distinguished Name field. Your Active Directory tree will be displayed. In the Active Directory tree, select the groups that you want to synchronize with ESET PROTECT On-Prem and click OK. If you select the top group or leave the field empty, the entire Active Directory tree will be synchronized.
-
Click Finish. The task will be added to the list of tasks and will run immediately.
- After the Active Directory synchronization is complete, create a task to remotely install or reinstall the Agent on the added computers.