By default, ESET Mail Security for Microsoft Exchange (EMSX) does not store emails classified as spam in any specific location. To store spam messages in a pre-determined location, you must create either a local quarantine mailbox or an external quarantine Microsoft Exchange quarantine mailbox. All spam messages filtered by the Antispam Protection module in EMSX will be stored in this mailbox.
The quarantine manager can manage quarantine and Microsoft Exchange quarantine boxes. However, the administrator manages SPAM and quarantined email messages within the Exchange mailbox databases.
Solution
Add a quarantine mailbox
Create a dedicated user in the quarantine Manager
Quarantined messages are stored in a dedicated mailbox for a specified user. Use the quarantine manager to view and manage items in the quarantine. We do not recommend using the administrator account as the quarantine mailbox.
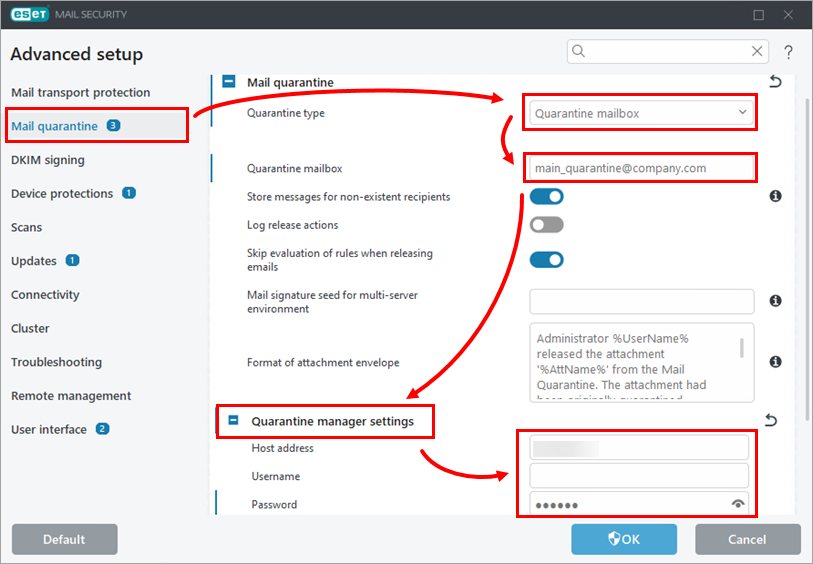
Click Mail quarantine. In the Quarantine type drop-down menu, select Quarantine mailbox. In the Quarantine mailbox field, type the email address to store spam and other potentially infected messages. Expand Quarantine Manager Settings, type or copy/paste the username and password for the dedicated quarantine user account in the appropriate fields.
Figure 1-1
Expand Quarantine Manager Settings, type or copy/paste the username and password for the dedicated quarantine user account in the appropriate fields.
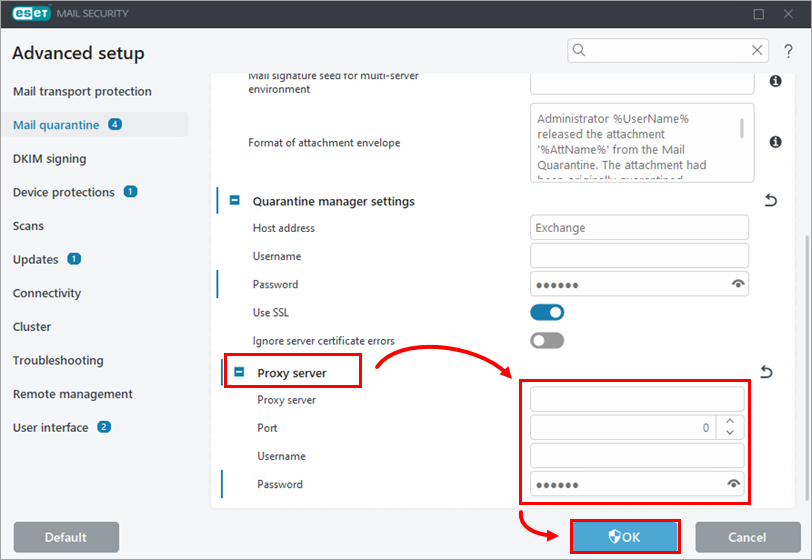
If you use a proxy server between your CAS role Exchange Server and your ESET Mail Security Exchange Server, expand Proxy Server, modify your Proxy server settings and click OK.
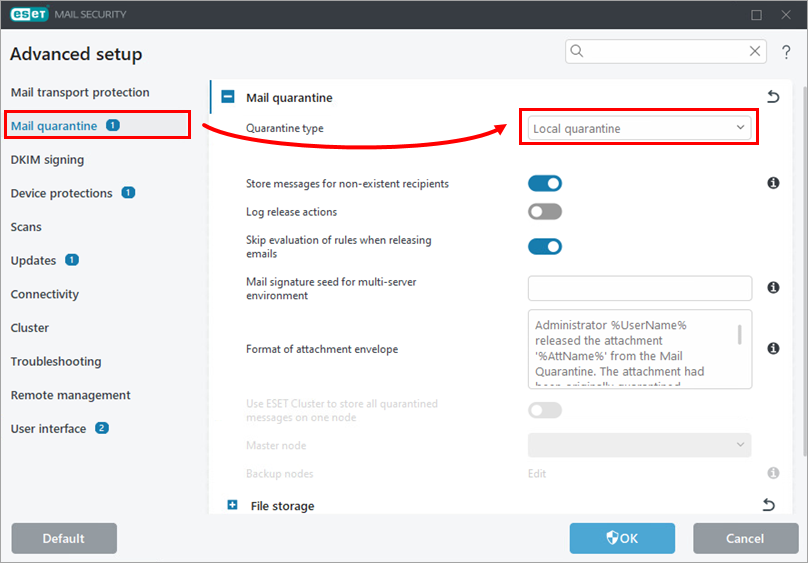
Click Mail quarantine. In the Quarantine type drop-down menu, select Local quarantine.
Figure 2-1
Expand File storage and adjust the settings to fit your requirements. Expand Web interface, click the toggle next to Enable web interface to enable it, adjust other settings to fit your requirements and click OK.
Web interface
Enable web interface to view and manage quarantined email objects using a link. The web interface is only available for local quarantine and cannot be used on a server with an Edge Transport Server role.