Issue
- Schedule an import of the Device control configuration in ESET Endpoint Security or ESET Endpoint Antivirus
Solution
You can import a Device control group with rules from an XML file using the task scheduler in ESET Windows endpoint product.
XML files with serial numbers that will be periodically imported must have a valid product configuration. You may not be able to use Device Control groups for other configurations.
- Enable Device control and add a new group and rules
- Enable and configure ESET RMM
- Schedule Device control update task
Enable Device control and add a new group and rules
-
Open the main program window of ESET Windows Endpoint product.
-
Press the F5 key to access Advanced setup.
-
Click Device control and click the toggle next to Enable Device control to enable it. Click Edit next to Groups.
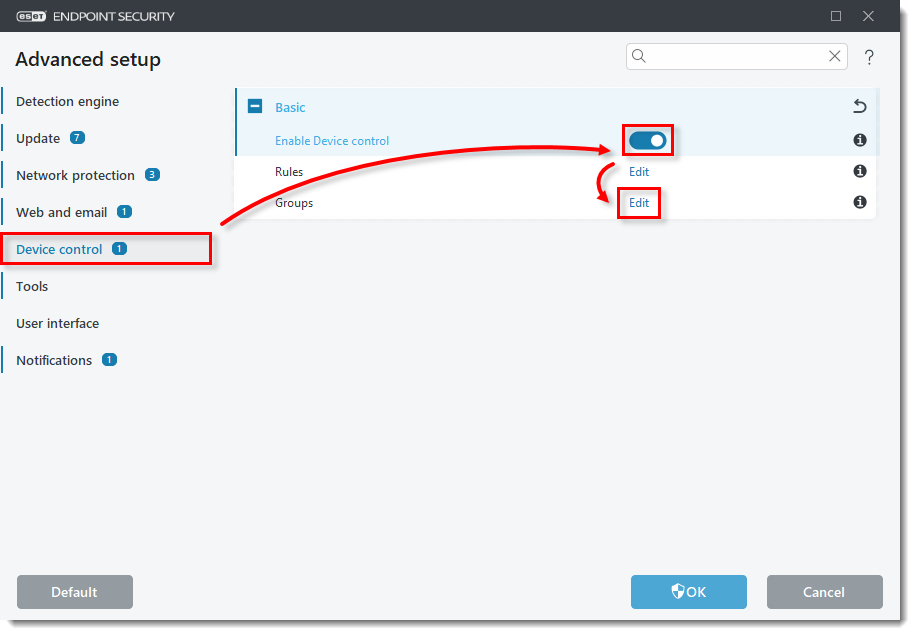
Figure 1-1 -
Click Add, type a name for a new group (in this example, Whitelist group) and click OK → OK.
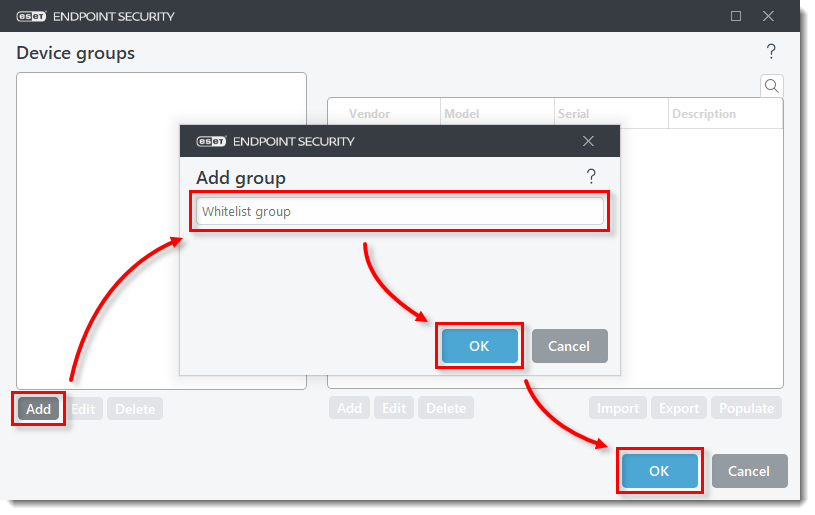
Figure 1-2 -
Click Edit next to Rules.
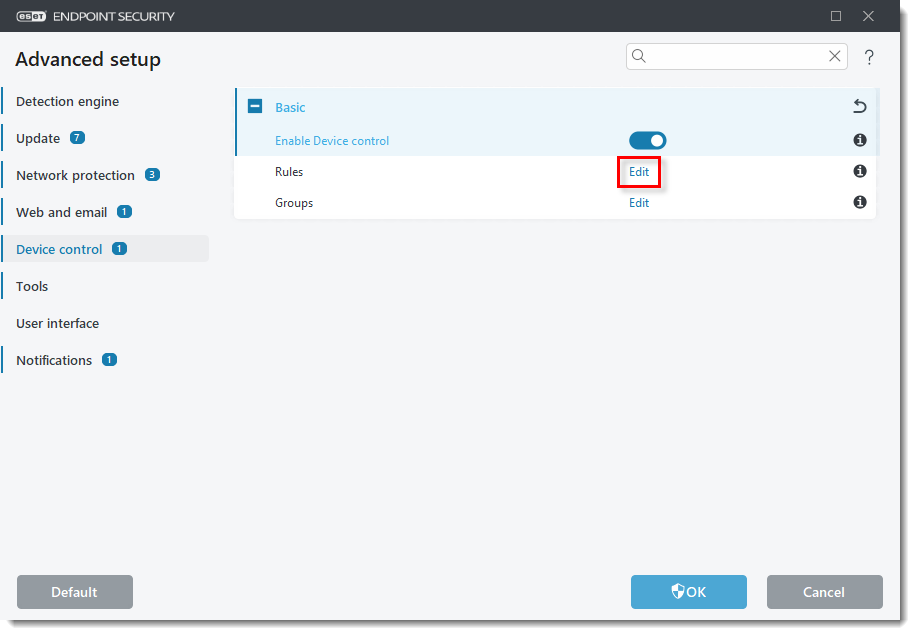
Figure 1-3 -
Click Add and type a name for a new rule (in this example, Whitelist rule). Verify that Allow is selected from the Action drop-down menu. Select Device group from the Criteria type drop-down menu and click OK.
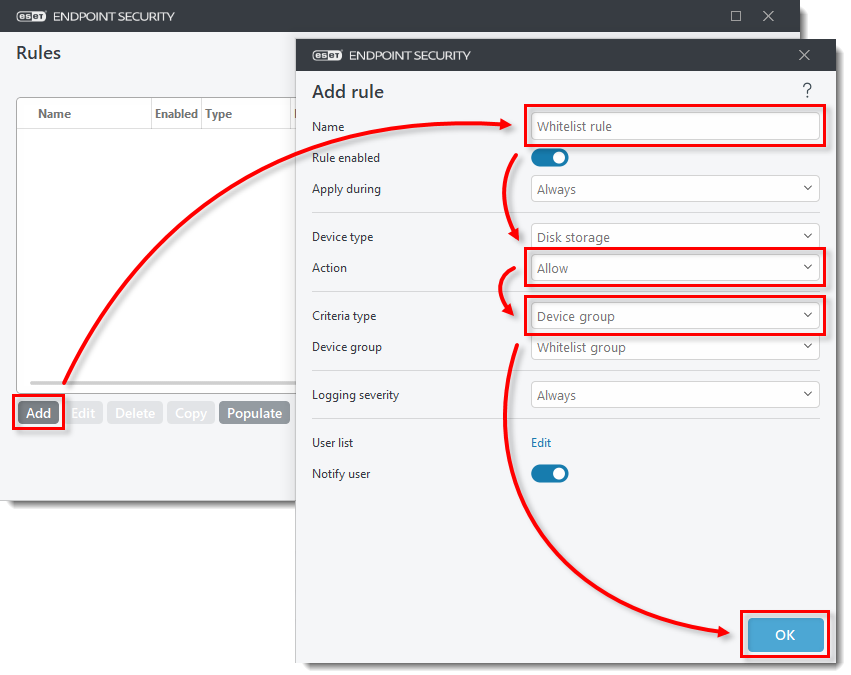
Figure 1-4 -
Click Add and type a name for a new rule (in this example, Block rule). Select Block from the Action drop-down menu. Verify that Device is selected from the Criteria type drop-down menu and click OK.
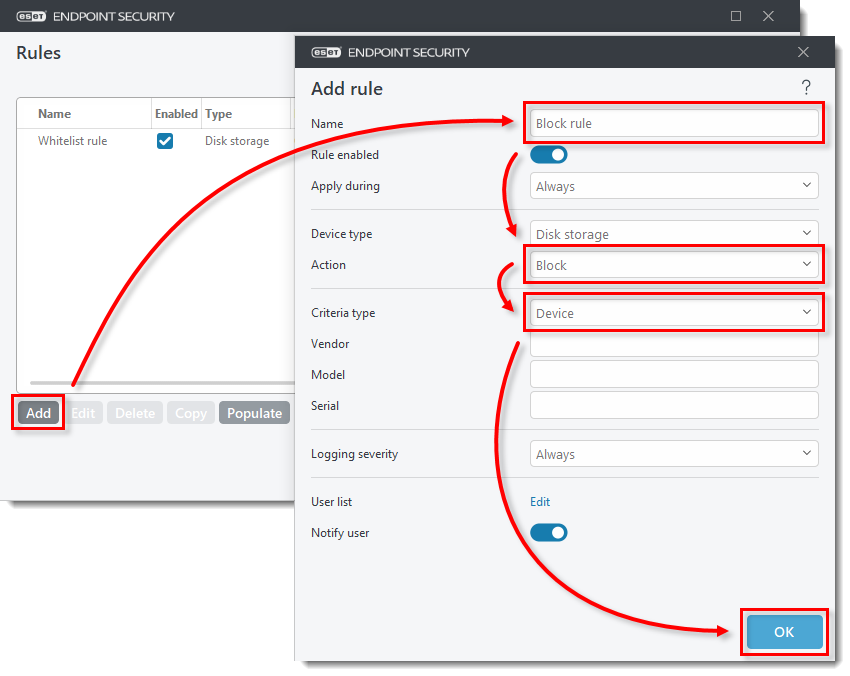
Figure 1-5 -
Verify that the two added rules have proper settings selected and click OK to save the changes.
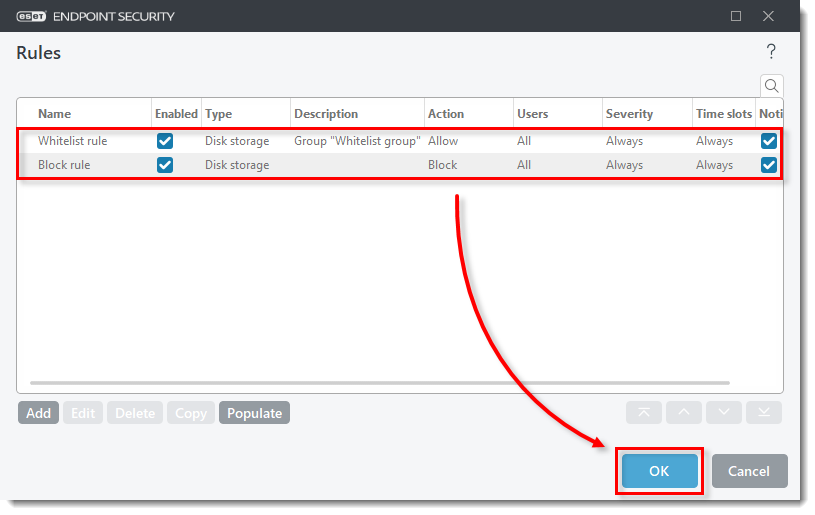
Figure 1-6
Enable and configure ESET RMM
-
Click Tools, expand ESET RMM and click the toggle next to Enable RMM to enable it. Select All operations from the Working mode drop-down menu. Click Edit next to Application paths.
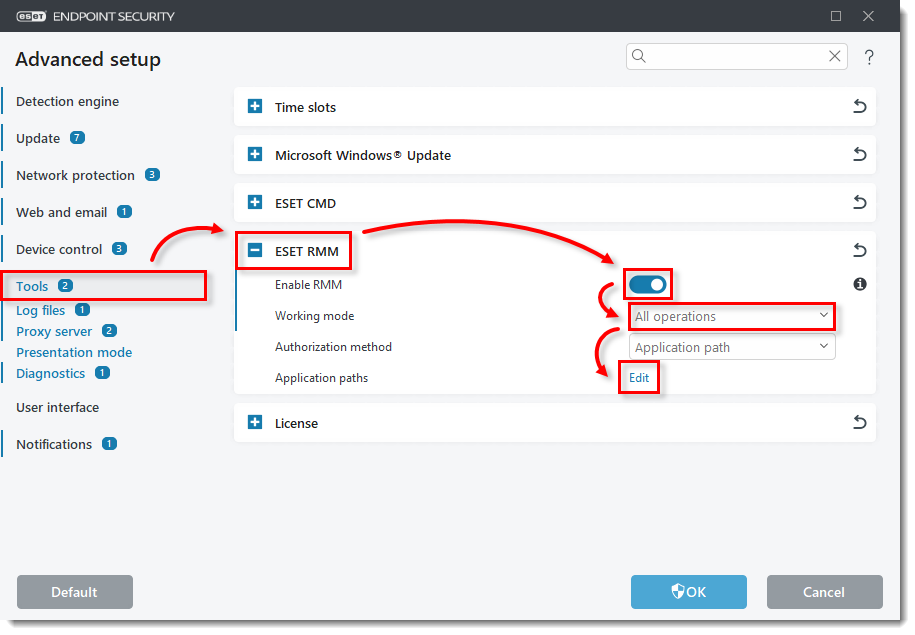
Figure 2-1 -
Click Add. Type or copy/paste the application path to the Add path field and click OK → OK.
Application path:C:\Program Files\ESET\ESET Security\eRmm.exe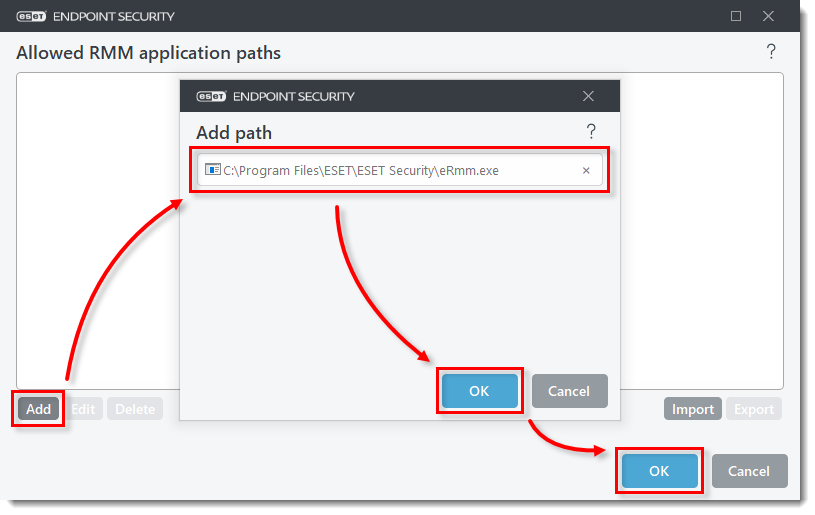
Figure 2-2 - Click OK to exit the Advanced setup.
Schedule Device control update task
-
In the main menu of your ESET Windows endpoint product, click Tools → Scheduler.
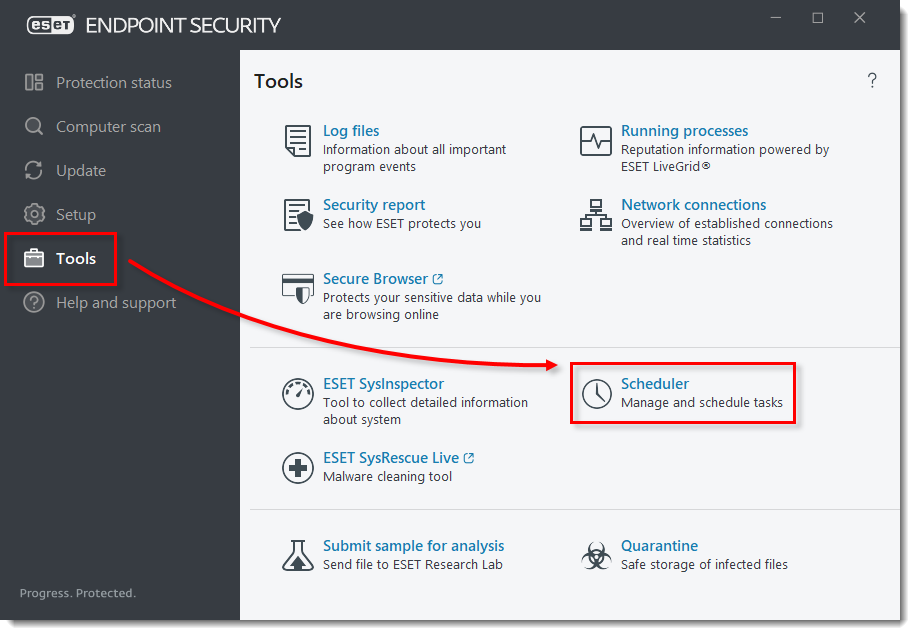
Figure 3-1 -
Click Add task. Type a name for a new task (in this example, Device control update) and verify that Run external application is selected from the Task type drop-down menu. Click Next.
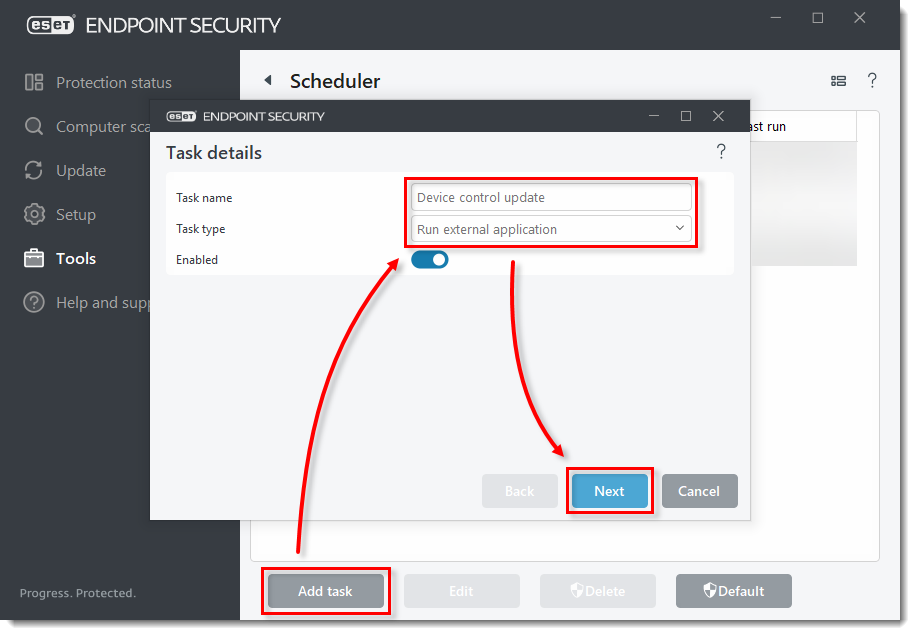
Figure 3-2 -
Schedule the new task to run (in this example, the task is set to run Once) and click Next.
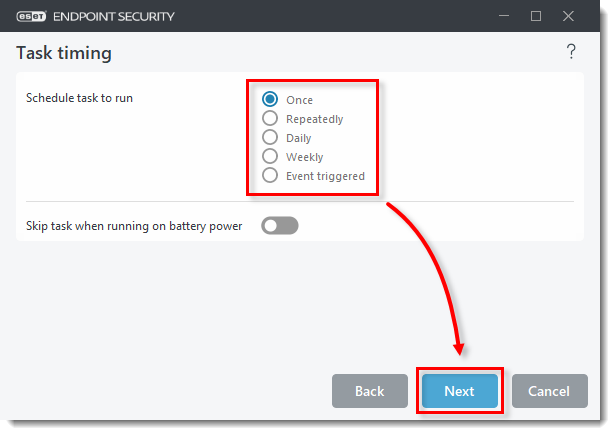
Figure 3-3 -
Select the date/time interval for task execution. This window is different for each option selected in step 3. Click Next.
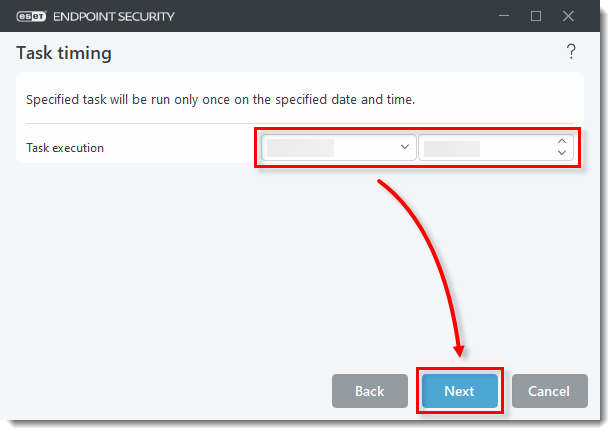
Figure 3-4 -
Select an option for when the task should run if the task has been skipped and click Next.
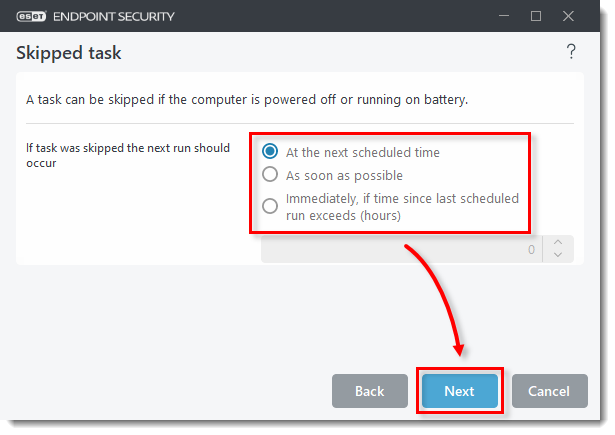
Figure 3-5 -
Copy/paste the application path to the Executable file and copy/paste the parameters line in the Parameters field. The Work folder will be populated accordingly. Click Finish.
Executable file application path:C:\Program Files\ESET\ESET Security\eRmm.exeParameters line:
set configuration --file <path-to-file>
Figure 3-6 -
The XML file imported from the scheduled task should look as follows:
<?xml version="1.0"?> <ESET> <PRODUCT NAME="endpoint" VERSION="10.0.2034.0" EXPORTED_BY_CE="2021.1 (20221207); 1914"> <ITEM NAME="plugins"> <ITEM NAME="01000e00"> <ITEM NAME="settings"> <ITEM NAME="groups" DELETE="1"> <ITEM NAME="1"> <NODE NAME="guid" TYPE="string" VALUE="334c2573-0662-4965-a406-f02d00000002" /> <NODE NAME="name" TYPE="string" VALUE="Whitelist" /> <ITEM NAME="params" DELETE="1"> </ITEM> </ITEM> </ITEM> </ITEM> </ITEM> </ITEM> </PRODUCT> </ESET> -
You can add serial numbers to the XML file as follows:
<?xml version="1.0"?>
<ESET>
 <PRODUCT NAME="endpoint" VERSION="9.1.2057" EXPORTED_BY_CE="2021.1 (20220711); 1914">
  <ITEM NAME="plugins">
   <ITEM NAME="01000e00">
    <ITEM NAME="settings">
     <ITEM NAME="groups" DELETE="1">
      <ITEM NAME="1">
       <NODE NAME="guid" TYPE="string" VALUE="334c2573-0662-4965-a406-f02d00000002" />
       <NODE NAME="name" TYPE="string" VALUE="Whitelist" />
       <ITEM NAME="params" DELETE="1">
        <ITEM NAME="1">
         <NODE NAME="serial" TYPE="string" VALUE="123456798" />
        </ITEM>
        <ITEM NAME="2">
         <NODE NAME="serial" TYPE="string" VALUE="56789123456" />
        </ITEM>
       </ITEM>
      </ITEM>
     </ITEM>
    </ITEM>
   </ITEM>
  </ITEM>
 </PRODUCT>
</ESET>