Issue
- Prevent the loss of internet connectivity on client computers due to firewall settings when deploying ESET Endpoint Security
- Add the IP range/subnets to the trusted zone before deploying ESET Endpoint Security
- Edit or disable Firewall rules in ESET PROTECT or ESET PROTECT On-Prem
Solution
Add the IP range/subnets to the trusted zone before deploying ESET Endpoint Security
To resolve your RDP/ping issue, configure the trusted zone with the IPv4 and Remote IP addresses, ranges, masks, and subnets, including any VPN networks and all subnets inside your network.
Click Policies, select the desired Built-in policy and then click Actions → New Policy.
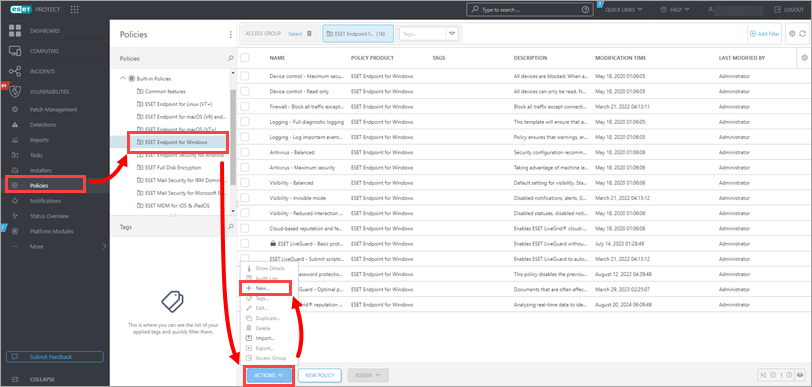
Figure 1-1
Type a name for the new policy into the Name field. The Description field is optional.
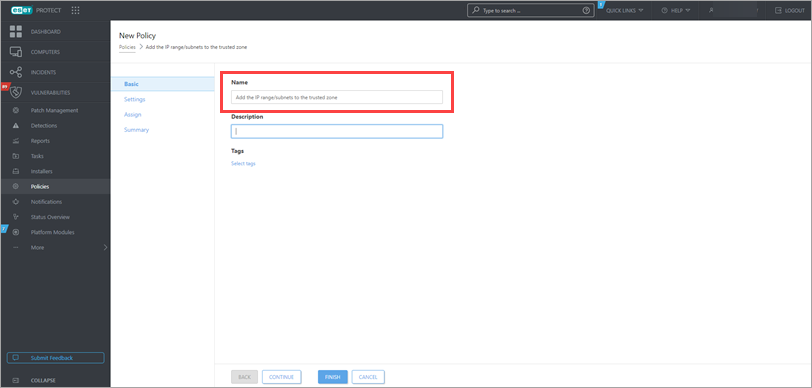
Figure 1-2
Click Settings → Protections → Network access protection and click Edit next to IP sets.
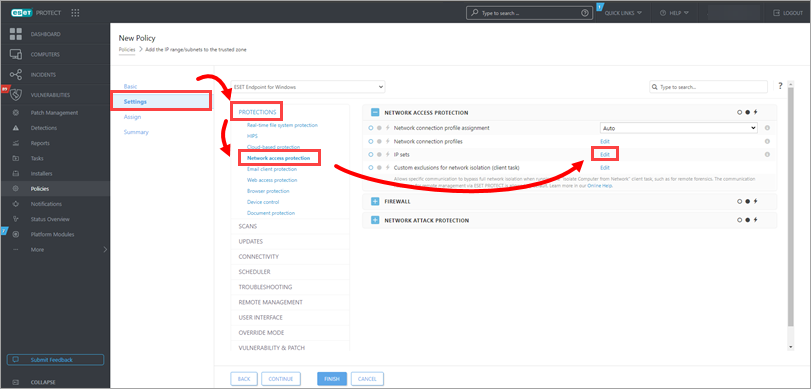
Figure 1-3
Select Trusted zone and click Edit.
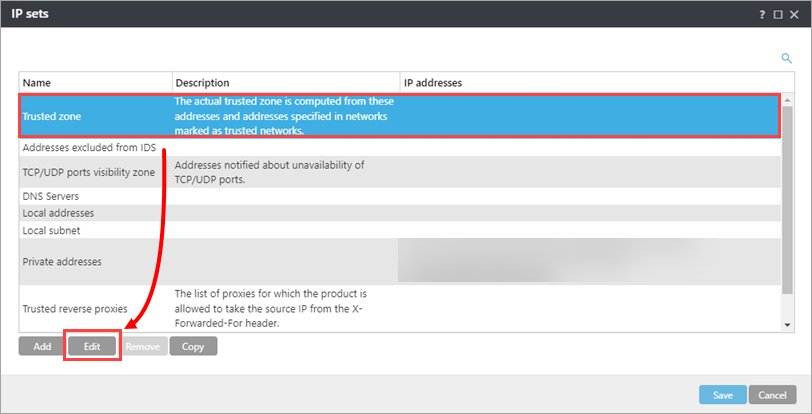
Figure 1-4
In the Remote computer address field, add your IPv4 and Remote IP addresses, ranges, masks, and subnets, including any VPN networks and all subnets inside your network. Click Save.
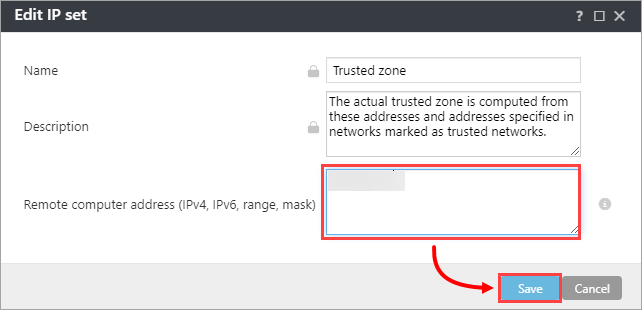
Figure 1-5
Click Assign → Assign. Read more about assigning a policy to a client or a group.
Select the check boxes next to separate clients or next to each static or dynamic group you want this policy assigned to and click OK.
Click Finish. When the system checks into ESET PROTECT or ESET PROTECT On-Prem with the new settings, you can deploy ESET Endpoint Security to your network.
Edit or disable Firewall rules in ESET PROTECT or ESET PROTECT On-Prem
Click Policies, select the desired Built-in policy and click Actions → New Policy.

Figure 2-1 Type a name for the new policy into the Name field. The Description field is optional.

Figure 2-2 Click Settings → Protections → Network access protection, expand Firewall, and click Edit next to Rules.
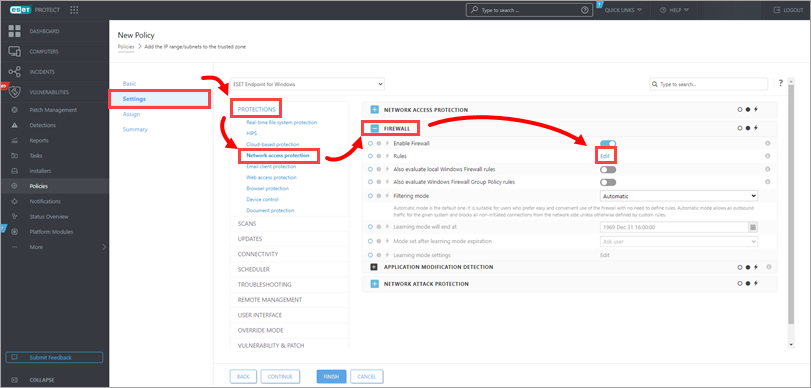
Figure 2-3
Click More filters.
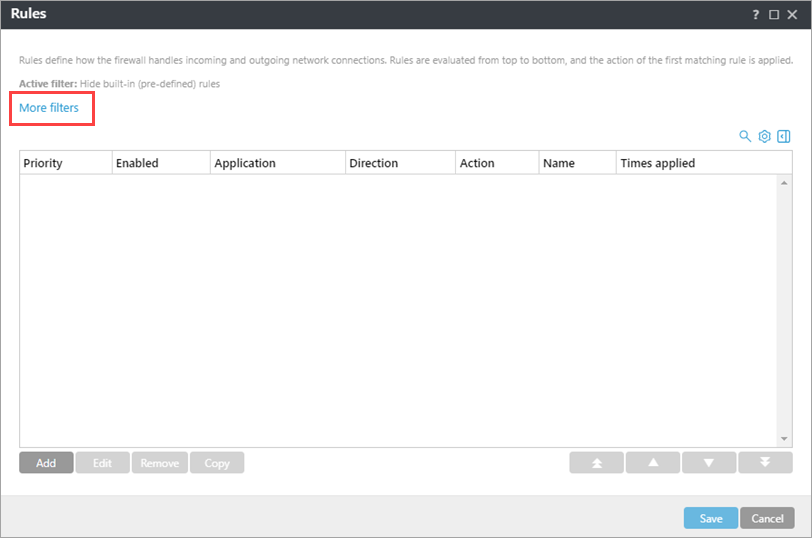
Figure 2-4
Select the check box next to Hide built-in (pre-defined) rules and click Apply.
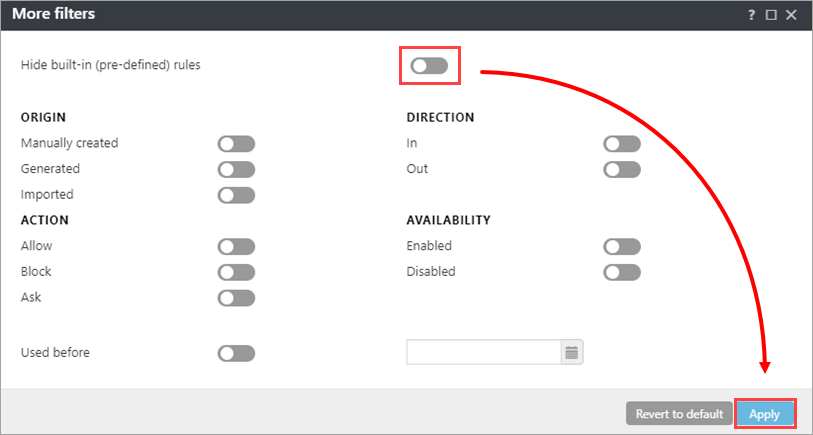
Figure 2-5 Deselect the check boxes next to Block incoming NETBIOS requests and Block incoming RPC requests and click Save.
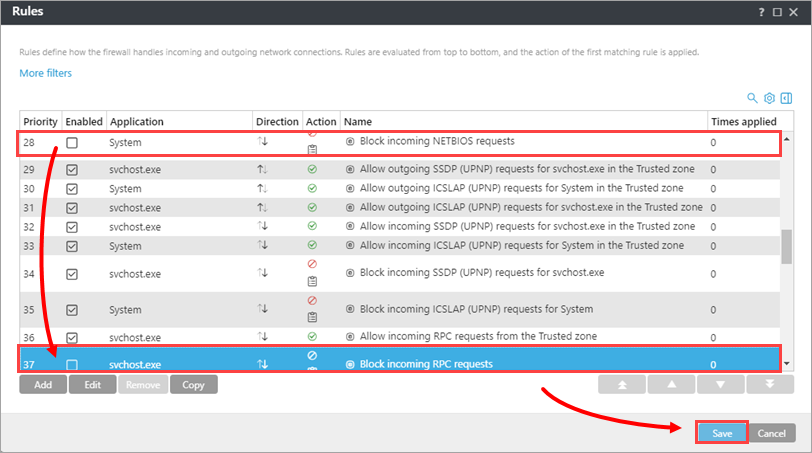
Figure 2-6
Click Assign → Assign. Read more about assigning a policy to a client or a group.
Select the check boxes next to separate clients or next to each static or dynamic group you want this policy assigned to and click OK.
Click Finish. When the system checks into ESET PROTECT or ESET PROTECT On-Prem with the new settings, you can deploy ESET Endpoint Security to your network.