Issue
- ESET Technical Support has asked you to generate a memory dump file for analysis to help them resolve an issue with your computer
Solution
I. Prerequisites
- If you are experiencing a BSOD error (computer crash), verify that your computer has not generated a memory dump automatically before you proceed.
-
The process to generate a memory dump will vary depending on your keyboard type (PS/2 or USB). To determine your keyboard type, open the Control Panel and click Keyboard → Hardware. Your keyboard type is listed in the Devices section.
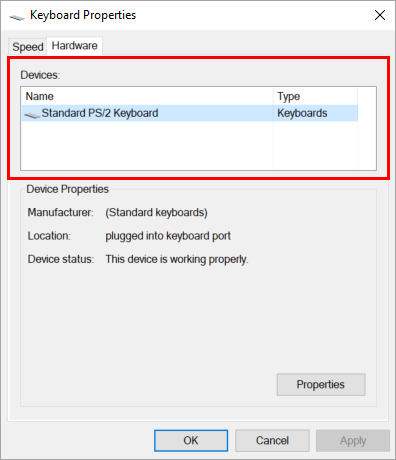
Figure 1-1
II. Configure memory dump settings
-
Press the Windows key
 + R. In the Open field, type
 sysdm.cpland click OK.
Figure 2-1 -
Click Advanced. In the Startup and Recovery section, click Settings.
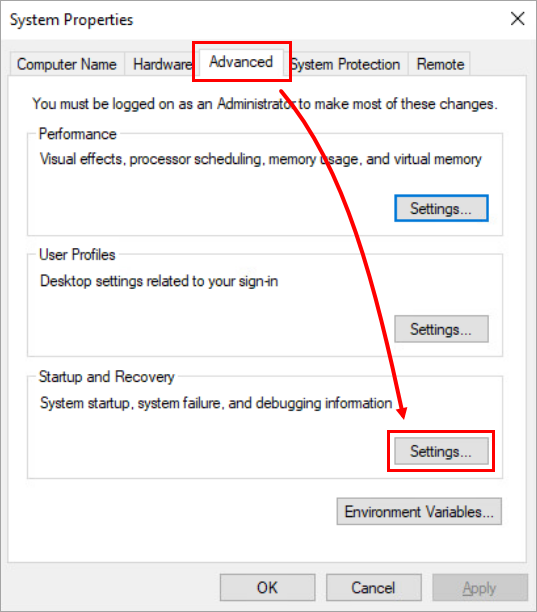
Figure 2-2 -
In the Write debugging information section, select Complete memory dump. In the Dump file section, type the applicable location. The
%SystemRoot%string is a Microsoft Windows variable that stands for the root directory of your Microsoft Windows installation. Typically, the default value isC:\Windows. -
Bookmark this article before you continue and then click OK to restart your computer. After your computer restarts, continue to part III below to generate a memory dump manually.
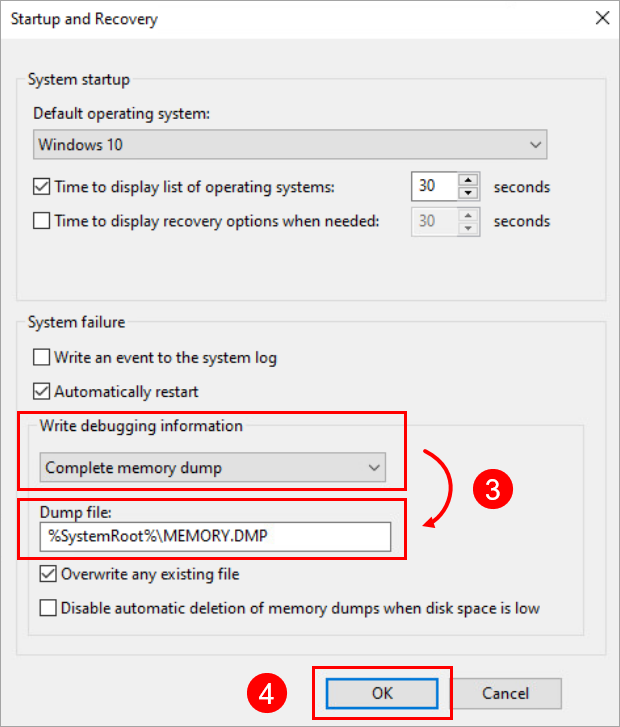
Figure 2-3
III. Generate a memory dump manually
-
Press the Windows
key + R. In the Open field, type regeditand click OK.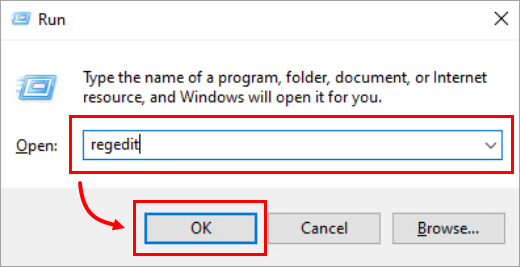
Figure 3-1 -
If you receive a User Account Control prompt, click Yes.
Figure 3-2 -
Navigate to the applicable Parameters folder.
-
- USB keyboard users:
HKEY_LOCAL_MACHINE\SYSTEM\CurrentControlSet\Services\kbdhid\Parameters - PS/2 keyboard users:
HKEY_LOCAL_MACHINE\SYSTEM\CurrentControlSet\Services\i8042prt\Parameters
- USB keyboard users:
-
In the right pane, right-click and select New → DWORD or DWORD (32-bit) Value depending on your operating system.
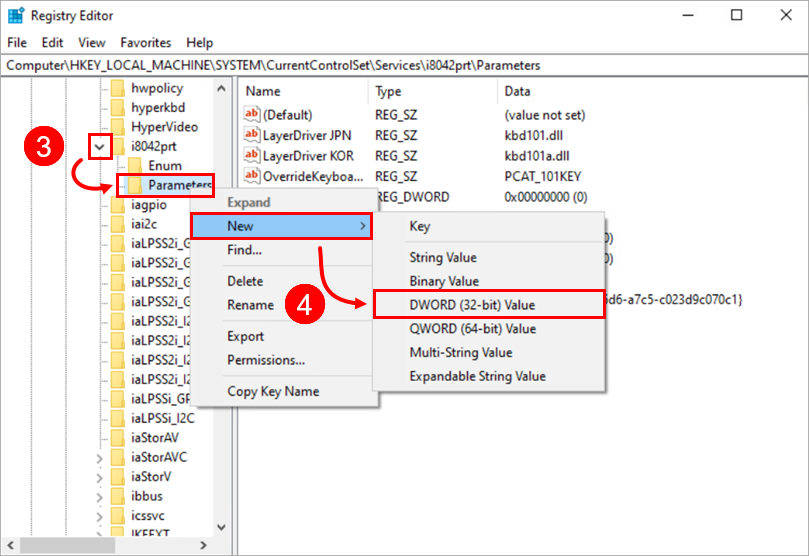
Figure 3-3 -
Right-click the new file and select Modify.
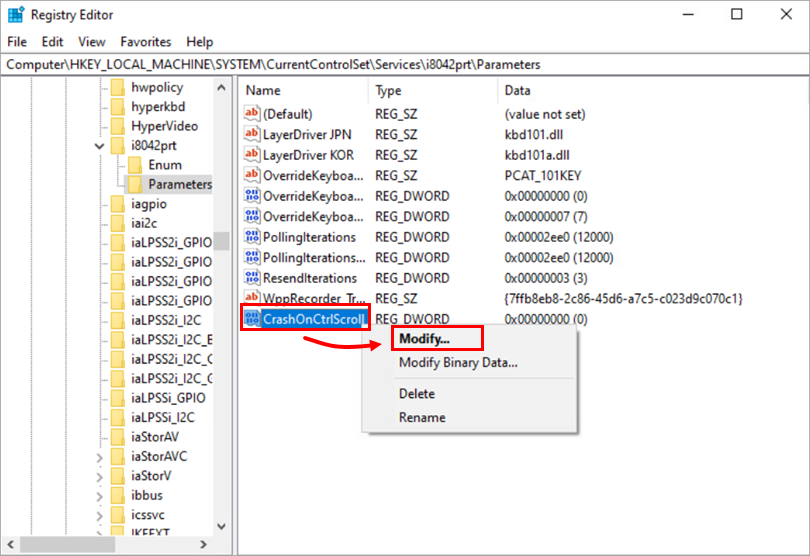
Figure 3-4 -
In the Value name field, type CrashOnCtrlScroll. In the Value data field, type
1and click OK.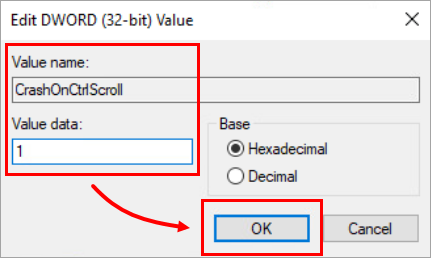
Figure 3-5 -
Close Registry Editor and restart your computer.
-
After your computer has restarted, wait until your issue is active or visible on the screen and then generate the memory dump. Press and hold the right CTRL key (you must use the right CTRL key) and then press the Scroll Lock key twice.
-
The Windows forced crash dialog runs and a memory dump is generated. Your computer may restart as a result.
-
After your computer has restarted, navigate to your system's root directory (
C:\Windowsby default) and locate theMEMORY.DMPfile. ZIP (compress) the memory dump file. -
Respond to the last email from your case with ESET Technical Support and notify them that you are ready to submit your memory dump file. An ESET Technical Support agent will contact you with instructions to submit the file for analysis.
-
In most cases, ESET Technical Support will request your SysInspector log, in addition to a memory dump.