問題
- Windows用ESETアプリケーションにアクセスするための画面読み上げソフトウェア(NVDA、JAWS、Narrator)の有効化
- ESETアプリケーションのホスト侵入防御システムが、スクリーンリーダーソフトウェアをブロックする。
- インストール中にアクセシビリティの改善を有効にする
- ESET アプリケーションに設定ファイルをインポートする
- 新しいホスト侵入防御システムルールを作成する
解決方法
インストール時にアクセシビリティの向上を有効にする
インストール中にアクセシビリティの向上を有効にすると、画面読み上げソフトウェアがESETアプリケーションにアクセスできるようになります。
-
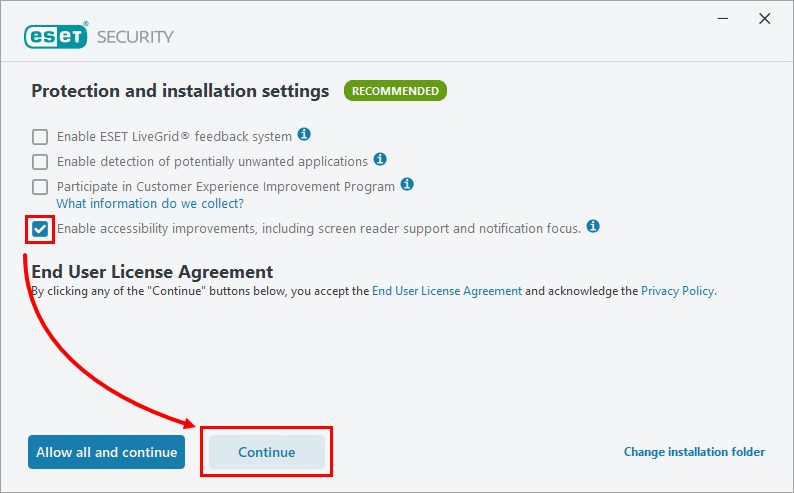
インストール中、「保護とインストールの設定」画面で、「スクリーン リーダーのサポートや通知フォーカスなど、アクセシビリティの向上を有効にする」にチェックを入れ、「続行」をクリックします。または、[すべてを許可して続行]をクリックして、このオプションを自動選択します。
-
続けてインストールを完了します。
ESET アプリケーションに設定ファイルをインポートする
すでにESETアプリケーションがインストールされている場合は、ホスト侵入防御システムのルールを含む設定ファイルをインポートして、画面読み上げソフトウェアがESETアプリケーションにアクセスできるようにすることができます。
-
設定ファイルをダウンロードし、.zip アーカイブを解凍します。
-
#解凍したscreen_readers_config.xmlファイルを使用します。
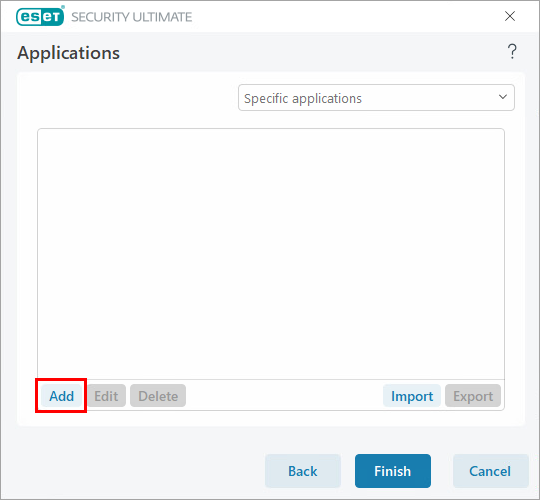
新しいホスト侵入防御システムルールを作成する
ESET アプリケーションがすでにインストールされている場合は、新しいホスト侵入防御システム規則を作成し、画面読み上げソフトウェアが ESET アプリケーションにアクセスできるようにすることができます。
-
F5キーを押して、詳細設定を開きます。
-
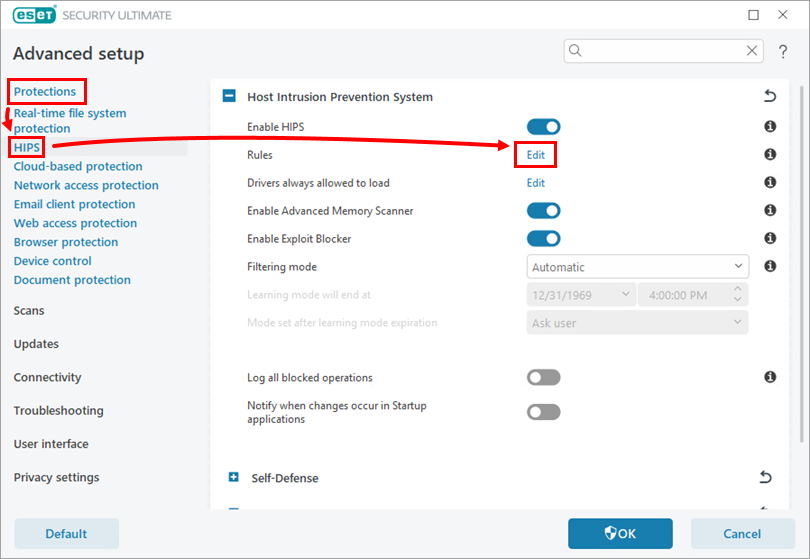
保護] →[HIPS]をクリックし、[ルール]の横にある[編集] をクリックします。
-
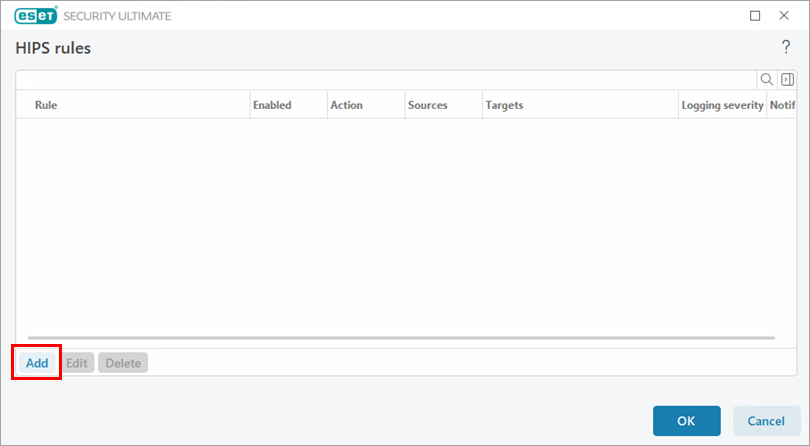
追加]をクリックします。
-
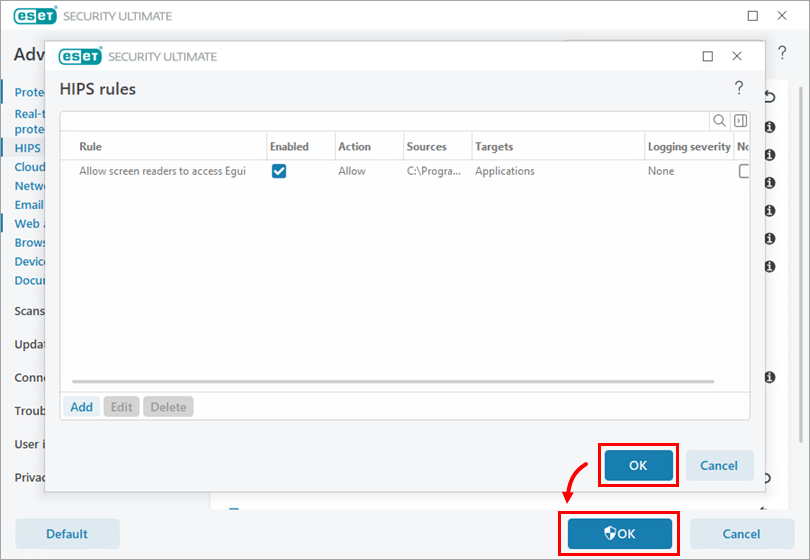
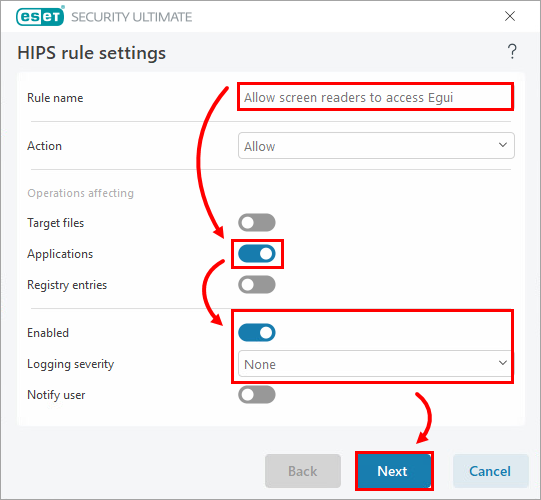
ルール 名 ]フィールドに「スクリーンリーダーによるEguiへのアクセスを許可」と入力し、[アプリケーション]の横のトグルを有効にします。次へ]をクリックします。
-
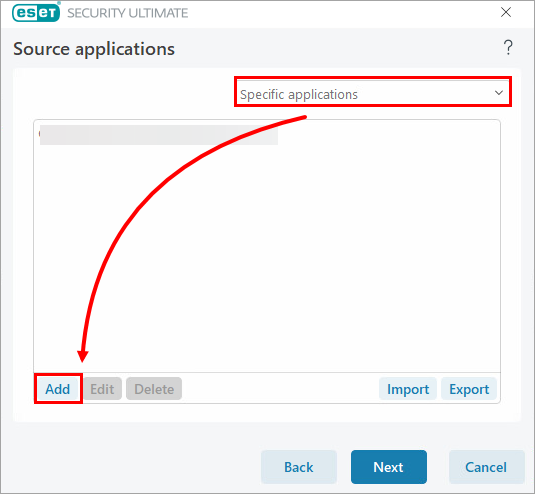
ドロップダウンメニューから[特定のアプリケーション]を選択し、[追加]をクリックします。
-
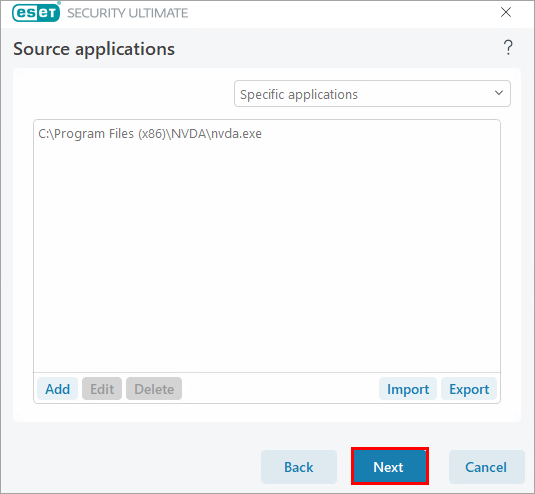
参照アイコン(3つの点)をクリックします。デバイスにインストールされているスクリーン・リーダー・アプリケーションを検索して選択します。OK]をクリックします。

-
次へ」をクリックします。
-
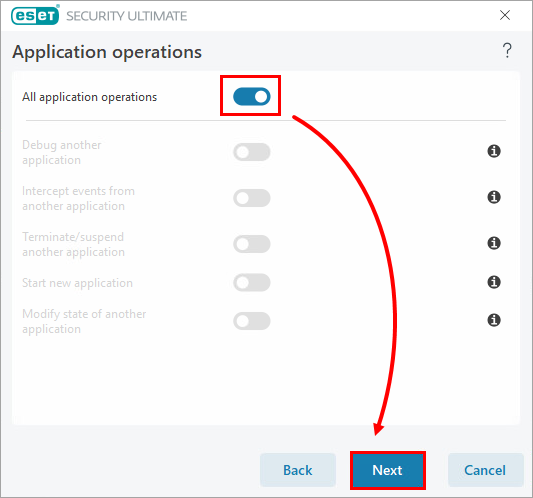
すべてのアプリケーション操作 ]の横にあるトグルを有効にして、[次へ]をクリックします。
-
Add(追加)」をクリックします。
-
テキストフィールドに%InstallDir%egui.exe
と入力し、OK→Finish をクリックします。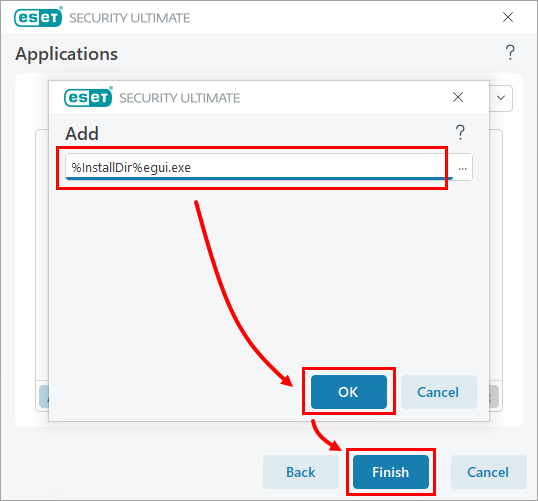
-
OK→OKをクリックします。