Issue
- Create a parent-child hierarchy of users in ESET PROTECT On-Prem
- The parent, an administrator-like account, has full control over all devices
- The child accounts have nearly full control, but only over selected devices
- Specific tasks and policies are shared
Solution
- Create static groups
- Move objects to shared group
- Create permission sets
- Create a low-level user
- Create ESET Management Agent for a specific group
I. Create static groups
Static groups serve a similar purpose as folders. They store devices and other objects like policies, tasks and also users and permission sets. To set up a multi-tenant environment correctly, it is crucial to have a proper structure of static groups.
Click Computers, click the gear icon
 next to the All group and click New Static Group.
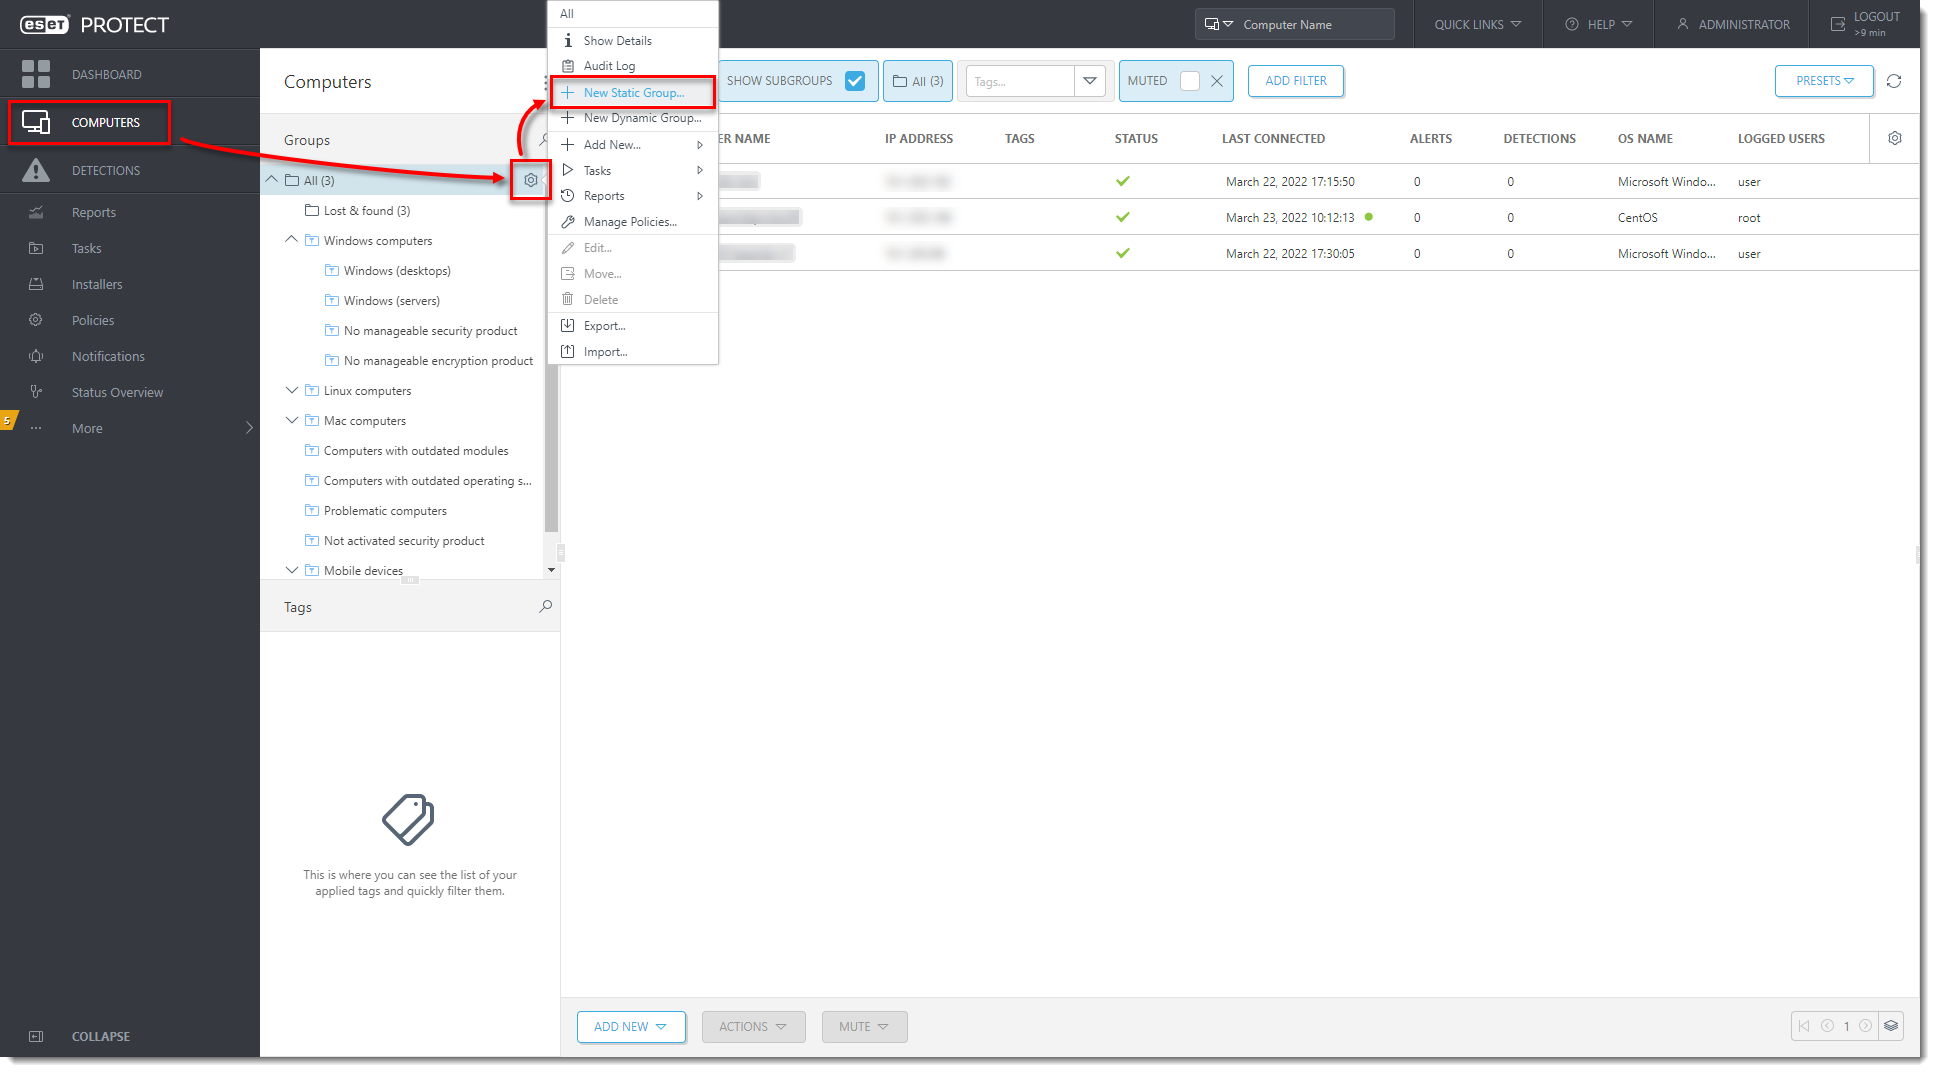
Figure 1-1
Click the image to view larger in new windowIn the Name field, type the name of the static group (for example, Shared Objects). Optionally, type a description and click Finish to create the group.
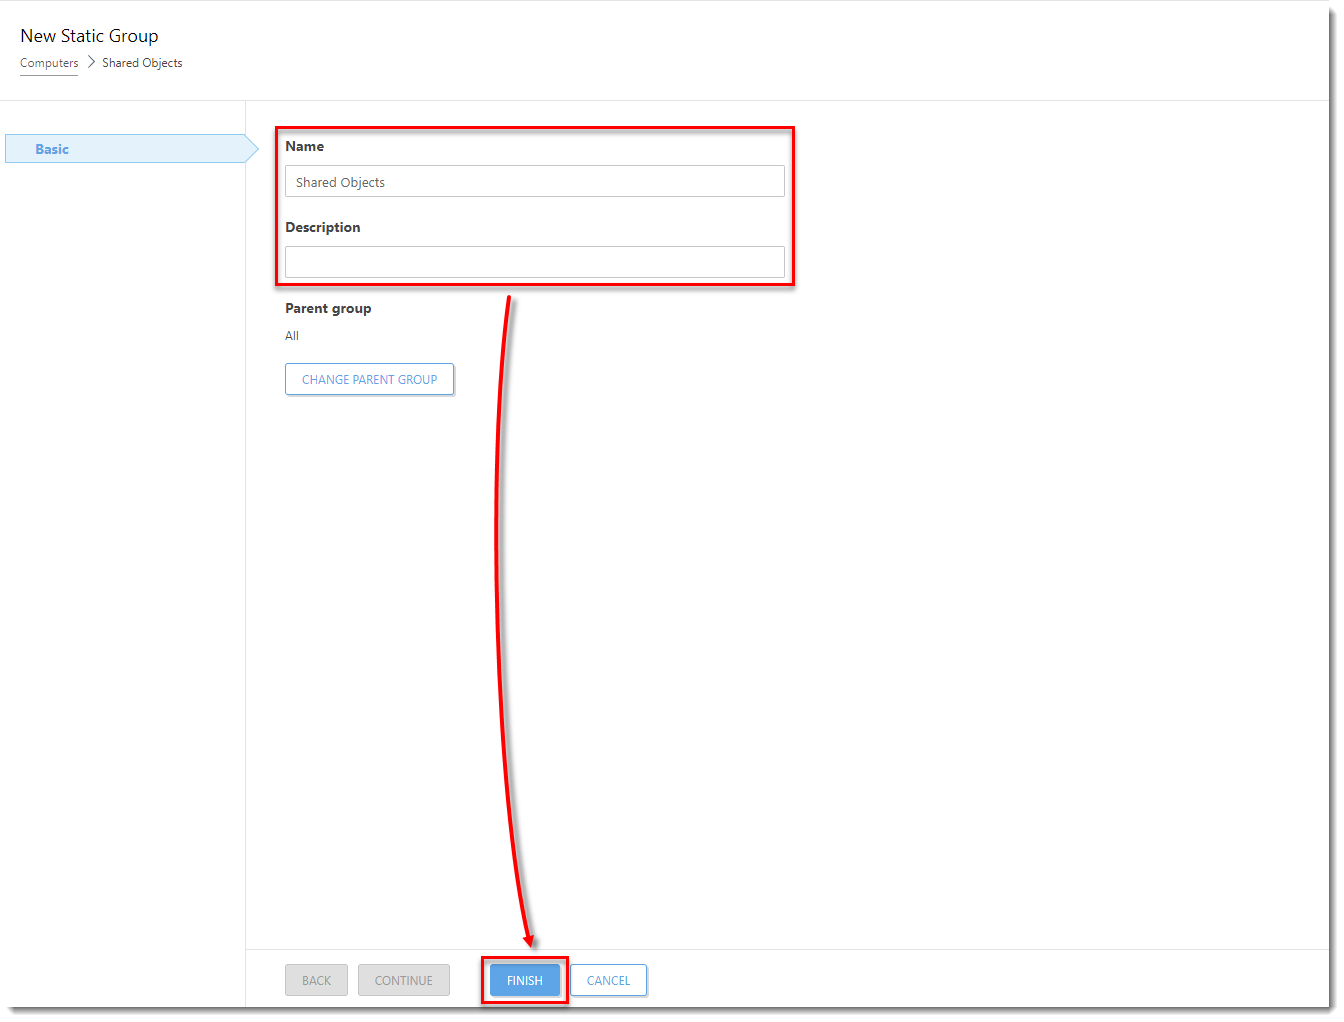
Figure 1-2
Click the image to view larger in new windowRepeat steps 1-4 for all static groups needed for your structure. In this example, a group named Office A is a home group for low-level users. The parent group of Office A is All.
II. Move objects to shared group
All pre-defined objects, like policies, client tasks, or reports displayed in the Dashboard, are stored in the group All. All objects should be moved to the Shared objects group to make them available to low-level users.
Move report categories
Click Reports. Next to the applicable category, click the gear icon
and select Access Group → Move.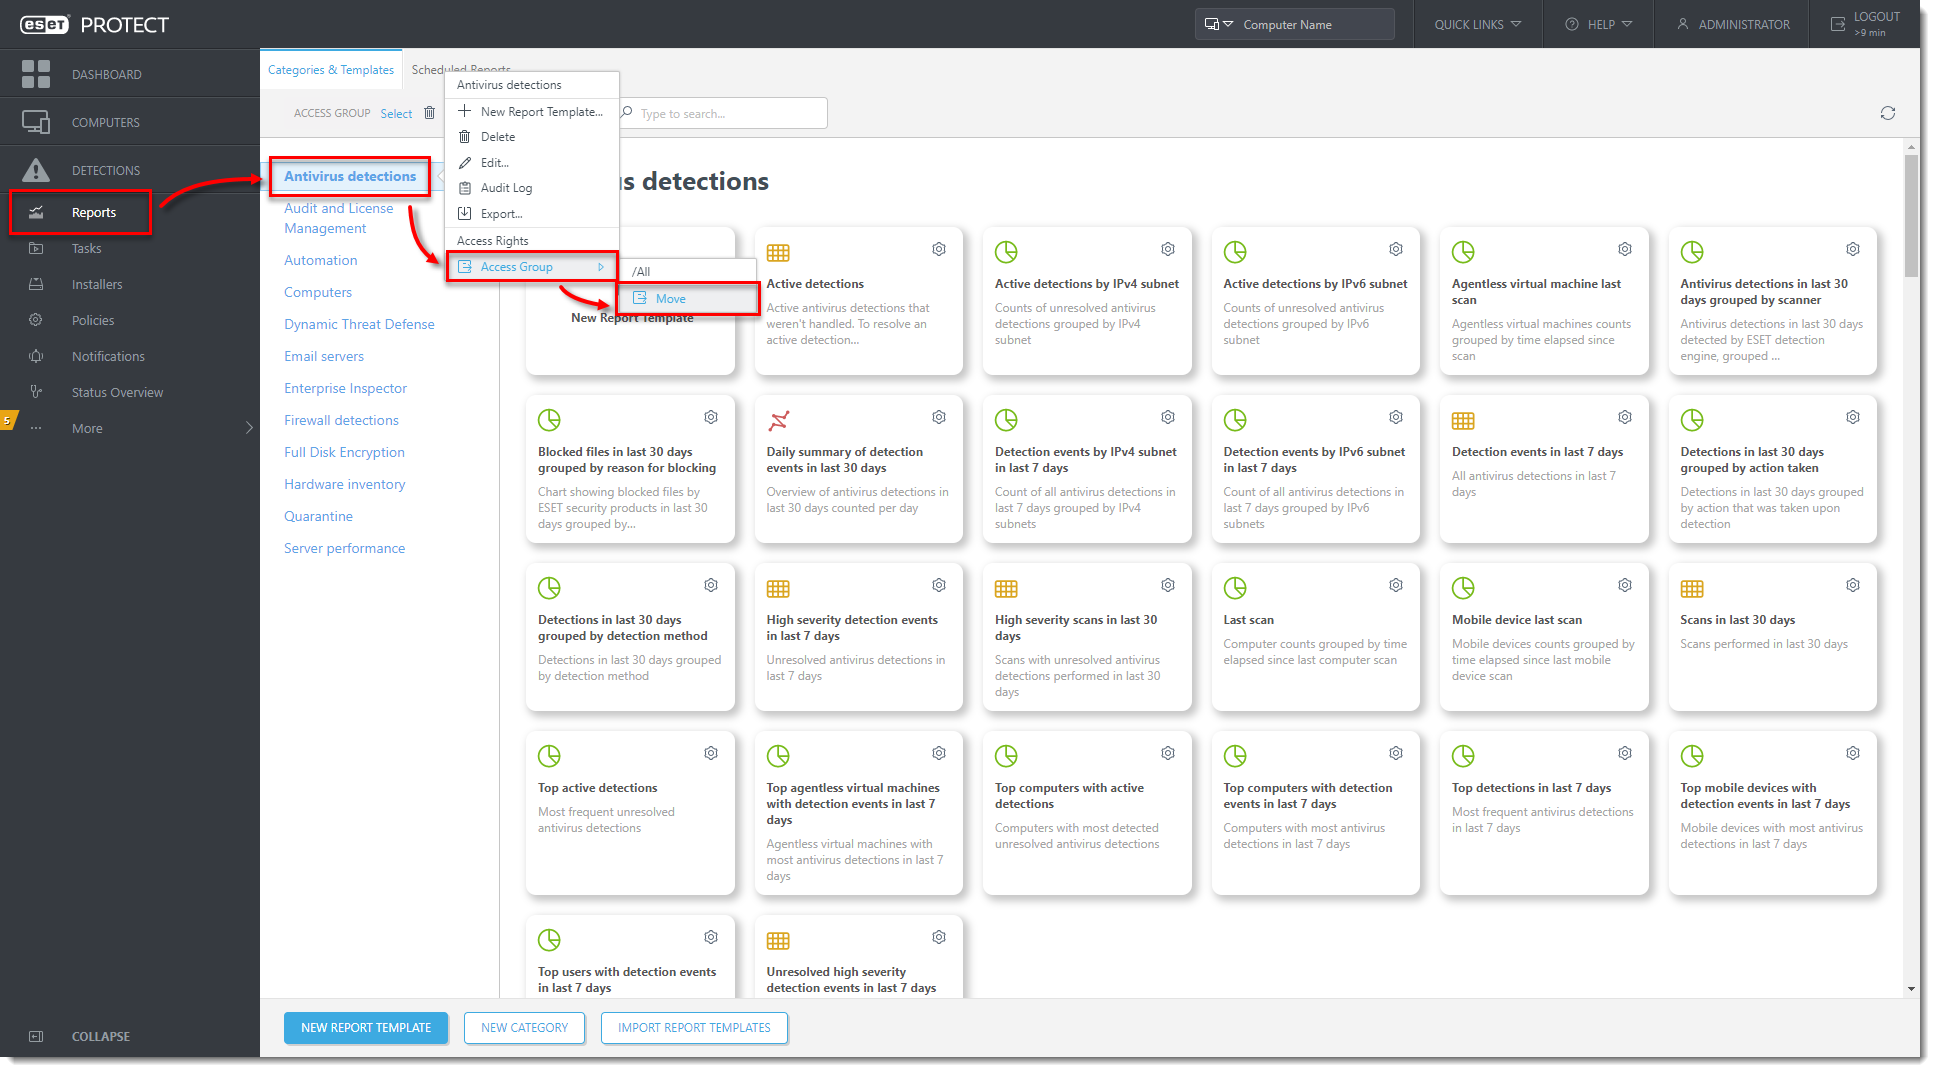
Figure 2-1
Click the image to view larger in new windowSelect the Shared Objects group and click OK.

Figure 2-2
Click the image to view larger in new windowRepeat steps 1-3 for all categories you want to share.
Move policies
Click Policies.
Select the check box next to the applicable policy and next to Access Group, click Select.
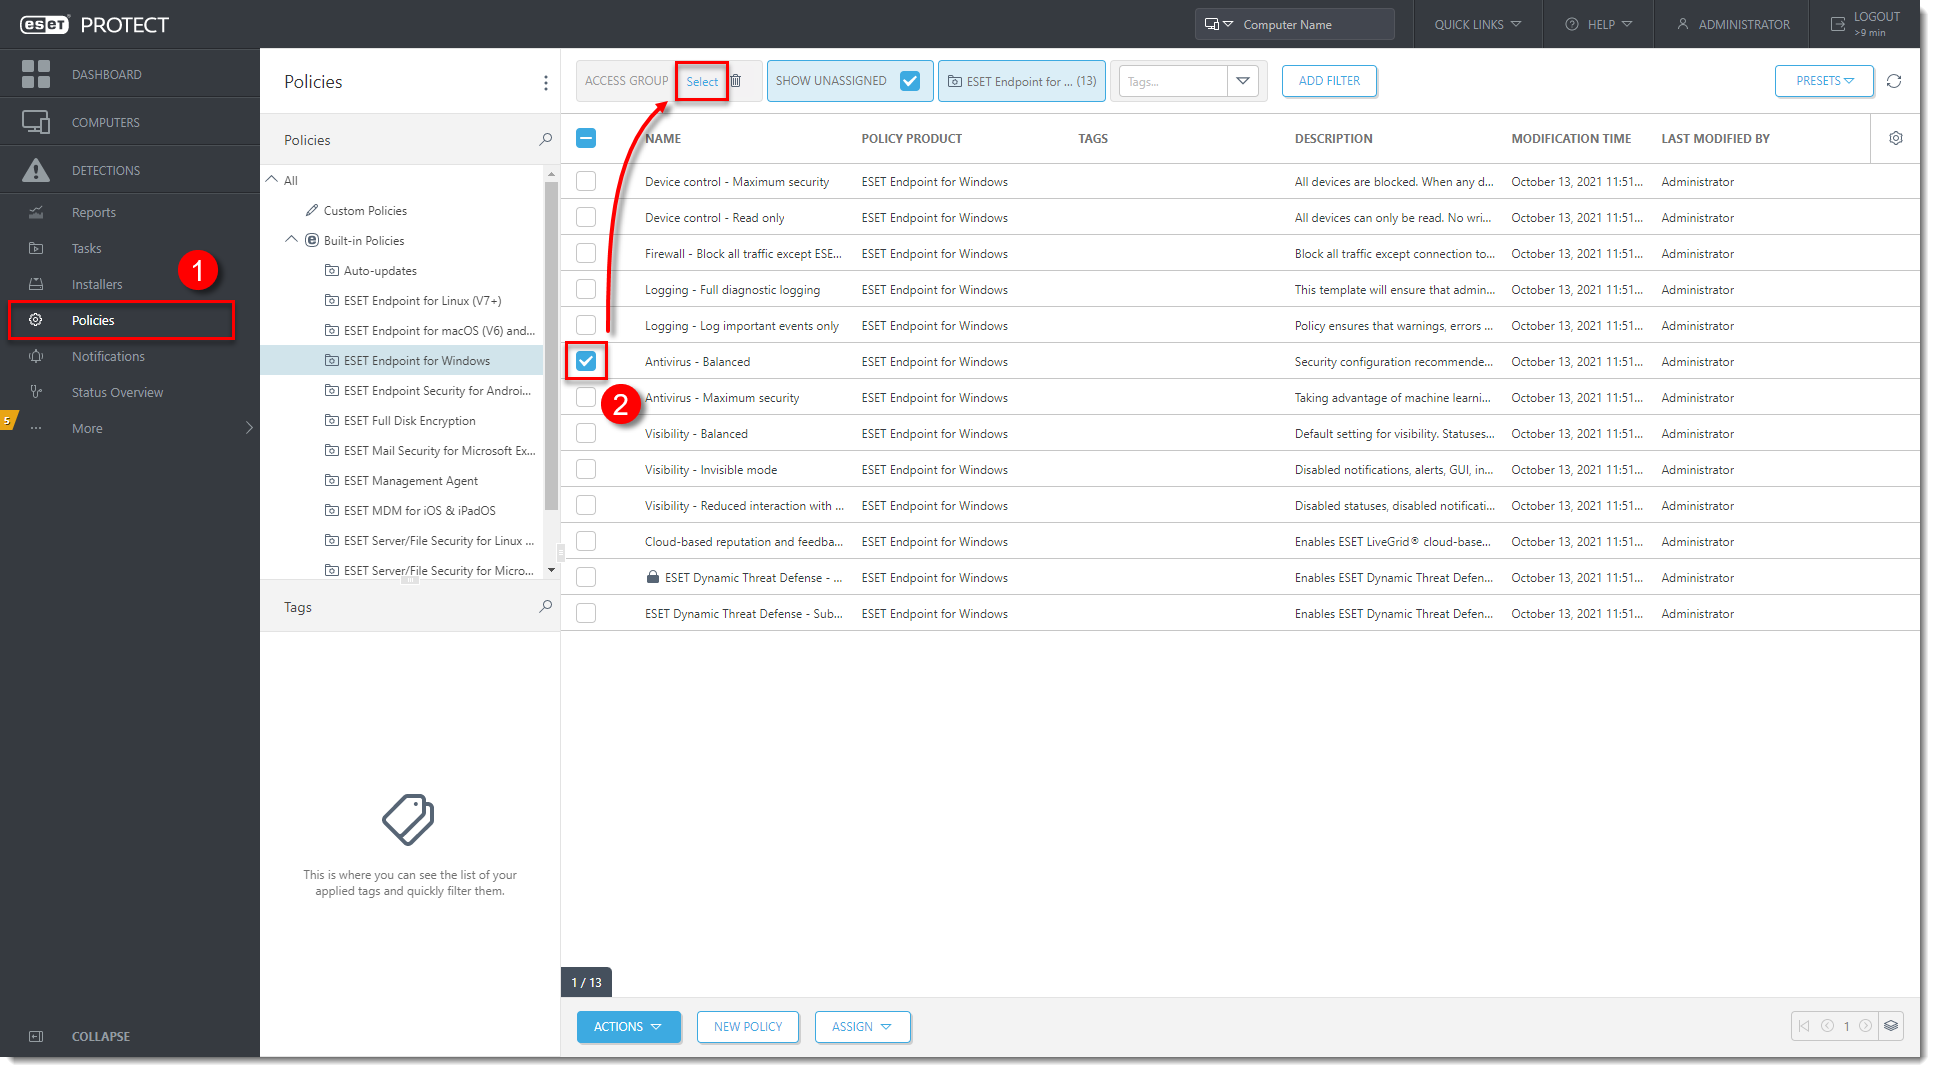
Figure 3-1
Click the image to view larger in new windowSelect the Shared Objects group and click OK.

Figure 3-2
Click the image to view larger in new windowRepeat steps 1-4 for all the policies you want to share.
Move Client Tasks
If you have created Client Tasks you would like to share with other (non-admin) users, you can move or duplicate them to the Shared Objects access group.
Click Tasks and expand Client Tasks.
Select the applicable task and next to Access Group, click Select.

Figure 4-1
Click the image to view larger in new windowSelect the Shared Objects group and click OK.

Figure 4-2
Click the image to view larger in new windowRepeat steps 1-4 for all Client Tasks you want to share.
In a similar way, you can move or duplicate all other objects you need to share with low-level users.
III. Create permission sets
The permission set is a set of rules. These rules define which functionalities are allowed over objects in the selected static group. One permission set can be assigned to multiple users and one user can be assigned with multiple sets.
Permission set for shared objects
Click More → Permission Sets → New.
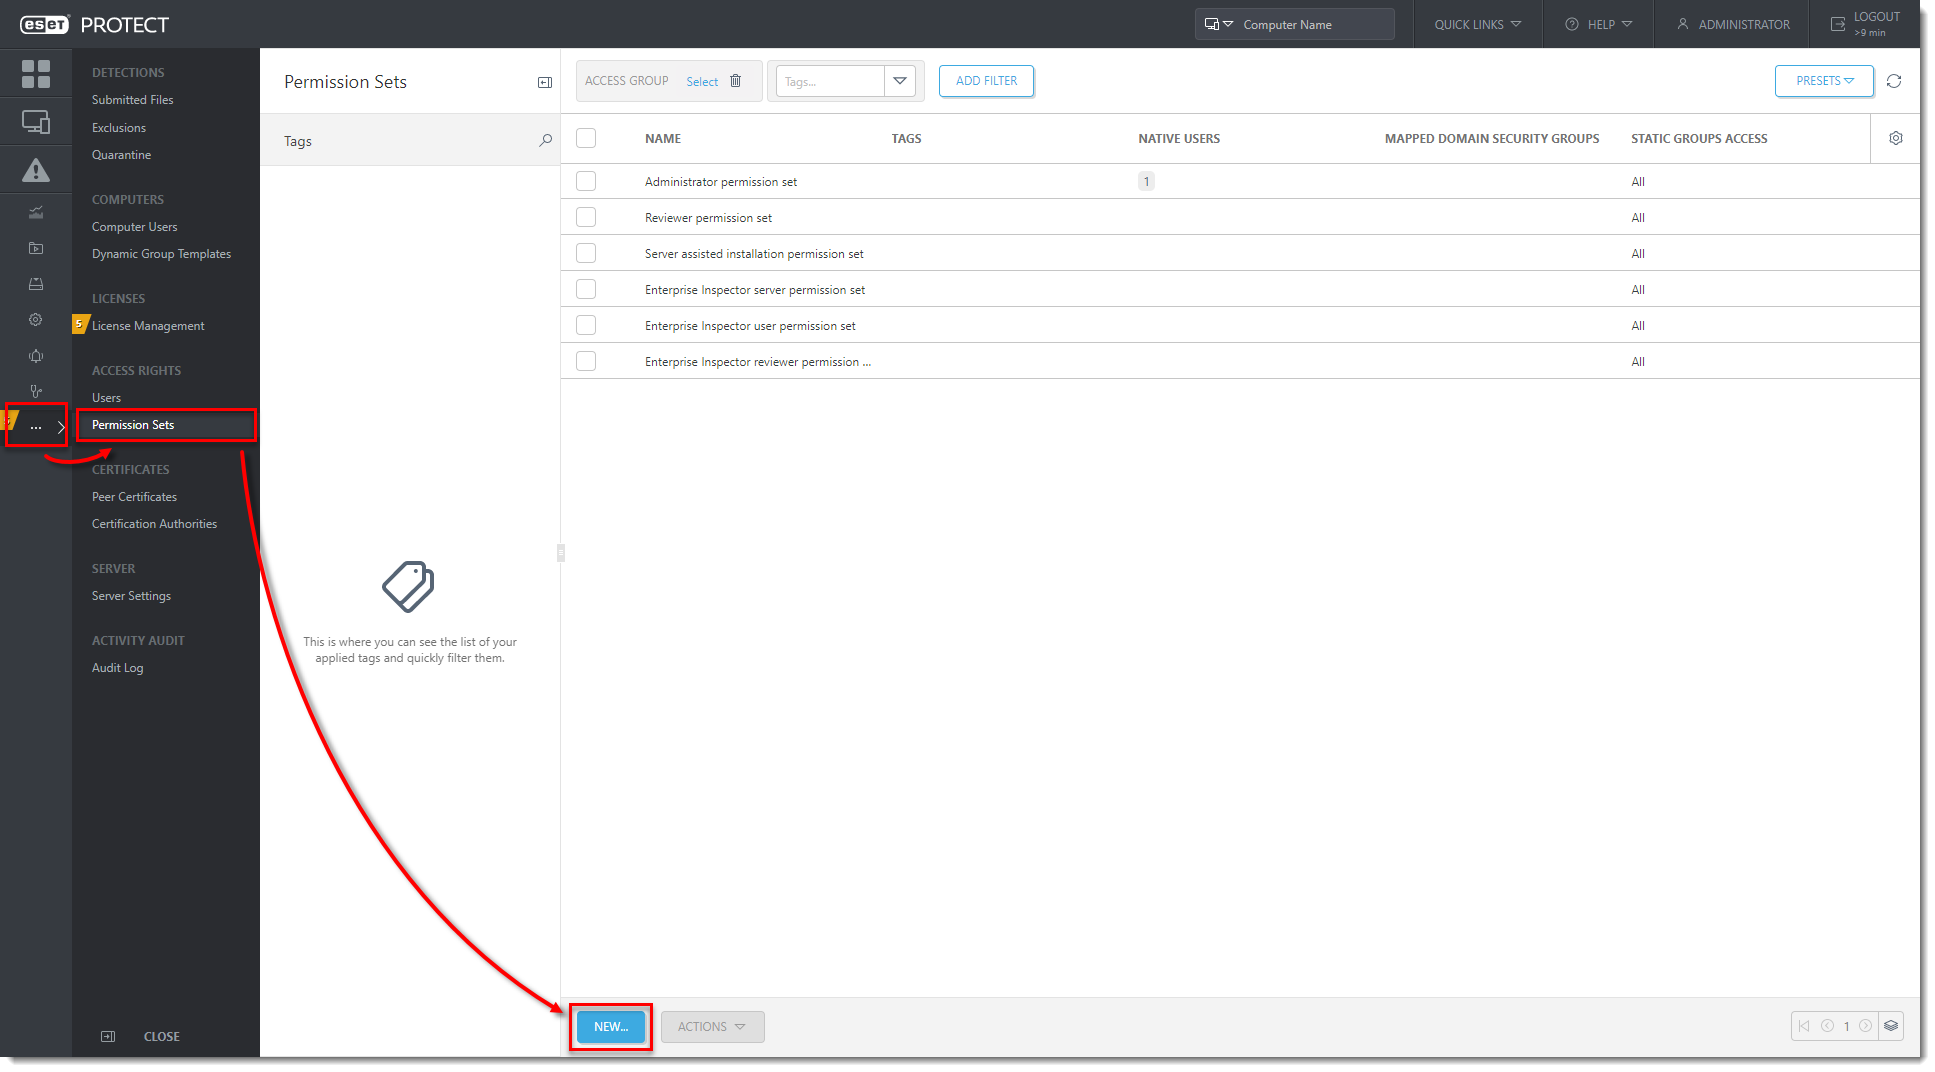
Figure 5-1
Click the image to view larger in new windowType a Name and Description for the set and click Continue.
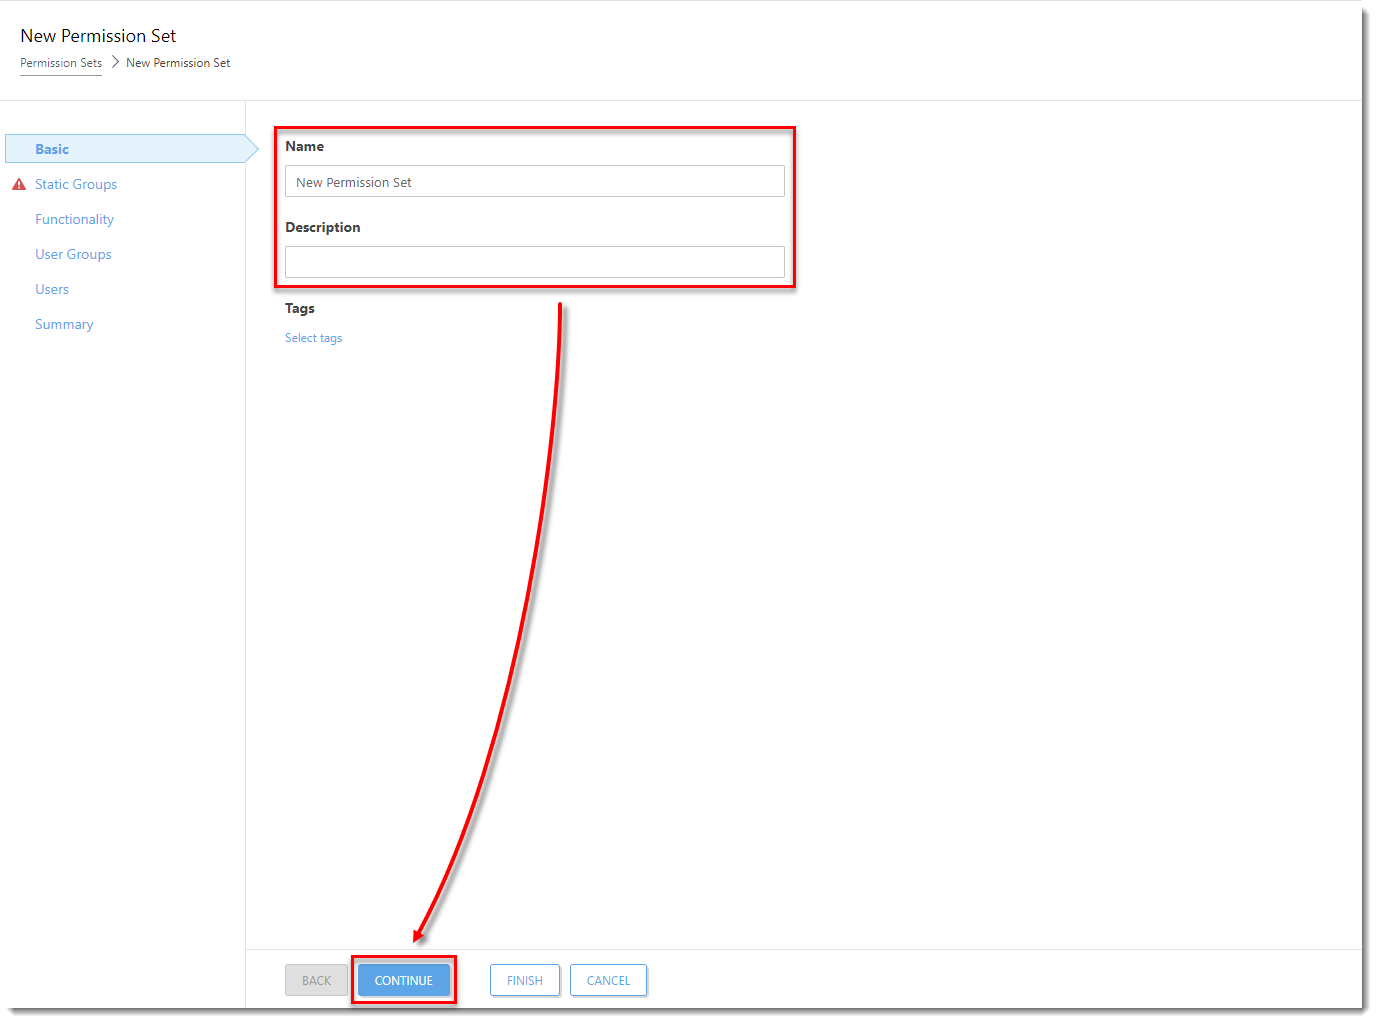
Figure 5-2
Click the image to view larger in new windowClick Select.

Figure 5-3
Click the image to view larger in new windowSelect the Shared Objects group, click OK.
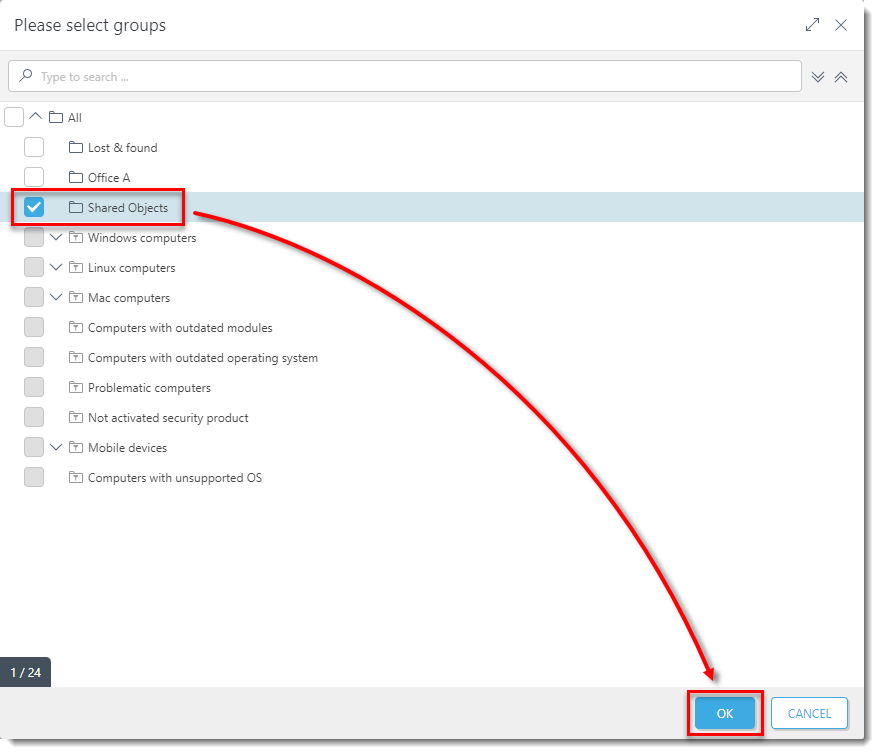
Figure 5-4
Click the image to view larger in new windowClick Continue.
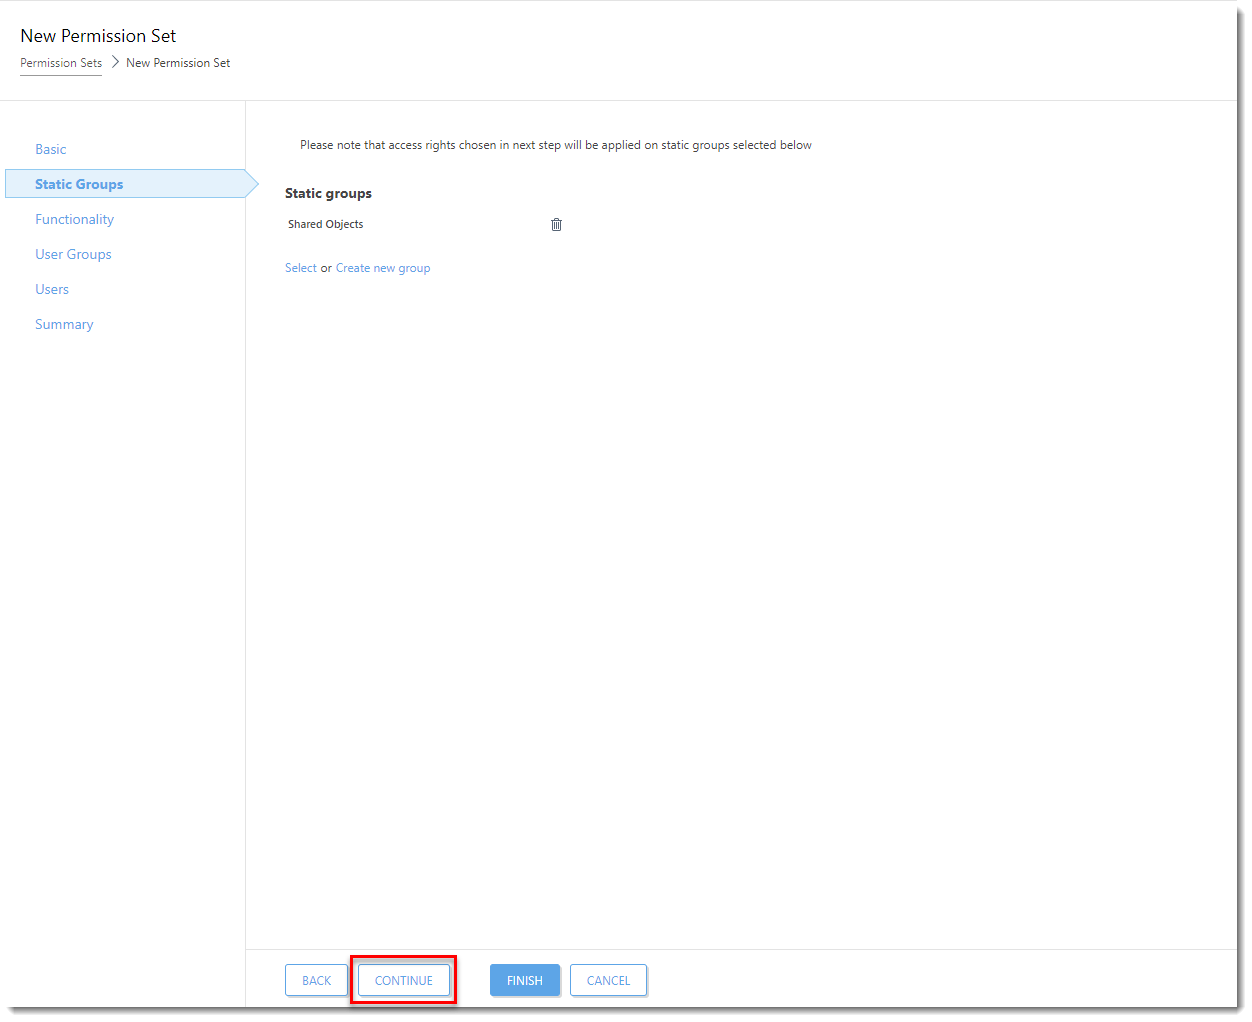
Figure 5-5
Click the image to view larger in new windowIn the functionality section, click Grant All Functionality Use Access.
Deselect Server Settings and click Finish.
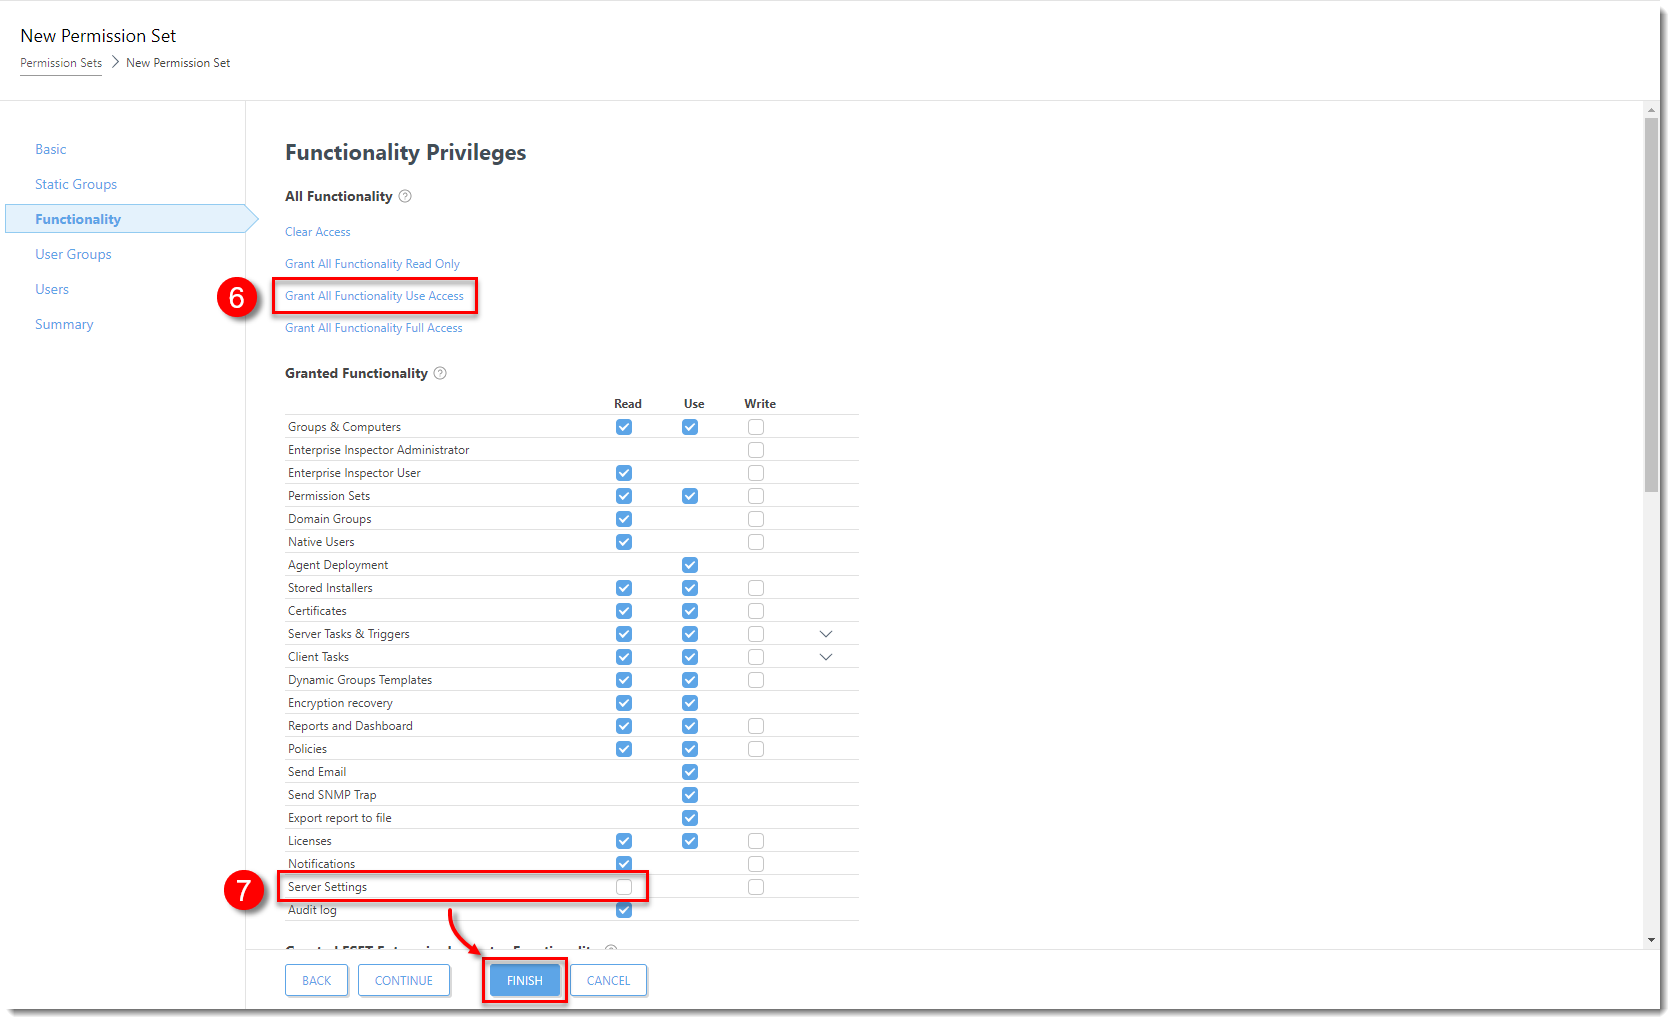
Figure 5-6
Click the image to view larger in new window
Permission set for user's home group
Click More → Permission Sets → New.
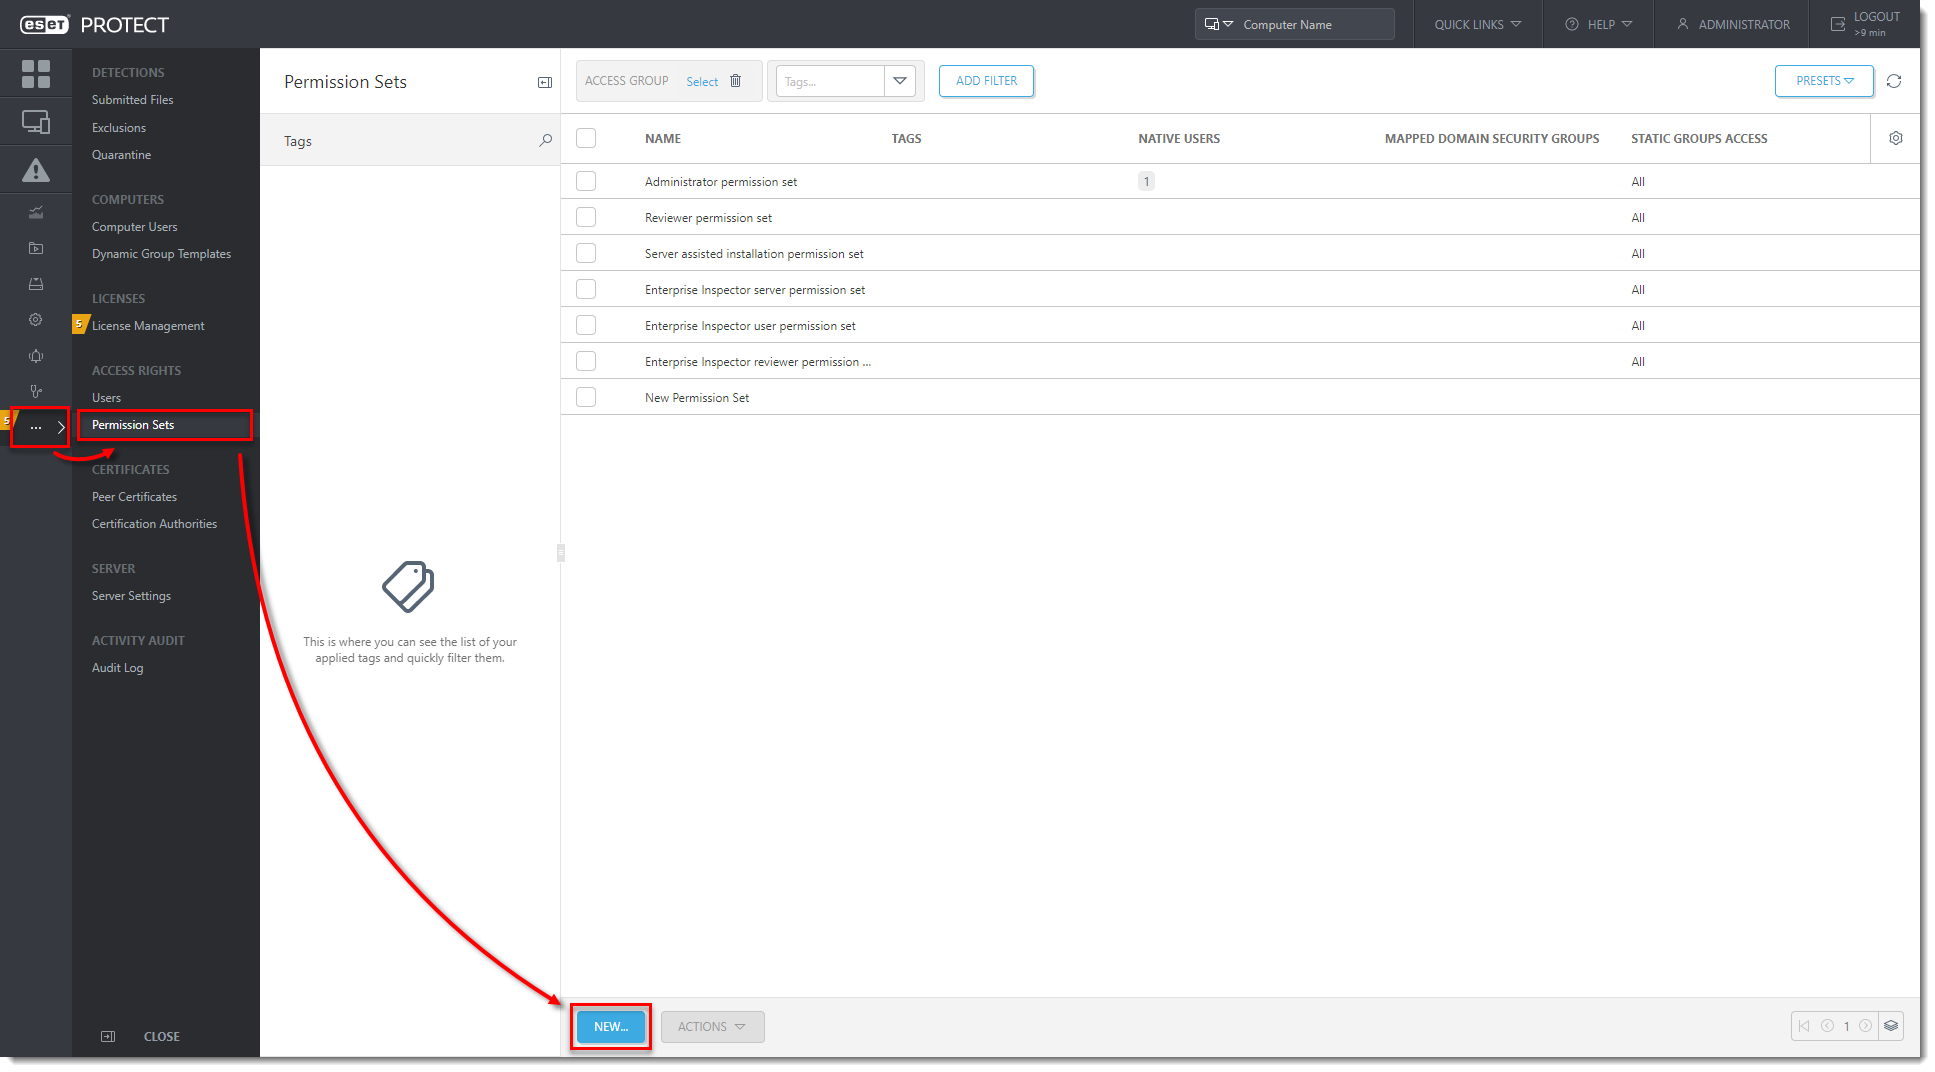
Figure 6-1
Click the image to view larger in new windowType a Name and Description for the set and click Continue.

Figure 6-2
Click the image to view larger in new windowClick Select.
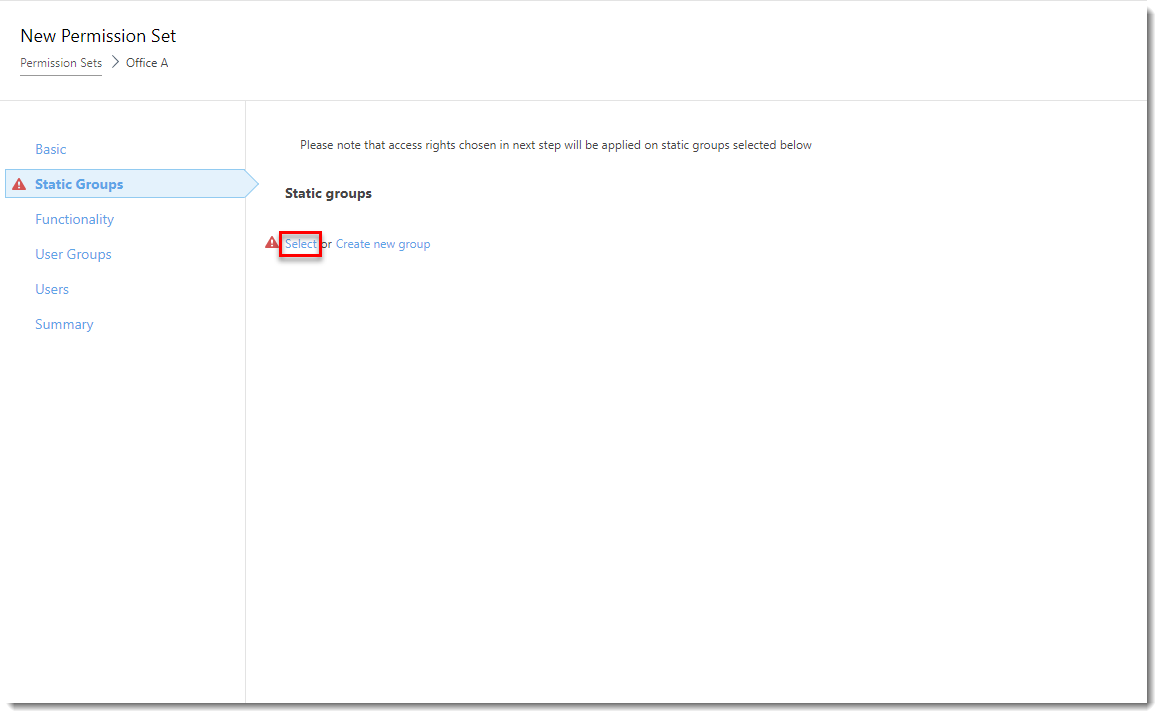
Figure 6-3
Click the image to view larger in new windowSelect the home group for the user (in this example, Office A) and click OK.
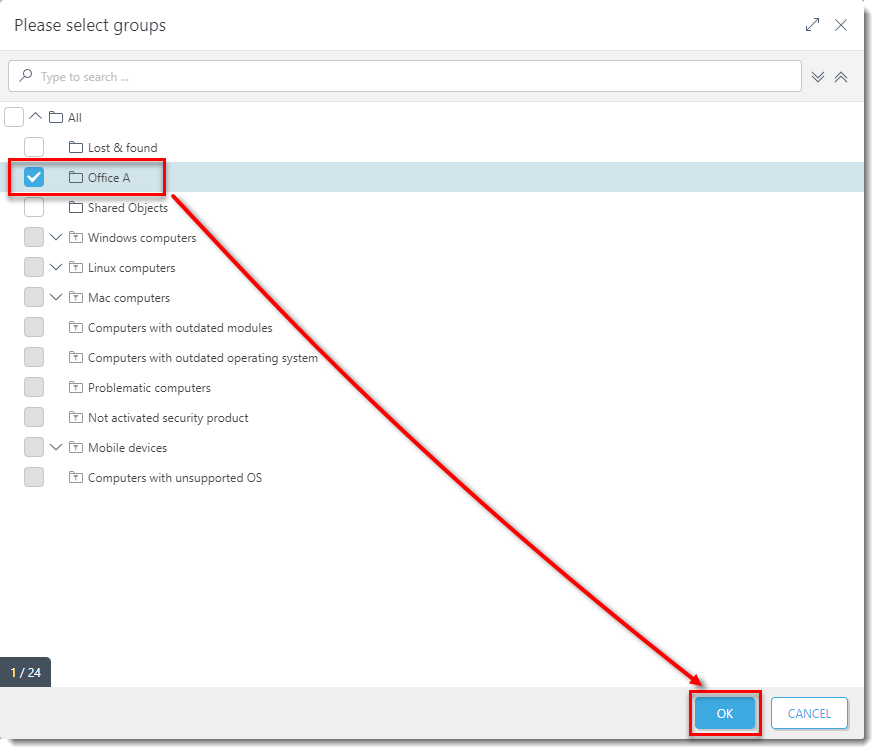
Figure 6-4
Click the image to view larger in new windowClick Continue.
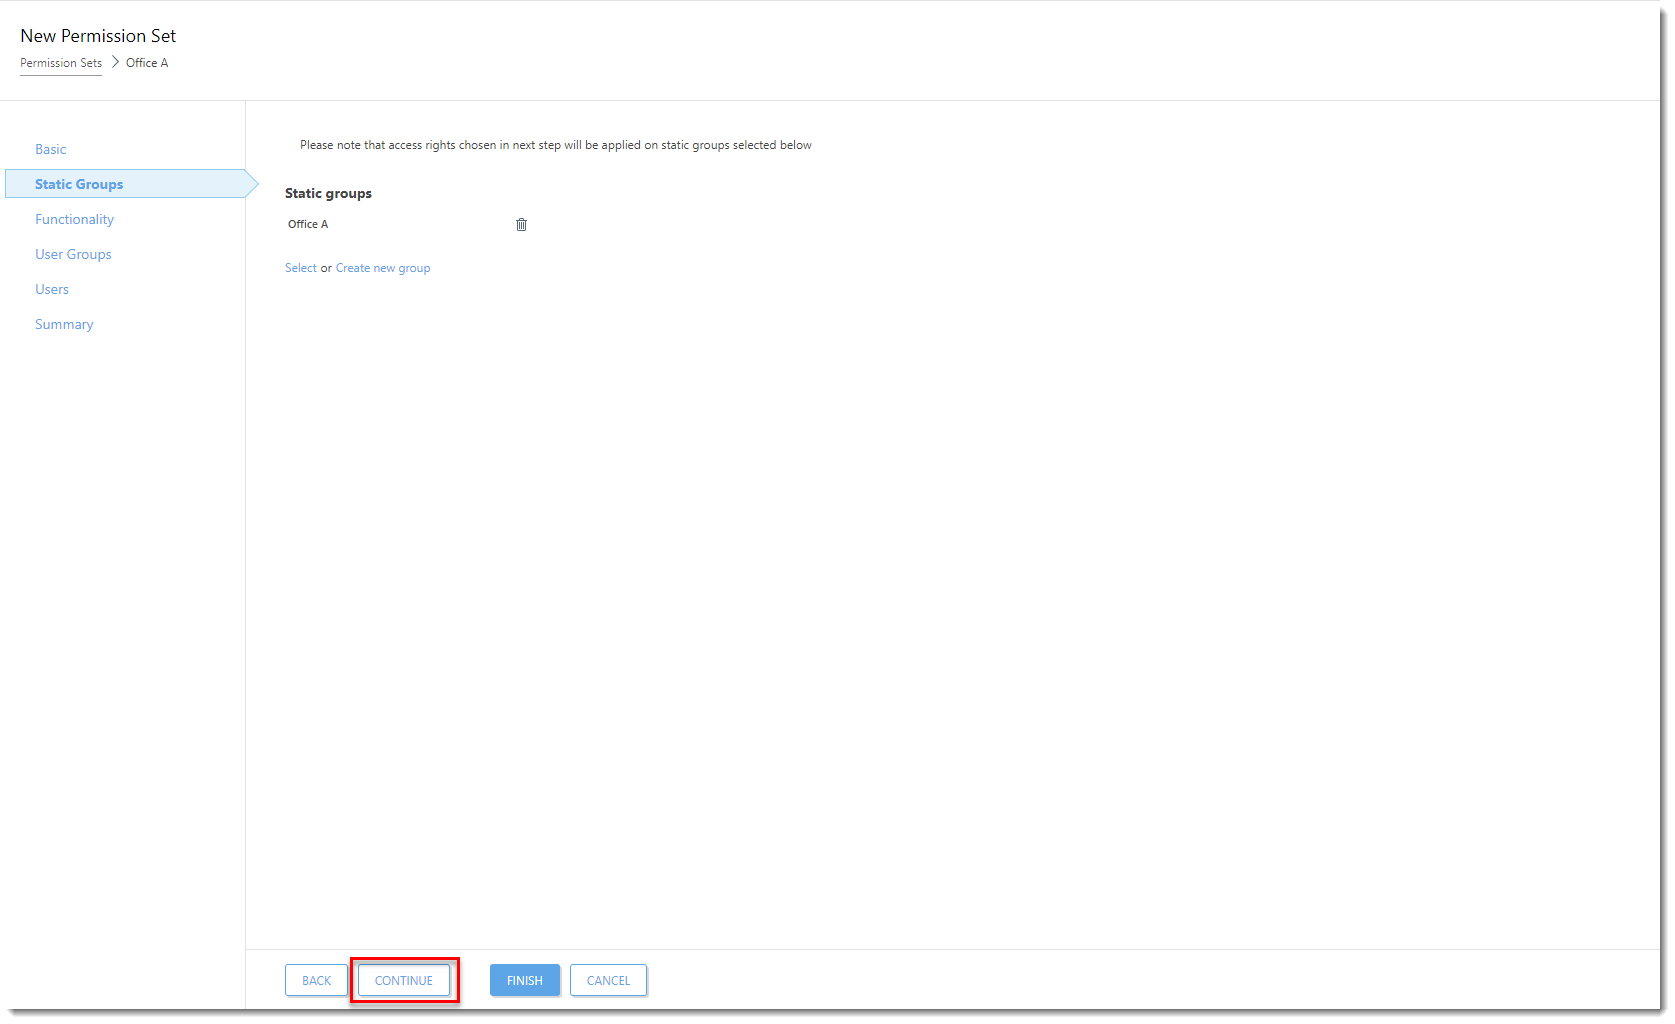
Figure 6-5
Click the image to view larger in new windowIn the functionality section, click Grant All Functionality Full Access.
Deselect Server Settings and click Finish.
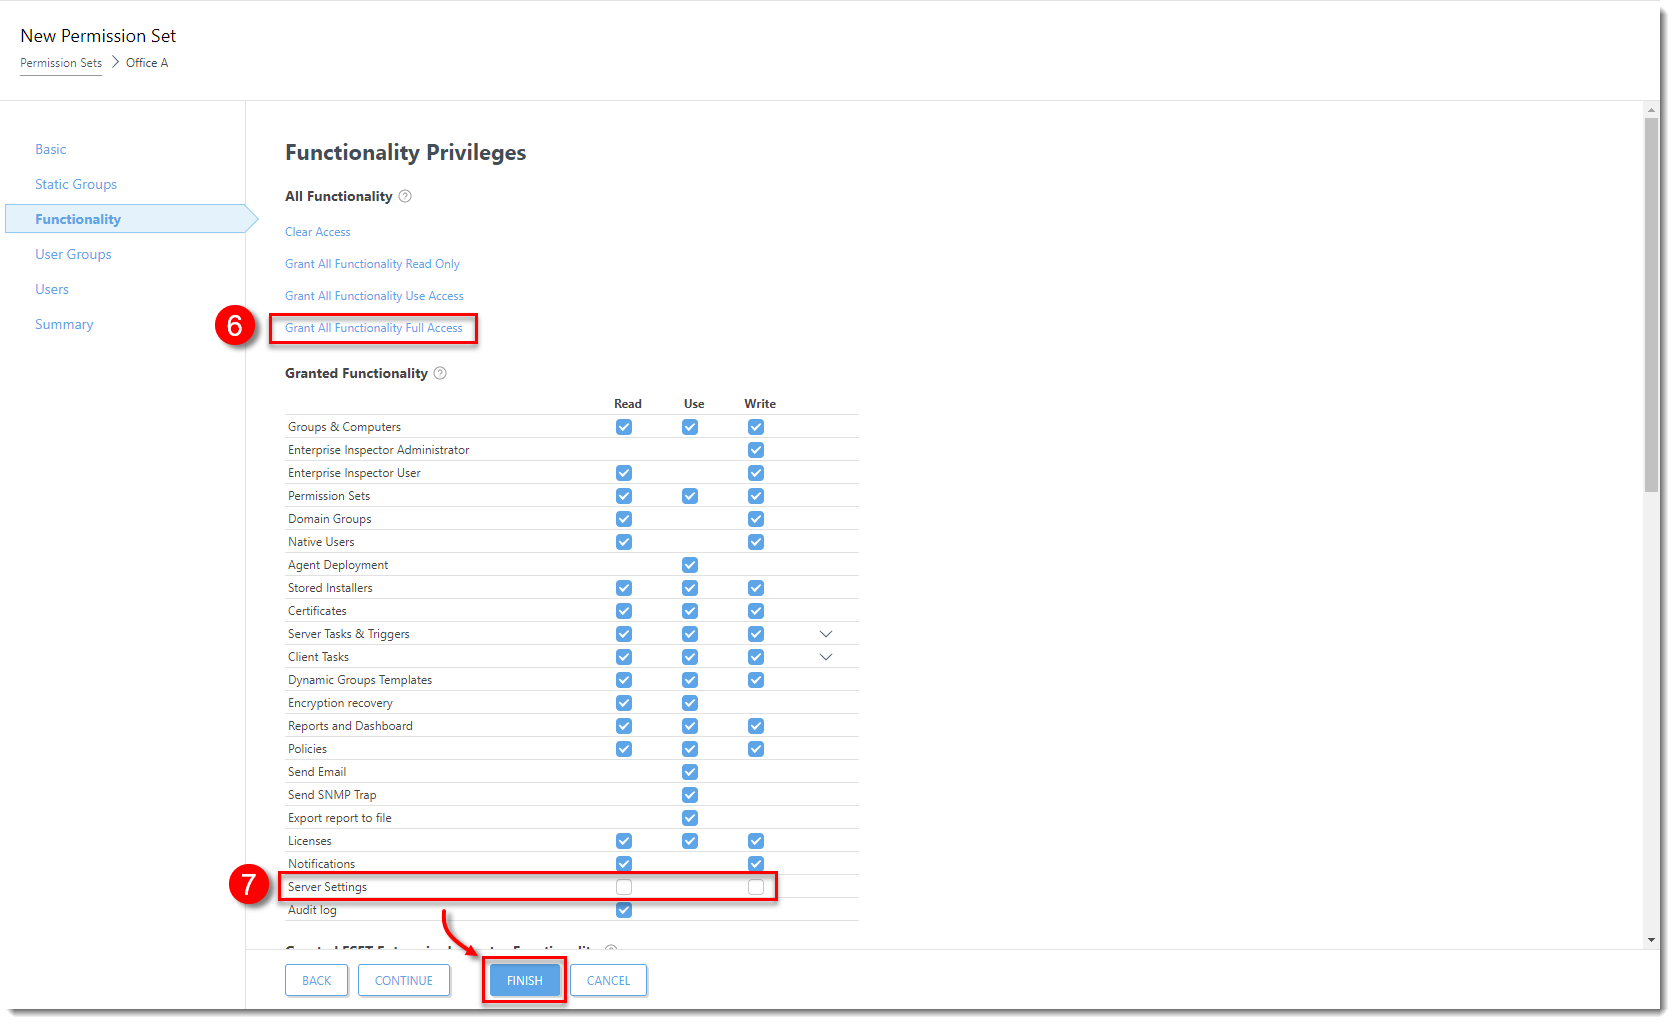
Figure 6-6
Click the image to view larger in new window
IV. Create a low-level user
Each user needs to have one home group and one or more permission sets. The home group is a static group where ESET PROTECT On-Prem stores all objects (tasks, computers, etc.) created by the user.
Click More → Users → Add New → New Native User.
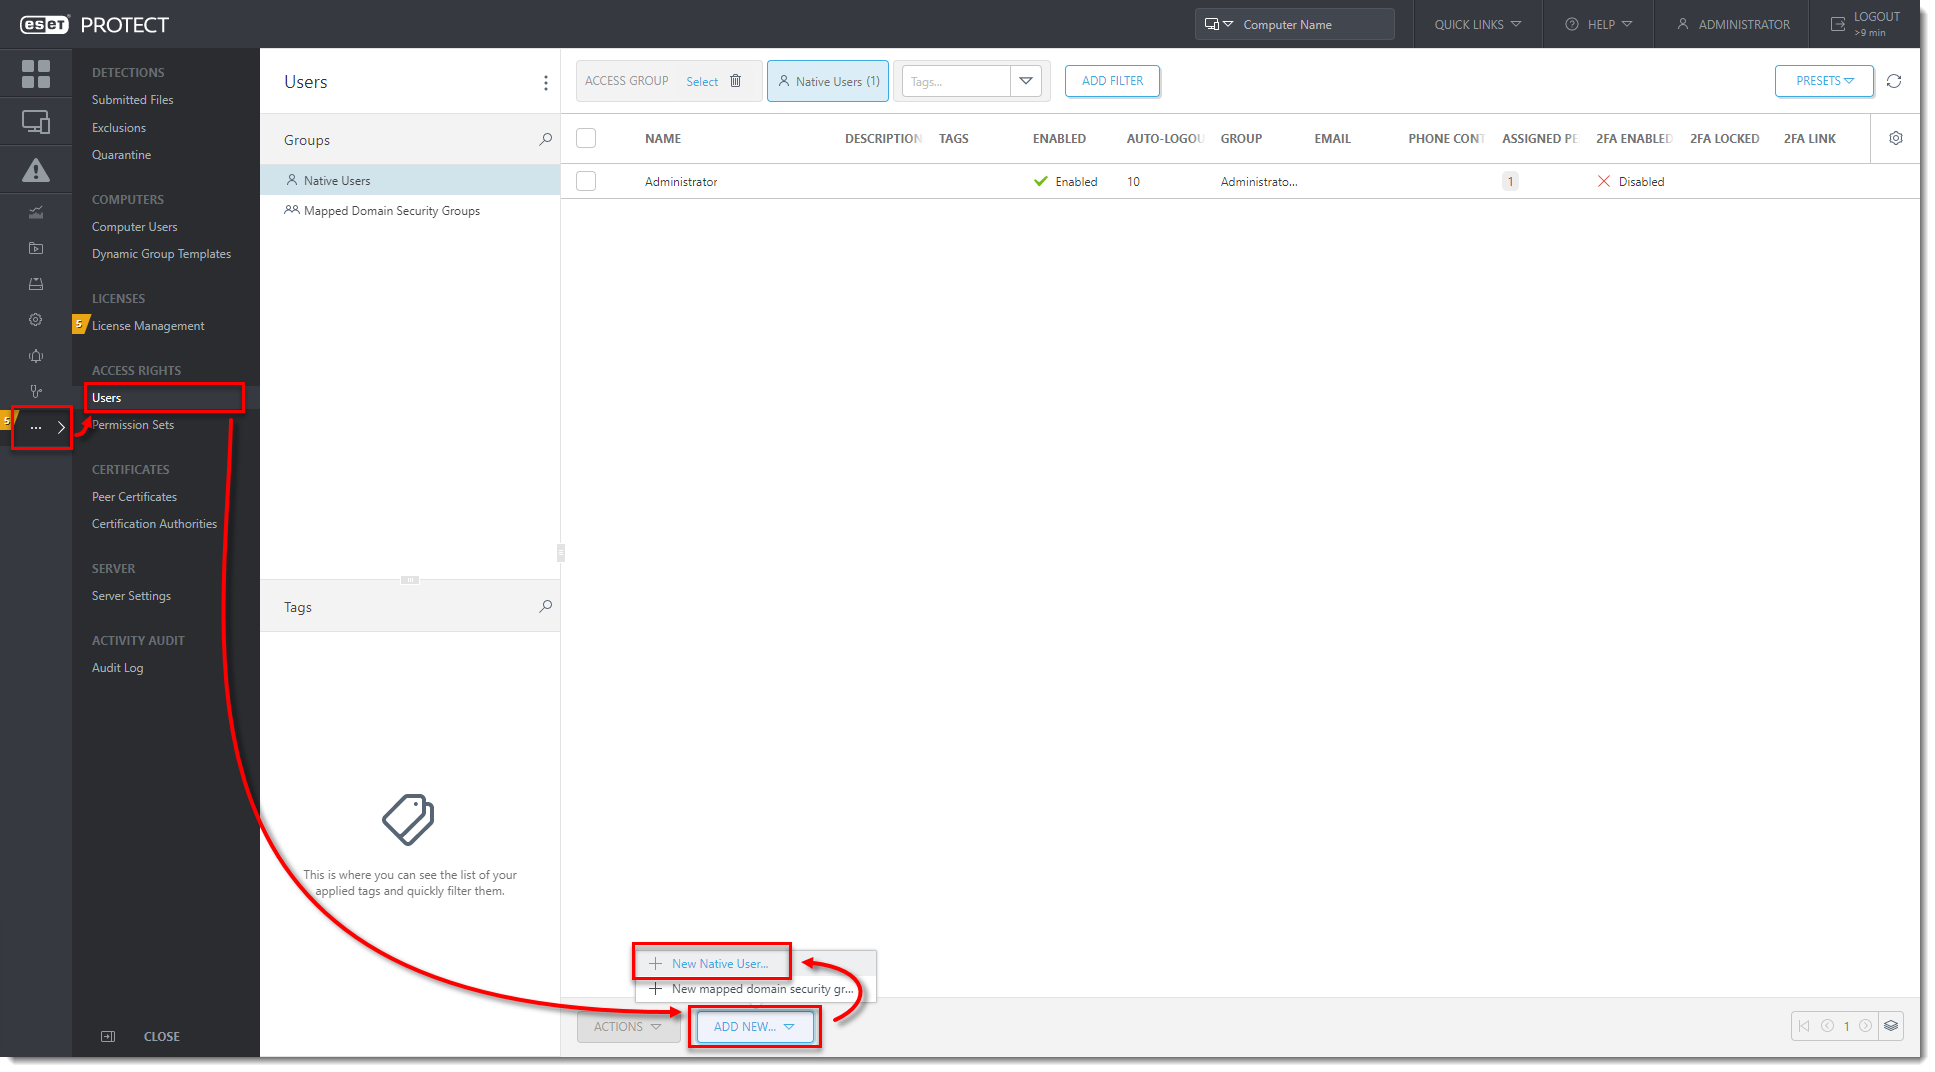
Figure 7-1
Click the image to view larger in new windowType a name and description for the user, for example,
user_office_a.For the home group, select Office A and click OK.
Set a password for the new user and click Continue.
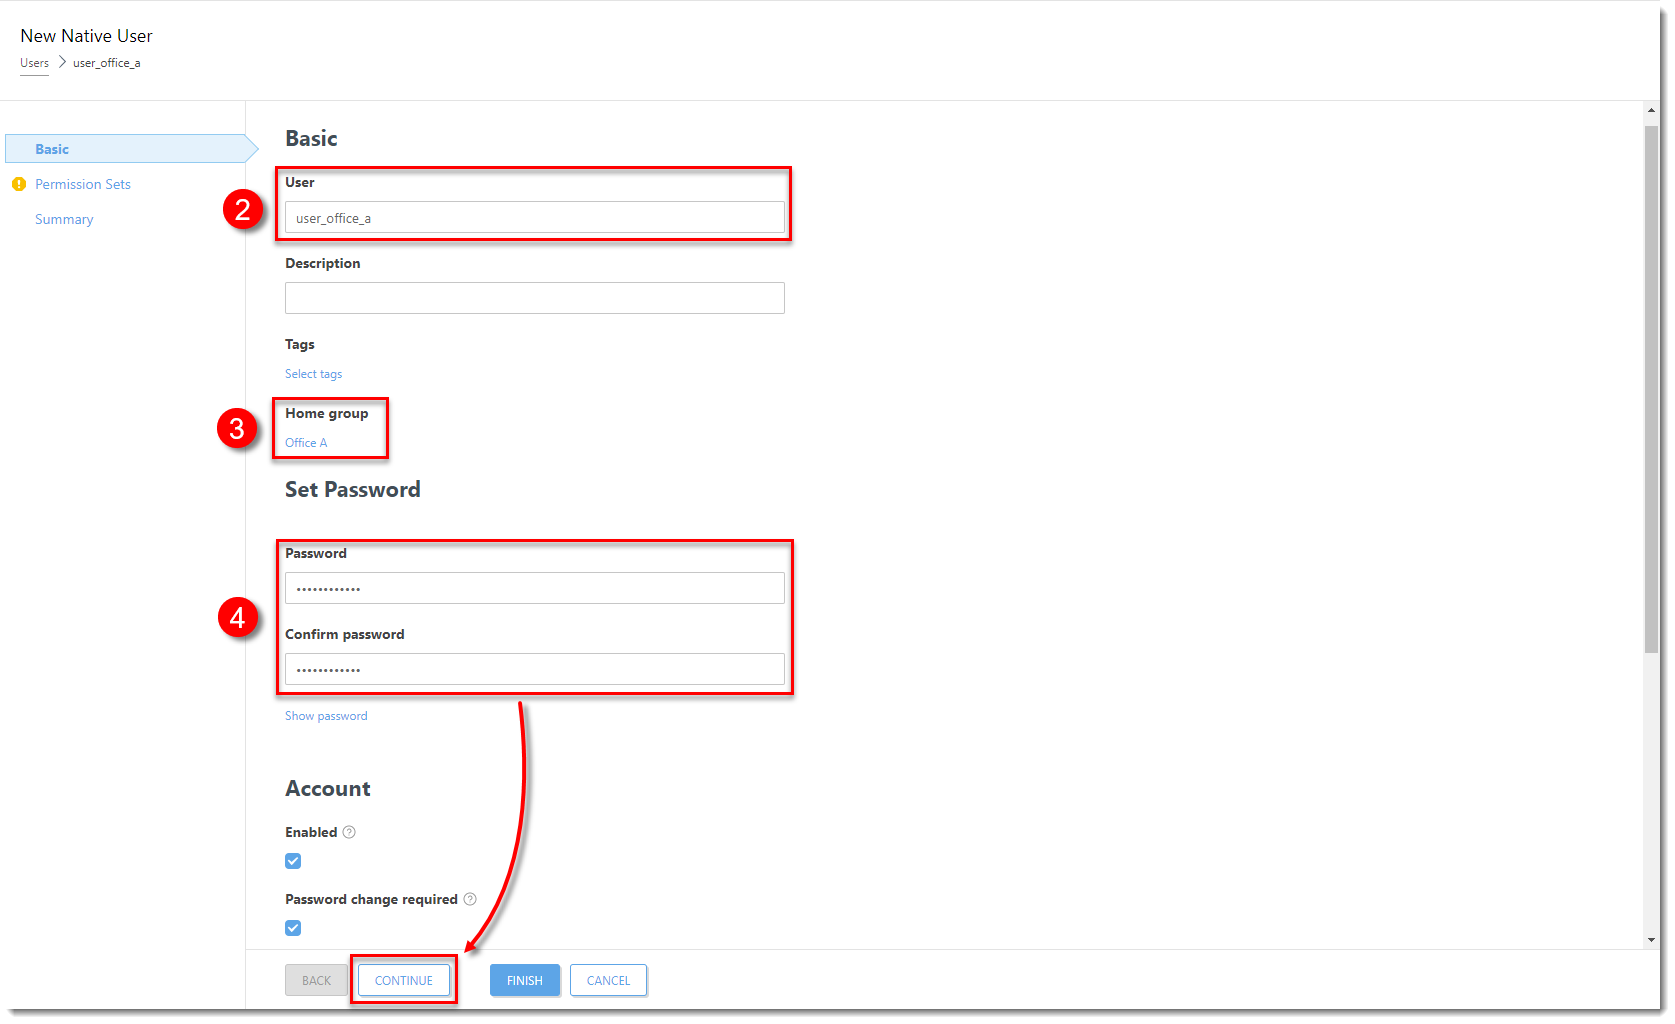
Figure 7-2
Click the image to view larger in new windowSelect the shared objects and the permission set previously created. Click Finish.
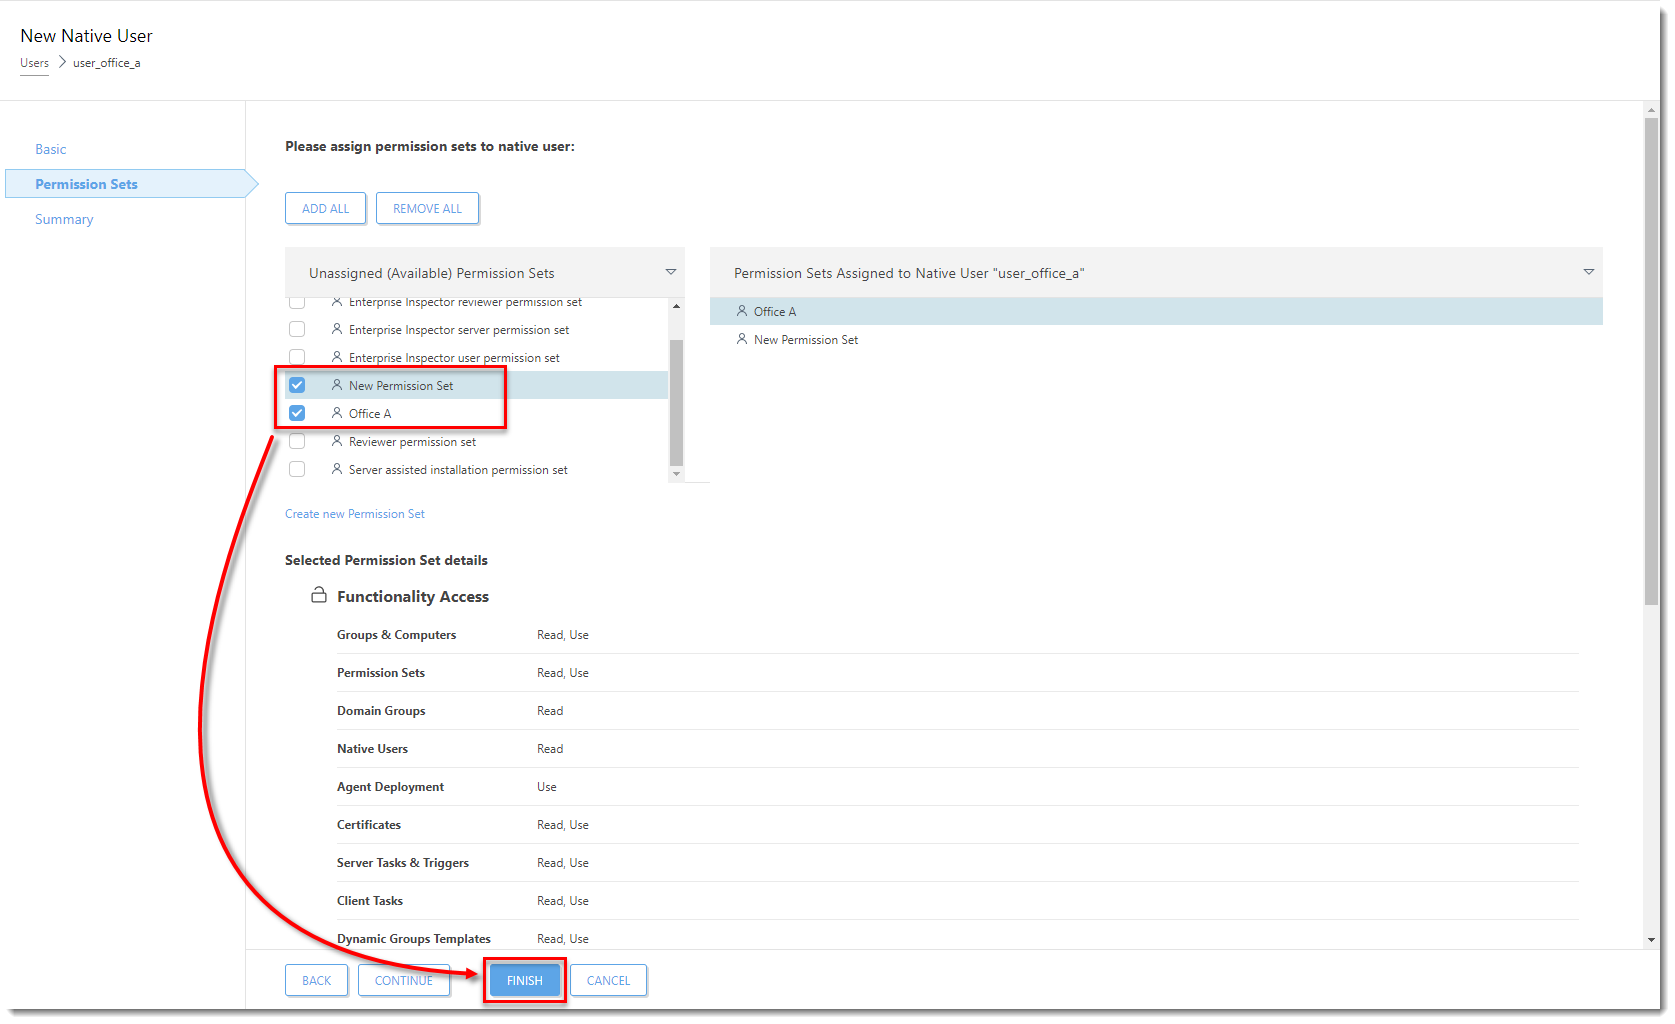
Figure 7-3
Click the image to view larger in new window
V. Create ESET Management Agent for a specific group
Using the settings below, Create Agent Live Installers that automatically assign a computer to a specific group. Similarly, you can deploy the ESET Management Agent and the ESET endpoint product together.
Click Installers → Create Installer → Agent Live Installer.
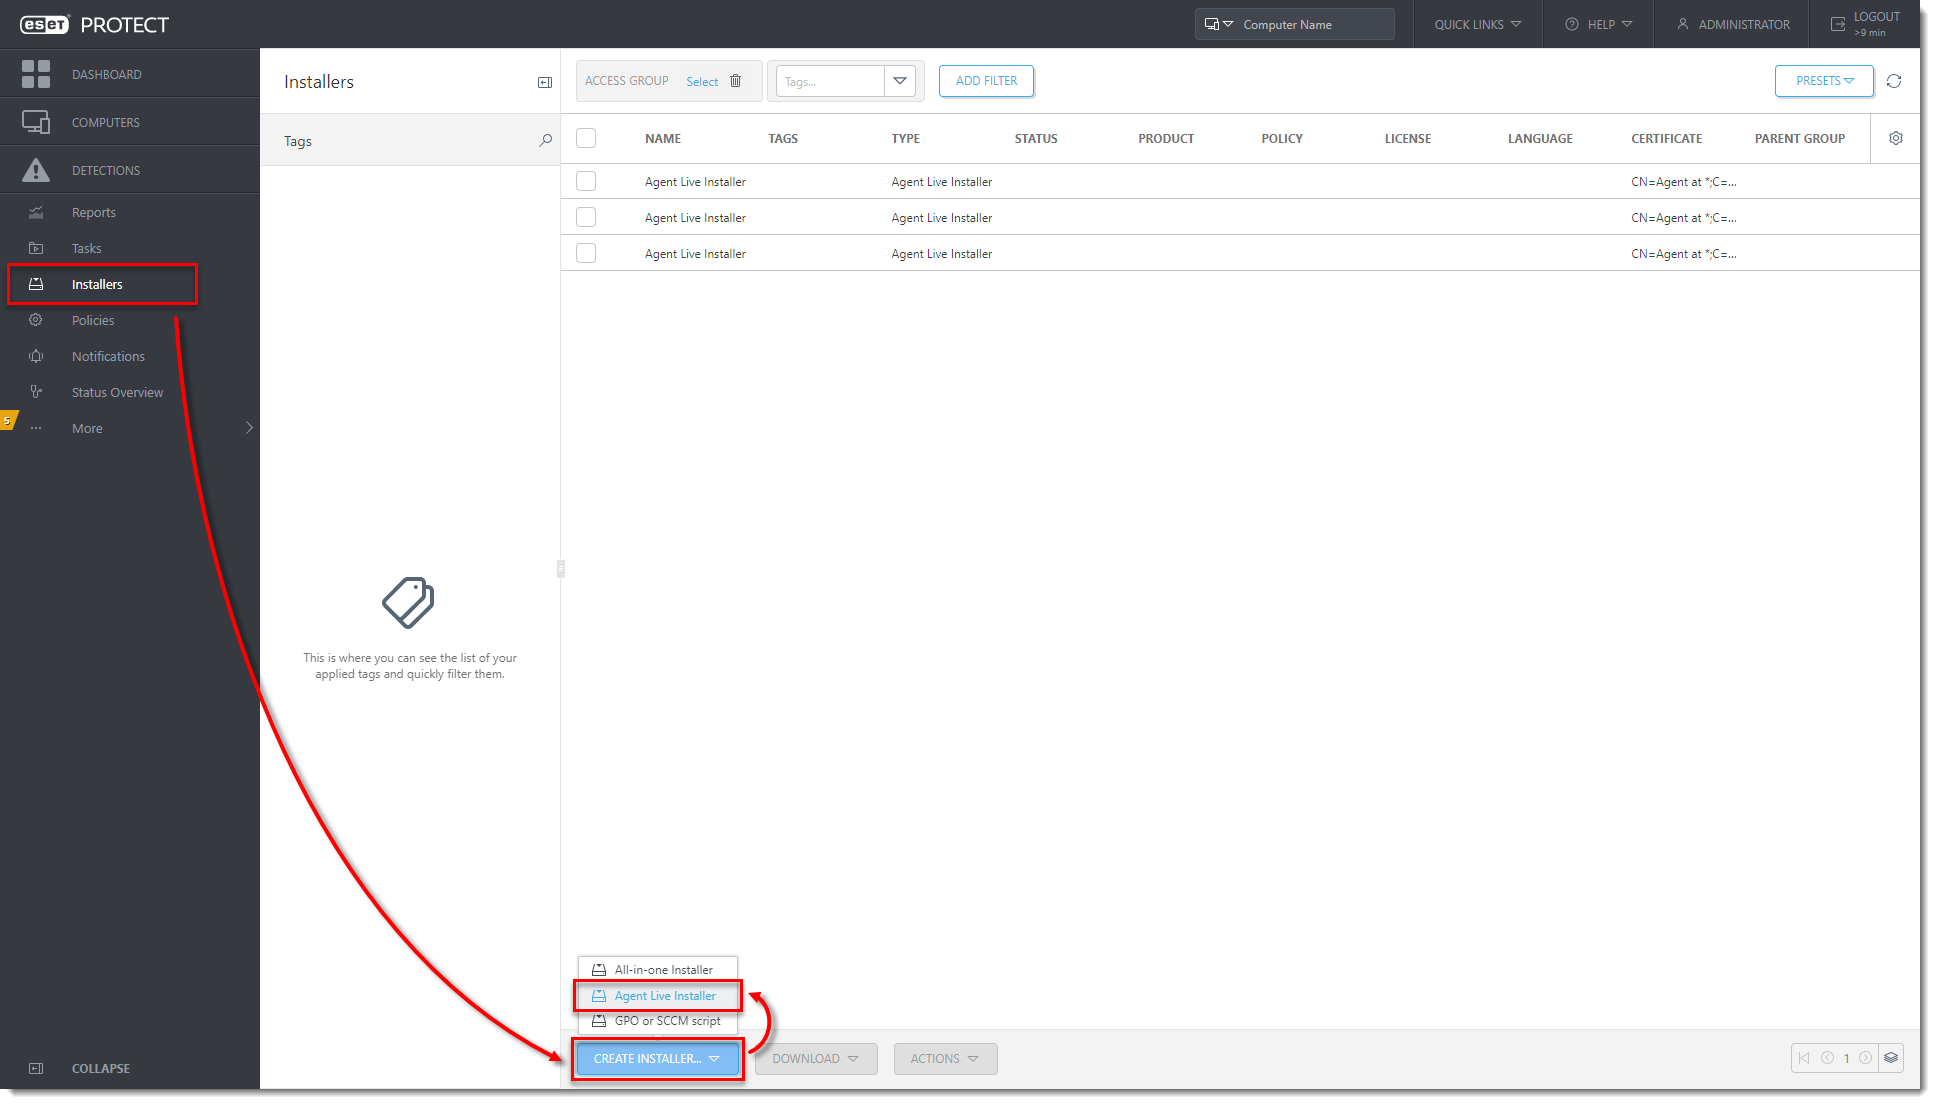
Figure 8-1
Click the image to view larger in new windowClick Configuration and type a Name for the installer. Optionally, type a Description.
Under Parent group (optional), click Select.
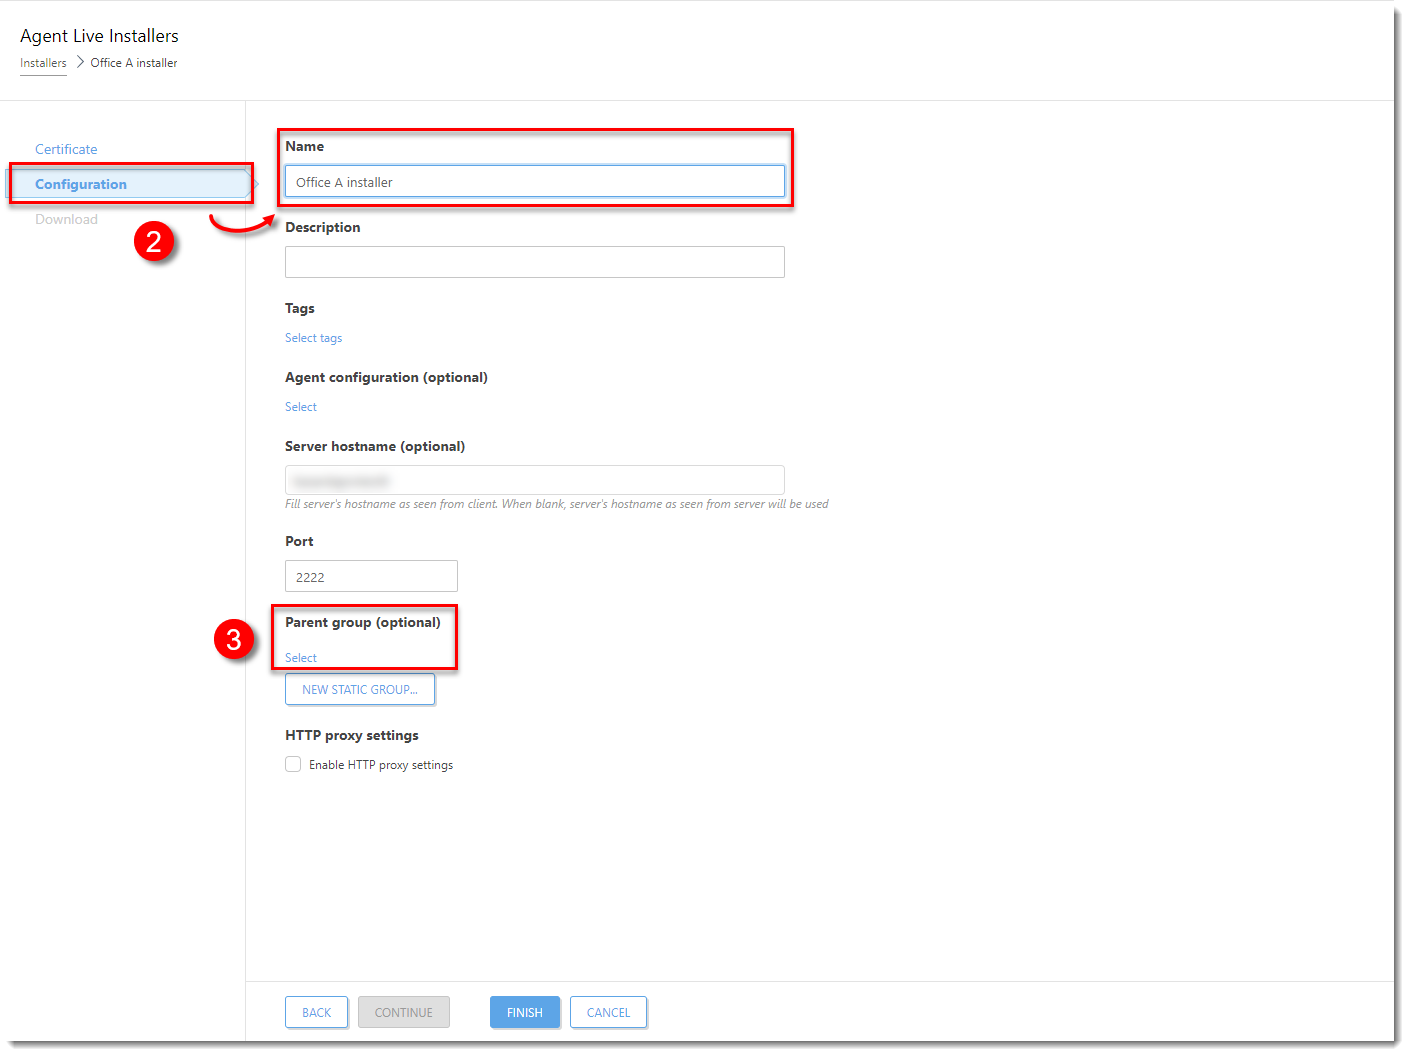
Figure 8-2
Click the image to view larger in new windowSelect the static group that you want the computers to be assigned to and click OK.
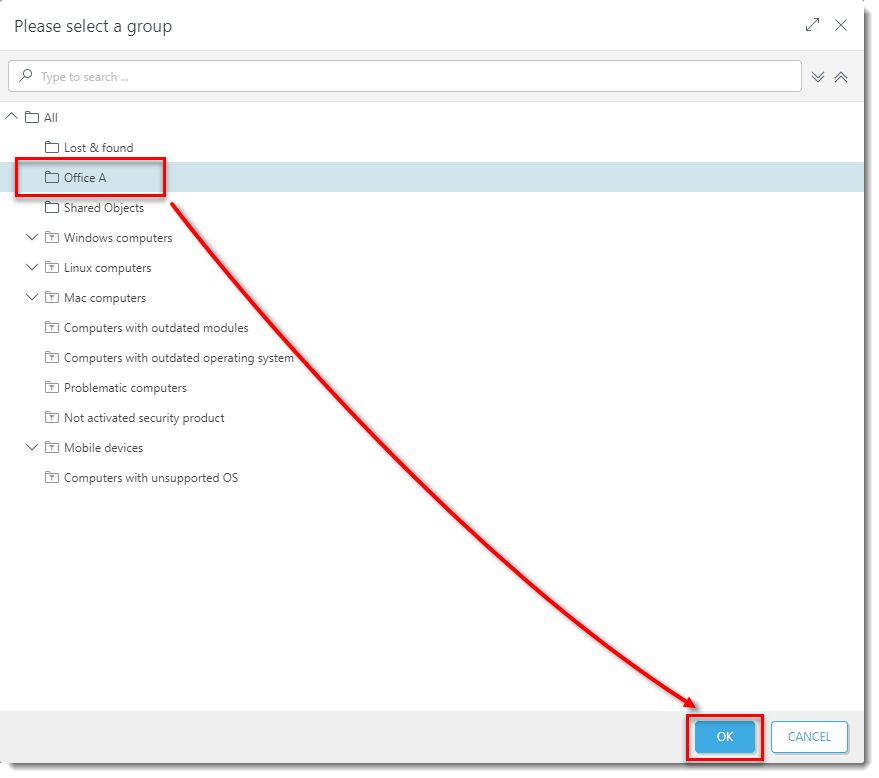
Figure 8-3
Click the image to view larger in new windowClick Finish.

Figure 8-4
Click the image to view larger in new windowClick Download under the Agent Installer or click Close.
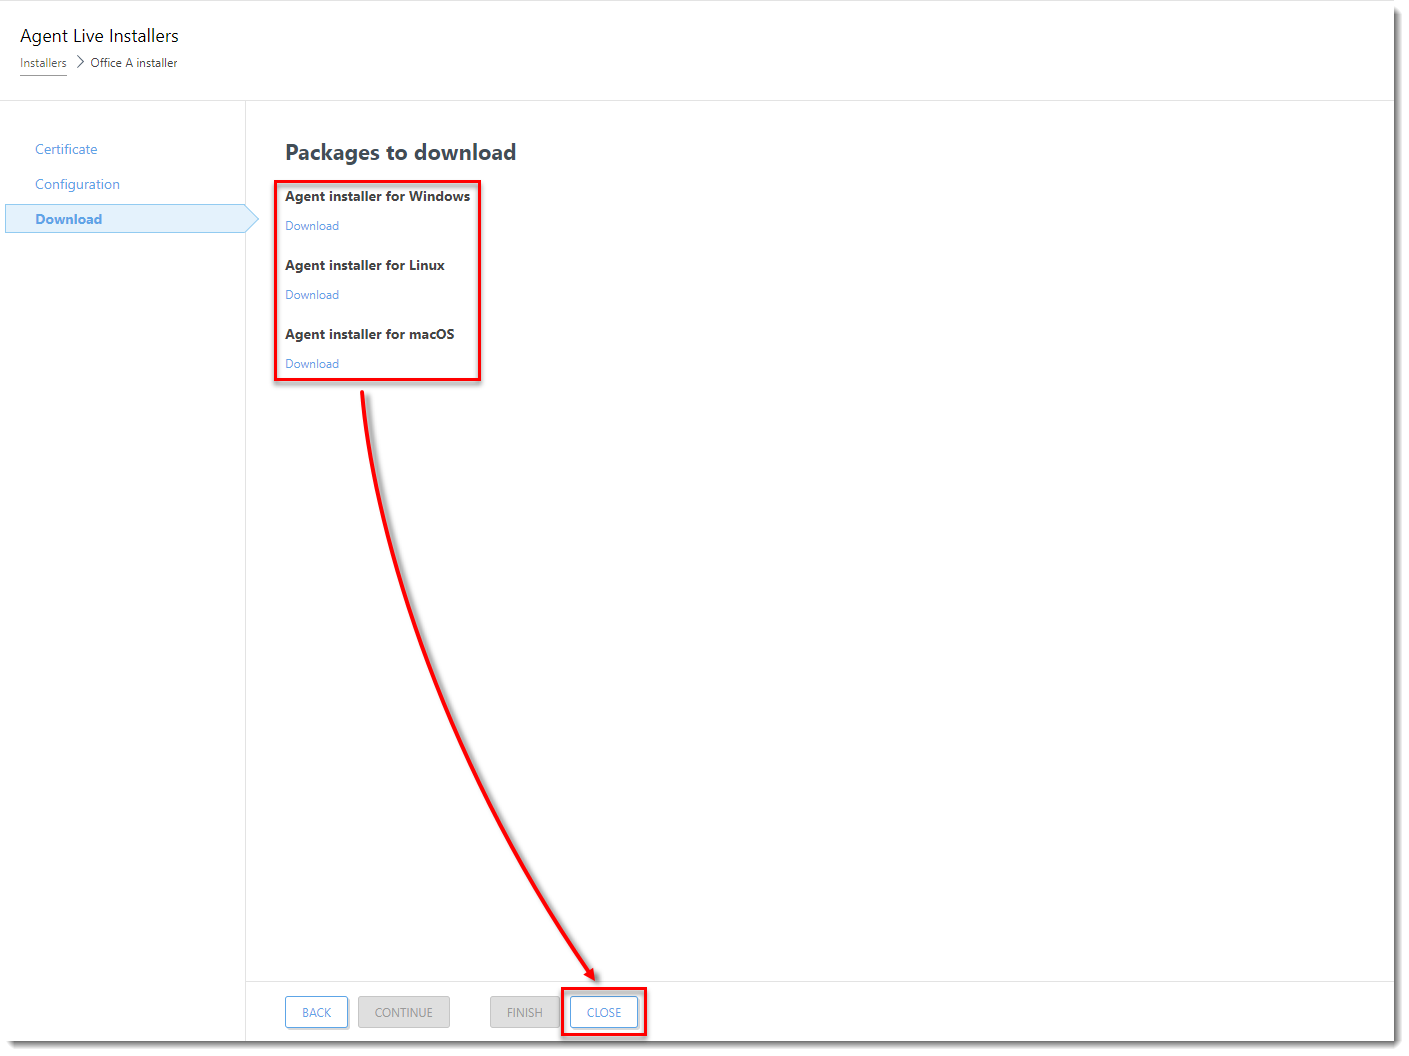
Figure 8-5
Click the image to view larger in new windowTo download the Installer at a later time, click Installers, select the check box next to the installer you want to download, click Download and select one of the operating systems.
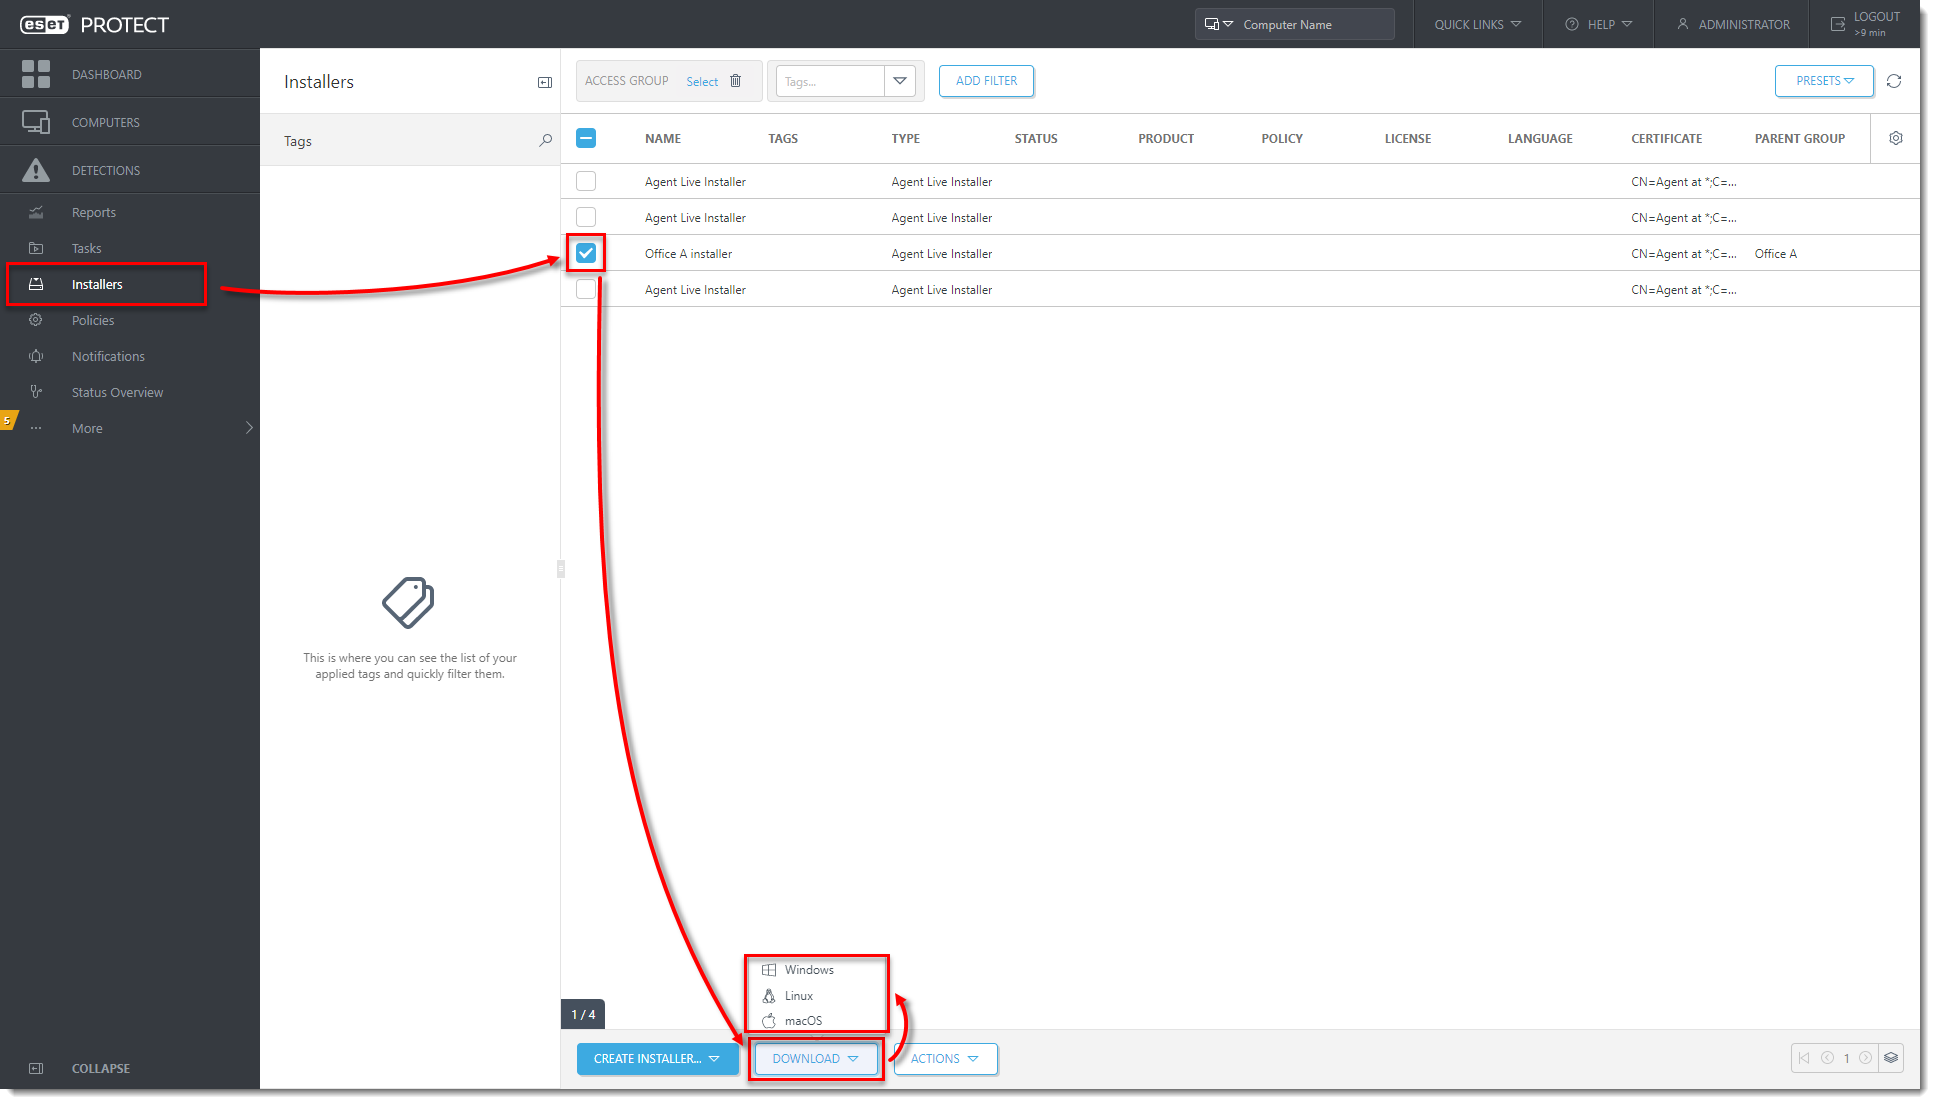
Figure 8-6
Click the image to view larger in new window