Issue
- Upgrade of Agents using the Components Upgrade Task (recommended Agent upgrade method) fails
- Upgrade ESET Management Agents on Linux clients using the ESET PROTECT Run Command task (alternative Agent upgrade method for advanced users).
Solution
Windows users, see the instructions for upgrading Agents on managed Windows computers.
Follow the steps applicable to your environment:
- If you manage both 32-bit and 64-bit Linux computers, follow the steps in both sections below.
- If you manage only 64-bit Linux computers, follow only the steps in Upgrade Agents on 64-bit Linux computers.
- If you do not know whether you manage any 32-bit Linux computers, follow the steps in both sections below.
Upgrade Agents on 32-bit Linux computers:
I. Create a new Dynamic group template for 32-bit Linux systems:
- In the ESET PROTECT Web Console, click More → Dynamic Group Templates → New Template.
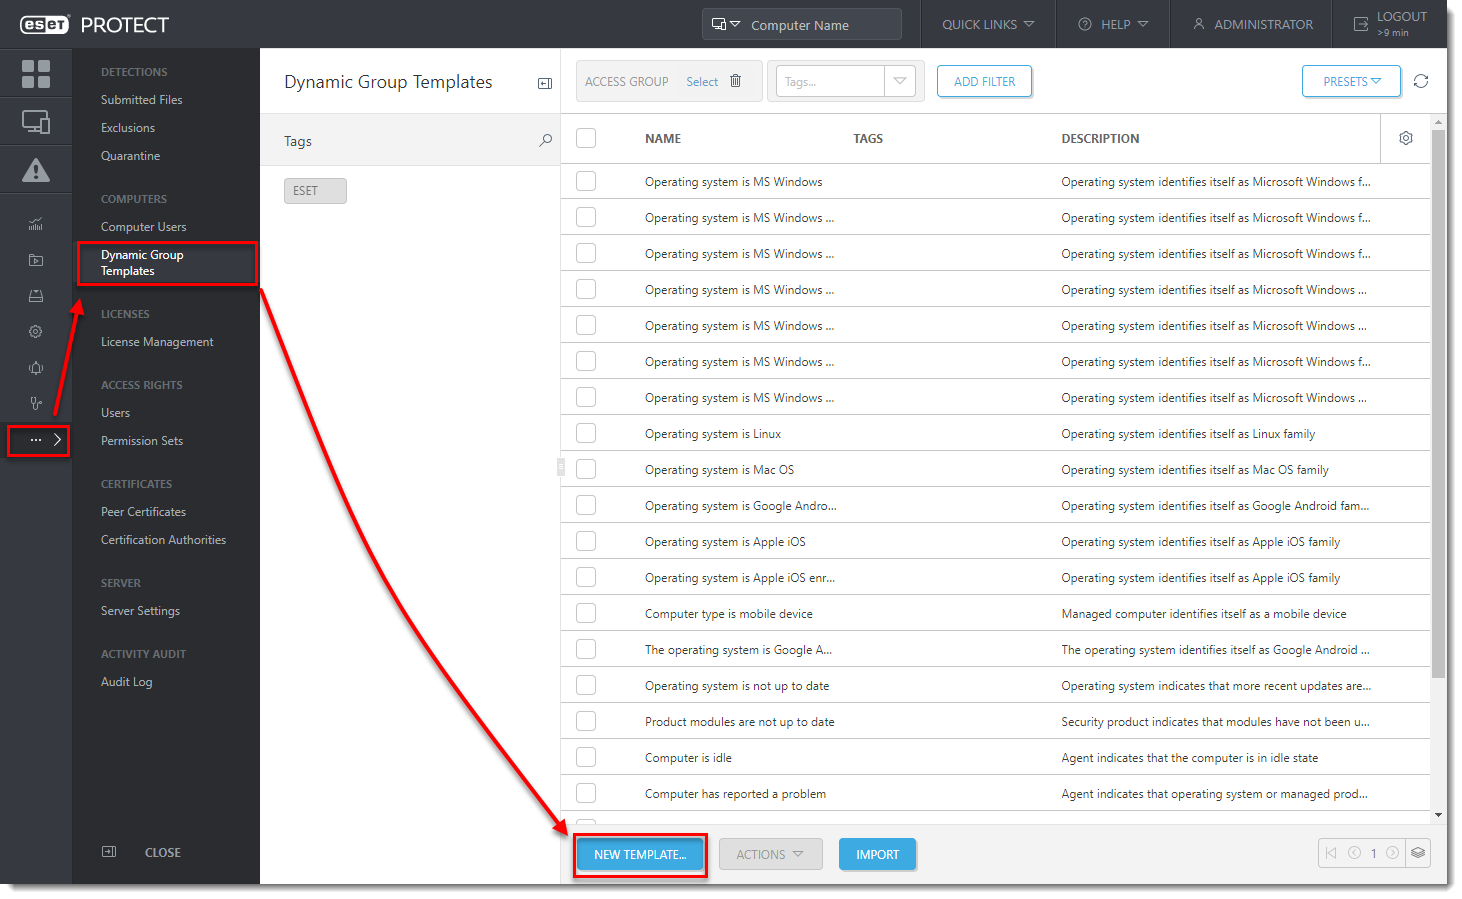
- Type a name and click Expression.
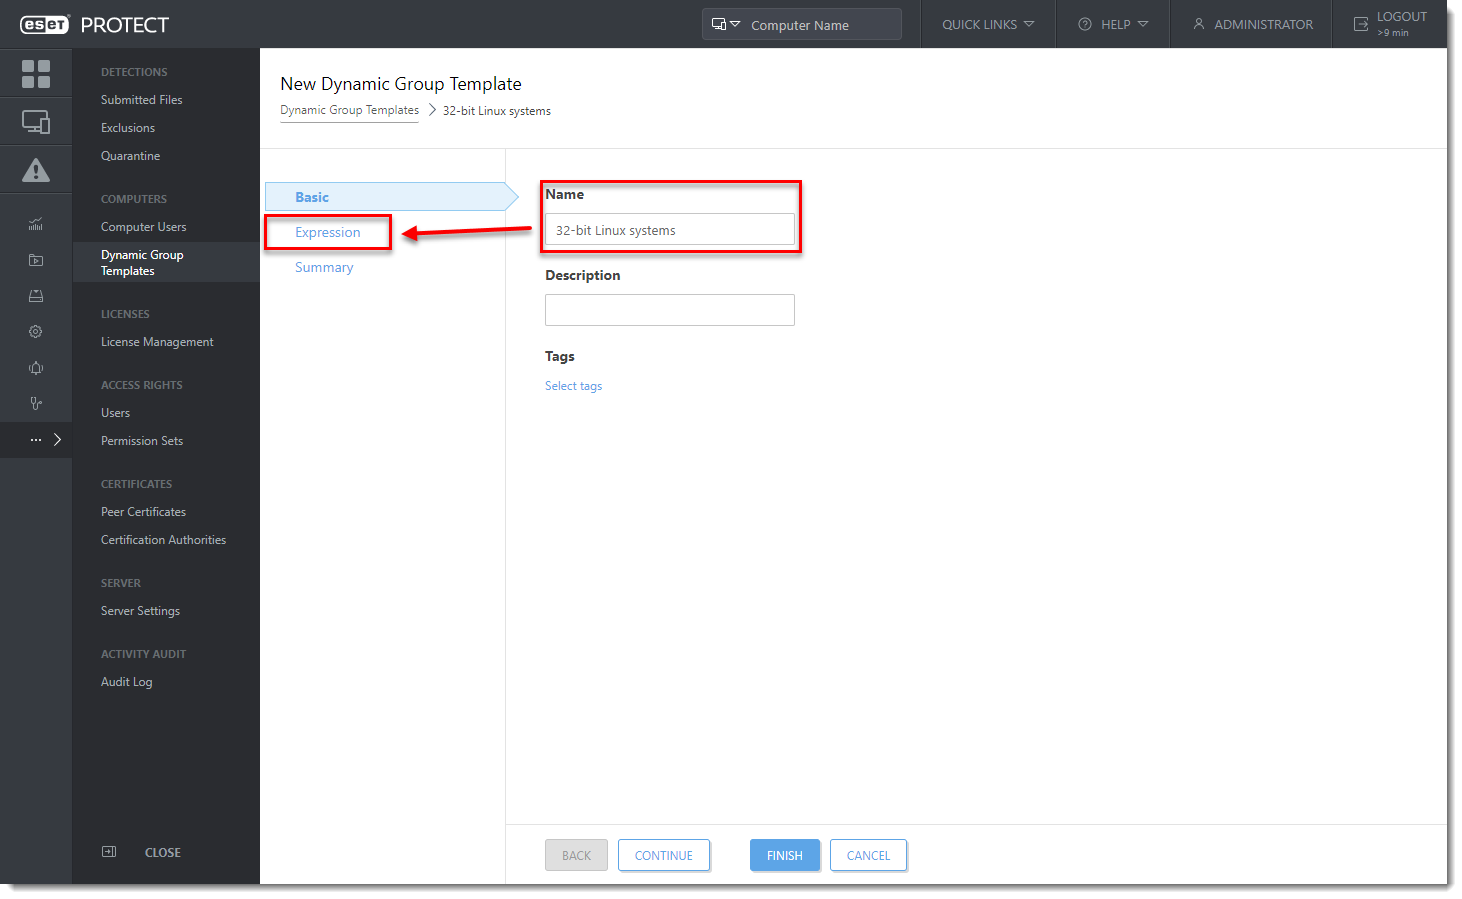
- In the Operation drop-down menu, select AND (All conditions have to be true).
- Add these rules (to add a new rule, click Add rule):
-
- Installed software → Application name → is one of → ESET Management Agent → click Add → ESET Remote Administrator Agent.
- Installed software → Application version → doesn't have prefix → 9.0 (use your current latest version)
- OS edition → OS platform → = (equal) → 32-bit.
- OS edition → OS type → = (equal) → Linux.
- Click Finish.

II. Create a new Dynamic group for 32-bit Linux systems:
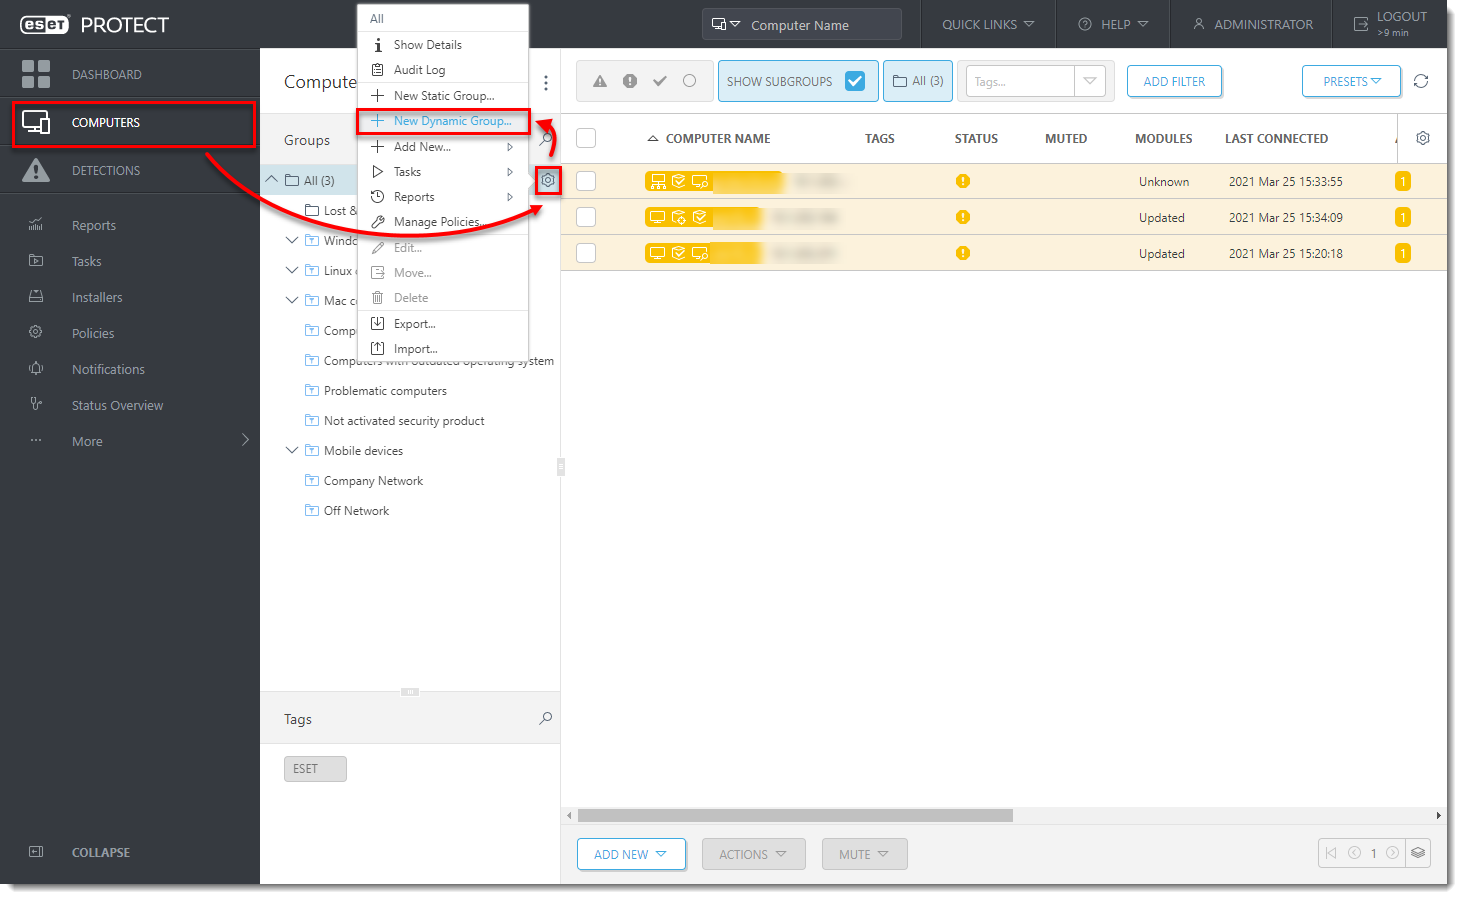
- In the ESET PROTECT Web Console, click Computers, click the gear icon next to ALL group and select New Dynamic Group.
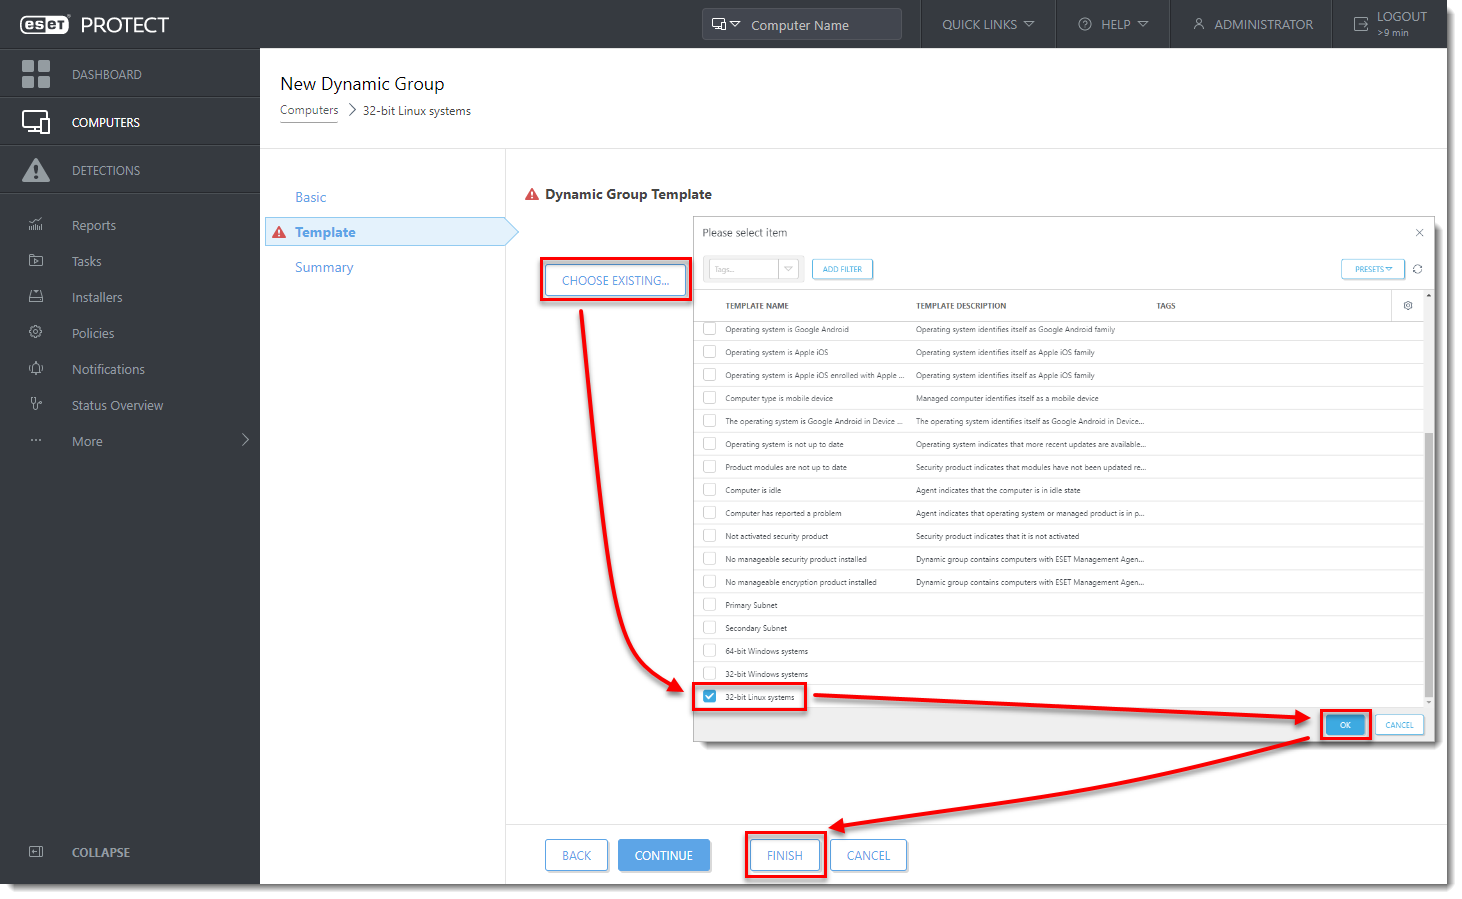
- Type a name and click Template.

- Click Choose existing, assign the Dynamic group template created in Section I and click Finish.
- Wait a few minutes until computers appear in the dynamic group.
III. Create a new Client task for 32-bit Linux systems:
- In the ESET PROTECT Web Console, click Tasks → New → Client Task.
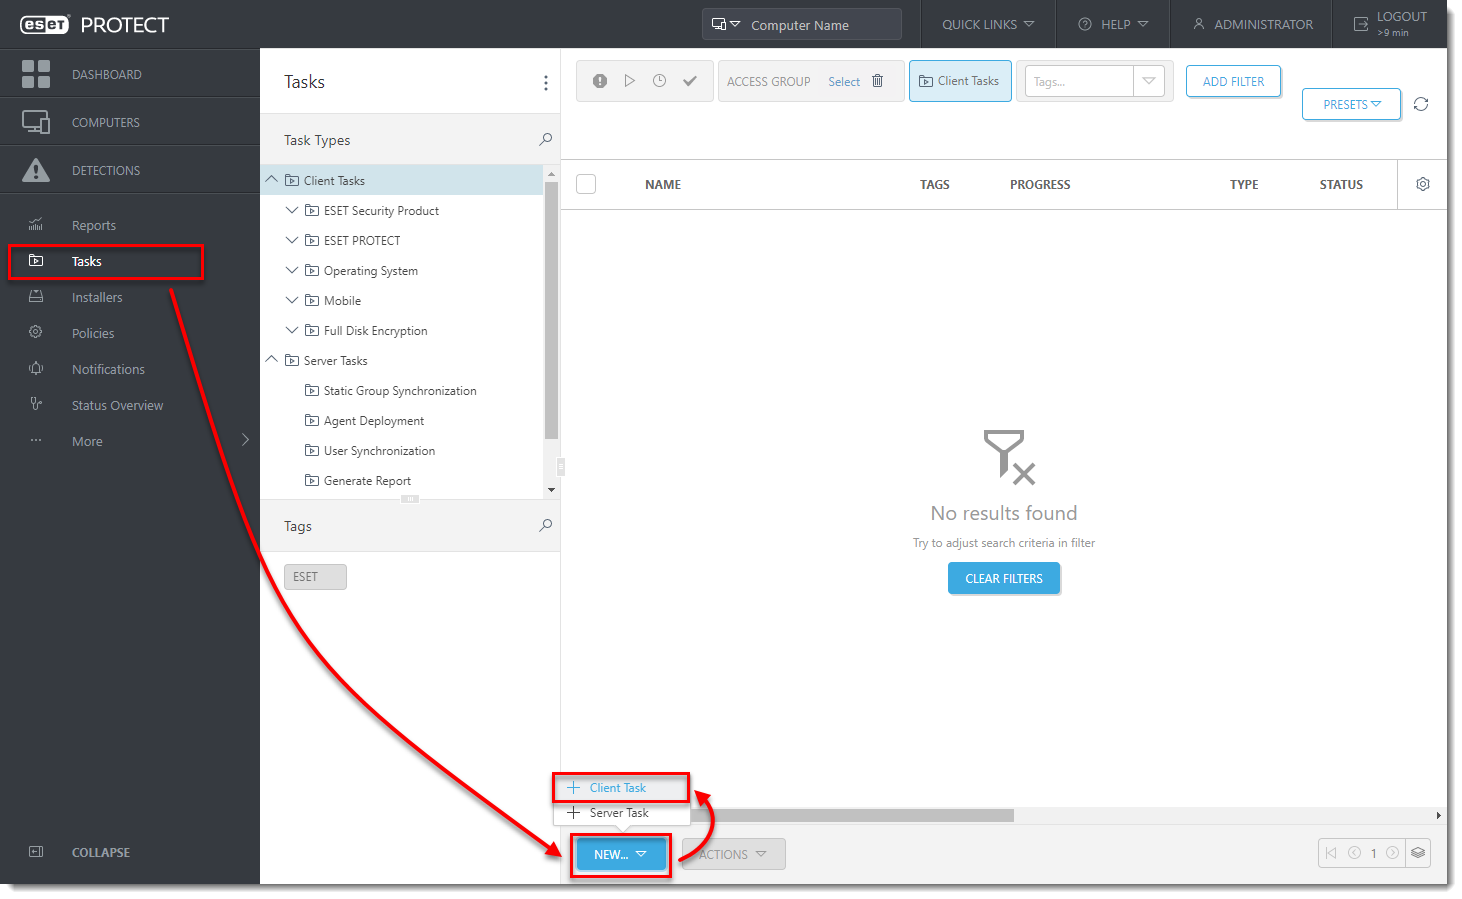
- Type the Name of the task, select Run Command from the Task drop-down menu and click Settings.

- In the Command line to run field, type (replace
SERVERwith your actual server name andsharewith your share name):
HTTP local share command:
wget -q http://SERVER/share/agent-linux-i386.sh -O /tmp/agent-linux-i386.sh && chmod a+x /tmp/agent-linux-i386.sh && /tmp/agent-linux-i386.sh --skip-license &> /tmp/era-agent-upgrade.txt
Request from online command:
wget -q https://download.eset.com/com/eset/apps/business/era/agent/latest/agent-linux-i386.sh -O /tmp/agent-linux-i386.sh && chmod a+x /tmp/agent-linux-i386.sh && /tmp/agent-linux-i386.sh --skip-license &> /tmp/era-agent-upgrade.txt- Create a Trigger for this Client Task and in the Targets section, select the dynamic group for 32-bit Linux systems created in Section II.
There will be a brief period where two versions of the Agent are running on a single client machine. This is only temporary. Create an Outdated applications report to monitor the status of client computers hourly.
Upgrade Agents on 64-bit Linux computers:
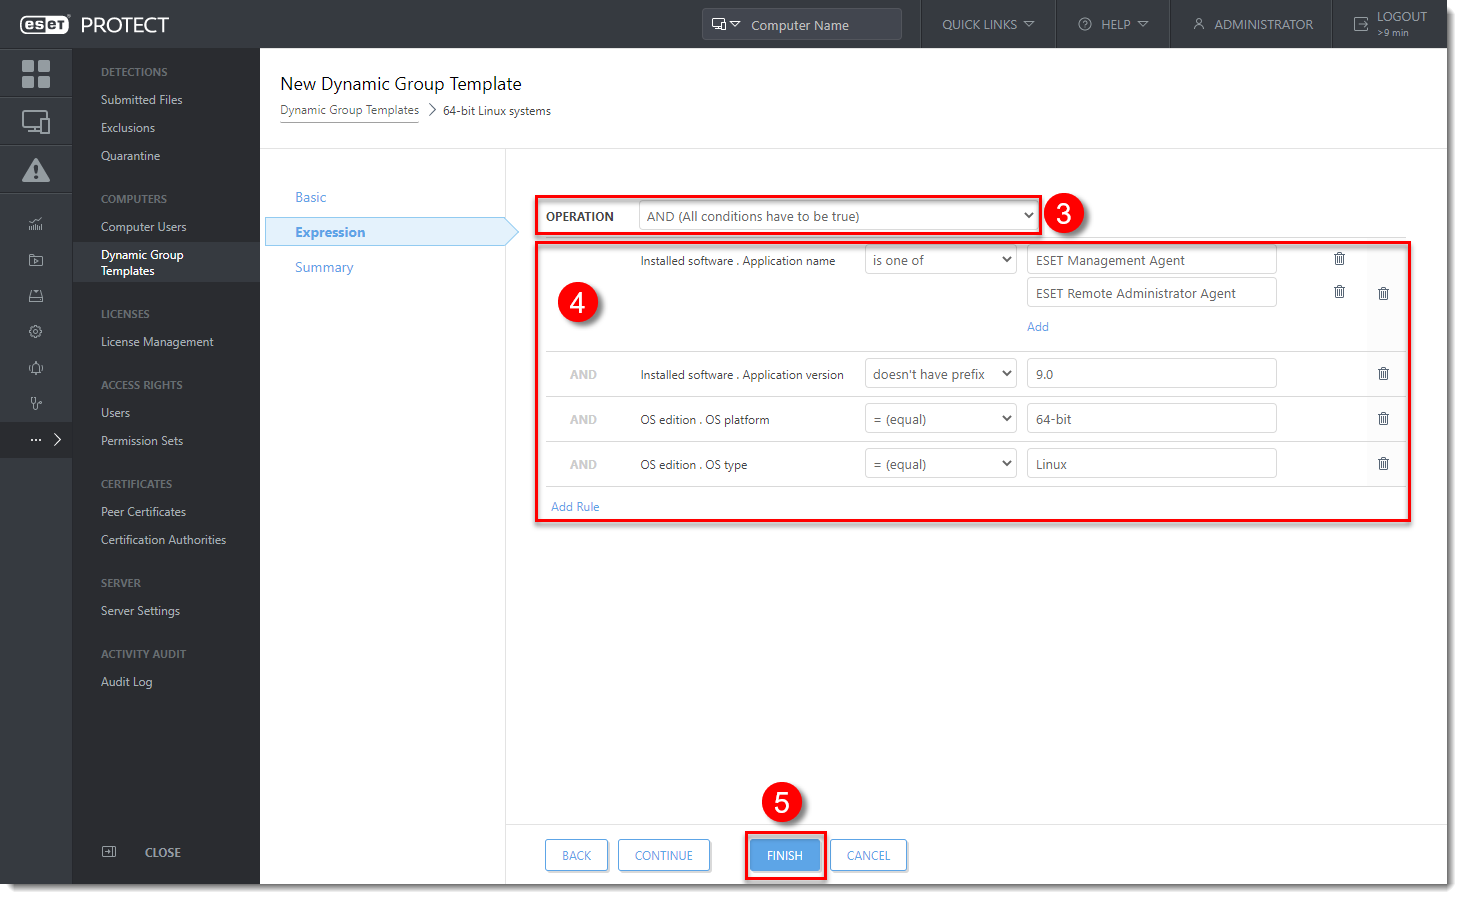
I. Create a new Dynamic group template for 64-bit Linux systems:
- In the ESET PROTECT Web Console, click More → Dynamic Group Templates → New Template.

- Type a name and click Expression.

- In the Operation drop-down menu select AND (All conditions have to be true).
- Add these rules (to add a new rule, click Add rule):
-
- Installed software → Application name → is one of → ESET Management Agent → click Add → ESET Remote Administrator Agent.
- Installed software → Application version → doesn't have prefix → 9.0
- OS edition → OS platform → = (equal) → 64-bit.
- OS edition → OS type → = (equal) → Linux.
- Click Finish.
II. Create a new Dynamic group for 64-bit Linux systems:
- In the ESET PROTECT Web Console, click Computers, click a gear icon next to ALL group and select New Dynamic Group.
- Type a name and click Template.

- Click Choose existing, assign the Dynamic group template created in Section I and click Finish.
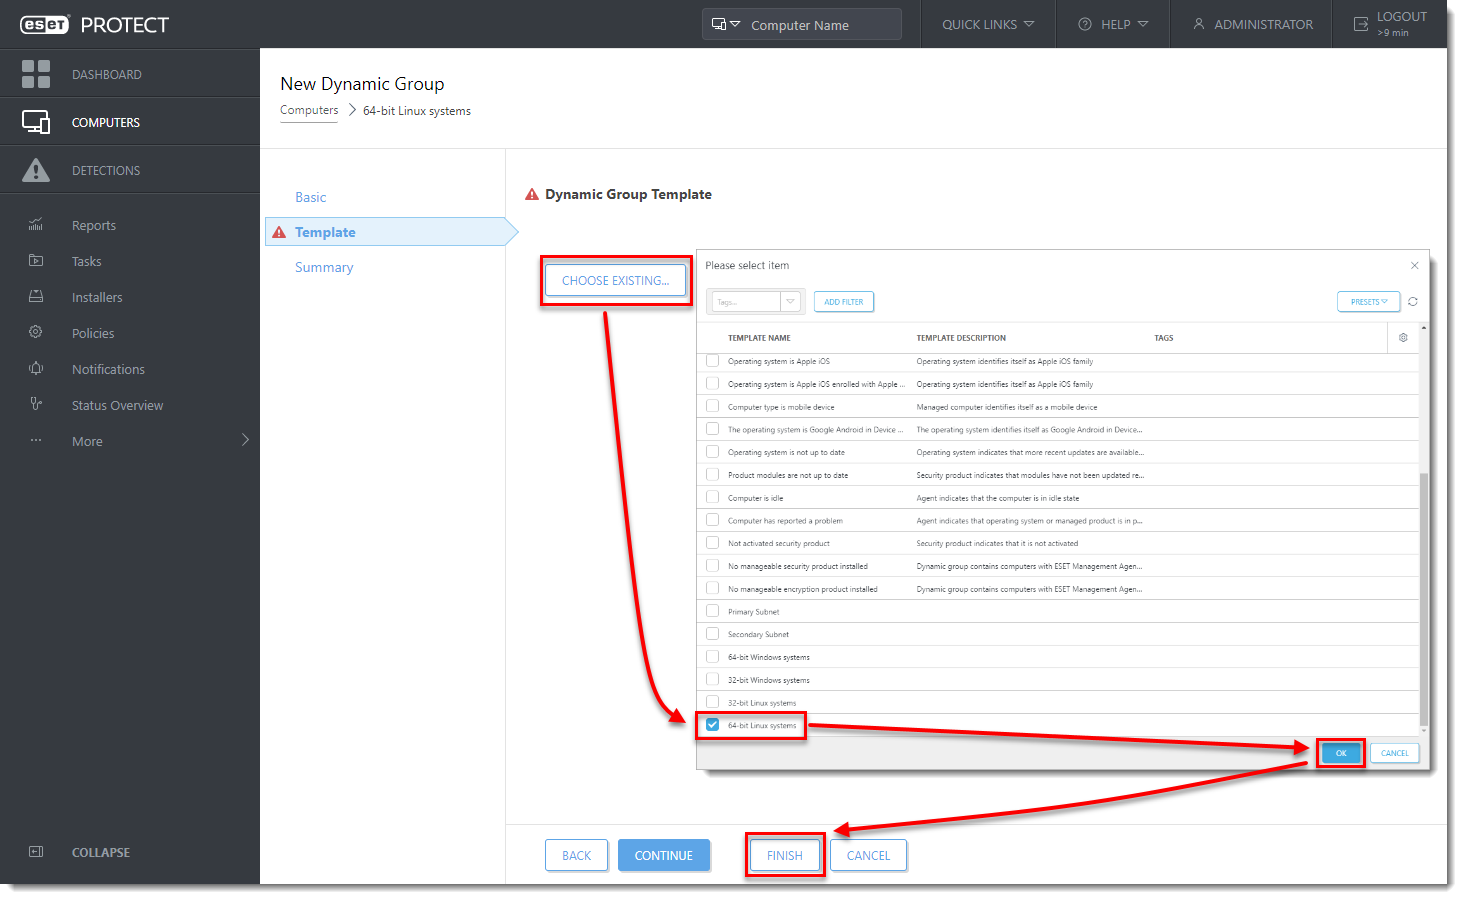
- Wait a few minutes until computers appear in the dynamic group.
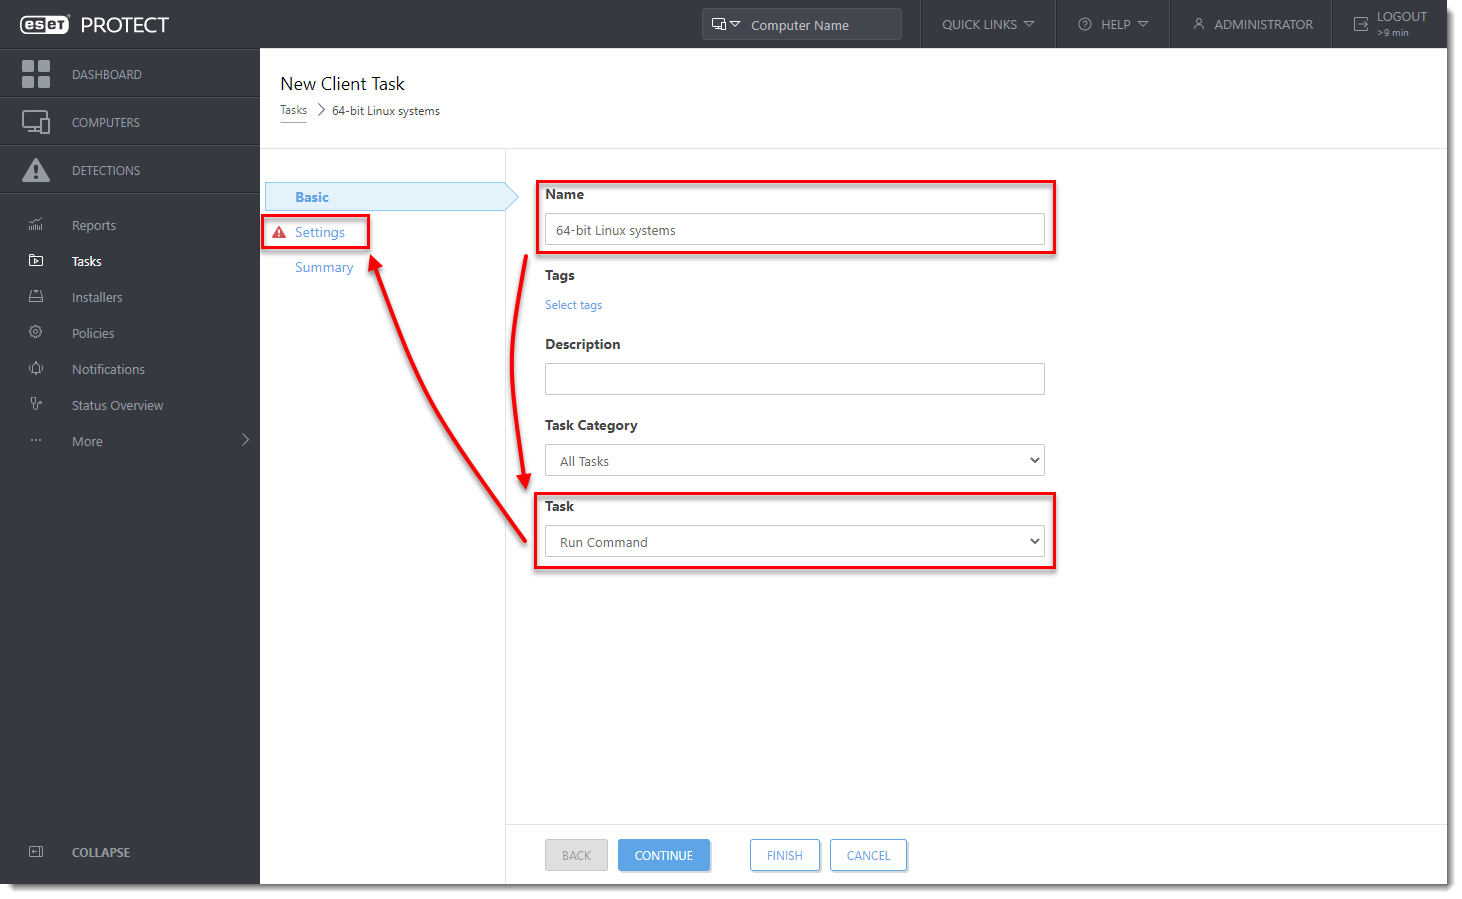
III. Create a new Client task for 64-bit Linux systems:
- In the ESET PROTECT Web Console, click Tasks → New → Client Task.

- Type the Name of the task, select Run Command from the Task drop-down menu and click Settings.
- In the Command line to run field, type (replace
SERVERwith your actual server name andsharewith your share name):
HTTP local share command:
wget -q http://SERVER/share/agent-linux-x86_64.sh -O /tmp/agent-linux-x86_64.sh && chmod a+x /tmp/agent-linux-x86_64.sh && /tmp/agent-linux-x86_64.sh --skip-license &> /tmp/era-agent-upgrade.txt
Request from online command:
wget -q https://download.eset.com/com/eset/apps/business/era/agent/latest/agent-linux-x86_64.sh -O /tmp/agent-linux-x86_64.sh && chmod a+x /tmp/agent-linux-x86_64.sh && /tmp/agent-linux-x86_64.sh --skip-license &> /tmp/era-agent-upgrade.txt- Create a Trigger for this Client Task and in the Targets section, select the dynamic group for 64-bit Linux systems created in Section II.
There will be a brief period where two versions of the Agent are running on a single client machine. This is only temporary. Create an Outdated applications report to monitor the status of client computers hourly.