Issue
- Stop all On-demand scans on Windows Server with ESET Shell (eShell)
- Stop all On-demand scans on Windows Server in ESET PROTECT
Solution
Stop all On-demand scans on Windows Server with ESET Shell
On the Windows Server system running ESET server security products, click the Start menu
 icon, expand the ESET folder and click ESET Shell.
In the ESET Shell window, type one of the following commands and press Enter to stop all file scans:
- To stop all file scans, type
stop computer scans on-demand scan all - To stop all email database scans in ESET Server Security, type
stop server on-demand database-scan scan all
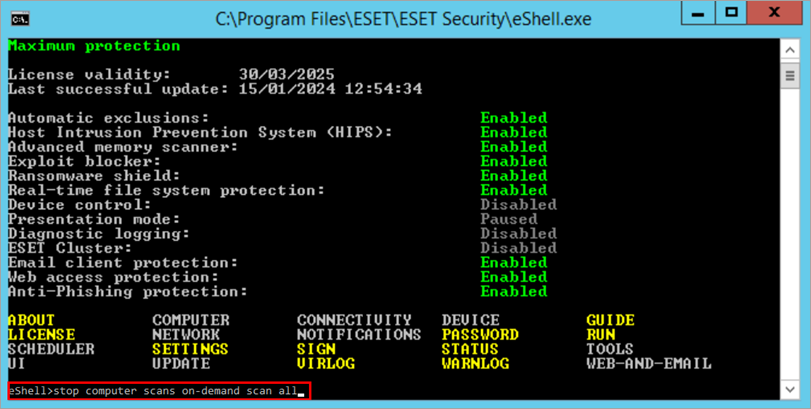
Figure 1-2 - To stop all file scans, type
A notification window will open that confirms that On-demand scans are stopped.
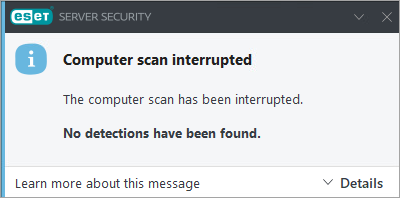
Figure 1-3
Stop all On-demand scans in ESET PROTECT
Click Tasks → New → Client Task.
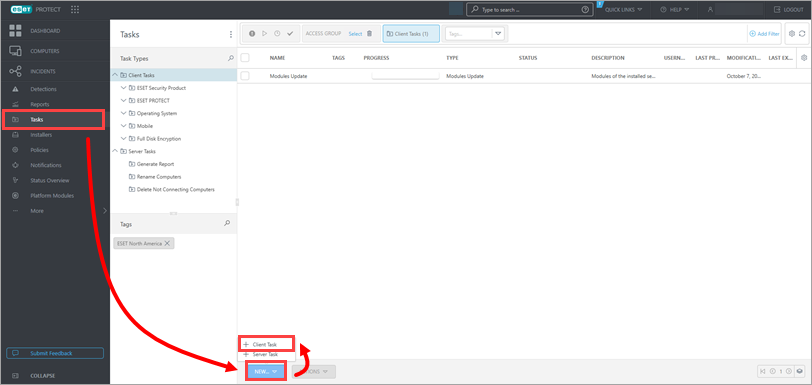
Figure 2-1 In the Name field, type a name for your task. From the Task Category drop-down menu, select All Tasks and from the Task drop-down menu, select Run Command.
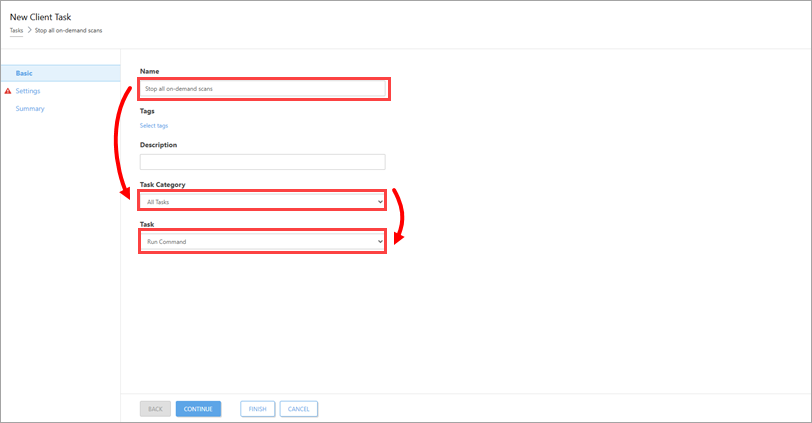
Figure 2-2 Click Settings and in the Command line to run field, type one of the following commands and click Finish:
- To stop all file scans, type
eshell stop computer scans on-demand scan all - To stop all email database scans in ESET Mail Security, type
eshell stop server on-demand database-scan scan all
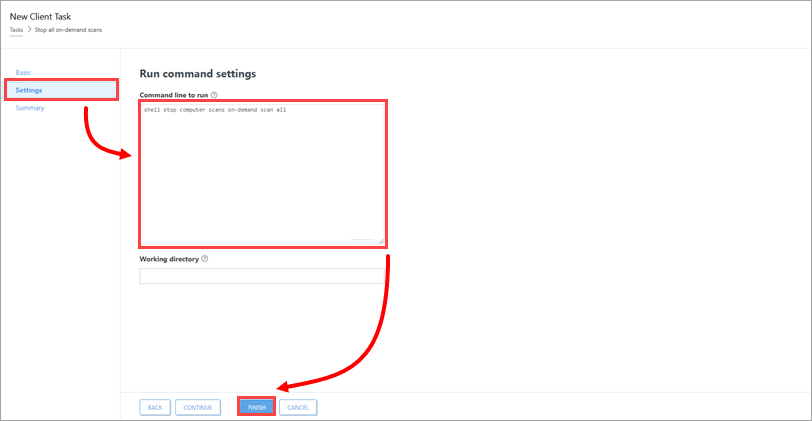
Figure 2-3 - To stop all file scans, type
To execute the task, create a trigger and add a target to the Windows Server.