Issue
Solution
Mail Server for scanning in ESET Mail Security for Microsoft Exchange Server
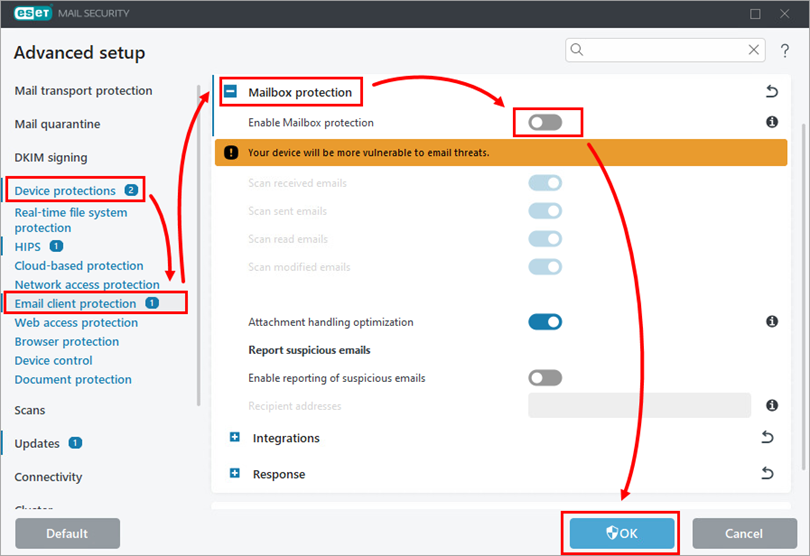
Click Scan → Mailbox database scan.
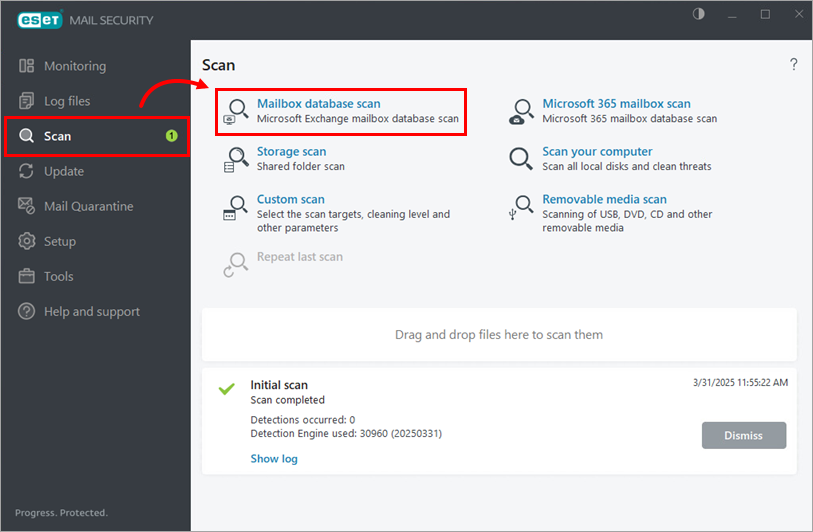
Figure 1-1
Click Edit next to Mailboxes.
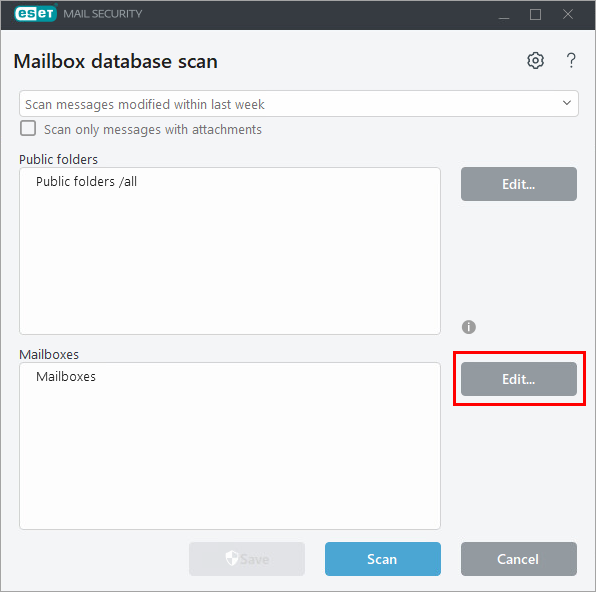
Figure 1-2
Select the check box next to Servers to select the mailbox server you want to scan and click OK.
Figure 1-3
Click Scan.

Figure 1-4
Mail Server for scanning in ESET PROTECT or ESET PROTECT On-Prem
Click Policies → New Policy.
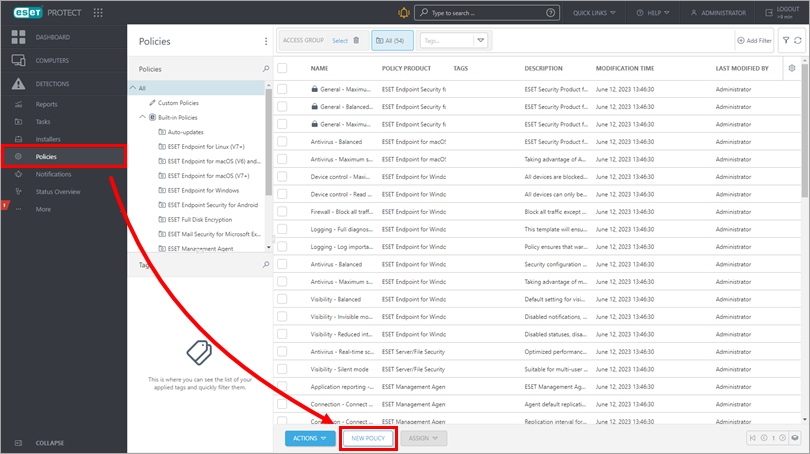
Figure 2-1 Type a Name for your policy and click Continue.

Figure 2-2 Select ESET Mail Security for Microsoft Exchange (V6+) from the drop-down menu.
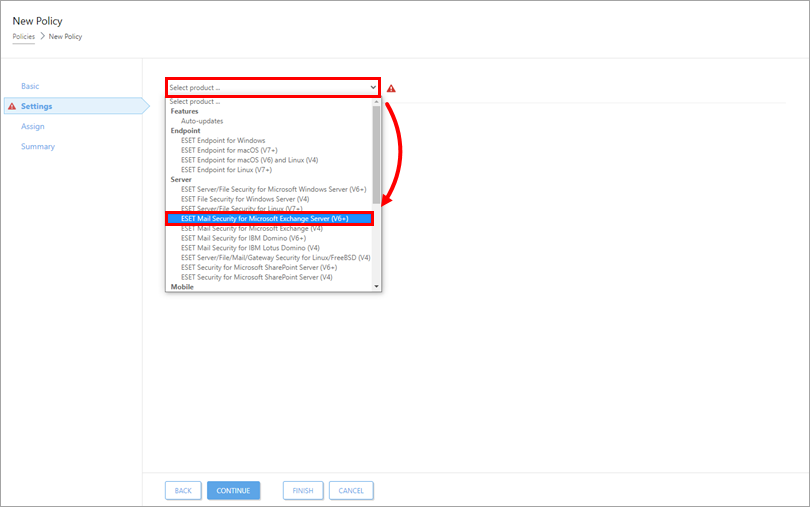
Figure 2-3 Click Server → On-demand mailbox database scan. By default, ESET Mail Security for Microsoft Exchange Server will scan your primary mail server. Leave the Host address and Username fields blank when using these settings.
To target a different mail server, access the computer with ESET Mail Security for Microsoft Exchange Server and navigate to Advanced setup → Server → On-demand mailbox database scan and type in the Host address and Username for the server you want to scan.
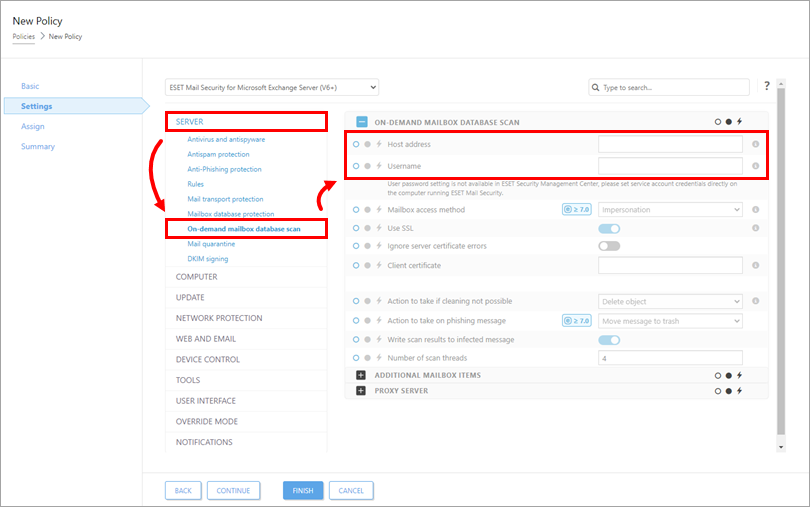
Figure 2-4 Click Tools → Scheduler and click Edit.

Figure 2-5 Click Add. Type a Task name, select Mailbox database scan from the Task type drop-down menu, and click Next.
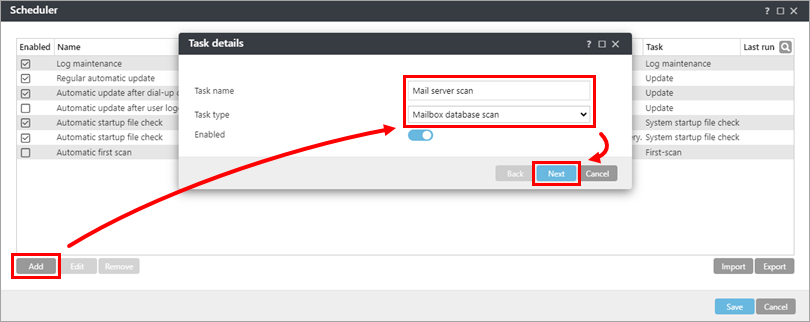
Figure 2-6 Select how often you want the task to run and click Next.

Figure 2-7 Next to Task execution, select a time and date for the task to run and click Next.

Figure 2-8 Select Immediately, if time since last run exceeds a specified value (hours), type 24 into the respective field and click Next.

Figure 2-9 Select Scan all messages from the Scan threshold drop-down menu and select your preferences for scanning message bodies and attachments. Click Finish.
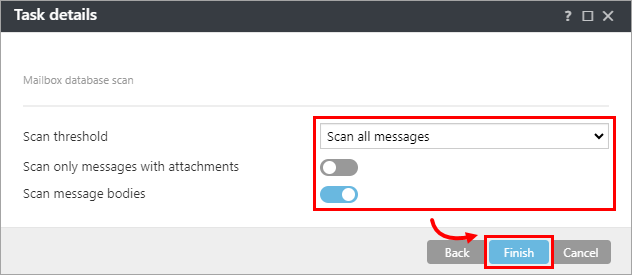
Figure 2-10 Your new scheduled scan will be displayed in the Scheduler window. Click Save → Finish.

Figure 2-11