Solution
Log in to the EEE Server with an administrator account that has the relevant permissions.
Click Organization → Active Directory → Settings.

Figure 1-1
Click the image to view larger in new windowSelect the check box next to Enable Active Directory Synchronization and type your domain name, administrator username and password.
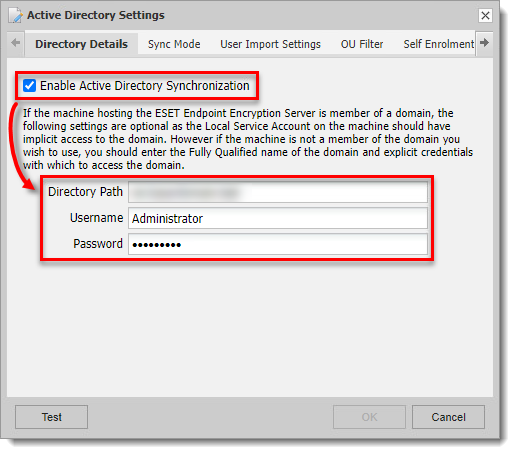
Figure 1-2
Click the image to view larger in new windowClick Sync Mode and from the drop-down menu, select one of the options to import the users.
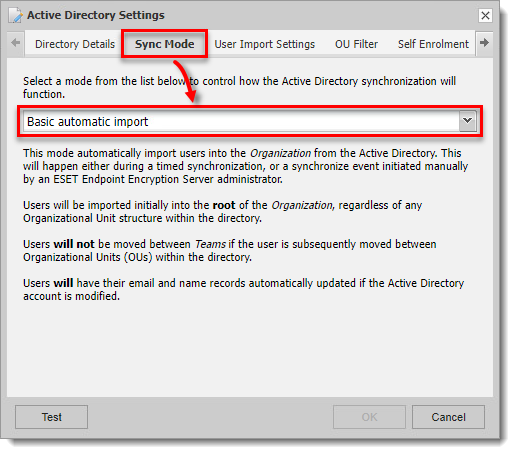
Figure 1-3
Click the image to view larger in new window
Manual Import Only
Manual Import Only mode will not automatically import users into the organization from the Active Directory. You must manually select users and import them to a team or to the root of your organization.

Click the image to view larger in new window
Basic Automatic Import
Basic Automatic Import imports users to the root of the organization. In the example below, users were added to the Users root after an import process using Basic Automatic Import.

Click the image to view larger in new window
The users with the Linked domain user status were successfully synchronized.

Click the image to view larger in new window
Automatic with Team import
Automatic with Team import imports users into a Team defined by their Distinguished Name (DN), which reflects Organizational Units (OUs).

Click the image to view larger in new window
Click User Import Settings and from the drop-down menu, select the attribute that will be used to specify the user's email address in the EEE Server.
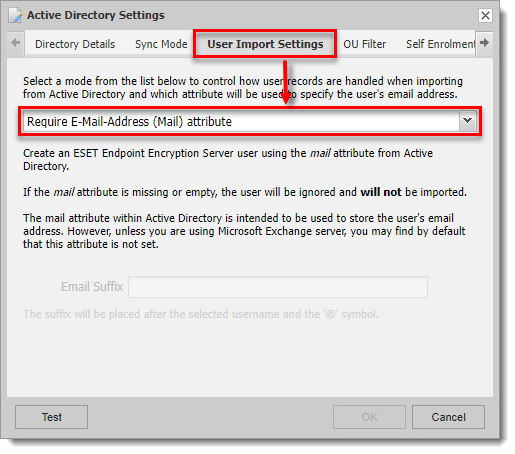
Figure 1-8
Click the image to view larger in new windowTo link a license to users added from Active Directory click Self Enrolment, select the check box next to Enable Self Enrolment, click Choose Licence and select your EEE license.
For more information, see Self Enrollment in ESET Endpoint Encryption.

Figure 1-9
Click the image to view larger in new windowTo add specific users from a Security Group configured in Active Directory, click Advanced and from the Security Group drop-down menu, select the group you want to sync.
You can also use the LDAP Query Filter to synchronize specific Organizational Units.
Click the Test button to test read from your directory. You may need to click OK to save the settings, open the settings window and click Test.

Figure 1-10
Click the image to view larger in new windowThe test results display how many records in total the EEE Server has access to. The first 15 records indicate if the user would be imported into the EEE Server or would be ignored. If the user will be imported it will also display the email address that will be assigned to that user.
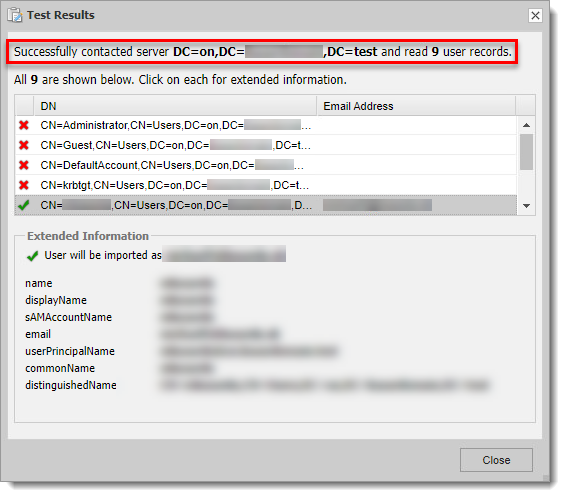
Figure 1-11
Click the image to view larger in new windowWhen you are satisfied with the results, click Close to close the results window. Click OK to save the settings. Active Directory synchronization is now active.
Click Resync to initiate the sync. If you are using an auto-sync mode it will also sync automatically in the background on a timer that can be changed in the EEE Server Control Panel.
When a sync has occurred you will see the results in the Active Directory tab. The users can be manually imported, or will already have been imported if one of the auto modes was selected.
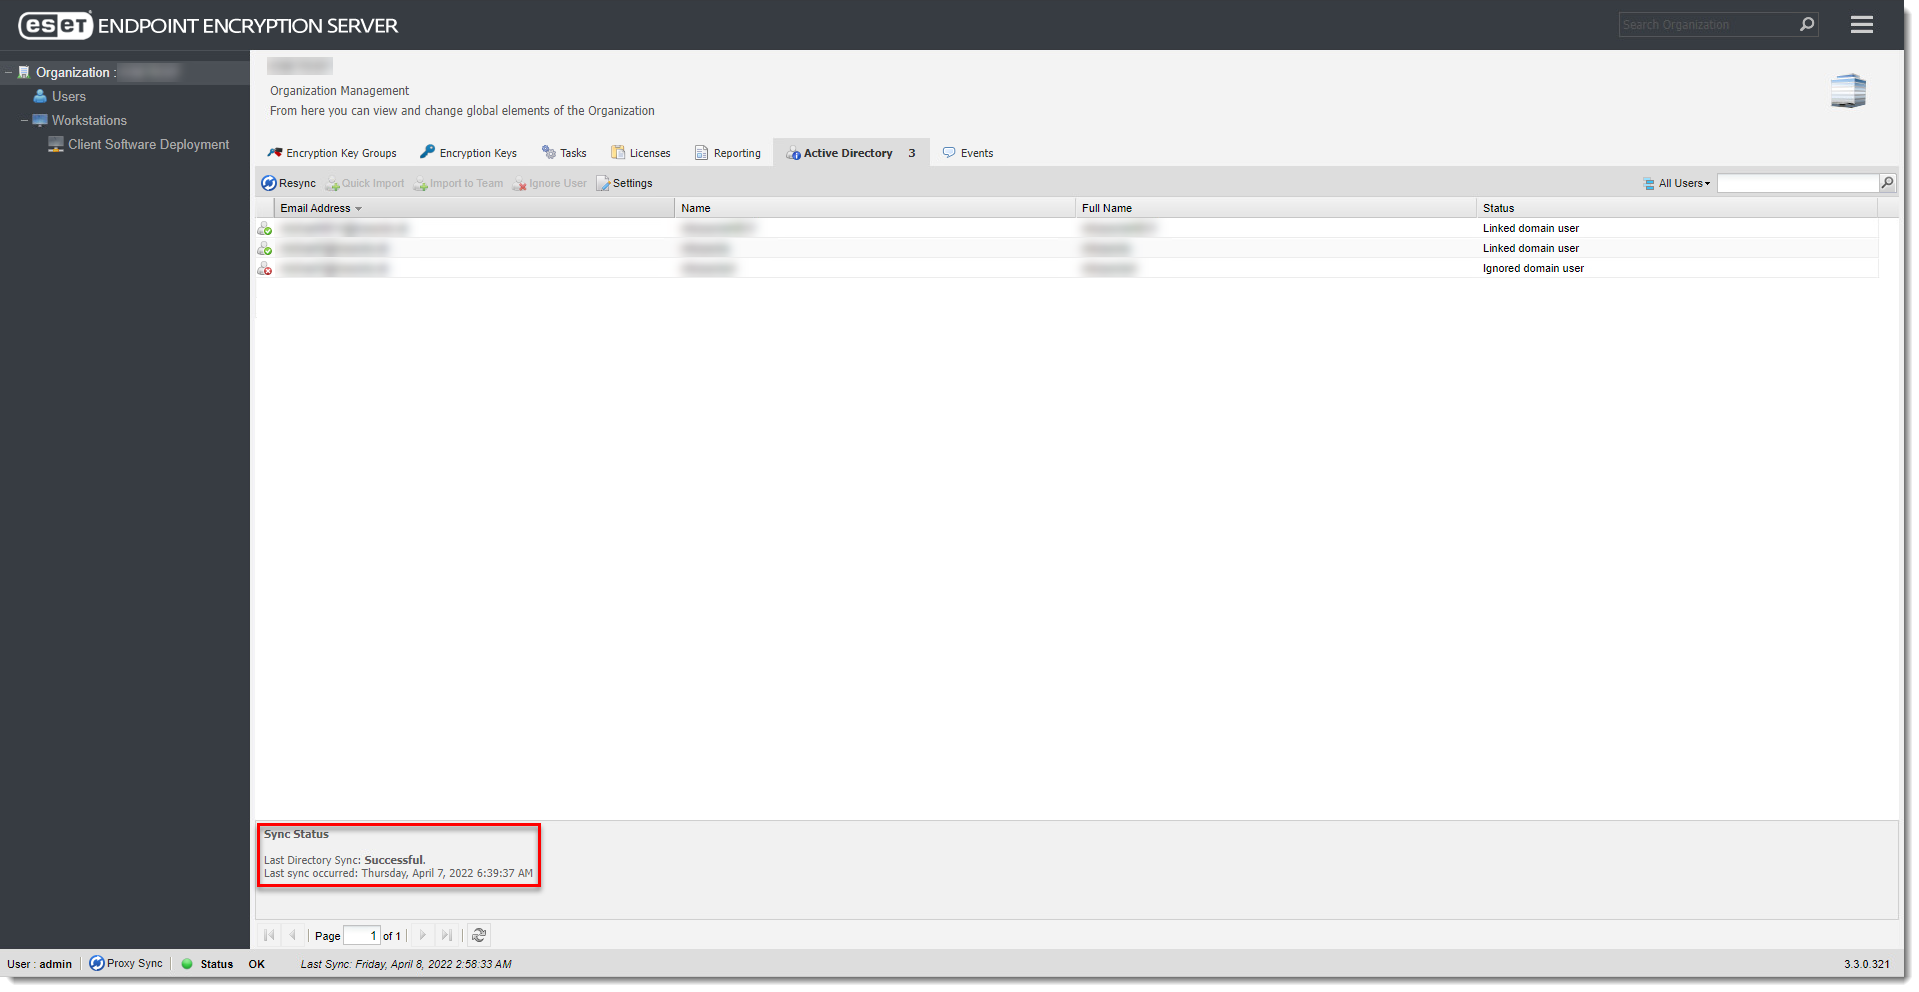
Figure 1-12
Click the image to view larger in new window