Issue
- ESET Communication Protocol (ECP) logs from your failed product activation have been requested by ESET Technical Support
- You could not activate your ESET Windows home or small office product
- Enable advanced product activation logging
- Generate product activation logs using infoWebClientFlags.zip
Solution
Related solutions: Business users
Enable advanced product activation logging
-
Open the main program window of your ESET Windows home or small office product.
-
Press the F5 key to access Advanced setup.
-
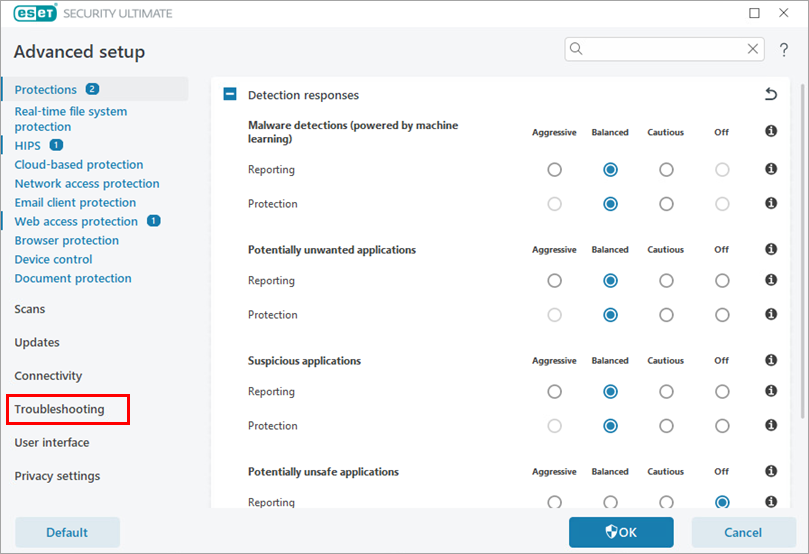
Click Troubleshooting.
-
Expand Advanced Logging. Click the toggle next to Enable Licensing advanced logging and click OK.

-
Attempt to activate your ESET product again to reproduce the error and generate the log.
-
Navigate to the ECP folder, located at
C:\ProgramData\ESET\ESETSecurity\Diagnostics\ECP. You may need to make hidden items visible to see the folder. -
Select all the log files and right-click them. From the displayed context menu, select Compress to → ZIP File to create a
.zipfile. -
Share the
.ziplog file with ESET Technical Support. We will review the files and advise you of the best course of action.- If you have already opened an ESET Technical Support case, respond to the email from ESET Technical Support and attach the
.ziplog file. - If you have not yet contacted ESET Technical Support, open a case and attach the
.ziplog file to the case.
- If you have already opened an ESET Technical Support case, respond to the email from ESET Technical Support and attach the
Generate product activation logs using infoWebClientFlags.zip
-
Open the main program window of your ESET Windows home or small office product.
-
Press the F5 key to access Advanced setup.
-
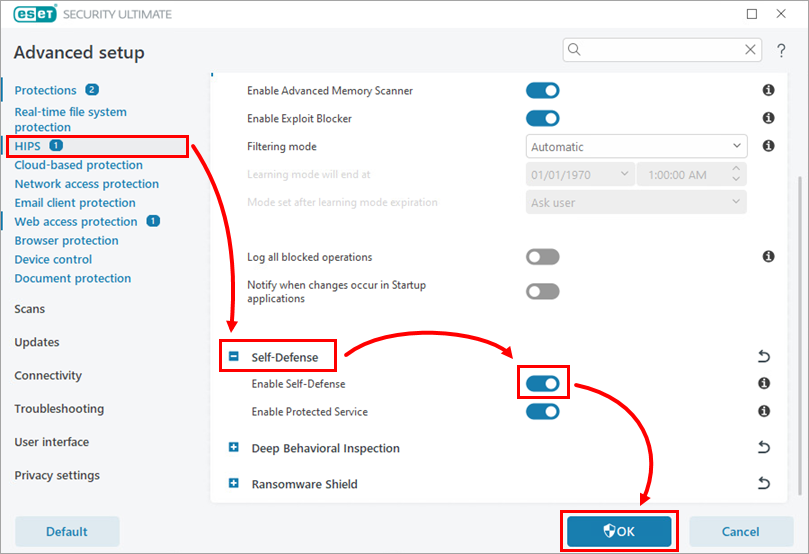
Click HIPS and expand Self-Defense. Click the toggle next to Enable Self-Defense to disable it and click OK.
-
Restart your computer.
-
Double-click the downloaded
infoWebClientFlags.zipfile. Then, double-click theinfoWebClientFlagsEnable.regfile and click Run.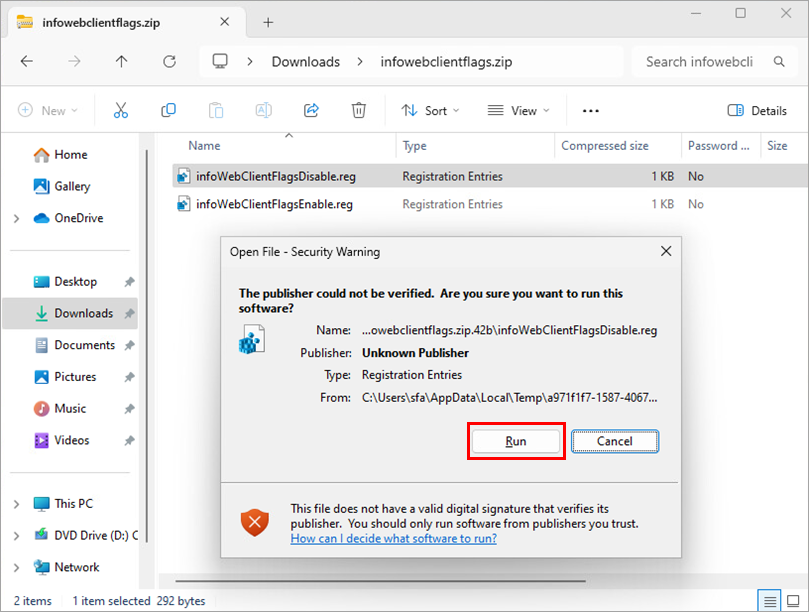
-
Restart your computer.
-
Attempt to activate your ESET product again to reproduce the error and generate the log.
-
Double-click the downloaded
infoWebClientFlags.zipfile. Then, double-click theinfoWebClientFlagsDisable.regfile and click Run. -
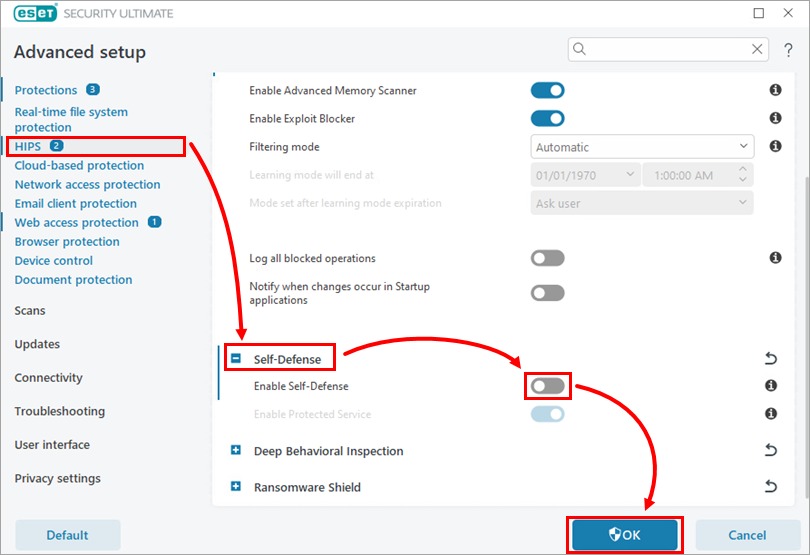
Re-enable Self-Defense: in the main program window of your ESET product, press the F5 key, click HIPS, expand Self-Defense, enable the toggle next to Enable Self-Defense and click OK. Then, restart your computer.
-
Navigate to the ECP folder, located at
C:\ProgramData\ESET\ESETSecurity\Diagnostics\ECP.You may need to make hidden items visible to see the folder. -
Select all the log files and right-click them. From the displayed context menu, select Compress to → ZIP File to create a
.zipfile. -
Share the
.ziplog file with ESET Technical Support. We will review the files and advise you of the best course of action.- If you have already opened an ESET Technical Support case, respond to the email from ESET Technical Support and attach the
.ziplog file. - If you have not yet contacted ESET Technical Support, open a case and attach the
.ziplog file to the case.
- If you have already opened an ESET Technical Support case, respond to the email from ESET Technical Support and attach the