Issue
- Remotely Deploy ESET Endpoint Security for Android to client devices using ESET PROTECT
- Deploy ESET Endpoint Security for Android using ESET PROTECT On-Prem
Solution
- Create and send an enrollment link via ESET PROTECT
- Enroll your Android device and deploy ESET Endpoint Security for Android
Create and send an enrollment link via ESET PROTECT
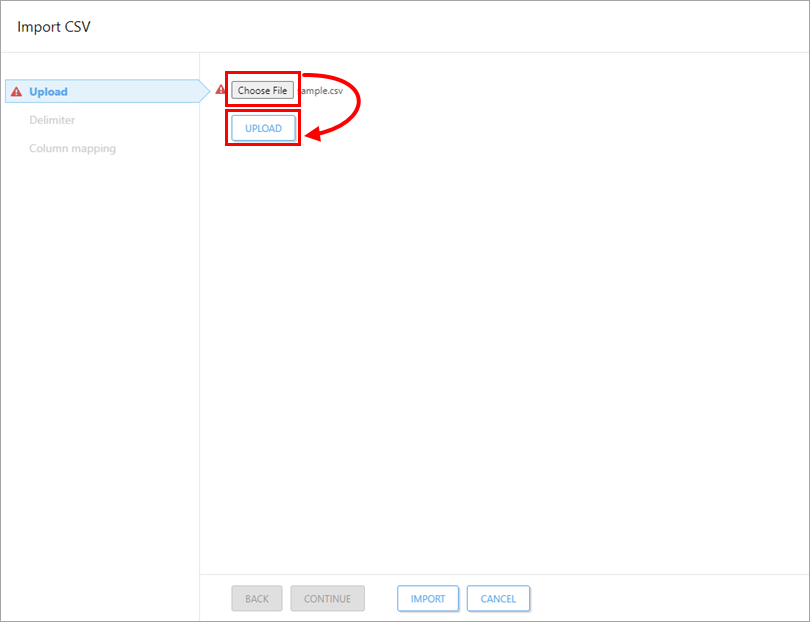
Click Quick Links → Mobile devices.
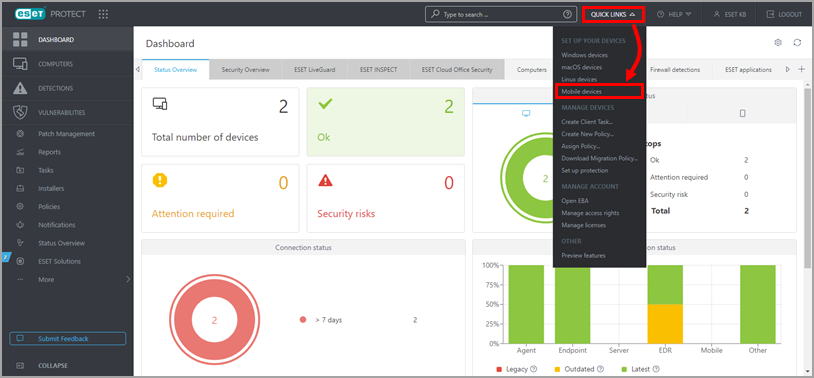
Figure 1-1 Ensure that Android or iOS/iPadOS is selected. Select the check box next to I accept the End User License Agreement and acknowledge the Privacy Policy and click the envelope icon to enroll the devices via email. For other enrollment methods, visit our Online Help page.
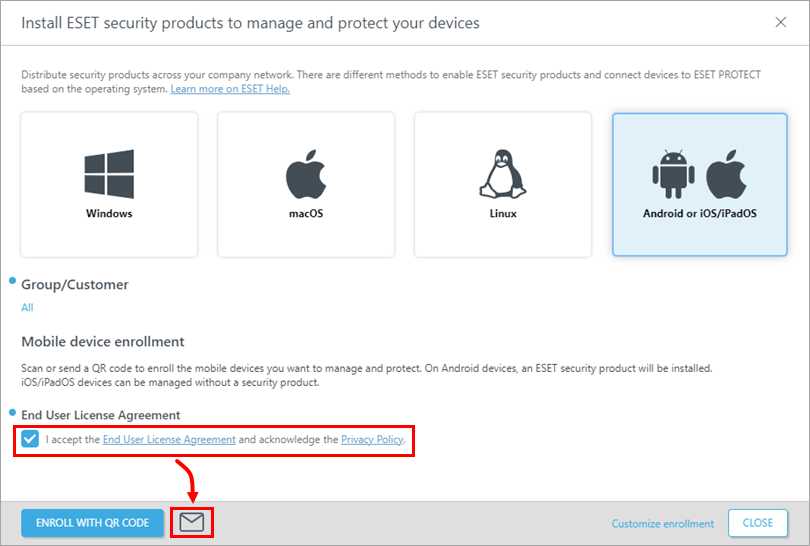
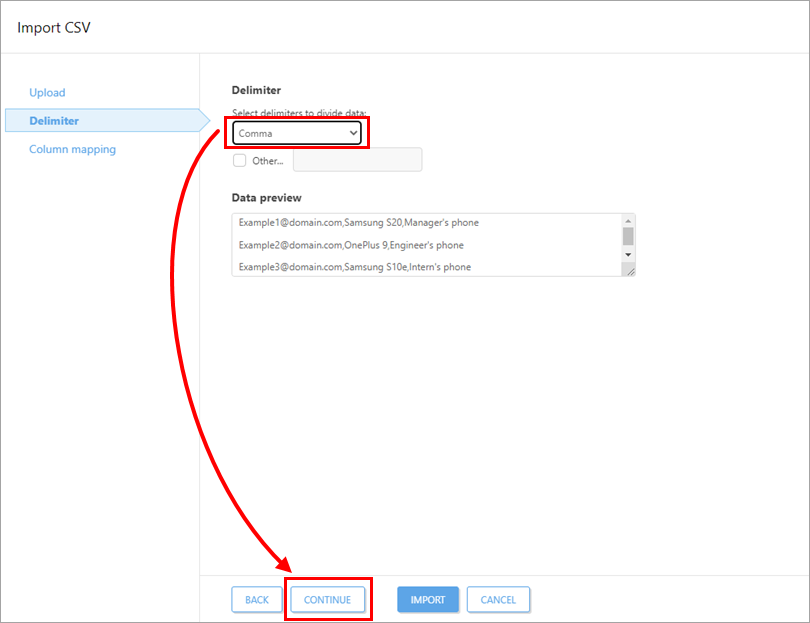
Figure 1-2 Click Add.
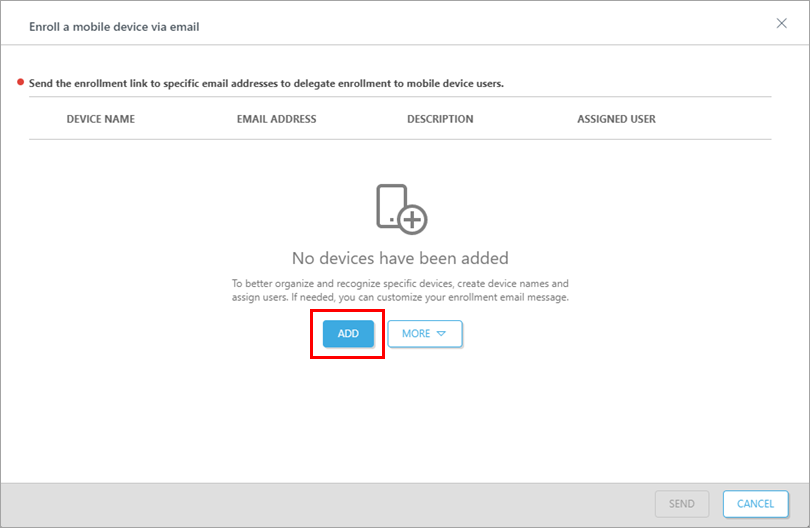
Figure 1-3
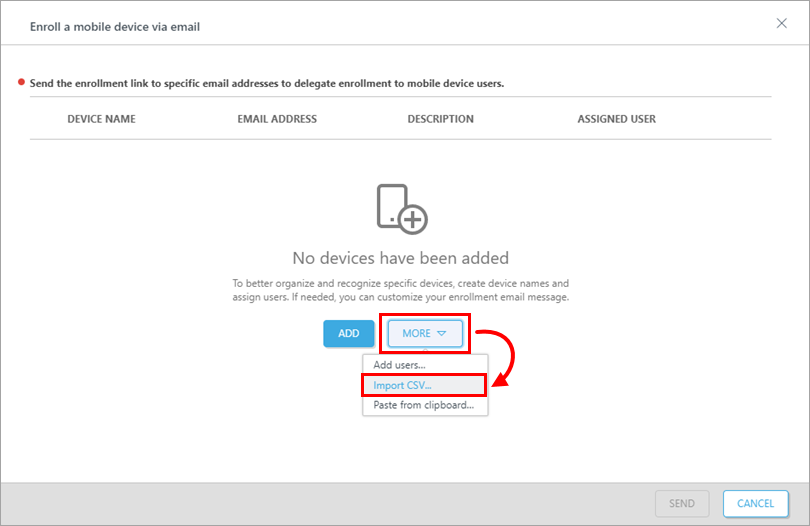
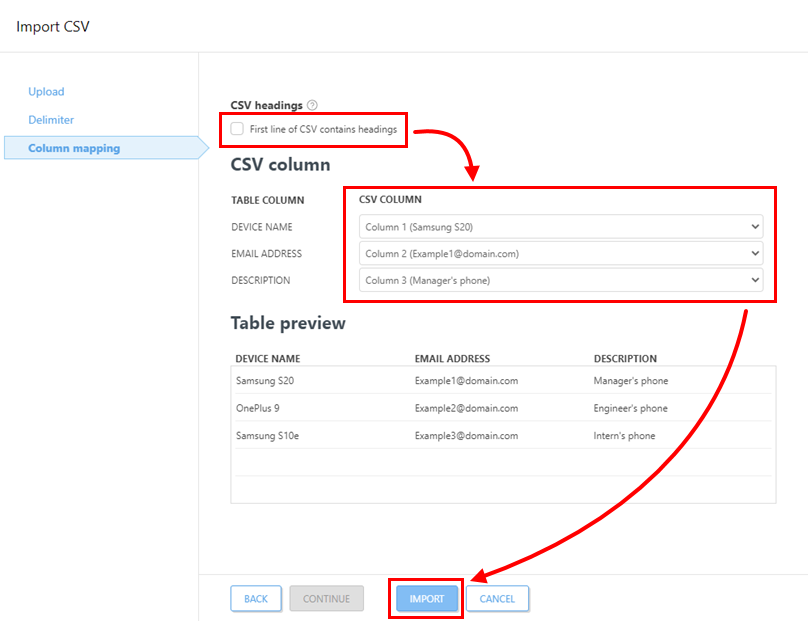
Type in the Device name and Email Address (this email address will be used to deliver the enrollment email message). The Description field is optional. To assign a specific user, click Pair with existing user to match it to an existing Computer User. Click the Save
 icon to save the device. Click Customize email if you want to make changes to the enrollment email. To add another device, click Add. Click Continue when you are finished adding devices.
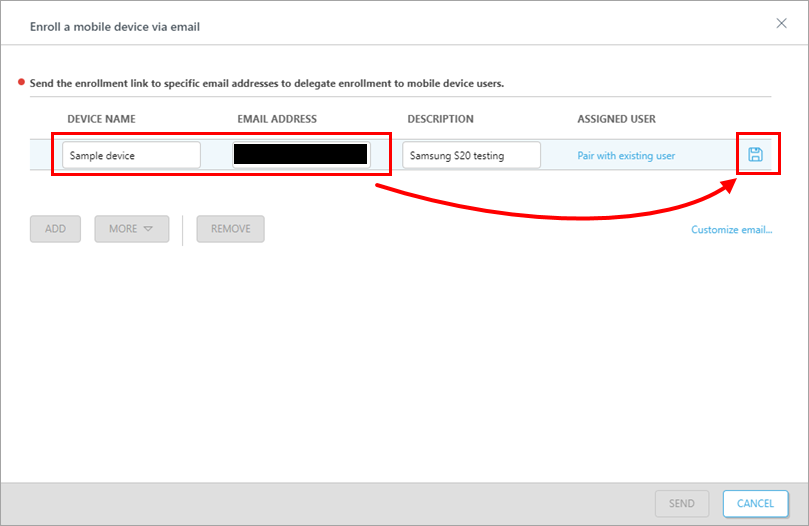
Figure 1-4 In the Enrollment section, click Send. The enrollment link will be sent to chosen emails.
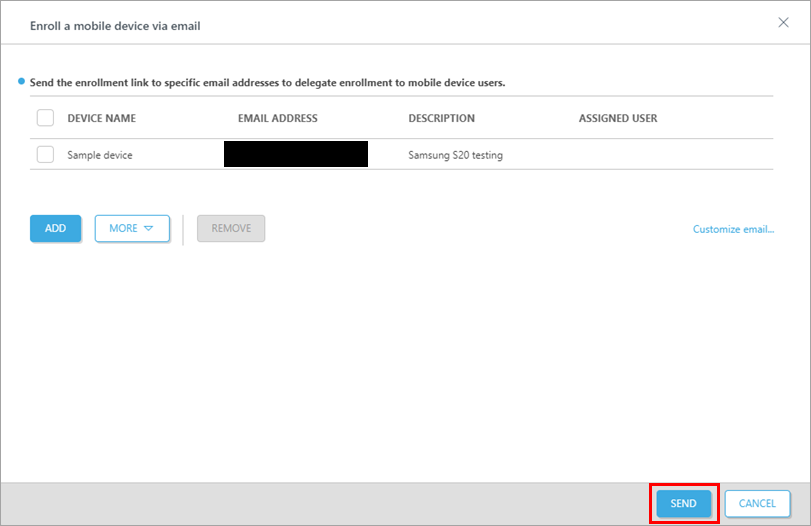
Figure 1-5
Enroll your Android device and deploy ESET Endpoint Security for Android
Open the email from eca.mdm@protect.eset.com. If you open it on the mobile device you want to enroll, tap the Enroll name of your device. If you opened the email on another device, scan the QR code with the device you want to enroll in and open the link.
Tap Connect Android.
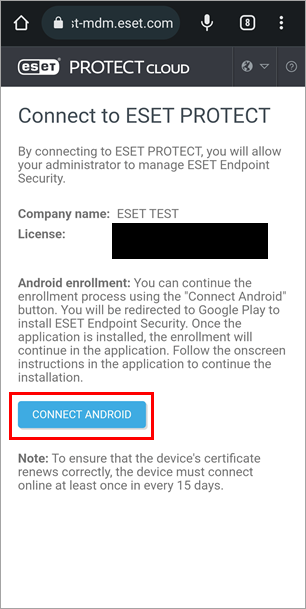
Figure 2-1 You will be redirected to Google Play Store. Tap Install and wait for the installation to finish. Tap Open.
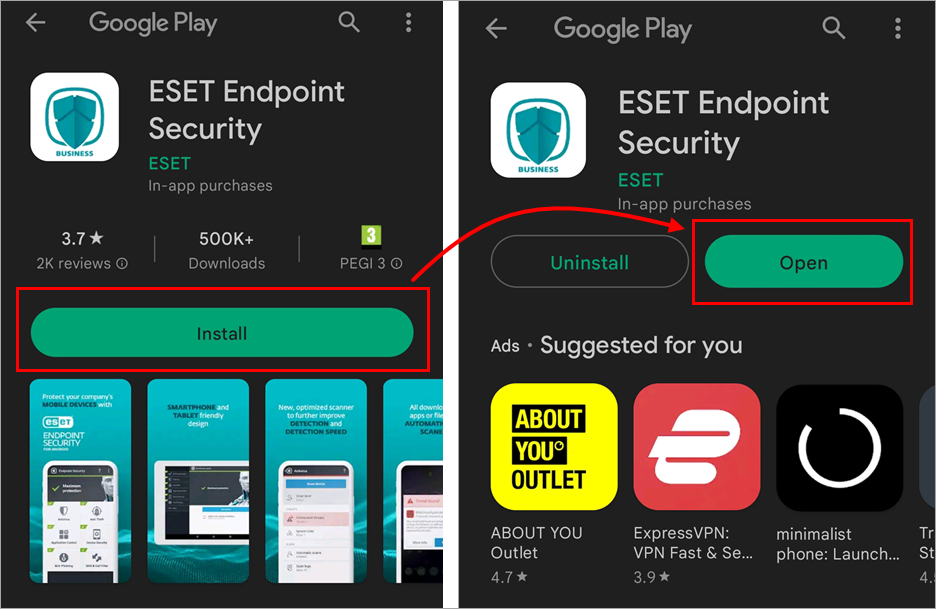
Figure 2-2 Tap Allow.
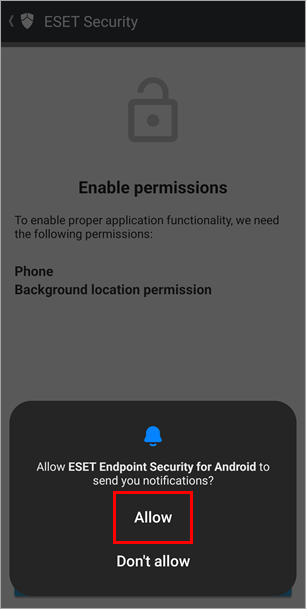
Figure 2-3 Tap Continue to open the displayed permissions settings. Tap While using this app and Allow.
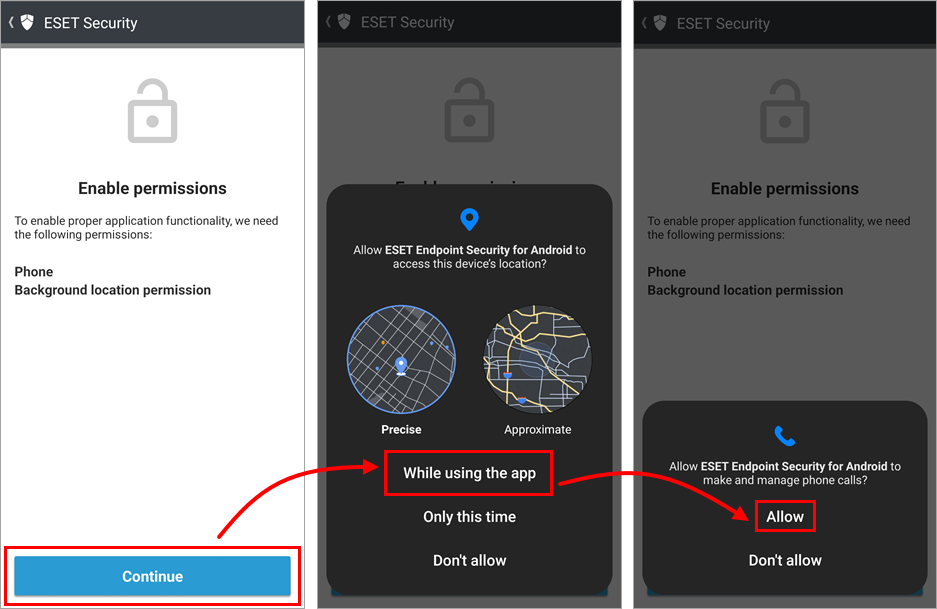
Figure 2-4 Tap Continue to open the displayed permissions settings. You will be temporarily taken out of the app to the Location permission settings. Tap Allow all the time, and in the top left corner, tap the arrow back to return to the wizard.
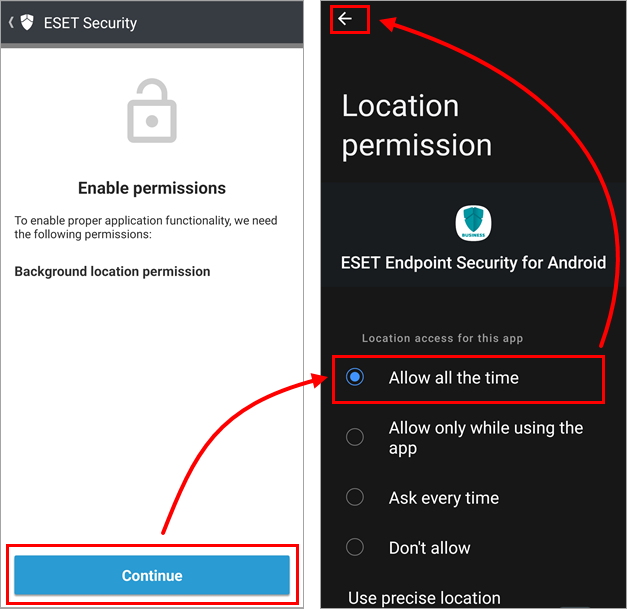
Figure 2-5 Tap Continue to open the All files access permission settings. You will be temporarily taken out of the app to the All files access settings. Tap the toggle next to ESET Endpoint Security for Android to turn it on (from grey to blue, but colors may differ based on your device manufacturer), and in the top left corner, tap the arrow back to return to the wizard.
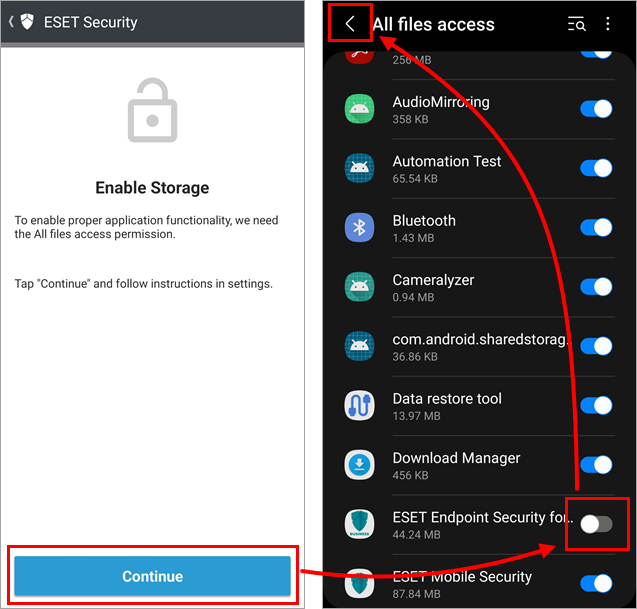
Figure 2-6 Tap Allow.
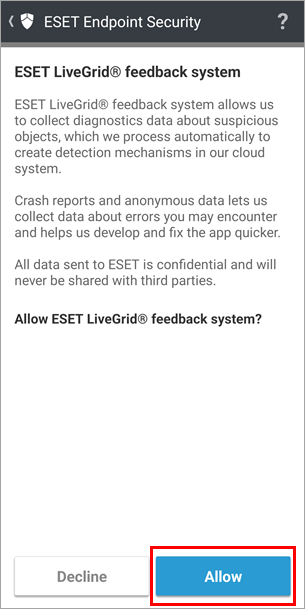
Figure 2-7 Type in your name to help the admin recognize your device and tap Save.
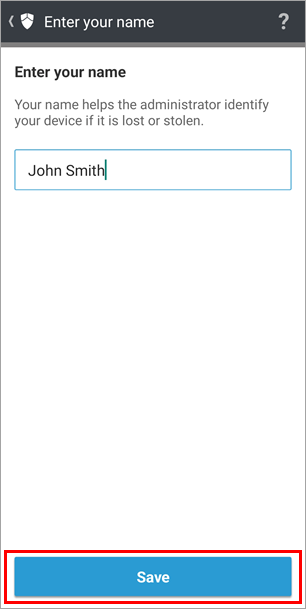
Figure 2-8 In the Enable draw over other apps, tap Continue. You will be temporarily taken out of the app to the Appear on top settings. Tap the toggle next to ESET Endpoint Security for Android to turn it on (from grey to blue, but colors may differ based on your device manufacturer), and in the top left corner, tap the arrow back to return to the wizard.
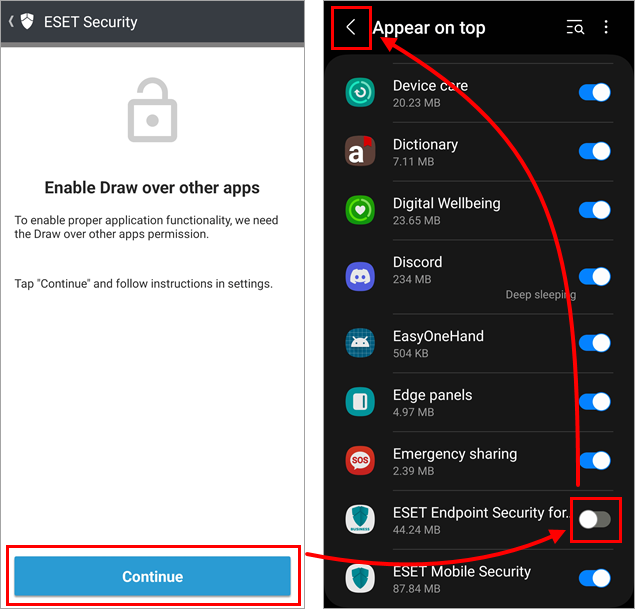
Figure 2-9 In Enable uninstall protection section, tap Enable. This will open the uninstall protection settings. Tap Activate.
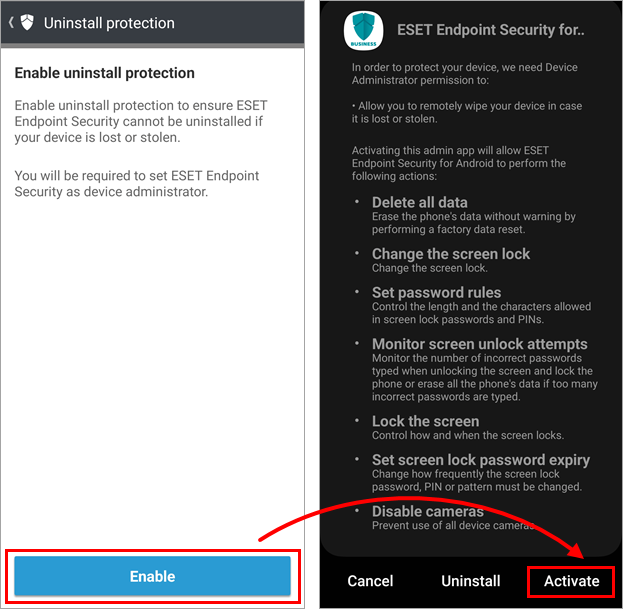
Figure 2-10 In Enable usage access, tap Continue. You will be temporarily taken out of the app to the Usage data access settings. Tap the toggle next to ESET Endpoint Security for Android to turn it on (from grey to blue, but colors may differ based on your device manufacturer), and in the top left corner, tap the arrow back to return to the wizard.
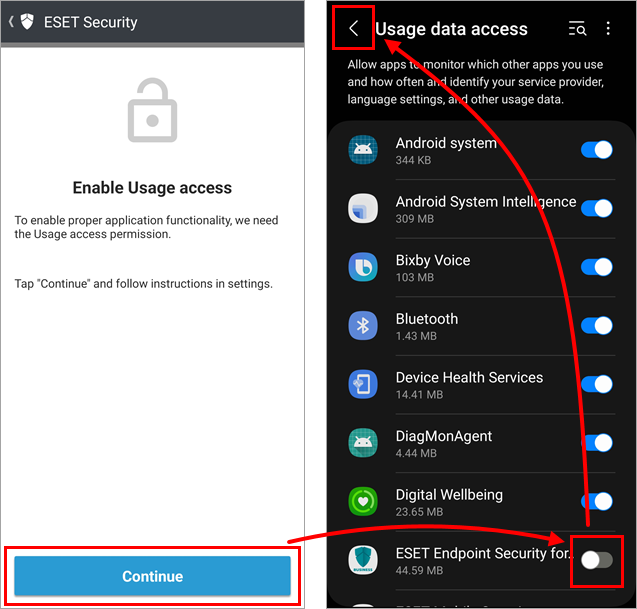
Figure 2-11 Tap Finish to exit the wizard.
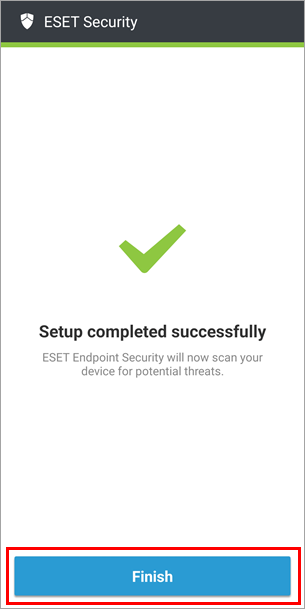
Figure 2-12 The Android device is now protected.
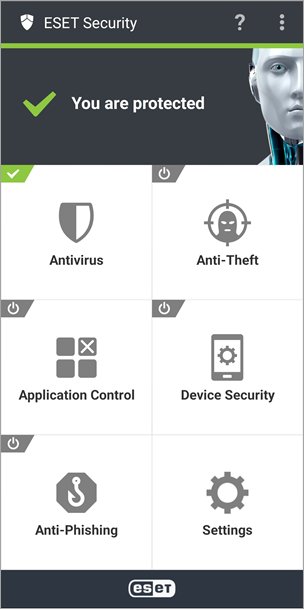
Figure 2-13