Details
ESET's Host-based Intrusion Prevention System (HIPS) is included in ESET Endpoint Security, ESET Endpoint Antivirus, ESET Mail Security for Microsoft Exchange, and ESET File Security for Microsoft Windows Server.
HIPS monitors system activity and uses a set of pre-defined rules to recognize suspicious system behavior. When this type of activity is identified, the HIPS self-defense mechanism stops the offending program or process from carrying out the potentially harmful activity. Changes to the Enable HIPS and Enable Self-defense settings take effect after the Windows operating system is restarted.
Solution
![]() Endpoint users: Perform these steps on individual client workstations
Endpoint users: Perform these steps on individual client workstations
- Click Policies and select the Built-in policy that you want to modify. Select the check box next to the default policy for clients and click Actions → Edit.
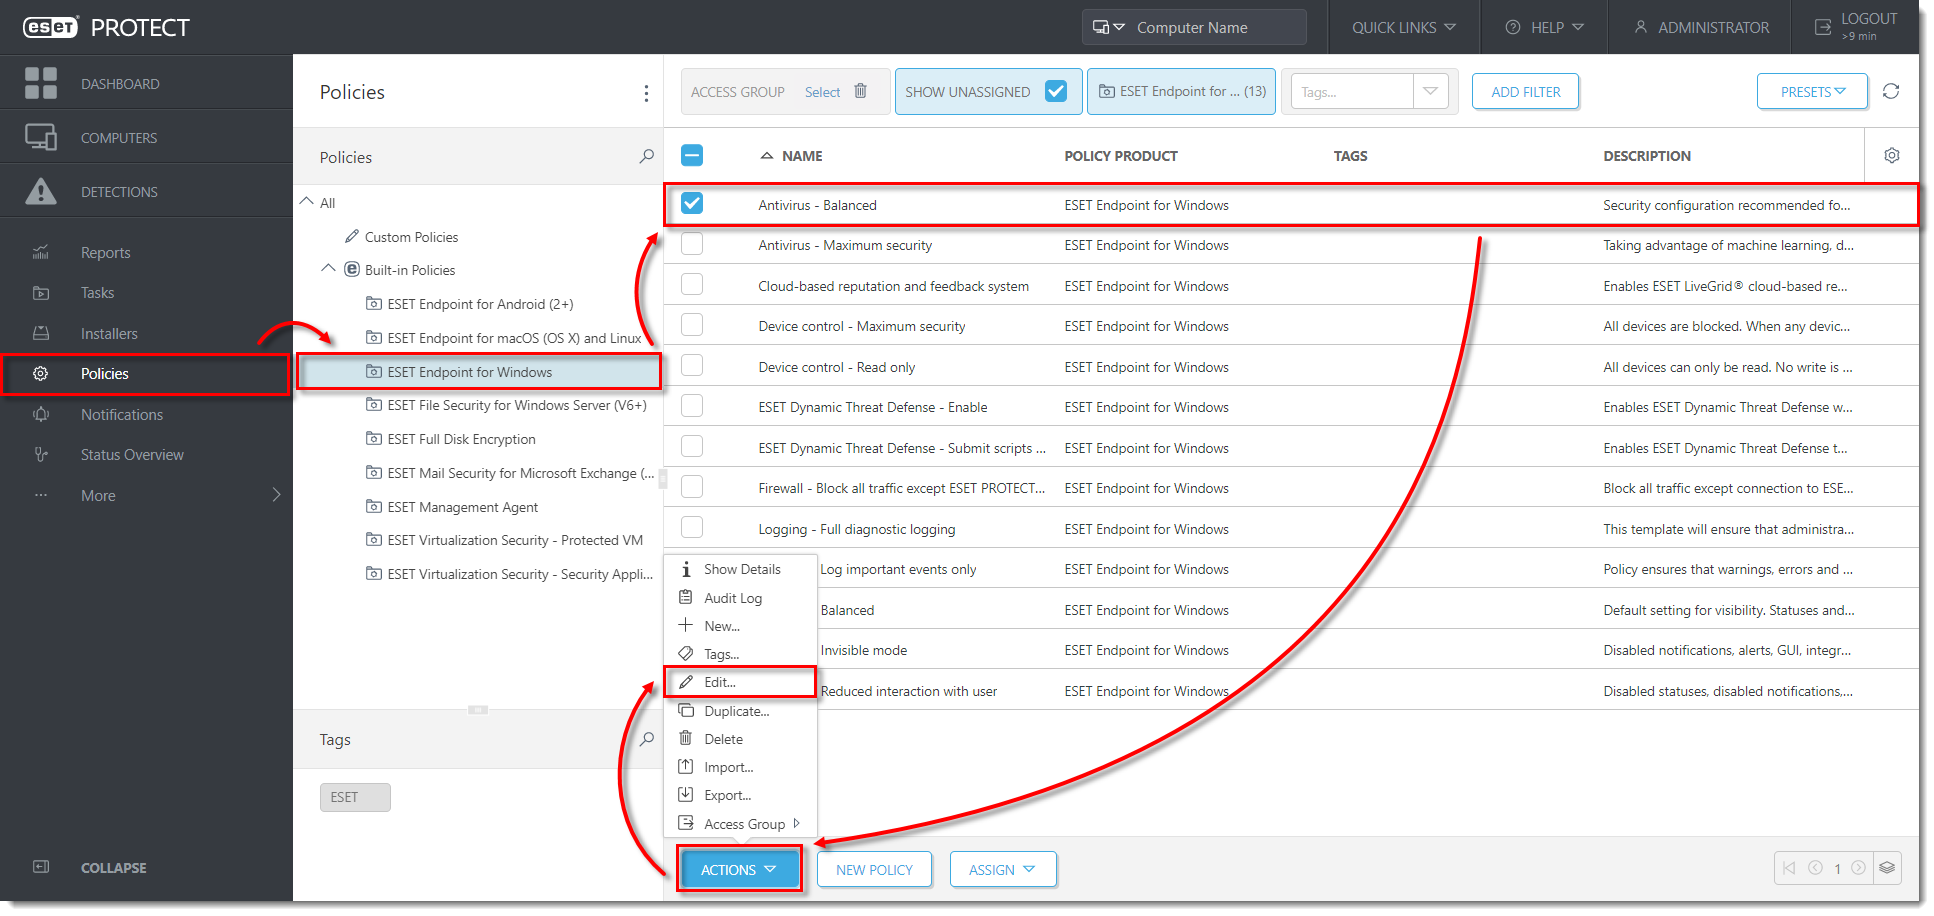
Click the image to view larger in new window
- Click Settings, expand Detection Engine, click HIPS, and then click Edit next to Rules.
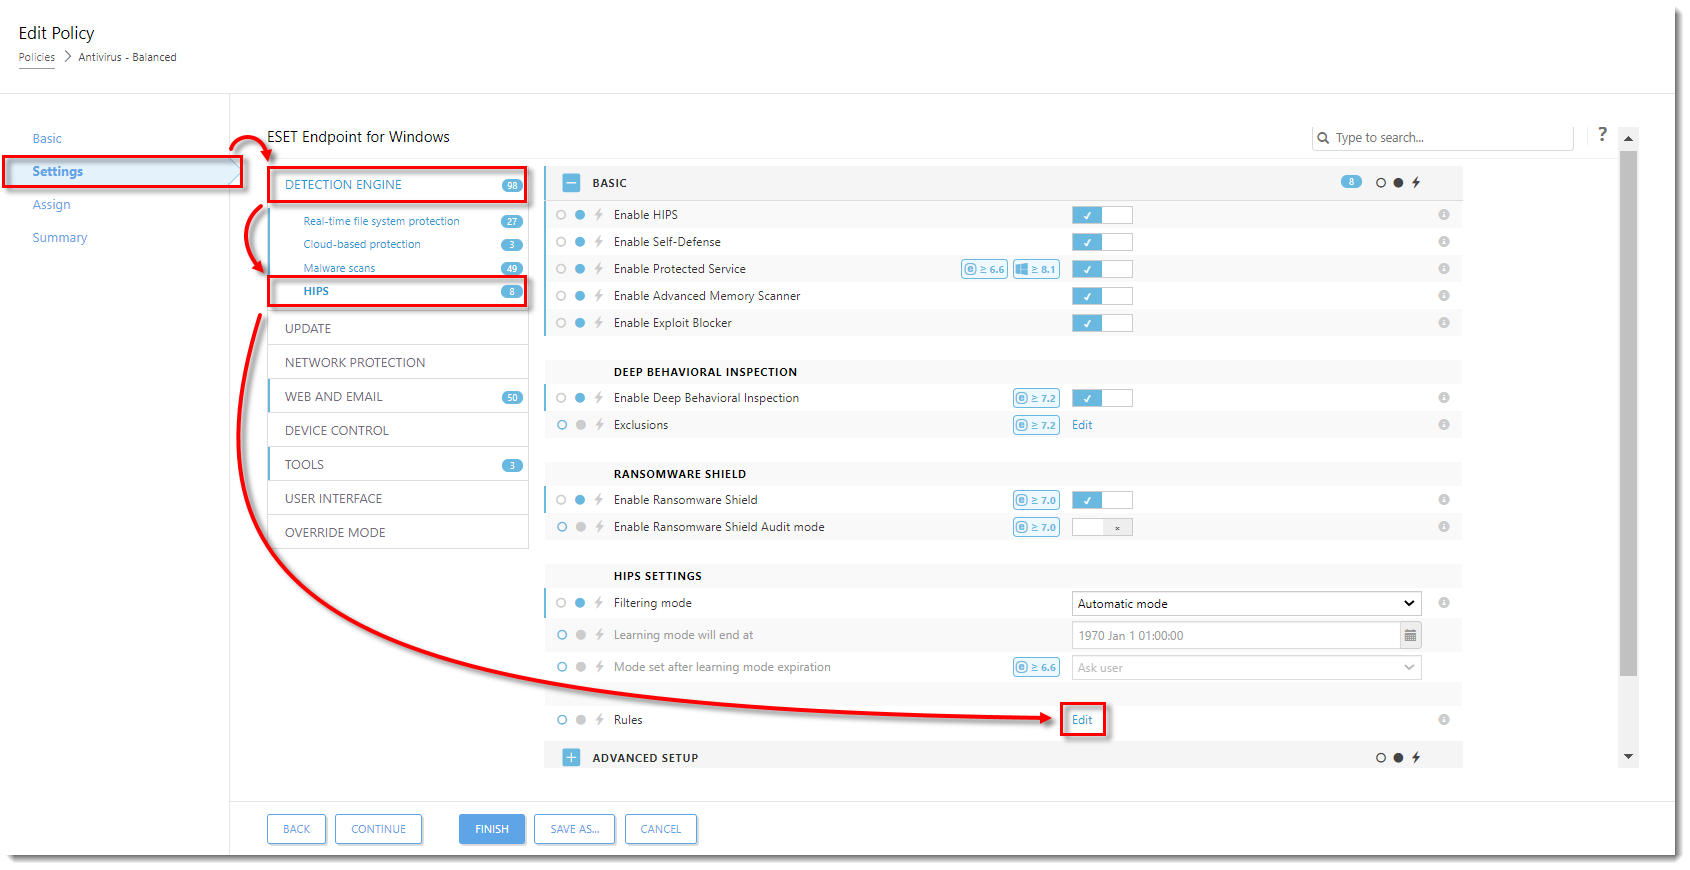
Click the image to view larger in new window
- Click Add. In the dialog window, configure your rule. In this example, operations affecting registry entries are blocked, and the end-user will be notified when this action is performed by the HIPS module. Click Next when you are finished configuring the rule.
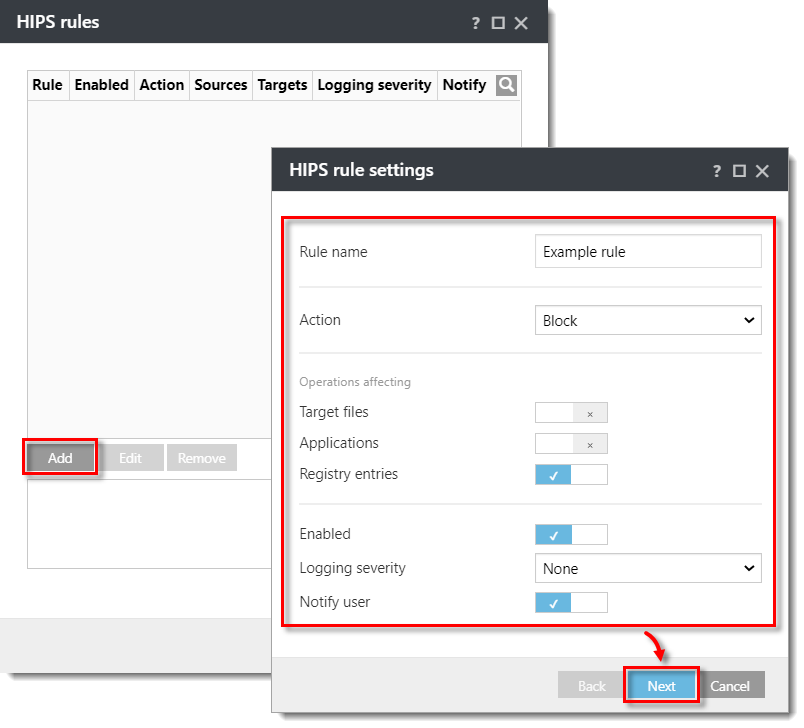
Click the image to view larger in new window
- In the Source applications window, select your desired option from the drop-down menu. In this example, All applications option is selected, so the HIPS rule will block any application that attempts to modify registry values. Click Next.
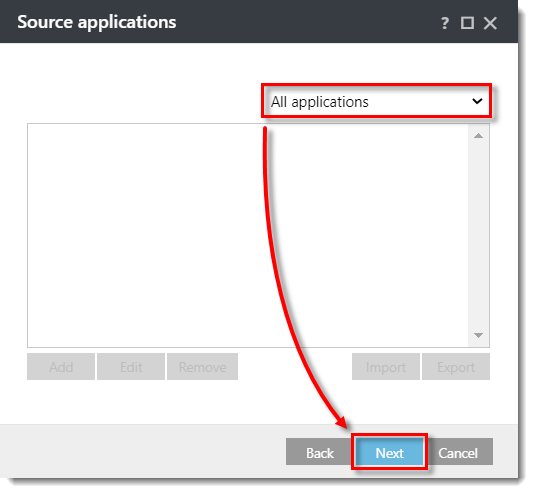
Click the image to view larger in new window
- In the Registry operations window, specify which operations will trigger this rule. In this example, Delete from registry is selected. Click Next.
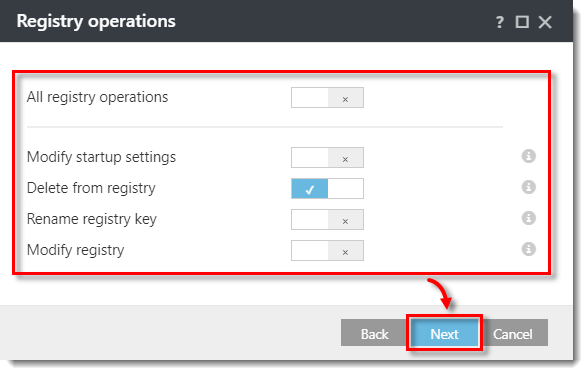
Click the image to view larger in new window
- In the Registry entries window, select your desired option from the drop-down menu. In this example, All entries is selected, so the rule blocks the deletion of any registry entries. Click Finish.
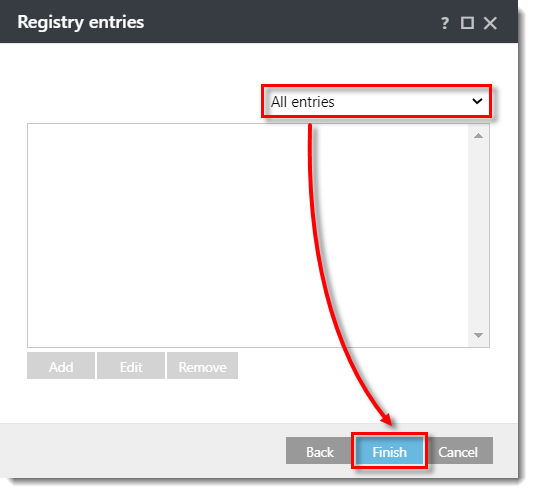
Click the image to view larger in new window
- Click OK to save the rule.
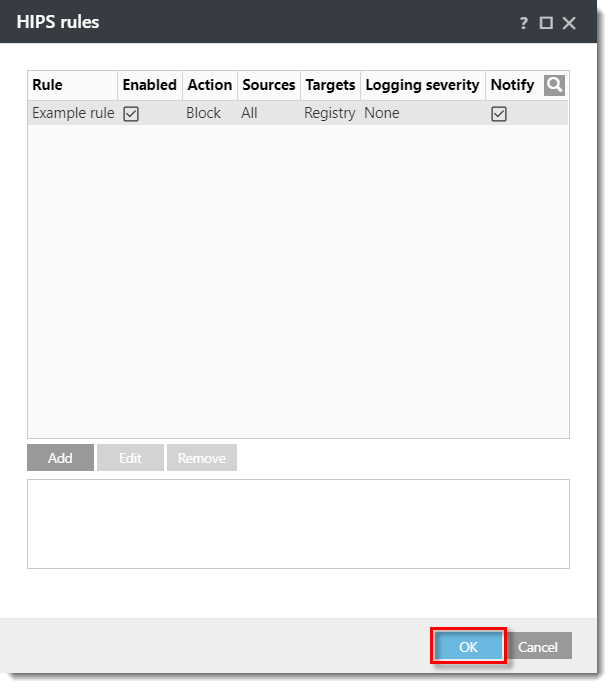
Click the image to view larger in new window
- Click the drop-down menu next to Edit and select how HIPS rules defined by this policy will interact with previously defined HIPS rules on the assigned computers. In this example, Replace is selected for both options. Click Finish.
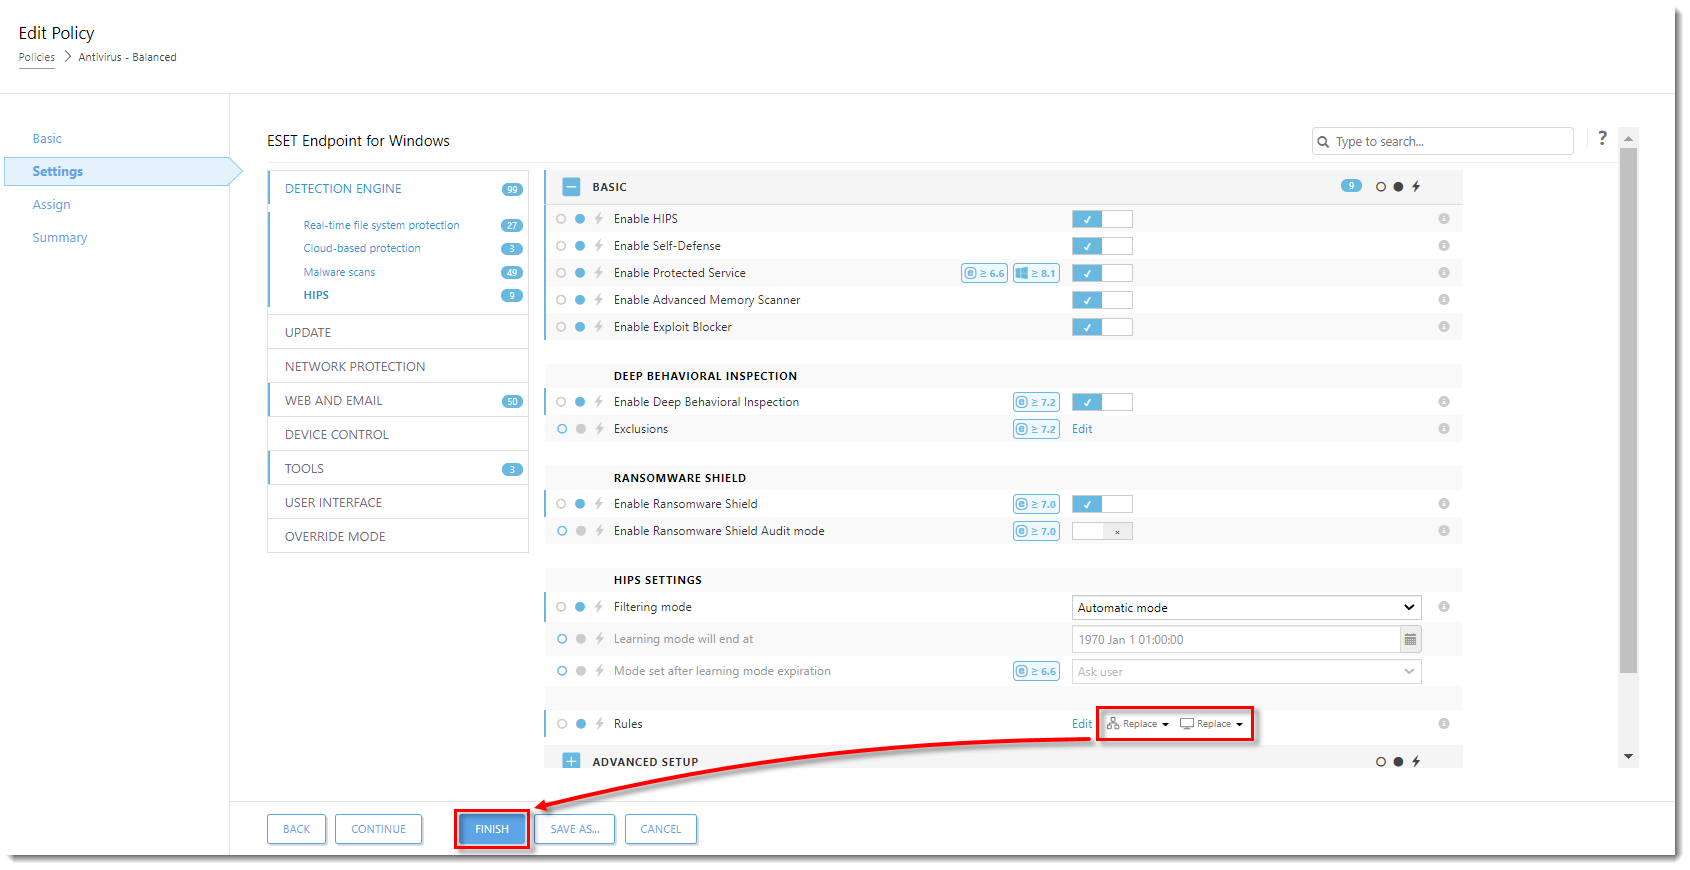
Click the image to view larger in new window
Computers assigned to the policy that you have modified will receive this new HIPS rule the next time they check into ESET PROTECT Server.