Issue
- Minimum compatibility requirements for Advanced Security
- Enable Advanced security in ESET PROTECT On-Prem
- You receive a Peer Certificate notification in your status log
Details
Click to expand
- ESET PROTECT Server installation has Advanced Security enabled by default
- Newly created certificates and certification authorities use SHA-256 (instead of SHA-1)
- ESET PROTECT Server uses the latest TLS (TLS 1.2) for communication with Agents
- Advanced Security enforces using TLS 1.2 for Syslog and SMTP communication
Solution
Minimum compatibility requirements for Advanced security
Advanced security does not influence the existing Certificate Authorities (CAs) and certificates, only the new CAs and certificates created after Advanced security is enabled. To apply Advanced security in your existing ESET PROTECT On-Prem infrastructure, replace the existing certificates.
Enable Advanced security in ESET PROTECT On-Prem
Click More → Settings. Click the toggle next to Advanced security (requires restart!) to enable it. Click Save.
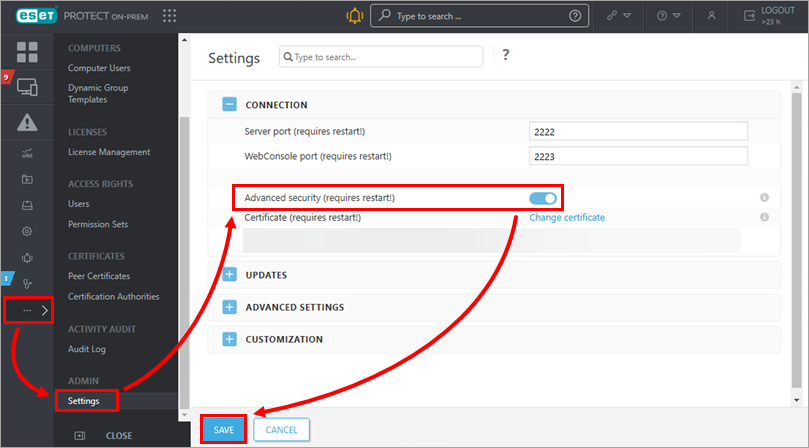
Figure 1-1 Close the ESET PROTECT Web Console and restart the ESET PROTECT Server service.
Wait a few minutes after the service has started, and log in to the ESET PROTECT Web Console.
Verify that all computers are still connecting and that no other problems have occurred.
Create a new Certification Authority (CA). The public part of the CA is automatically sent to all client computers during the next Agent-to-Server connection.
Create new peer certificates signed with the new CA. Create a peer certificate for Agent and one for Server (select the applicable value in the Product drop-down menu in step 3 of the linked process).
Apply the new Agent certificate and assign the policy to the computers where you want to use the Advanced security.
After all devices connect with the new certificate, replace the current Server certificate with the new Server certificate. In the ESET PROTECT Web Console, click More → Settings → Change Certificate.
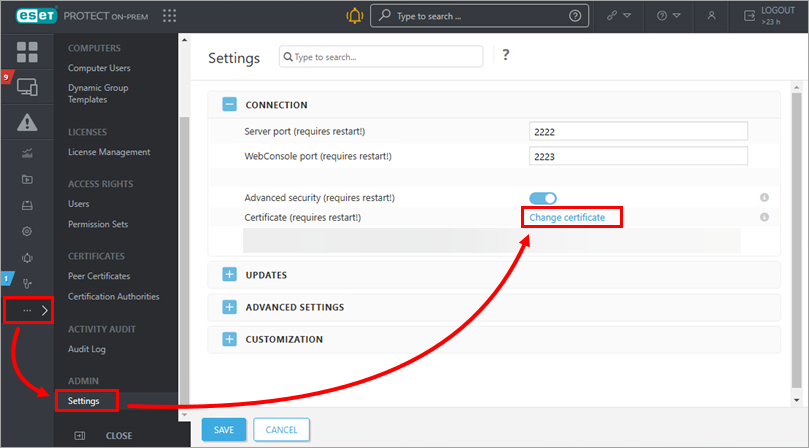
Figure 1-2 Click Open certificate list.
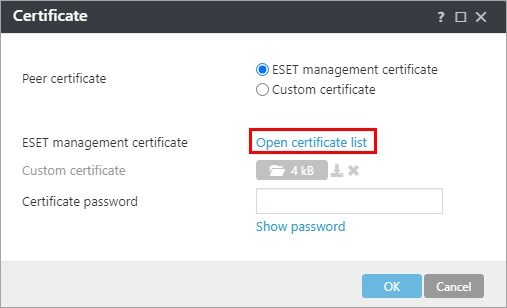
Figure 1-3 Choose the new Server certificate and click OK.
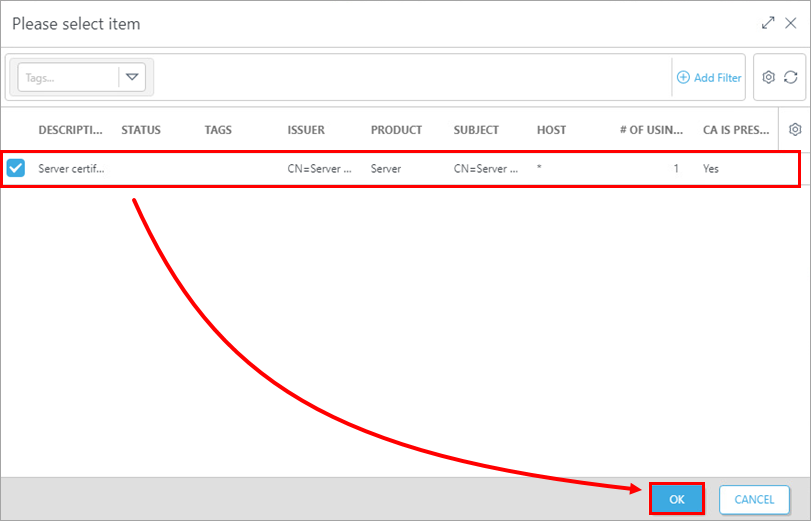
Figure 1-4 - Click Save. Restart the ESET PROTECT Server.