Issue
- You use the ESET Virtualization Security and you need to migrate your environment to the latest version of ESET PROTECT On-Prem
Details
Click to expand
The ESET Virtualization Security (EVS) is in End of Life status and no new version of the product is expected. The support of EVS ended with ESET PROTECT 8.1.
We recommend that you migrate your environment to endpoint management with the latest version of ESET PROTECT On-Prem. To do this, install ESET PROTECT On-Prem in your virtual environment and deploy ESET Management Agent with endpoint security products on the virtual machines.
Managing your virtual machines with ESET Endpoint Security enables you a higher level of security, with features such as HIPS, Brute-Force Attack Protection, firewall, device control, web control, email and antispam protection.
Solution
- Prerequisites
- Deploy ESET Management Agent and endpoint security products
- Set up the rules for virtual machines identification
- Unassign virtual machines from EVS security policies
- Remove EVS service policies from NSX manager
- De-register EVS Virtual Agent from the NSX manager
- Remove EVS service virtual machines
I. Prerequisites
You have an ESET PROTECT On-Prem running on a server or as a Virtual Appliance in your virtual environment, with all your licenses imported.
Make sure you have enabled communication on port 2222 and other required ports and addresses.
II. Deploy ESET Management Agent and endpoint security products
Using ESET PROTECT On-Prem, deploy the ESET Management Agent and then deploy ESET endpoint products on your virtual machines.
Your virtual machines are now protected and can be managed in ESET PROTECT On-Prem.
III. Set up the rules for virtual machines identification
To manage virtual machines in groups, create Dynamic Group templates or create Static Groups and then add the virtual machines to the Static Groups.
To configure a VDI environment in ESET PROTECT On-Prem, configure ESET PROTECT On-Prem to match all clones to a master computer. For more information about managing a VDI environment in ESET PROTECT On-Prem, read our Online Help topic.
IV. Unassign virtual machines from EVS security policies
Open your virtualization client and log in.
Click Menu → Networking and Security.
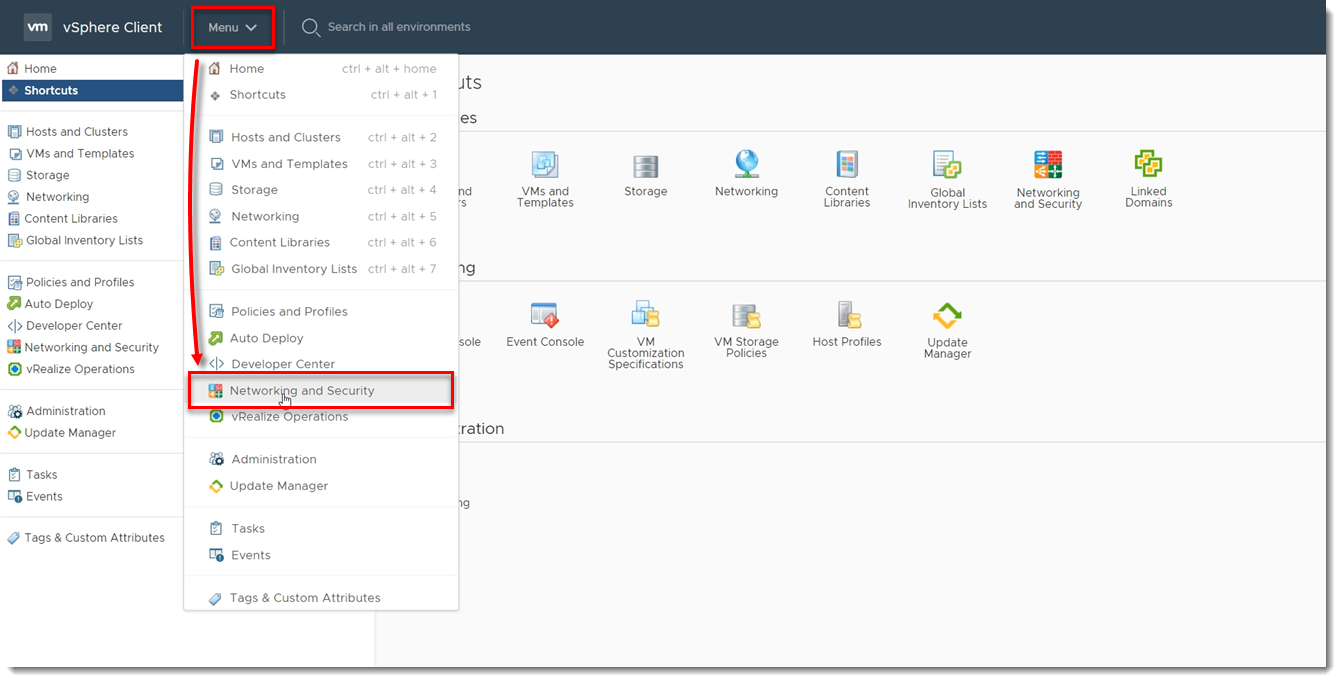
Figure 1-1 Click Service Composer → Security Policies, select your EVS Security policy and click Apply.

Figure 1-2 Select the check boxes next to all the groups and click the left arrow. This will unassign your virtual machines from the EVS security policy.
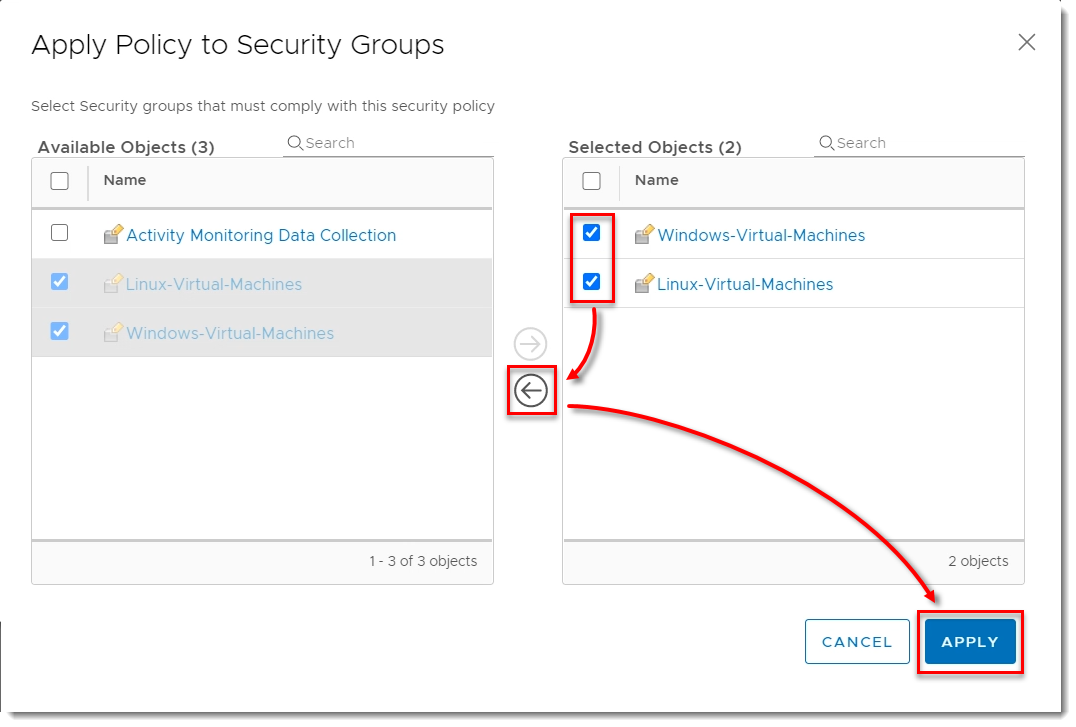
Figure 1-3
V. Remove EVS security policies from NSX manager
In your virtualization client, click Menu → Networking and Security.
Figure 2-1 Click Service Composer → Security Policies, select your EVS Security policy and click Delete.
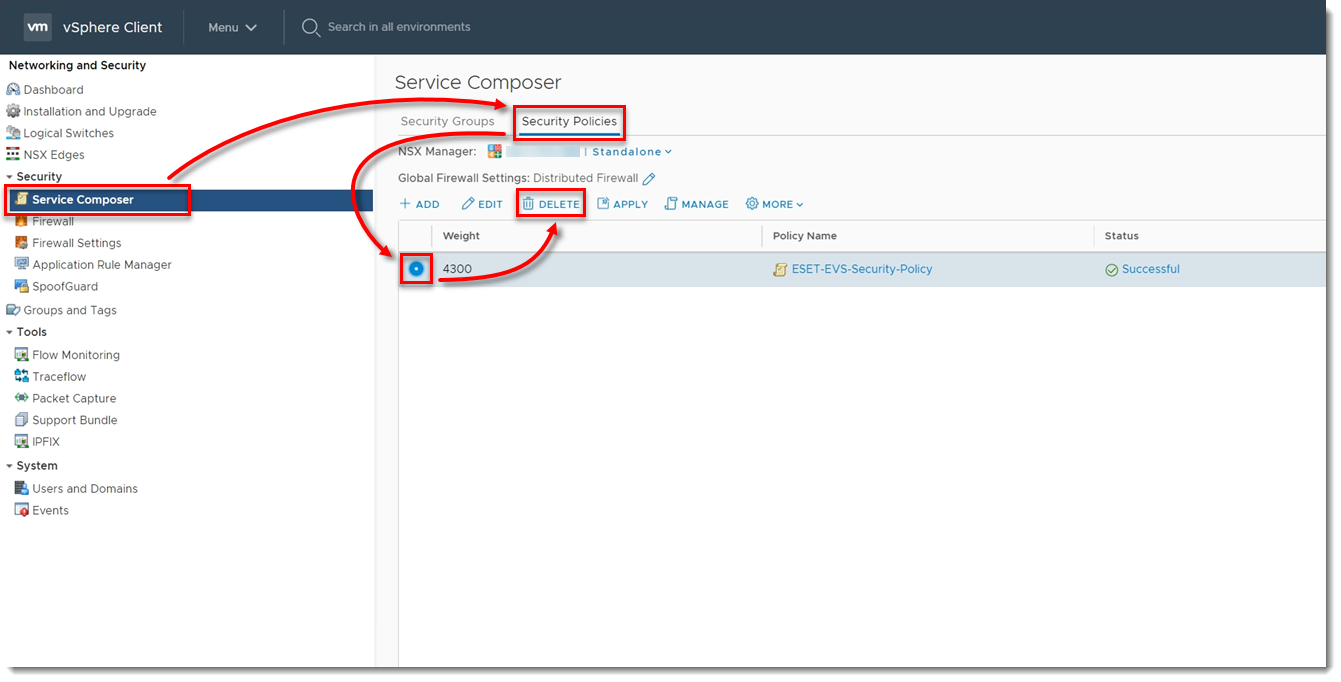
Figure 2-2 Click Delete.
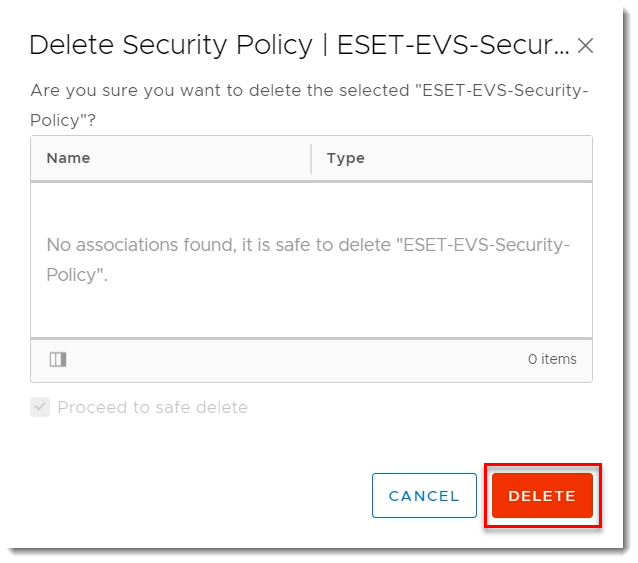
Figure 2-3
VI. De-register EVS Virtual Agent from the NSX manager
Open your Virtual Agent Host appliance.
Press Enter, type your password, and press Enter.
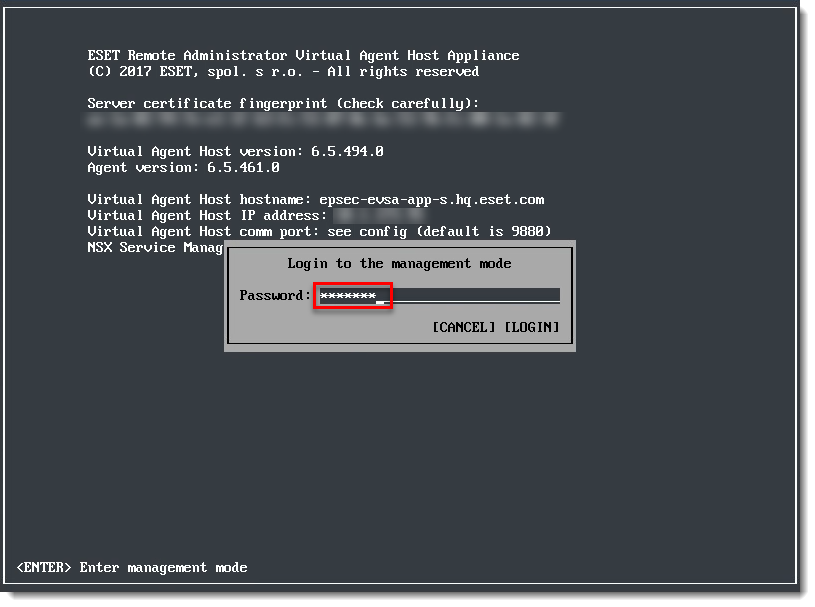
Figure 3-1 With the arrow keys on your keyboard, navigate to Register to VMware NSX Manager and press Enter.
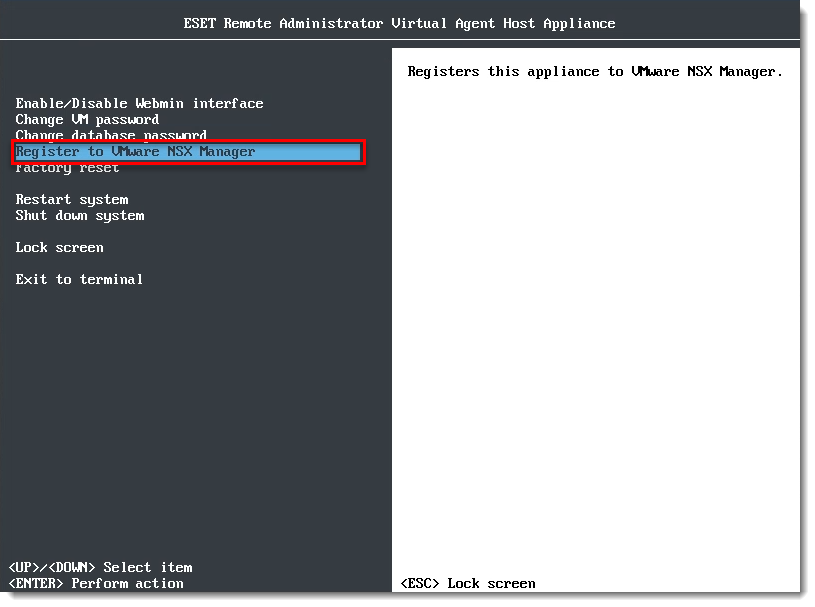
Figure 3-2 Type
uand press Enter.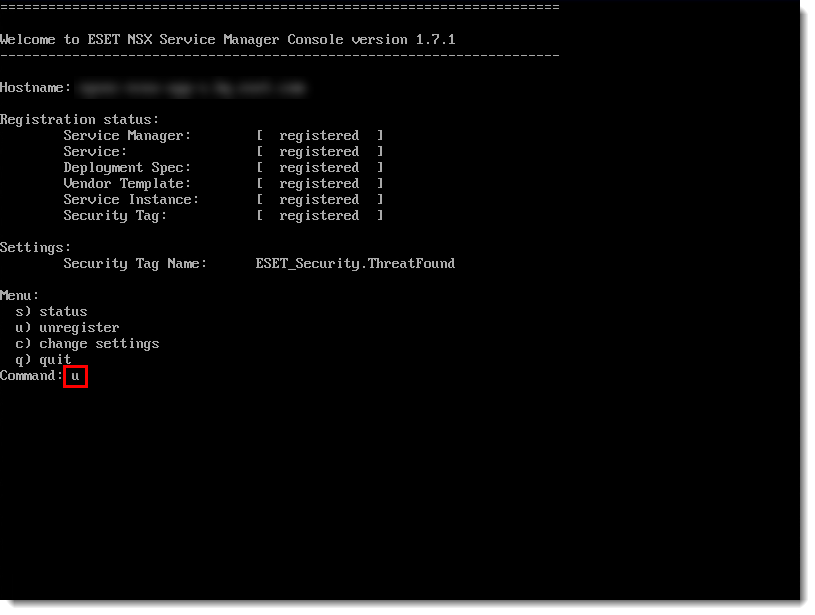
Figure 3-3 Wait for the de-registration to finish. Type
qand press Enter.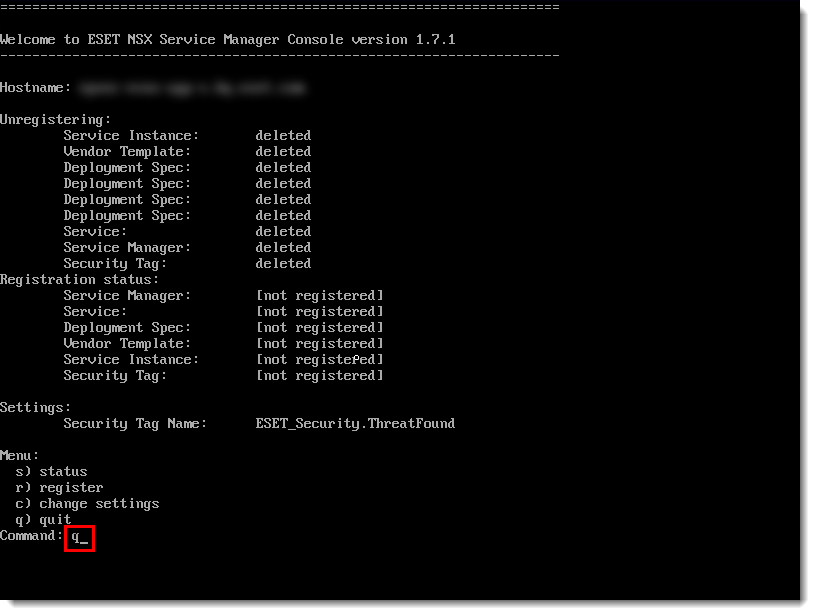
Figure 3-4
VII. Remove EVS service virtual machines
In your virtualization client, click Menu → Networking and Security.
Figure 4-1 Click Installation and Upgrade → Service Deployment, select ESET Virtualization Security and click Delete.
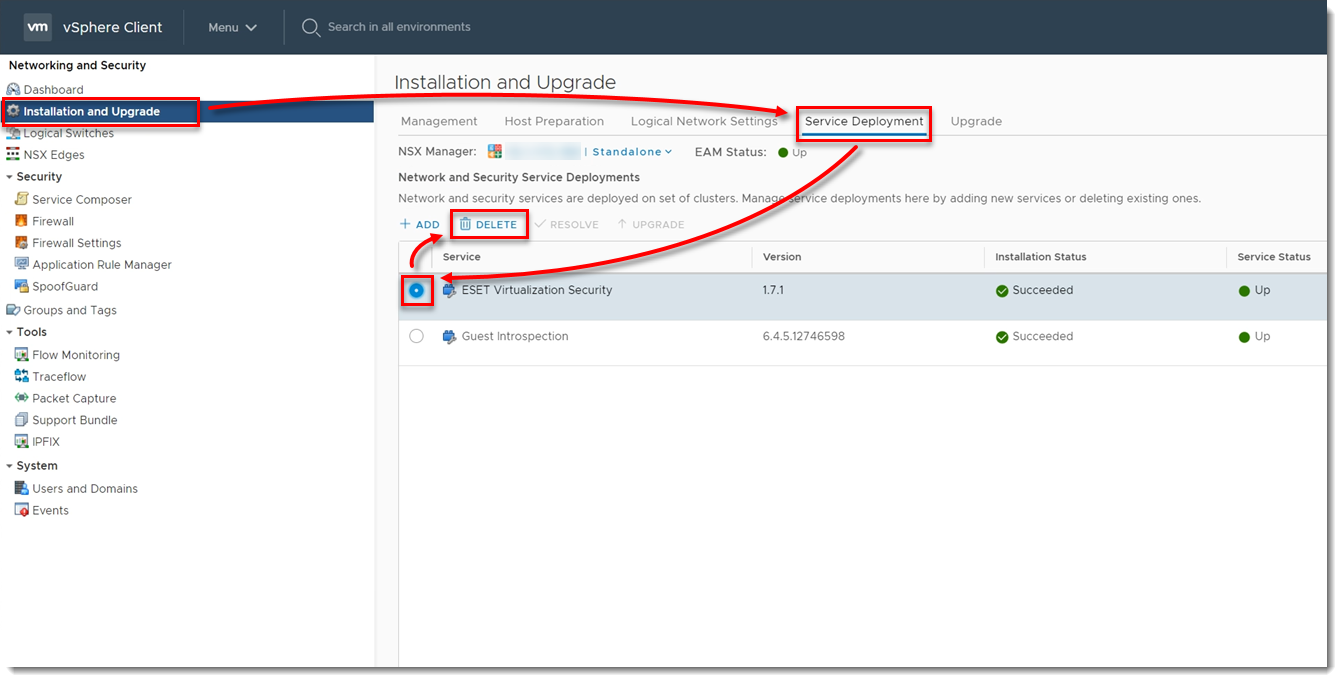
Figure 4-2 Click Delete.
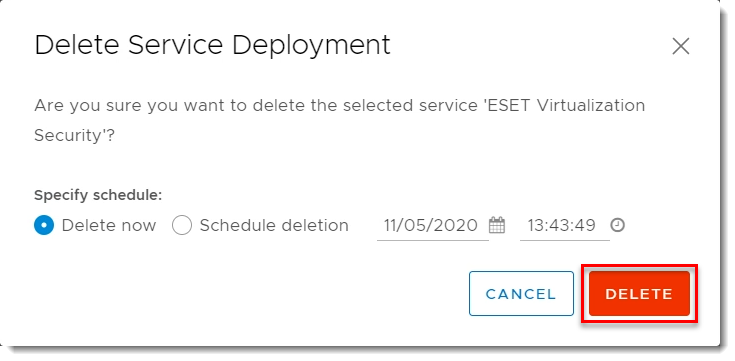
Figure 4-3 Verify ESET Virtualization Security has an Installation Status of Scheduled for uninstall and wait for the service to finish uninstalling.
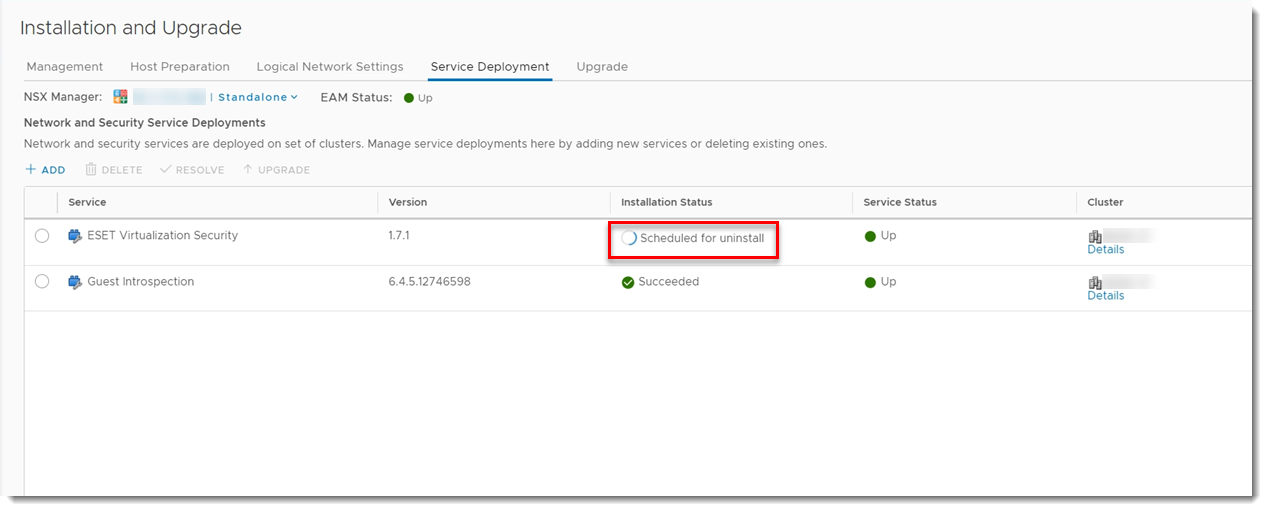
Figure 4-4 Delete the Virtual Agent Host appliance from your disk.