Issue
- Configure the ESET Management Agent installer file for deployment via Group Policy Object (GPO) or System Center Configuration Manager (SCCM)
- Configure an alternative method to deploy the ESET Management Agent for enterprise environments or environments with a high number of client computers
- Use GPO or SCCM for deployment
Details
Click to expand
Create a modified ESET Management Agent installer file for deployment in large-to-enterprise-level environments. The .msi file for the ESET Management Agent is separated from the .bat file available from ESET PROTECT On-Prem. The .msi file is then modified so that it can recognize the proper certificate and port for communication with your ESET PROTECT Server after distribution to client computers.
Solution
ESET PROTECT
Use GPO or SCCM for deployment
-
Click Installers → Create installer.

Figure 1-1 -
Click Customize installer.
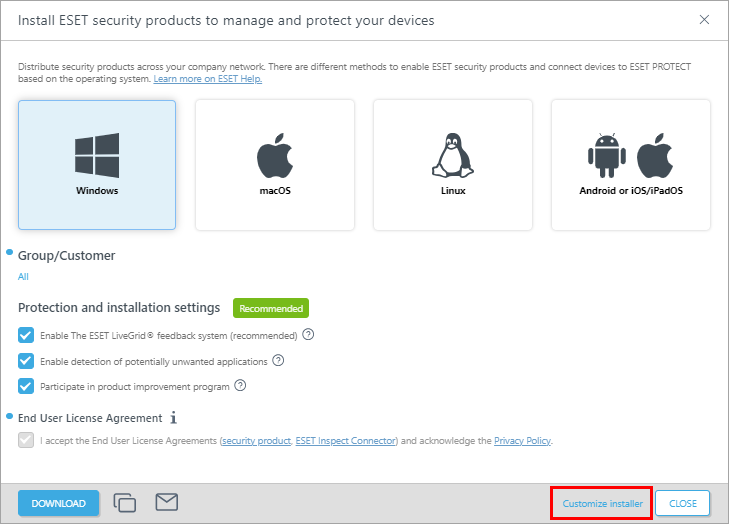
Figure 1-2 -
Windows operating system is pre-selected. Select Use GPO or SCCM for deployment next to Distribution and scroll down.
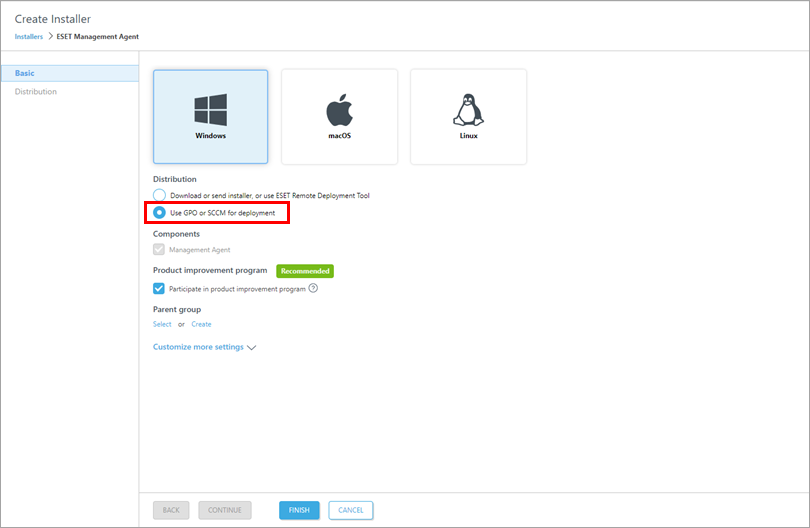
Figure 1-3 -
Select the Parent group where the ESET PROTECT will place the computer after an Agent installation. The parent group is mandatory if you use an ESET PROTECT Hub or ESET Business Account with sites or ESET MSP Administrator and optional if you use an ESET PROTECT Hub or ESET Business Account without sites. If you use an ESET PROTECT Hub or ESET Business Account without sites and you do not want to use the Parent group, continue to step 6. Otherwise, click Select.
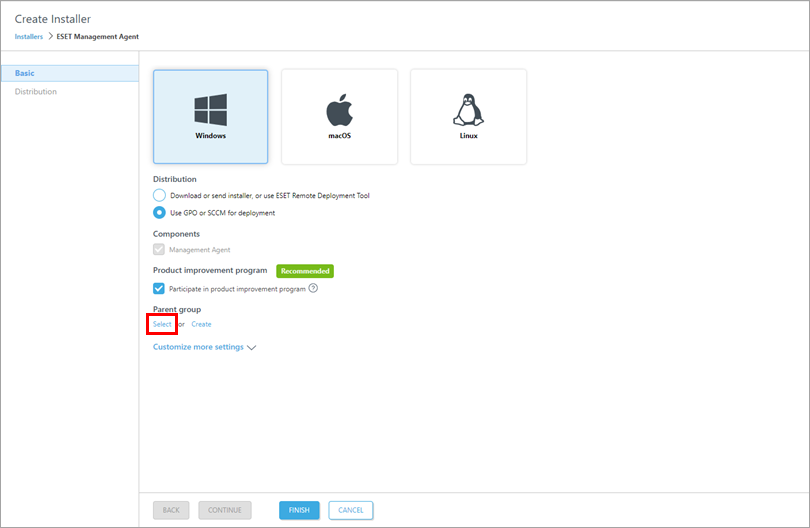
Figure 1-4 -
Select the group you want your computers to fall into and click OK.
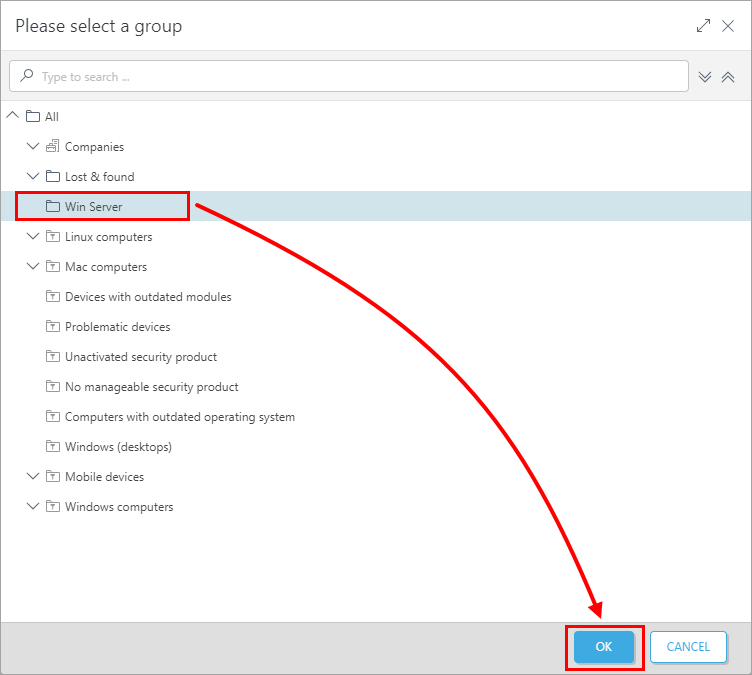
Figure 1-5 -
Click Finish to generate the installation files.
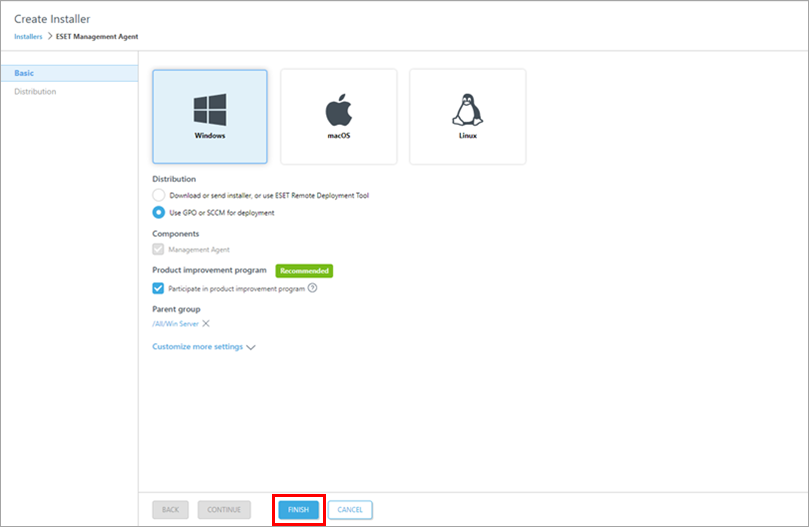
Figure 1-6 -
Click the file icon to download the
install_config.inifile. Select the desired agent installer icon (32-bit, 64-bit, ARM64) to download the agent installer.msifile and save them to the same shared folder.After you have downloaded both files, click Finish.
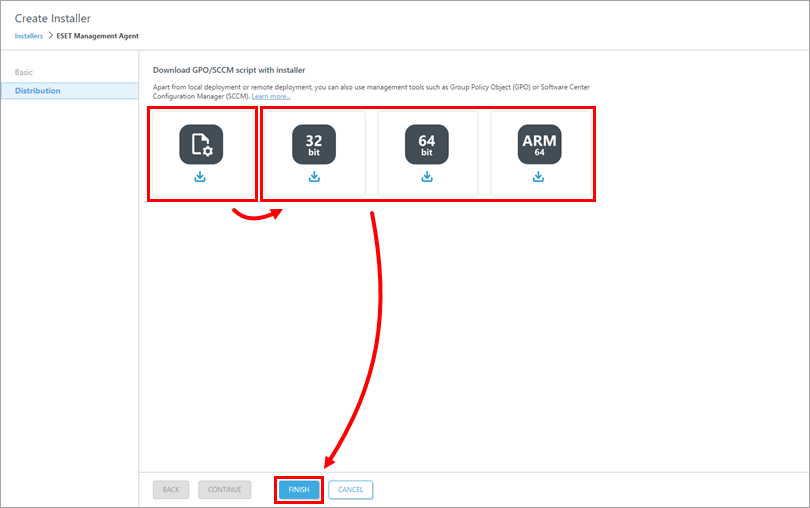
Figure 1-7 -
Refer to one of the processes below to deploy the package:
ESET PROTECT On-Prem
Use GPO or SCCM for deployment
-
Click Quick Links → Deploy Agent
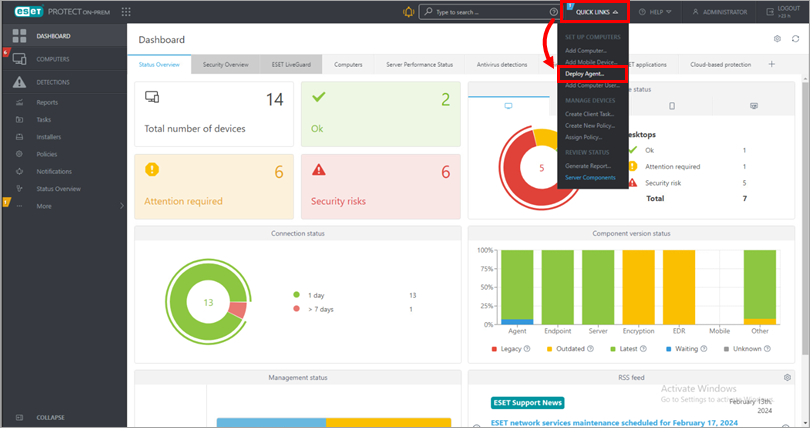
Figure 2-1
-
Confirm the Windows operating system is selected, select Use GPO or SCCM for deployment next to Distribution and scroll down.
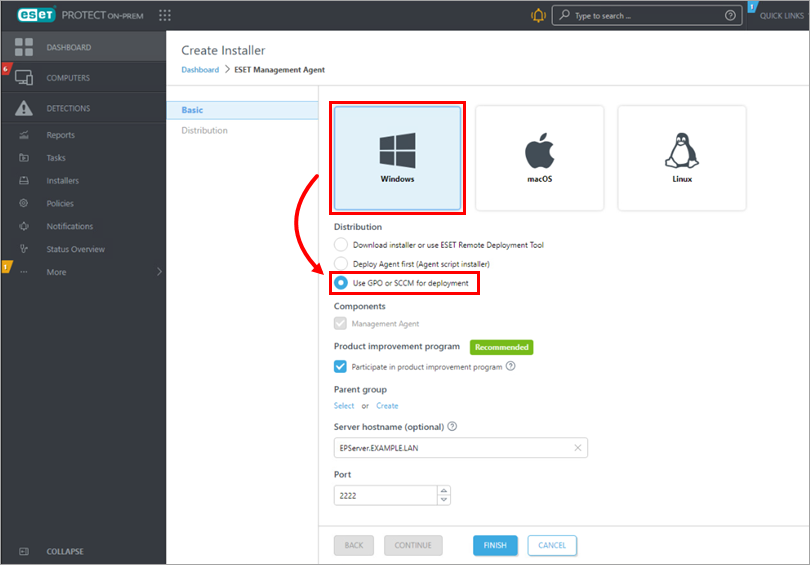
Figure 2-2
-
Click Finish. The ESET PROTECT On-Prem certificate is selected by default. For custom certificate users, refer to the custom certificates with ESET PROTECT On-Prem Online Help topic for more details. Peer certificates and Certification Authority created during the installation are, by default, contained in the static group labeled All.
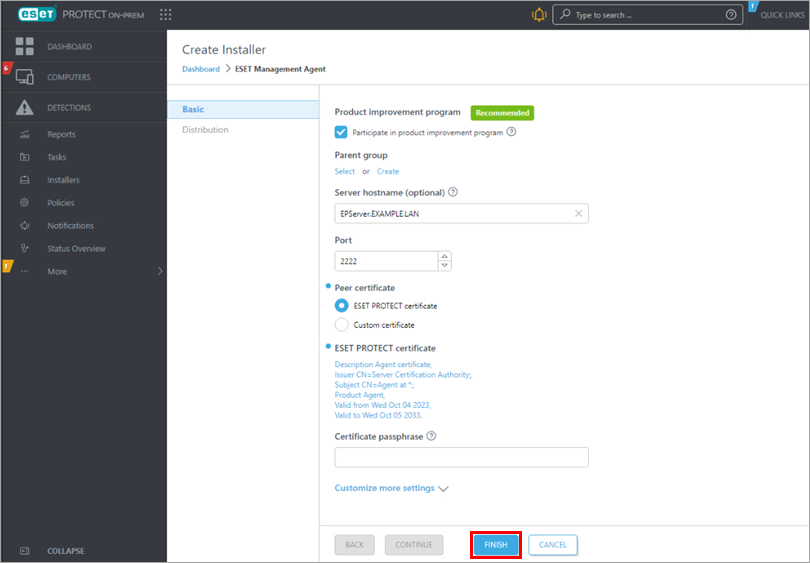
Figure 2-3 - Click the file icon to download the
install_config.inifile. Select the desired agent installer icon (32-bit-64-bit, ARM64) to download the agent installer.msifile and save it to the same shared folder.
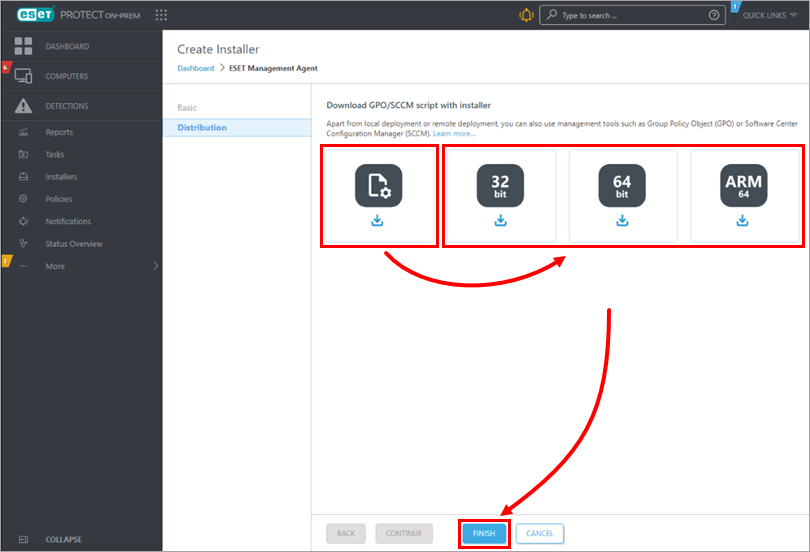
Figure 2-4
- Refer to one of the processes below to deploy the package:
- Deploy the ESET Management Agent using a Group Policy Object (GPO)
- Deploy the ESET Management Agent using System Center Configuration Manager (SCCM).
When you have completed the instructions from the appropriate article, proceed to Step 5, deploy ESET endpoint products to your client computers if you are performing a new installation of ESET PROTECT On-Prem.