Issue
- Create multiple network profiles for use on different networks
- Automatically switch between profiles when you enter or leave a zone
- Configure your network profiles in ESET Cyber Security
Details
Click to expand
The firewall distinguishes between two types of networks:
-
Private Network: This refers to familiar networks, such as those at home or in the workplace, where the user trusts all connected devices. As a result, less strict rules can be applied to communications on private networks. An inbound trusted rule can be applied to this network.
-
Public Network: This applies to unfamiliar networks, such as public Wi-Fi, where the user cannot assess the safety of communications. Strict rules should be enforced on public networks to ensure security.
Solution
-
Click ESET Cyber Security in the macOS menu bar (at the top of the screen) and click Settings.
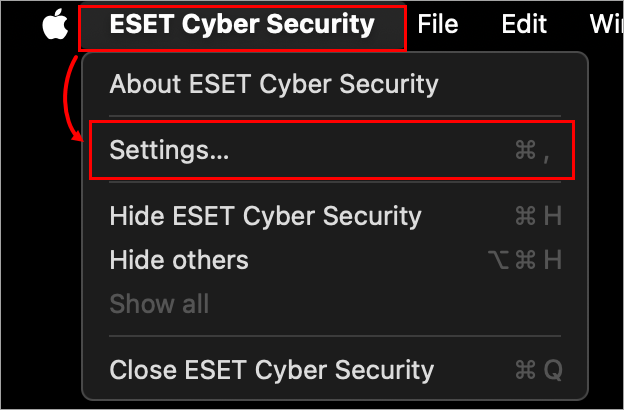
Figure 1-1 -
In Protections, click Network Profiles.
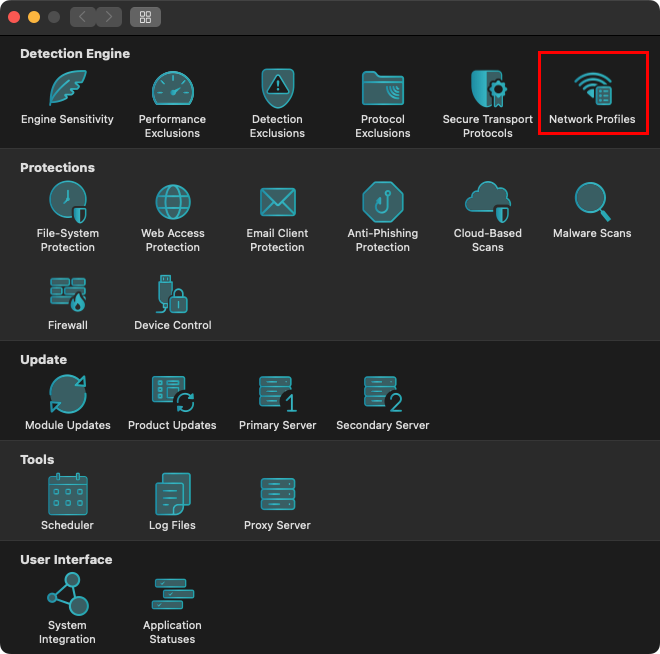
Figure 1-2 -
Click Private, Public, or Guest to view or modify existing network files.
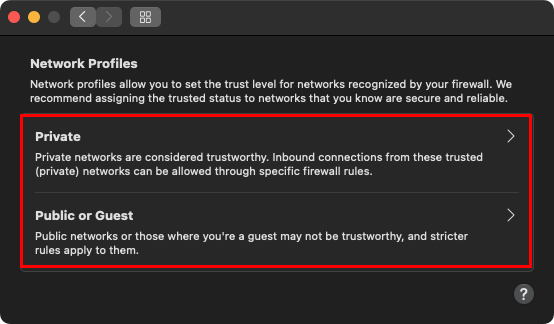
Figure 1-3 -
To review the network profile before deleting it, view the tooltip in the profiles table by hovering over the selected profile or by exporting the information to a CSV file using the context menu option Export Networks to CSV.
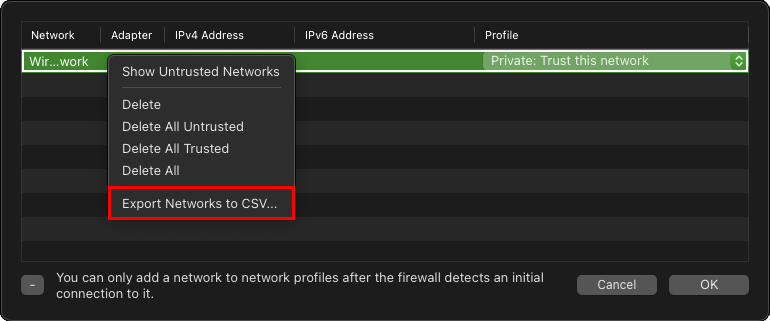
Figure 1-4 -
To change the network profile, click the drop-down menu Profile and select Private: Trust this network or Public or Guest: Don't trust this network. click OK to confirm the profile changes.
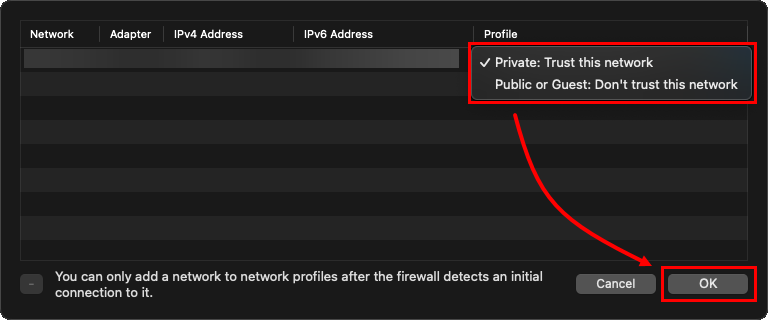
Figure 1-5 -
To remove a network profile, click the network, then click the remove icon (minus) and click OK.
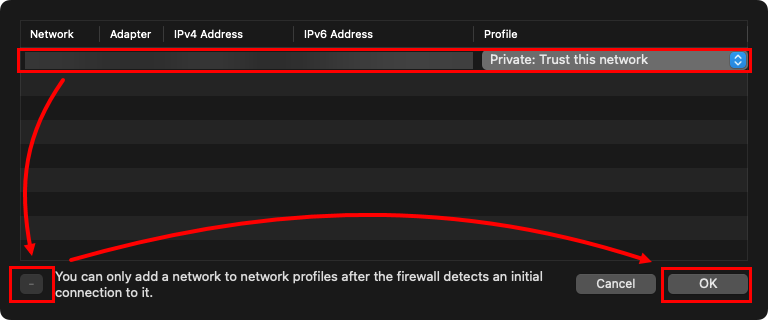
Figure 1-6 -
After deleting the network profile, the network is identified again using all available parameters provided by macOS. Access these parameters from the "Your Device" section when connecting to a new network window. Click Private, Public or Guest to save the network profile.
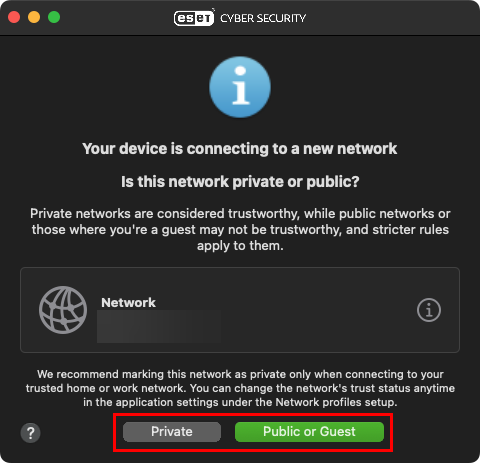
Figure 1-7 -
Click the info in the firewall window to display a basic set of parameters. Click Share to copy all parameters to the clipboard.
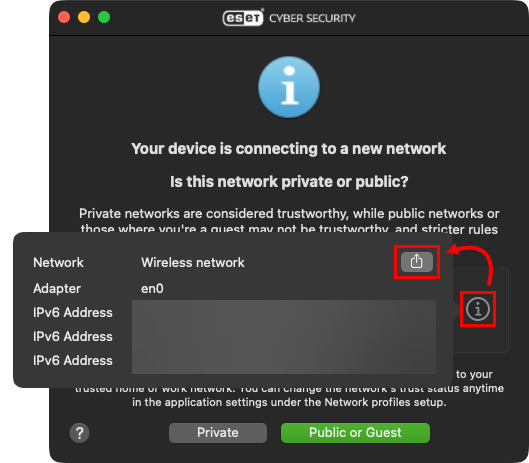
Figure 1-8