Issue
- Enable or disable Web control on client workstations from the ESET Remote Administrator Console, or on individual client workstations.
Details
Web control is used primarily for regulating the web content that can be accessed by client workstations in a company network
Solution
Enable / disable Web control using Policy Manager
- Open the ESET Remote Administrator Console by clicking Start → All Programs → ESET → ESET Remote Administrator Console → ESET Remote Administrator Console.
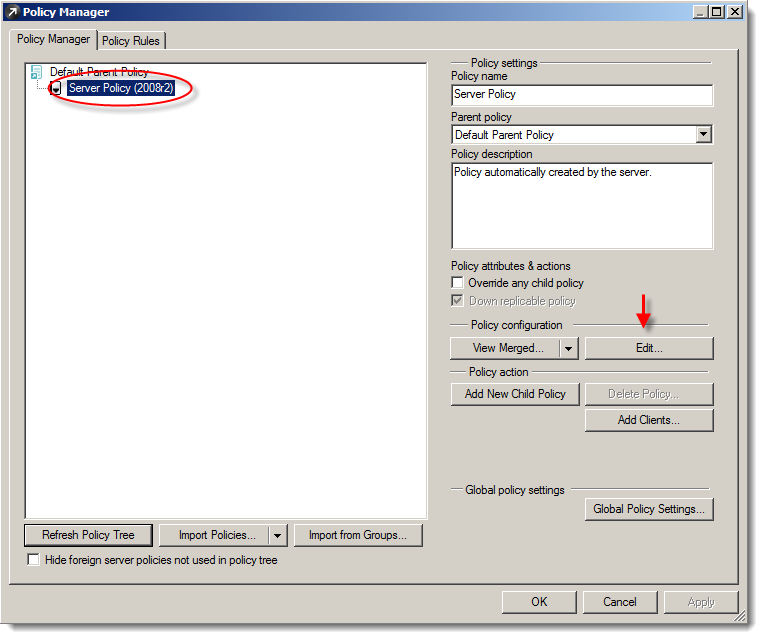
- Click Tools → Policy Manager. In the Policy Manager window select the policy you want to modify and click Edit.
Figure 1-1
Click the image to view larger in a new window
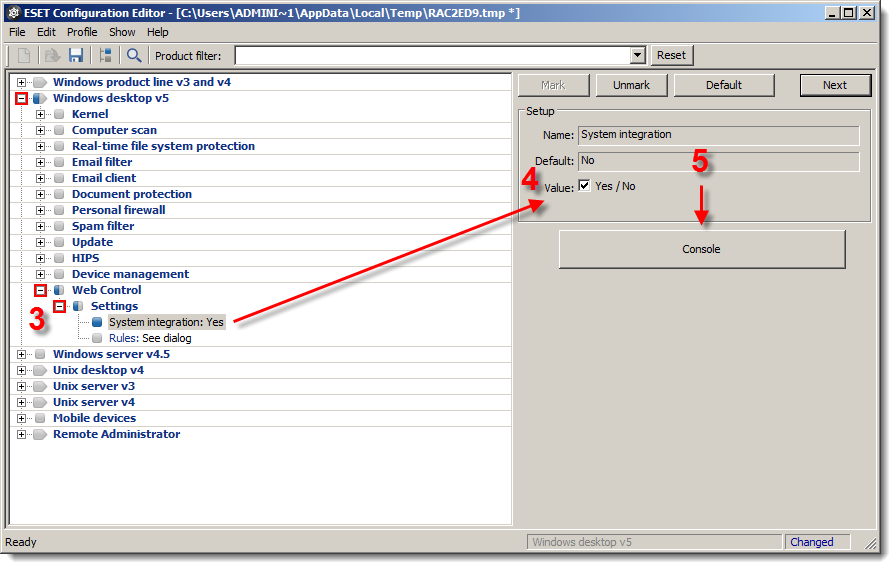
- Expand Windows desktop v5 → Web Control → Settings (see Figure 1-2).
- Click System integration: No and select the check box next to Yes/No.
- Click Console → Yes to save your changes. These changes will be applied to client workstations the next time they check in to ESET Remote Administrator.
Figure 1-2
Click the image to view larger in a new window
Enable / disable Web control on an individual client workstation
- Open ESET Smart Security or ESET NOD32 Antivirus. How do I open my ESET product?
- Press the F5 key on your keyboard to access the Advanced setup window.
-
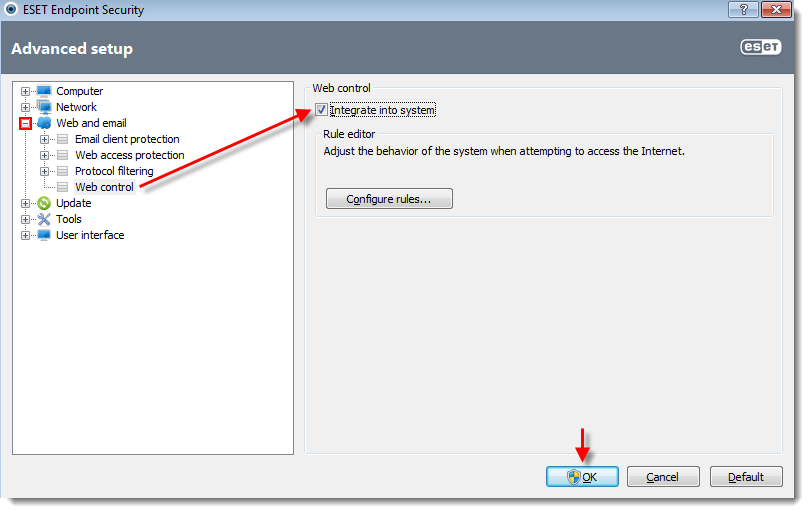
Expand Web and email, click Web control and then select the check box next to Integrate into system. Click OK to save your changes.
Figure 2-1
Click the image to view larger in a new window


