Issue
- Upgrade ESET Endpoint Security, ESET Endpoint Antivirus, or ESET Server/Mail Security products to the latest version
- Deploy ESET endpoint solutions to clients remotely using the Software Install task
Click the expanders below to show the procedure for ESET PROTECT or ESET PROTECT On-Prem:
ESET PROTECT
Solution
-
Click Tasks → Operating System → Software Install → New → Client Task.

Figure 2-1 -
In the Basic section, type a name into the Name field. The Description field is optional. The Task Category and Task drop-down menus will automatically be set to All tasks and Software Install, respectively. Click Continue.
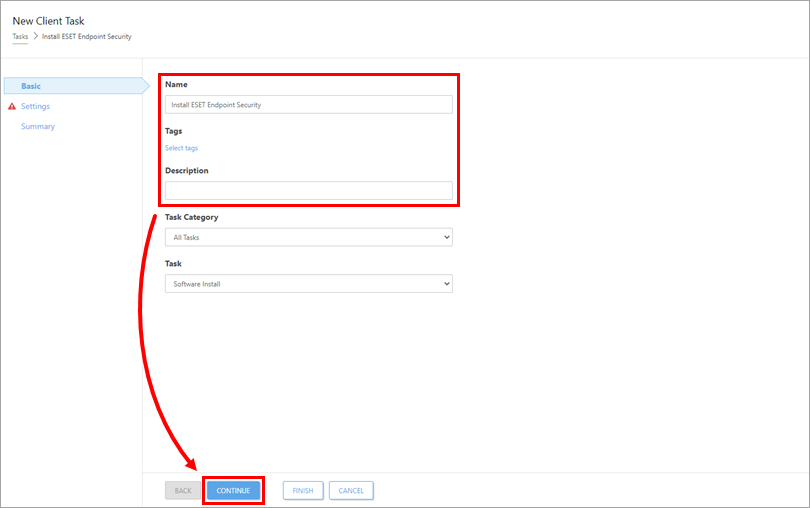
Figure 2-2 -
In the Settings section, under Package to install, there are two options to select the package that will be installed on target clients: Install package from repository or Install by direct package URL.
-
-
Verify that Install package from repository is selected. Select the operating system (in this example, Windows is selected) and click Select below Choose package from repository. In the Choose product window, select the product and the language from the Language drop-down menu. Optionally, you can expand Customize more settings, where you can select the specific product version. Check for the latest version of your ESET business products. Click OK.
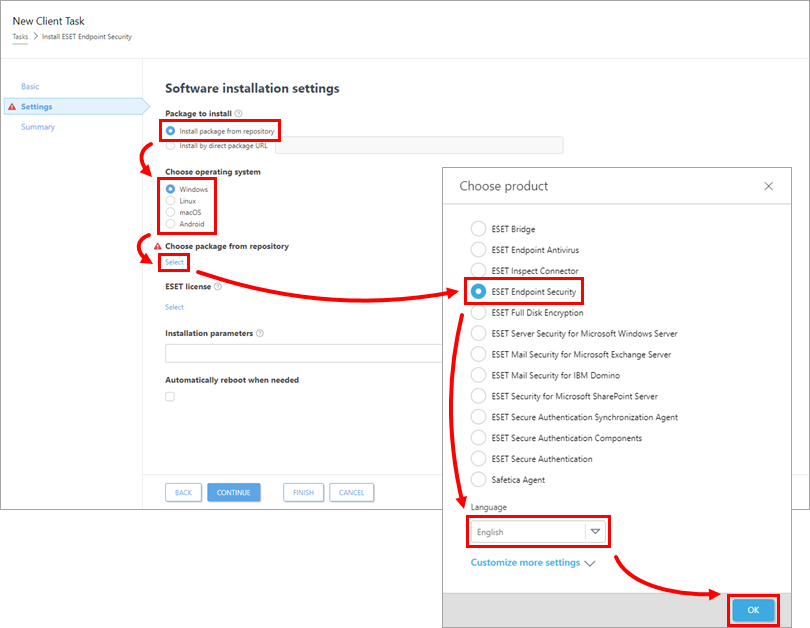
Figure 2-3
-
-
-
-
The check box next to Allow to install the latest product version for which the EULA is accepted is pre-selected. Deselect this check box if you do not want to install the latest version of the chosen product. Click the license below the ESET license to change it. Optionally, select the check box next to Activate ESET LiveGuard to enable this functionality (review the note and license below). Select the check boxes next to Enable The ESET LiveGrid® feedback system (recommended) and next to Enable detection of potentially unwanted applications. Select the check box below Automatically reboot when needed and configure the Postpone and Allow user to cancel the action settings if needed. Proceed to step 5.
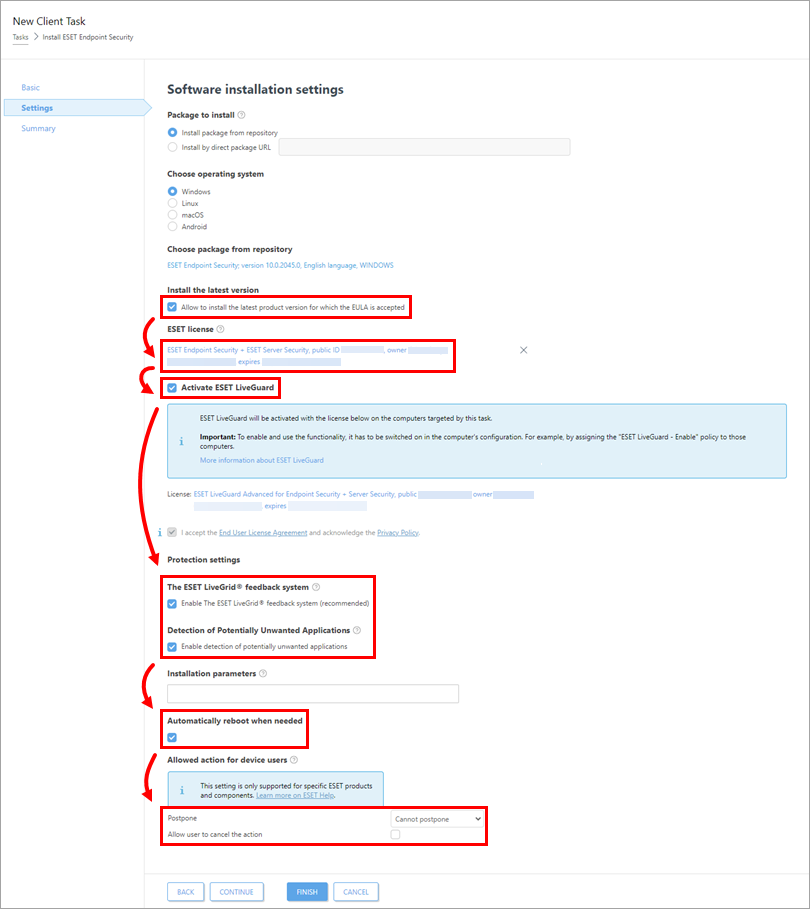
Figure 2-4
-
-
-
-
Check for the latest version of your ESET business products.
-
Select Install by direct package URL, type or copy/paste the package URL into the corresponding field. Only click Select below ESET license when installing a new product or upgrading products that are not activated, or if you want to change the license currently in use to a different license from the list of available licenses. Select the check box next to I accept the End User License Agreement. Select the check box below Automatically reboot when needed and configure the Postpone and Allow user to cancel the action settings if needed. Proceed to step 5.
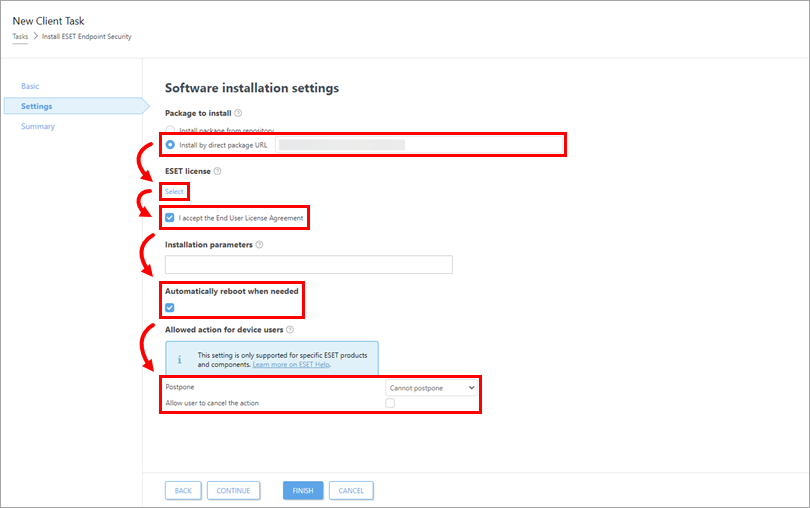
Figure 2-5
-
-
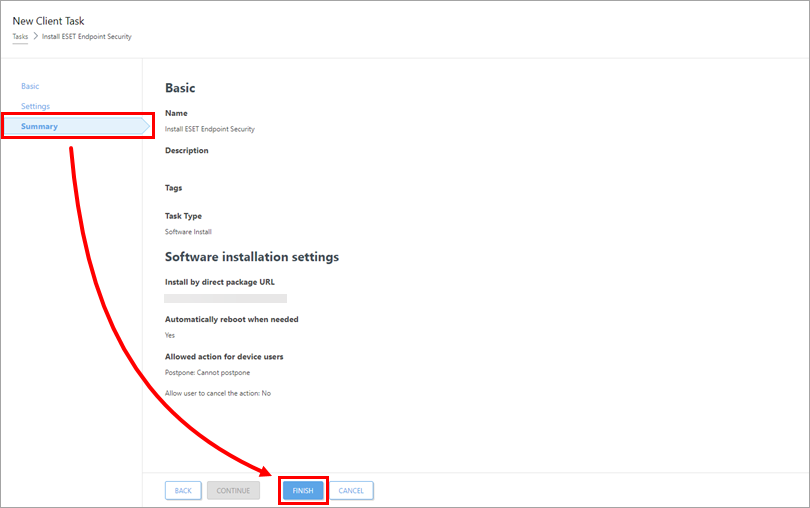
Figure 2-6 -
When prompted, click Create Trigger.
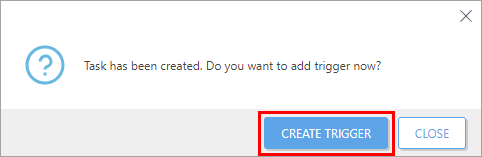
Figure 2-7 -
Type a name for the trigger into the Trigger Description field and click Continue.
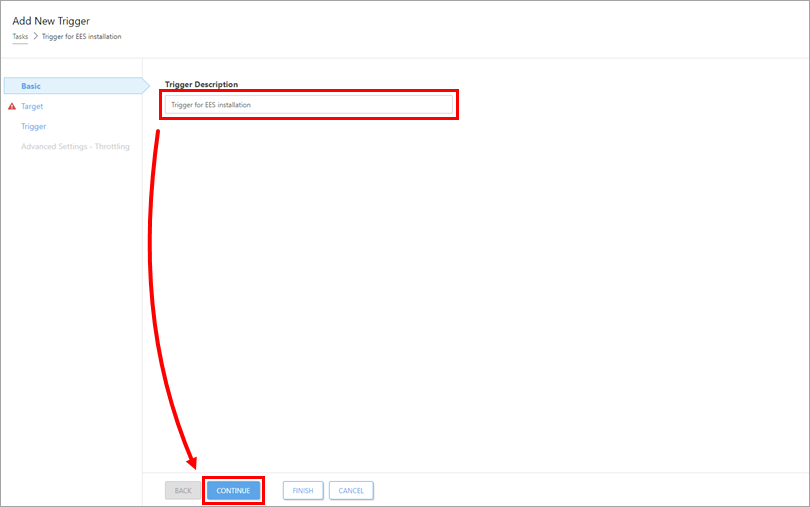
Figure 2-8 -
Click Add targets. Select the check boxes next to the computers or groups to which you want to send this task and click OK.
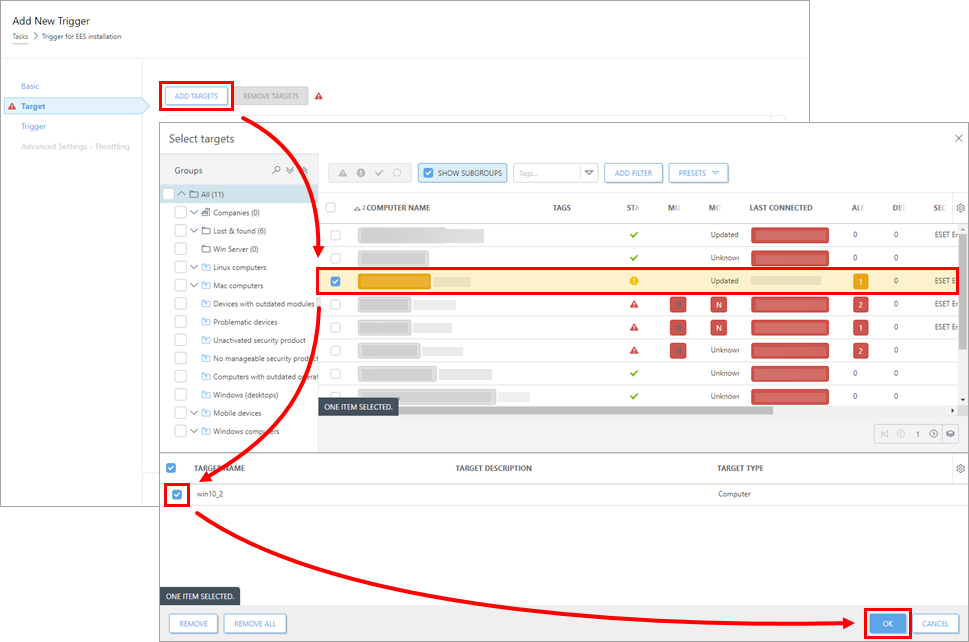
Figure 2-9 -
Click Trigger, select a Trigger type from the drop-down menu and click Finish.
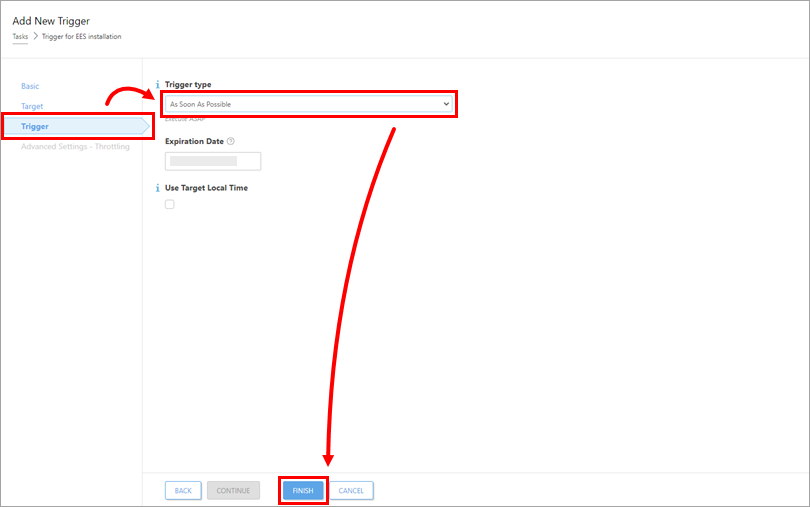
Figure 2-10 -
Send an activation task to the computers on which you installed ESET endpoint or ESET Server/Mail Security products so that they can begin receiving regular updates.
ESET PROTECT On-Prem
Solution
-
Click Tasks → Operating System → Software Install → New → Client Task.
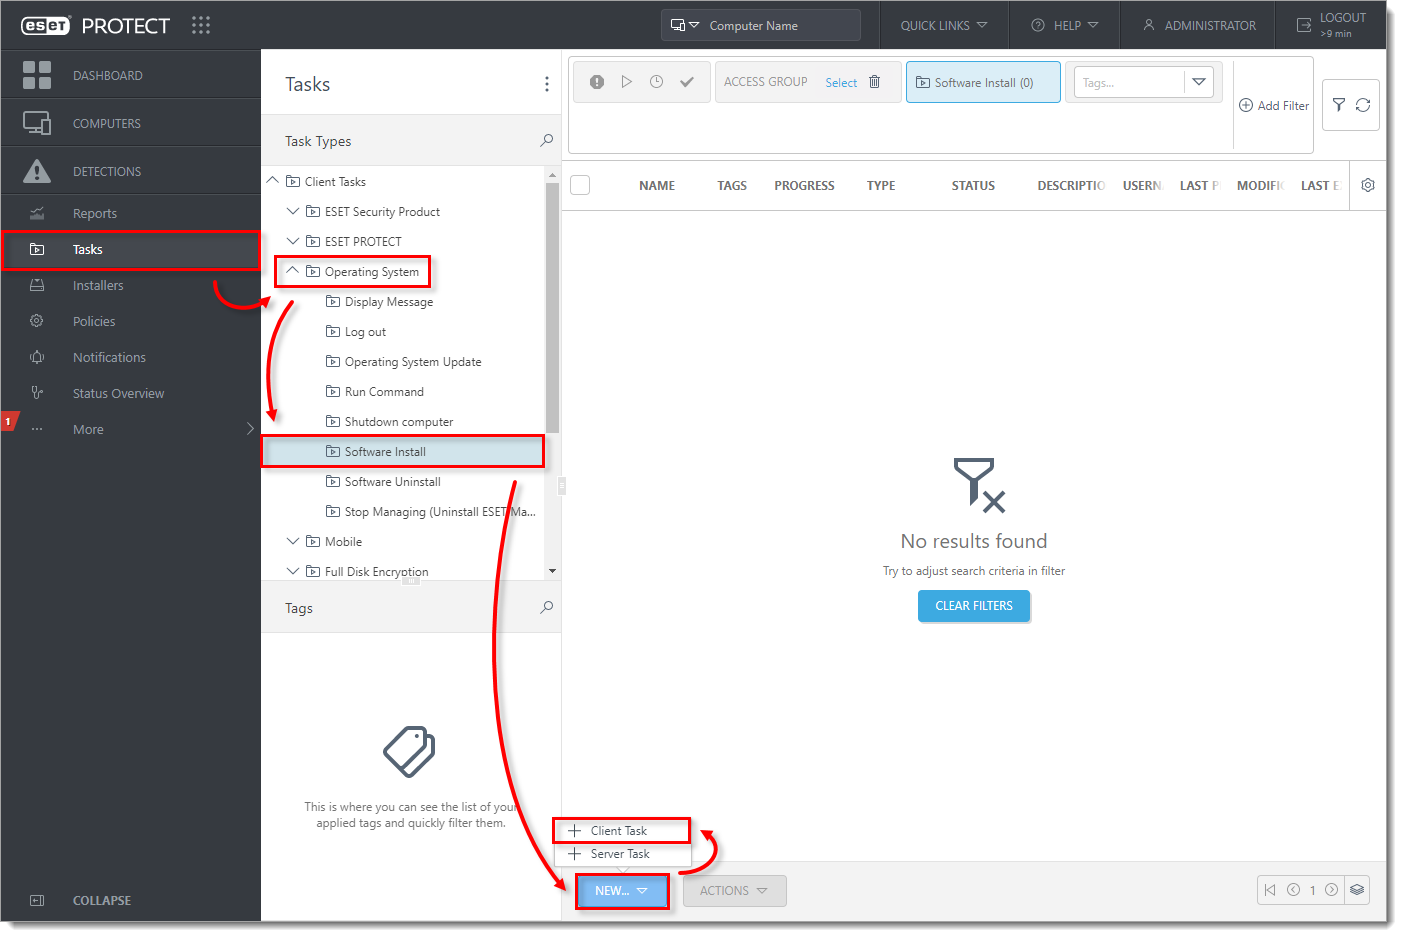
Figure 1-1
-
In the Basic section, type a name into the Name field. The Description field is optional. The Task drop-down menu will automatically be set to Software Install. Click Continue.
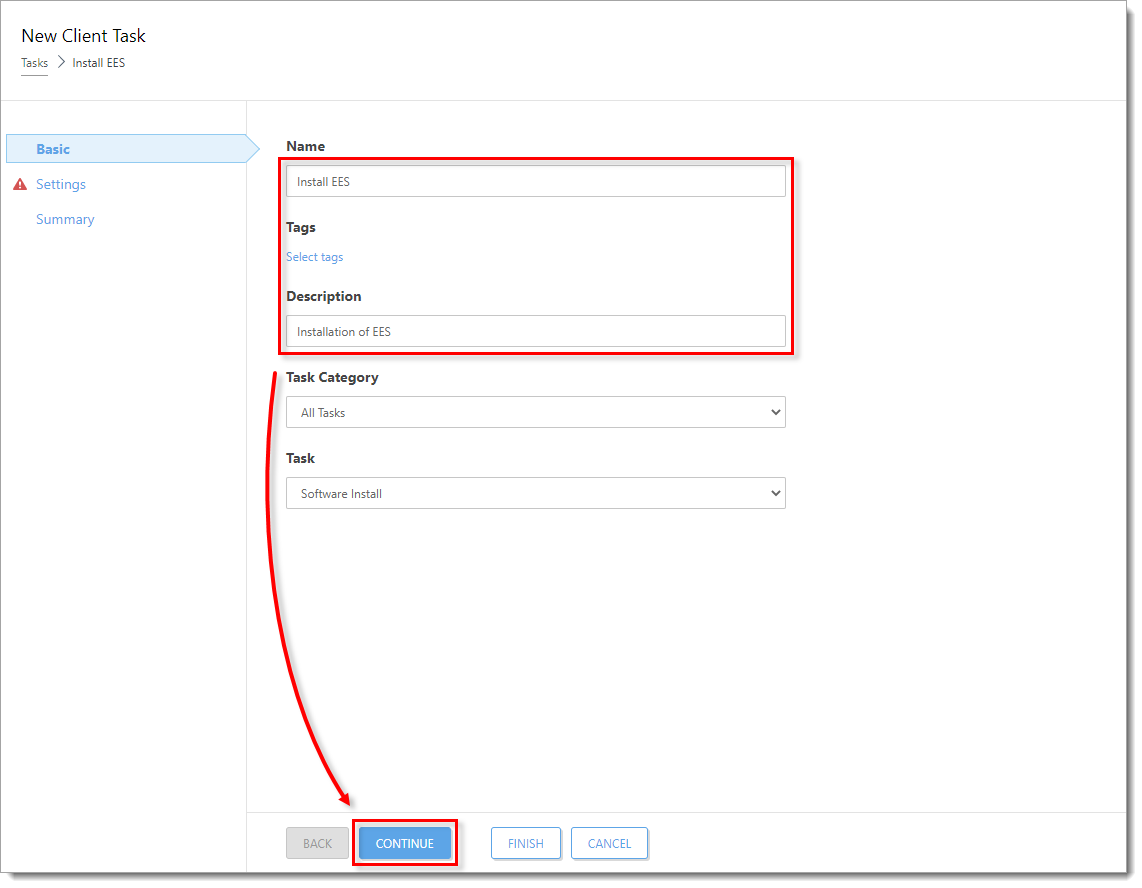
Figure 1-2
-
In the Settings section, under Package to install, there are two options to select the package that will be installed on target clients.
-
-
To install a package from the repository:
-
-
-
Verify that Install package from repository is selected. Select the operating system (in this example, Windows is selected) and click Select below Choose package from repository. In the Choose product window, select the product and the language from the Language drop-down menu. Optionally, you can click Customize more settings, where you can select the specific product version. Check for the latest version of your ESET business products. Click OK.
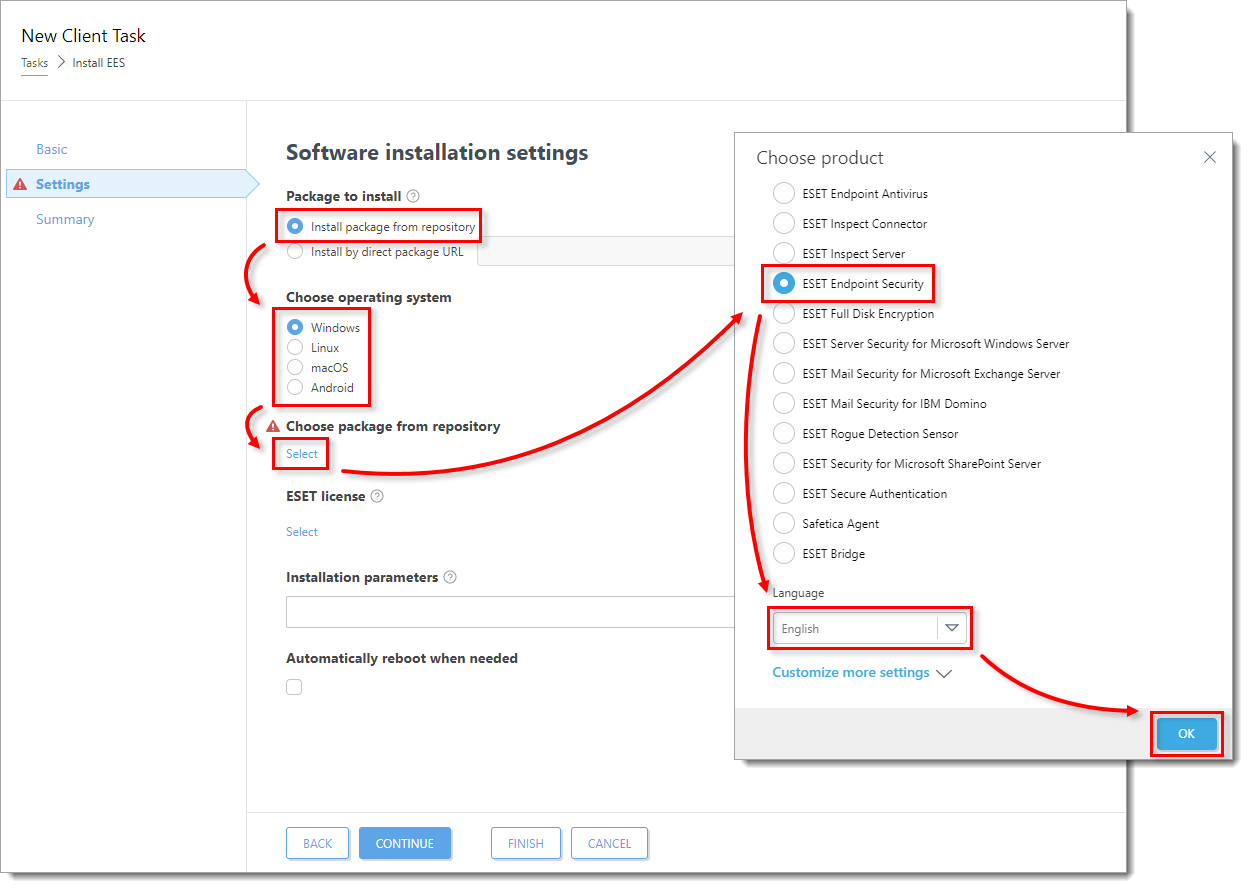
Figure 1-3
-
-
-
-
The check box next to Allow to install the latest product version for which the EULA is accepted is pre-selected. Deselect this check box if you do not want to install the latest version of the chosen product. Select the check box next to I accept the End User License Agreement and acknowledge the Privacy Policy. Select the check boxes next to Enable The ESET LiveGrid® feedback system (recommended) and next to Enable detection of potentially unwanted applications. Select the check box below Automatically reboot when needed and configure the settings below Allowed action for device users if needed. Proceed to Step 6.
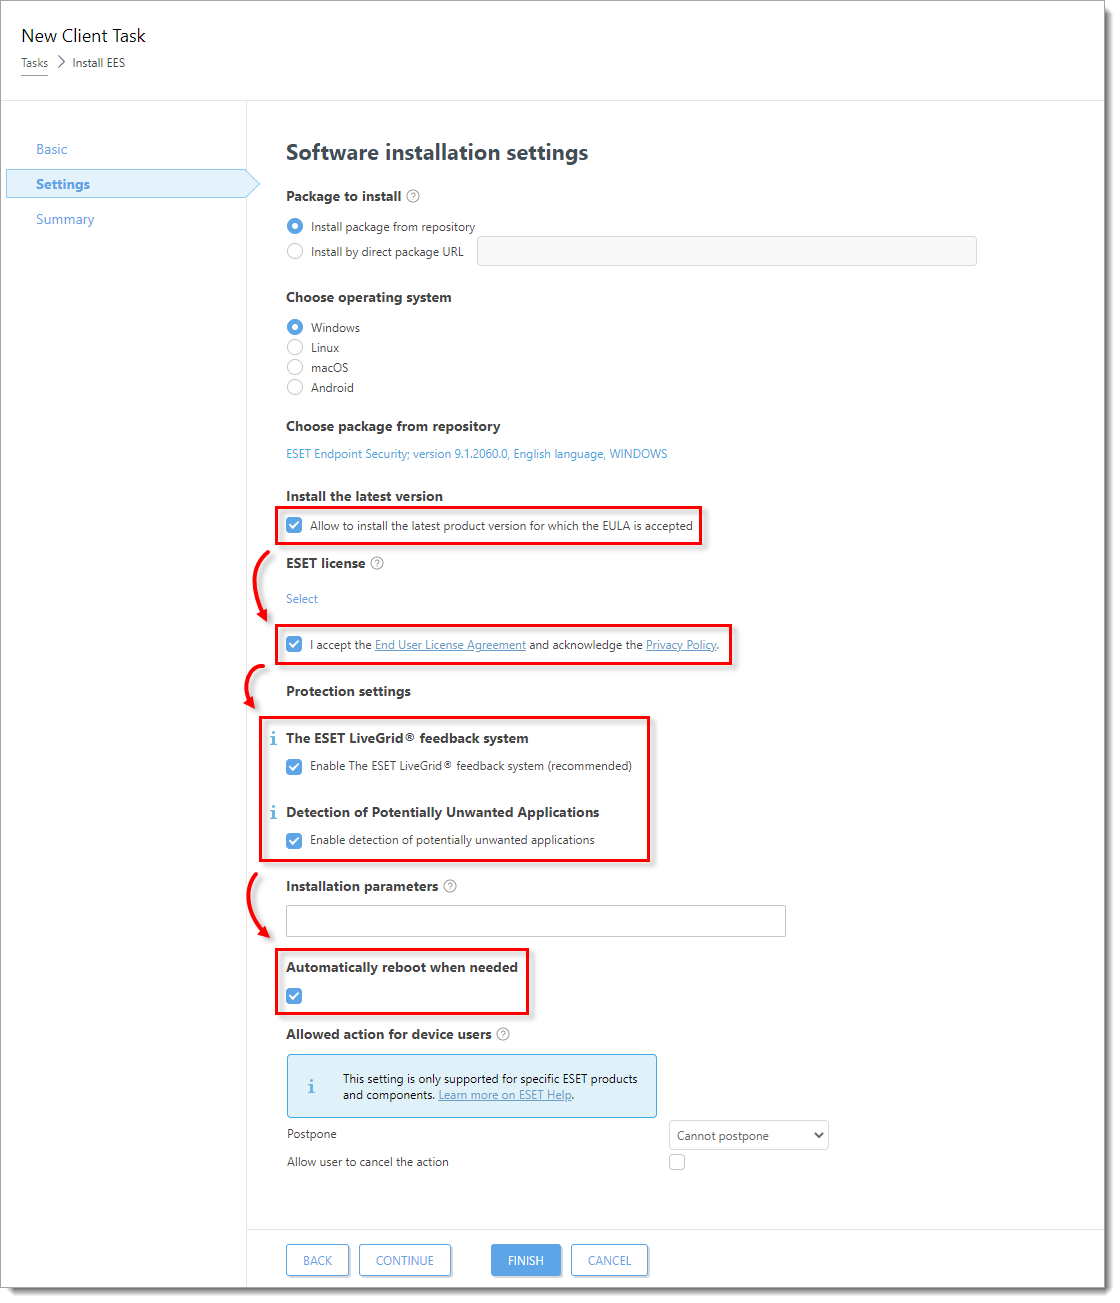
Figure 1-4
-
-
-
-
To install a package by entering the target URL:
-
-
-
Check for the latest version of your ESET business products.
-
Select Install by direct package URL, type or copy/paste the package URL into the corresponding field and select the check box next to I accept the End User License Agreement. Select the check box below Automatically reboot when needed and configure the settings below Allowed action for device users if needed.
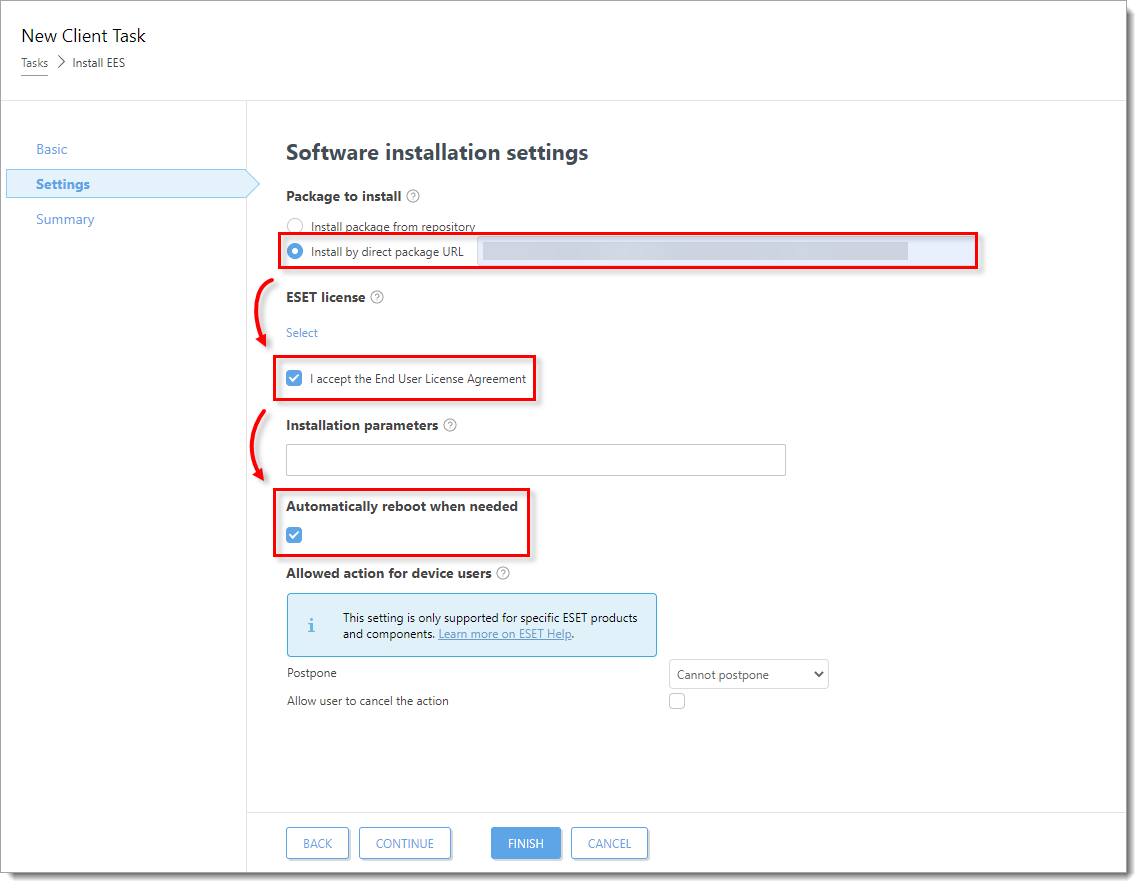
Figure 1-5
-
-
Only click Select below ESET license when installing a new product or upgrading products that are not activated, or if you want to change the license currently in use to a different license. Select the appropriate product license from the list of available licenses. Proceed to Step 6.
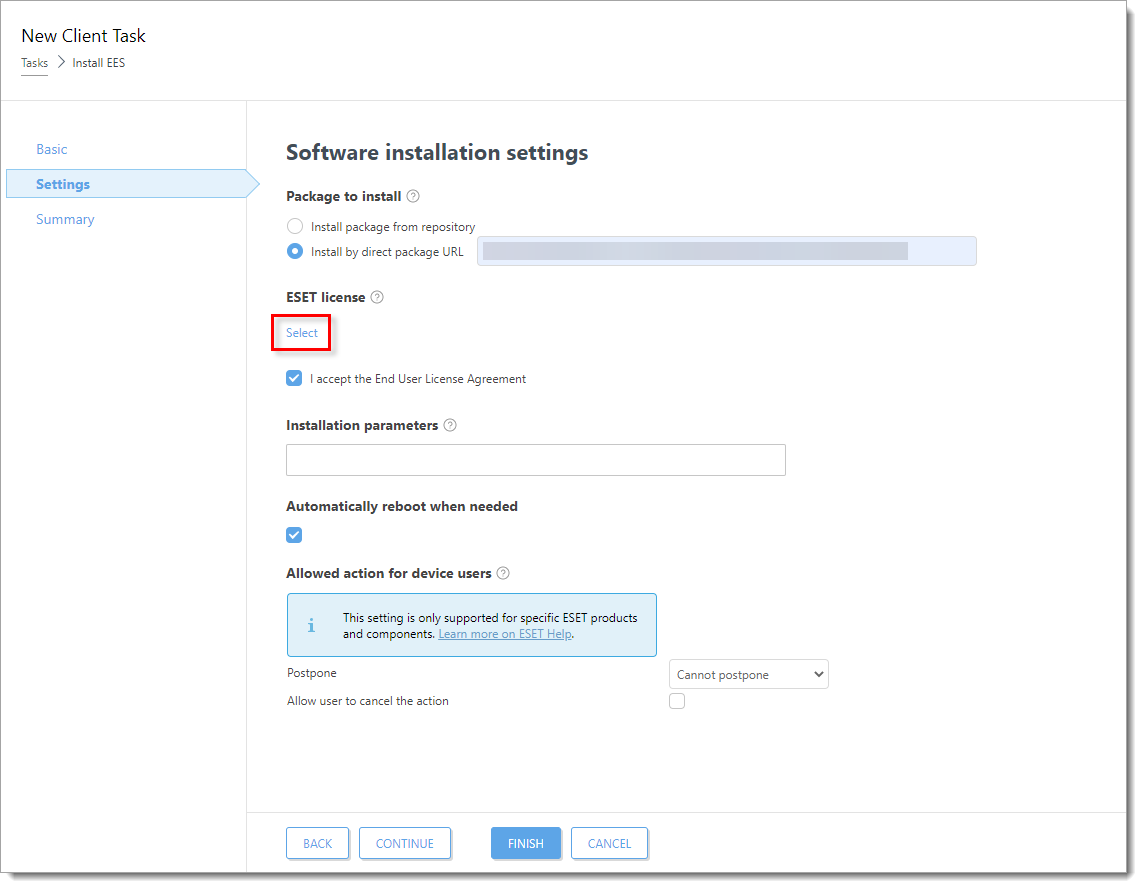
Figure 1-6
-
When prompted, click Create Trigger.
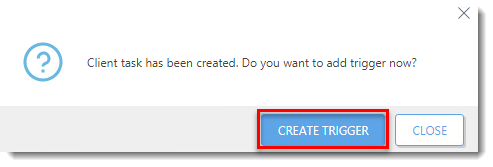
Figure 1-8
-
Type a name for the trigger into the Trigger Description field.
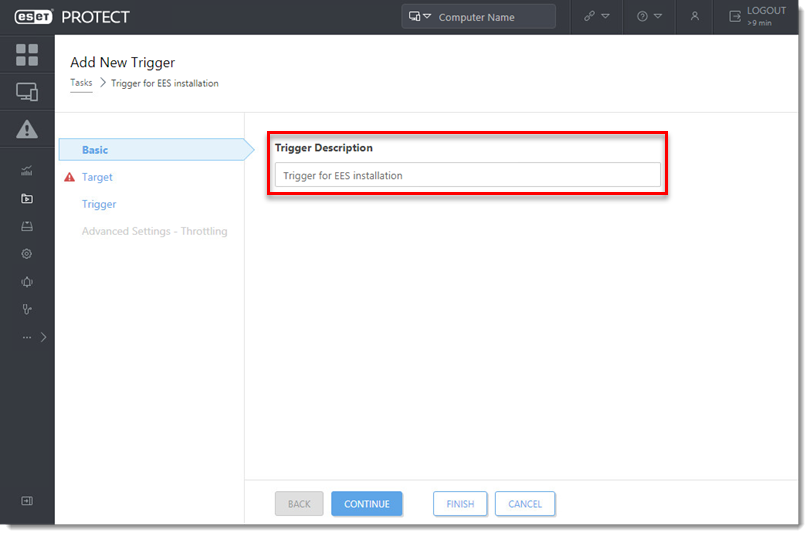
Figure 1-9
-
Click Target and click Add computers or Add groups.

Figure 1-10
-
Select the check boxes next to the computers or groups to which you want to send this task and click OK.
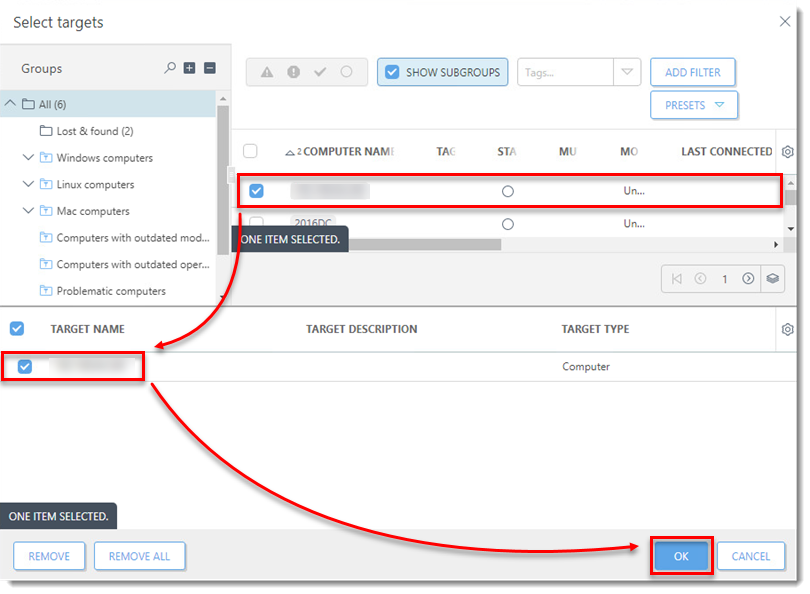
Figure 1-11
-
Click Trigger, select a Trigger type, and click Finish.
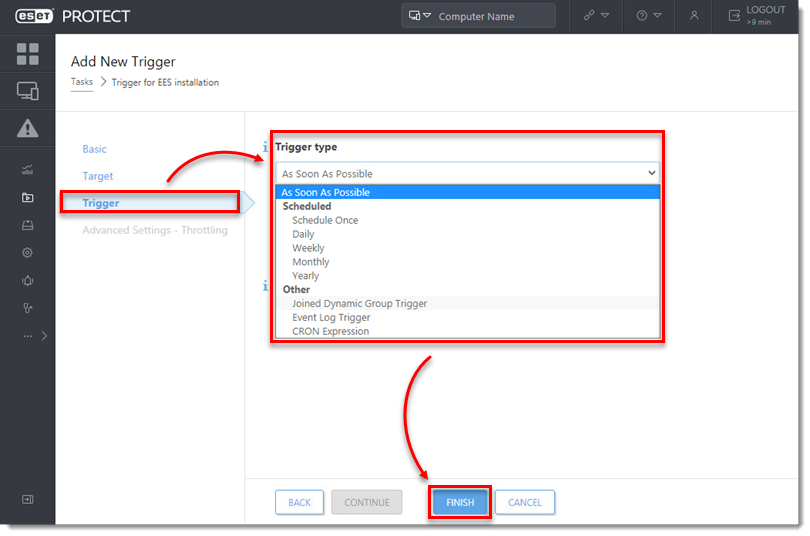
Figure 1-12
-
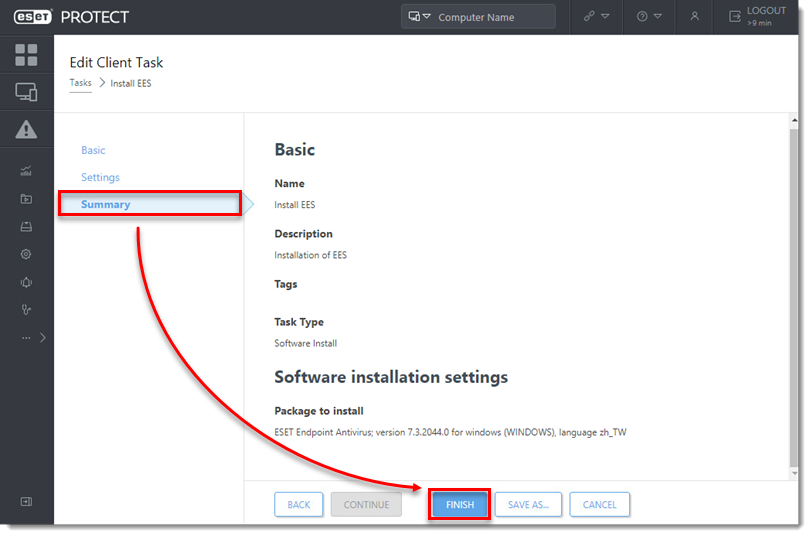
Send an activation task to the computers on which you installed ESET endpoint or ESET Server/Mail Security products so that they can begin receiving regular updates.
-
If you are performing a new installation of ESET PROTECT On-Prem, proceed to post-installation tasks.