Issue
- Recover files from a disk encrypted with ESET Full Disk Encryption (EFDE) from an Apple computer with macOS Catalina (10.15) or Big Sur (11)
Details
Click to expand
Due to the nature of macOS Catalina (10.15) or Big Sur (11) , you cannot boot to a recovery mode with Terminal on an encrypted Apple computer.
ESET provides a workaround using the Target Disk Mode, where two Apple computers are required.
Solution
- Download the recovery data file
- Create a recovery USB disk
- Unlock the encrypted disk from another computer
I. Download the recovery data file
-
Click Computers, select the computer you want to decrypt the disk and click Show Details.
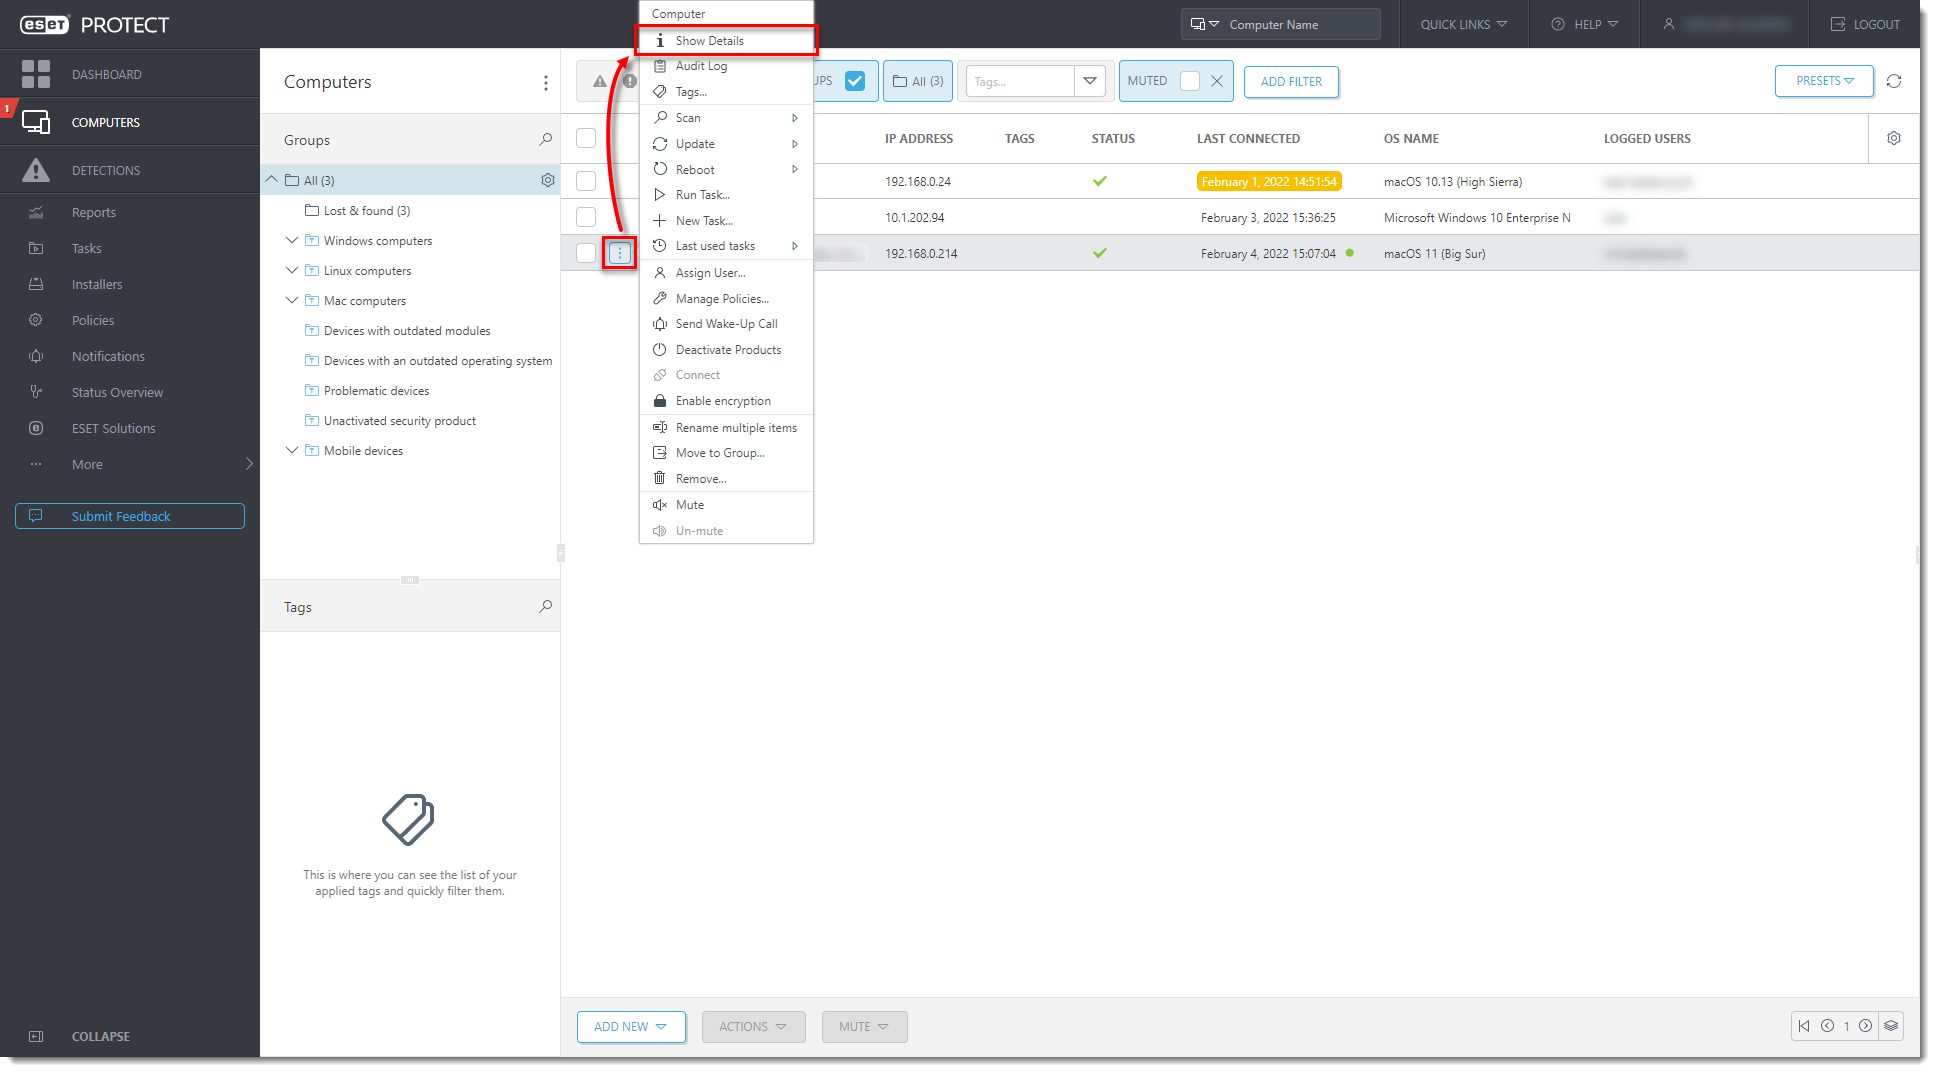
Figure 1-1
Click the image to view larger in new window -
In the Encryption active dashboard, click Manage → Restore Access → Recovery data.
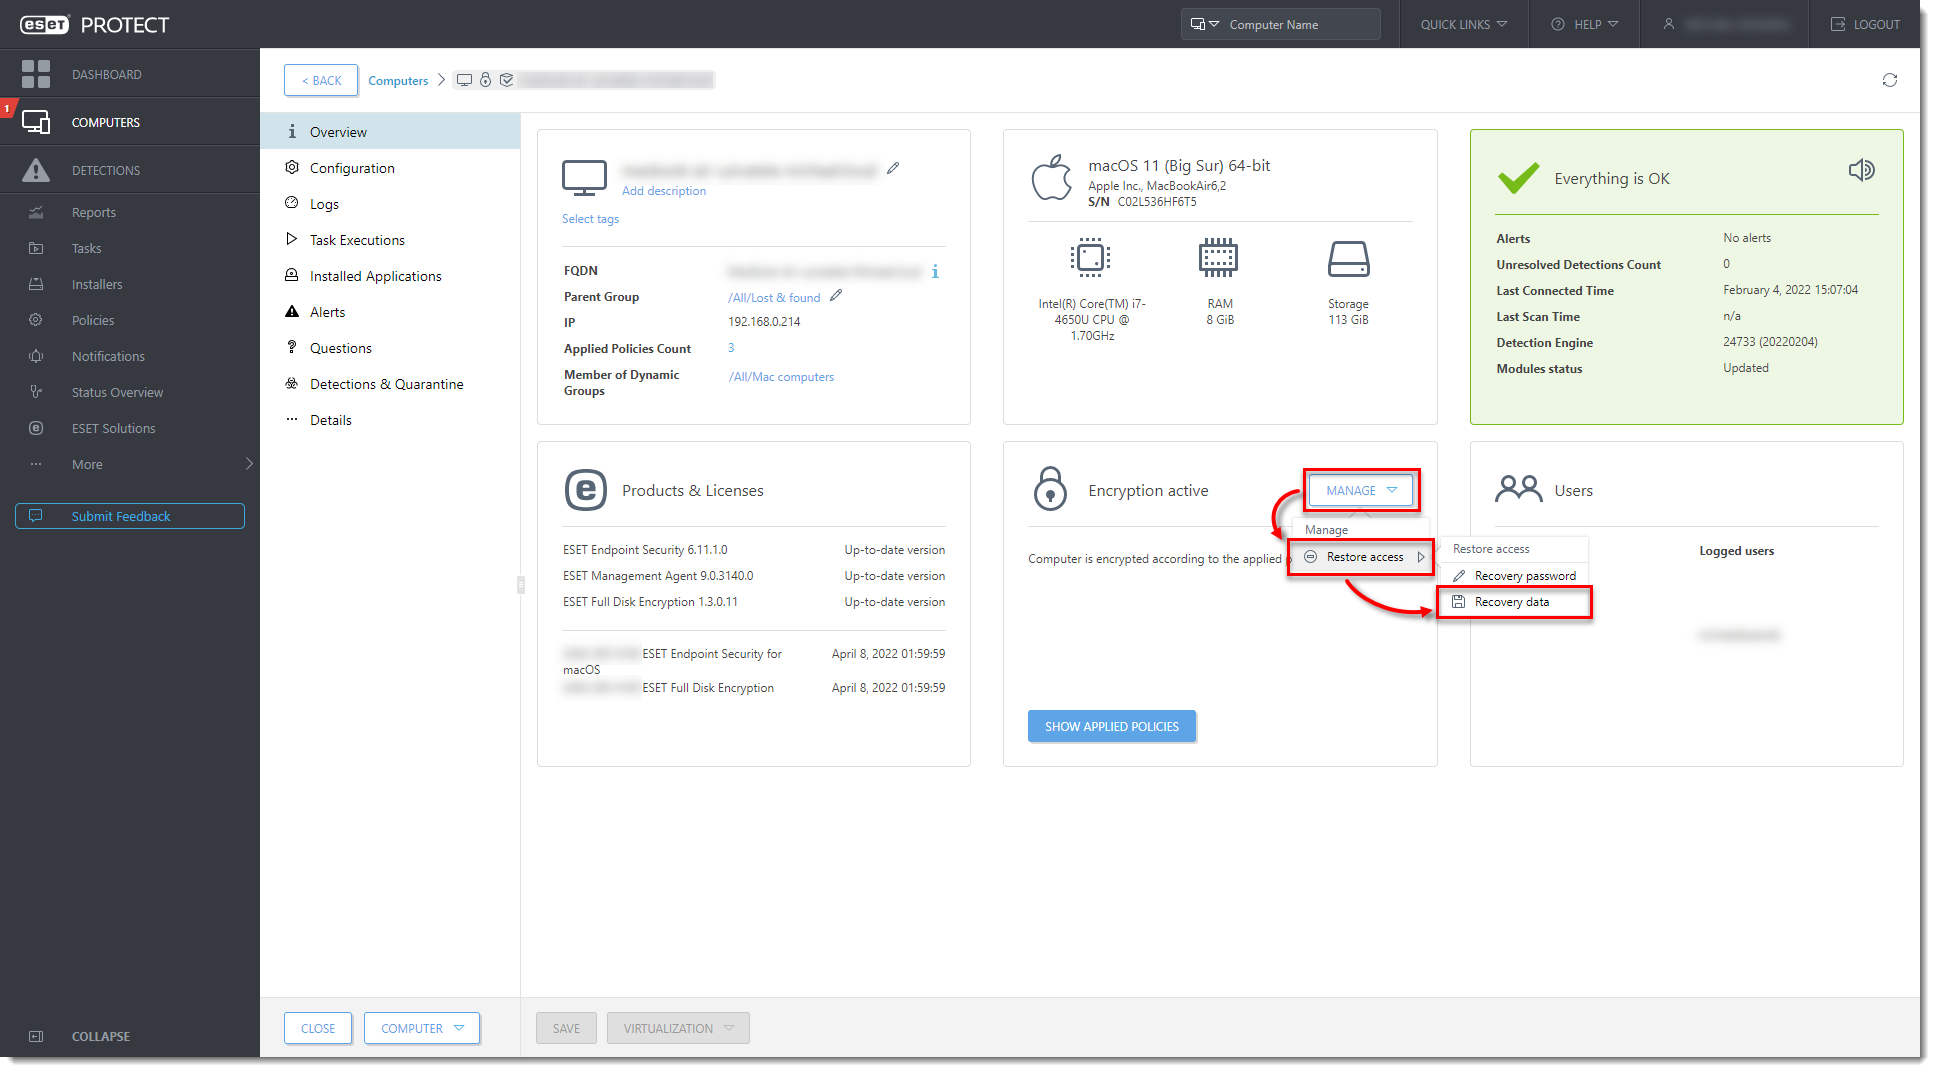
Figure 1-2
Click the image to view larger in new window -
Type a new Password, confirm the password and click Create Recovery Data.
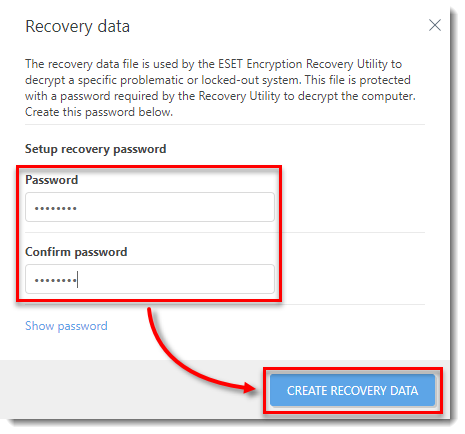
Figure 1-3
Click the image to view larger in new window -
To download the recovery data file, click efderecovery.dat and save or copy the file to a USB disk.
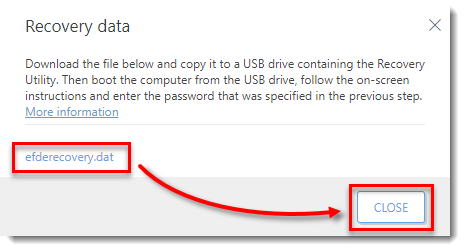
Figure 1-4
Click the image to view larger in new window
II. Create a recovery USB disk
-
On a second Apple computer, download the Encryption recovery tool for macOS and unzip and copy the
recoveryappfile to the USB disk that contains theefderecovery.datfile -
Open Terminal, type
cd /Volumes/[NAME], where[NAME]is the name of the USB disk and press Enter. -
Type the following command and press Enter:
./recoveryapp efderecovery.dat -
Type the password you created in ESET PROTECT On-Prem and press Enter.

Figure 2-1
Click the image to view larger in new window
III. Unlock the encrypted disk from another computer
-
Connect the Apple computer with the EFDE encrypted disk to a second Apple computer. Verify that the USB disk is inserted into the second Apple computer.
-
Boot the Apple computer with the EFDE encrypted disk to a Target Disk Mode. To do this, shut down the computer, press the power button and then press and hold the T button on the keyboard.
For example, if you are using a Thunderbolt connection, the screen of the Apple computer in Target Disk Mode will look like this:
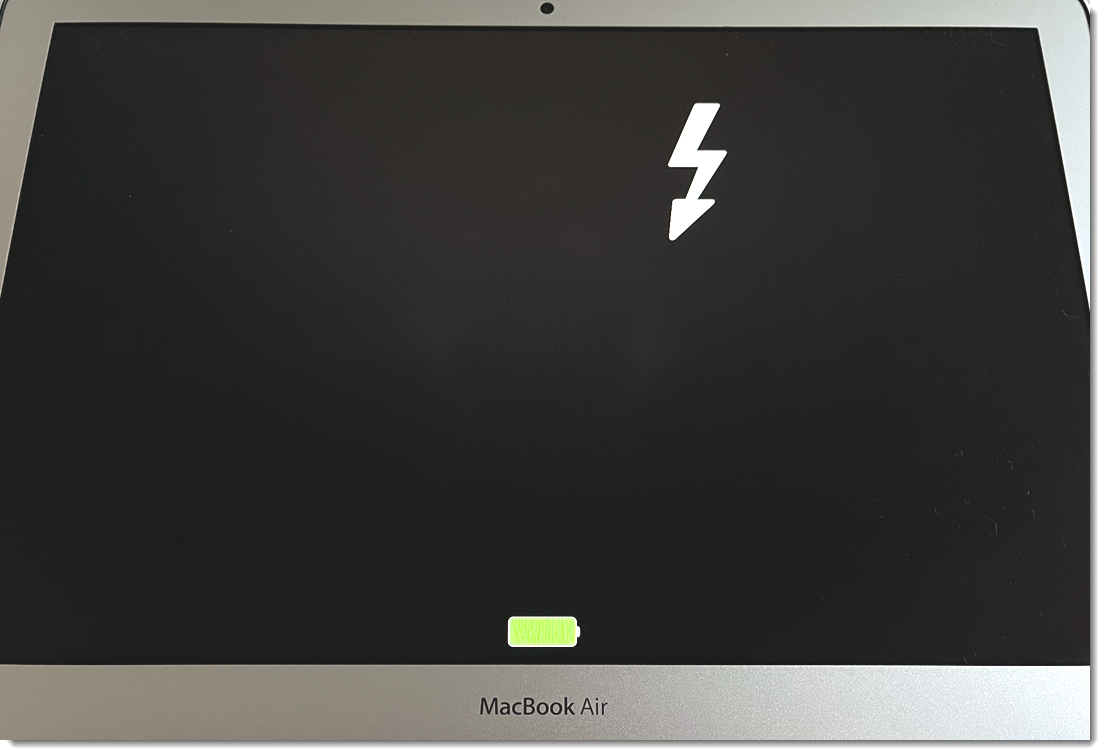
Figure 3-1
Click the image to view larger in new window -
On the second Apple computer, open Terminal, type the following command and press Enter:
diskutil apfs listFrom the list of the disks, find the partition with the description FileVault: Yes (Locked). Make a note of the partition identifier (in this case, disk15s1).
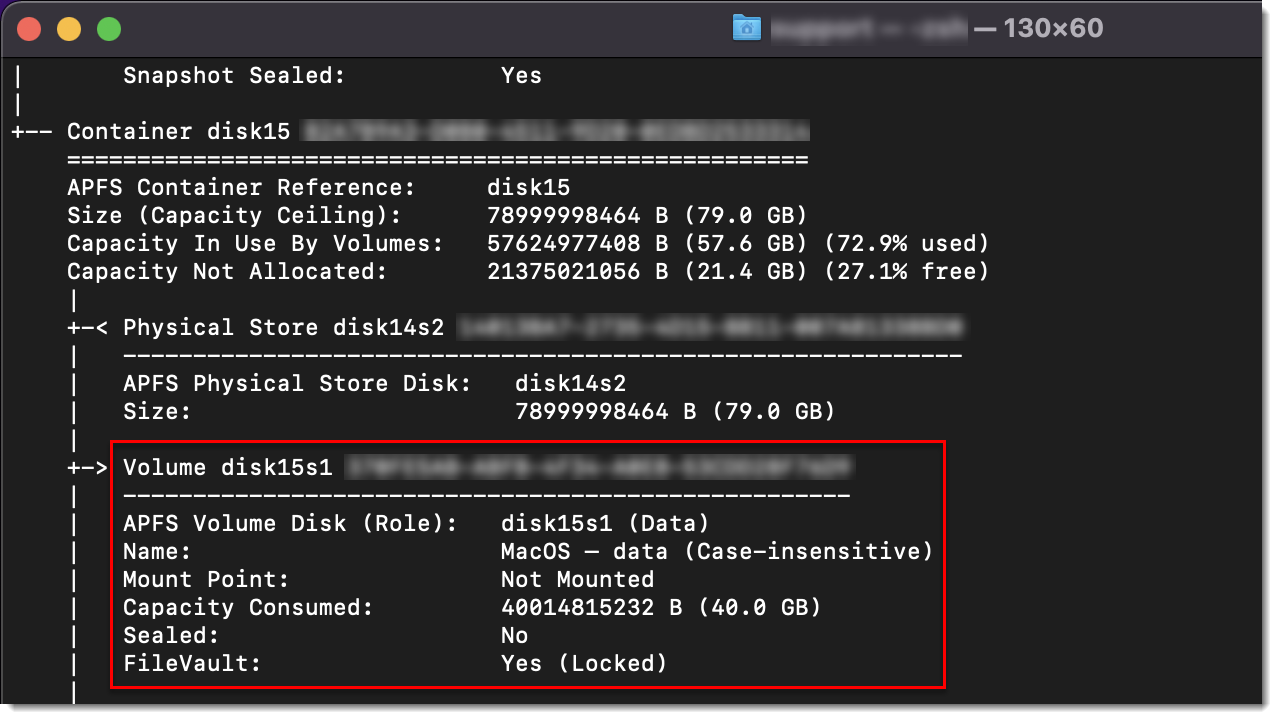
Figure 3-2
Click the image to view larger in new window -
Type the following command where [IDENTIFIER] is the disk identifier and [NAME] is the name of the USB disk and press Enter:
diskutil apfs unlockVolume /dev/[IDENTIFIER] -recoverykeychain /Volumes/[NAME]/FileVaultMaster.keychain
Figure 3-3
Click the image to view larger in new window -
Type the password you created and click OK.

Figure 3-4
Click the image to view larger in new window -
The disk will unlock and show as a mounted disk on the desktop. You can access and copy the data from the encrypted disk.
-
To decrypt the disk, type the following command and press Enter:
diskutil apfs decryptVolume /dev/[IDENTIFIER] –recoverykeychain /Volumes/[NAME]/FileVaultRecovery.keychain
Figure 3-5
Click the image to view larger in new window -
To see the decryption progress, type the following command and press Enter:
diskutil apfs list
Figure 3-6
Click the image to view larger in new window -
When the encryption is complete, you can exit the Terminal, unmount the disk (drag the disk icon to the trash bin icon), disconnect the two Apple computers and shut down and power on the Apple computer you want to decrypt to exit Target Disk Mode.