Issue
- You need to configure your ESET product to mitigate PrintNightmare exploits
- Create a mitigation policy for ESET Endpoint for Windows
- Create a mitigation policy for ESET Server Security for Windows Server
- Create a mitigation policy for ESET Mail Security for Microsoft Exchange
Details
You can use policies from ESET PROTECT and ESET PROTECT On-Prem to block malicious use of the Print Spooler service. With ESET’s Host-Based Intrusion Prevention System (HIPS), a user can block spoolsv.exe from writing new DLLs to the driver folder (a necessary element of remote exploitation of the PrintNightmare vulnerability).
Read more about PrintNightmare.
Solution
Create a mitigation policy for ESET Endpoint for Windows
Create a new policy and follow the steps up to step 4. Select ESET Endpoint for Windows from the Select product ... drop-down menu.
Follow these steps starting from Step 3 to configure the policy.
When the new policy is created, before you proceed with assigning the policy, in the Rules row, click the drop-down menu next to Edit and change both settings to Prepend.
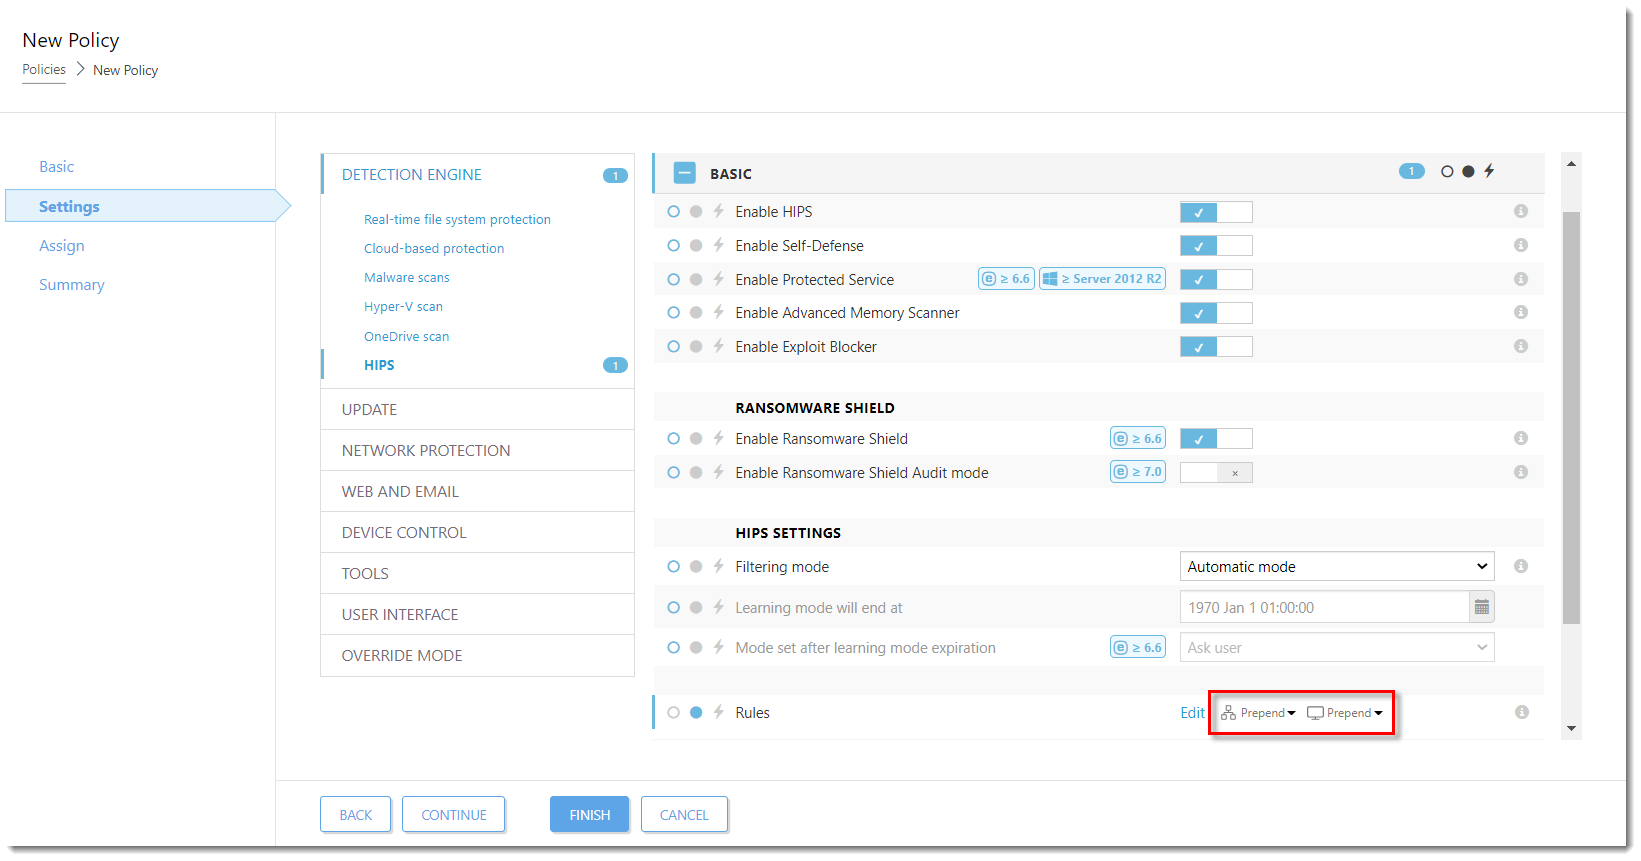
Click the image to view larger in new window
- Go to Step 7 and assign the policy to the groups or separate client computers.
Create a mitigation policy for ESET Server Security for Windows Server
Create a new policy and follow the steps up to step 4. Select ESET Server Security for Windows Server (V6+) from the Select product ... drop-down menu.
Follow these steps starting from Step 3 to configure the policy.
When the new policy is created, before you proceed with assigning the policy, in the Rules row, click the drop-down menu next to Edit and change bothsettings to Prepend.
Go to Step 7 and assign the policy to the groups or separate client computers.
Create a mitigation policy for ESET Mail Security for Microsoft Exchange
Create a new policy and follow the steps up to step 4. Select ESET Mail Security for Microsoft Exchange (V6+) from the Select product ... drop-down menu.
- Expand Computer, click HIPS and then click Edit next to Rules.
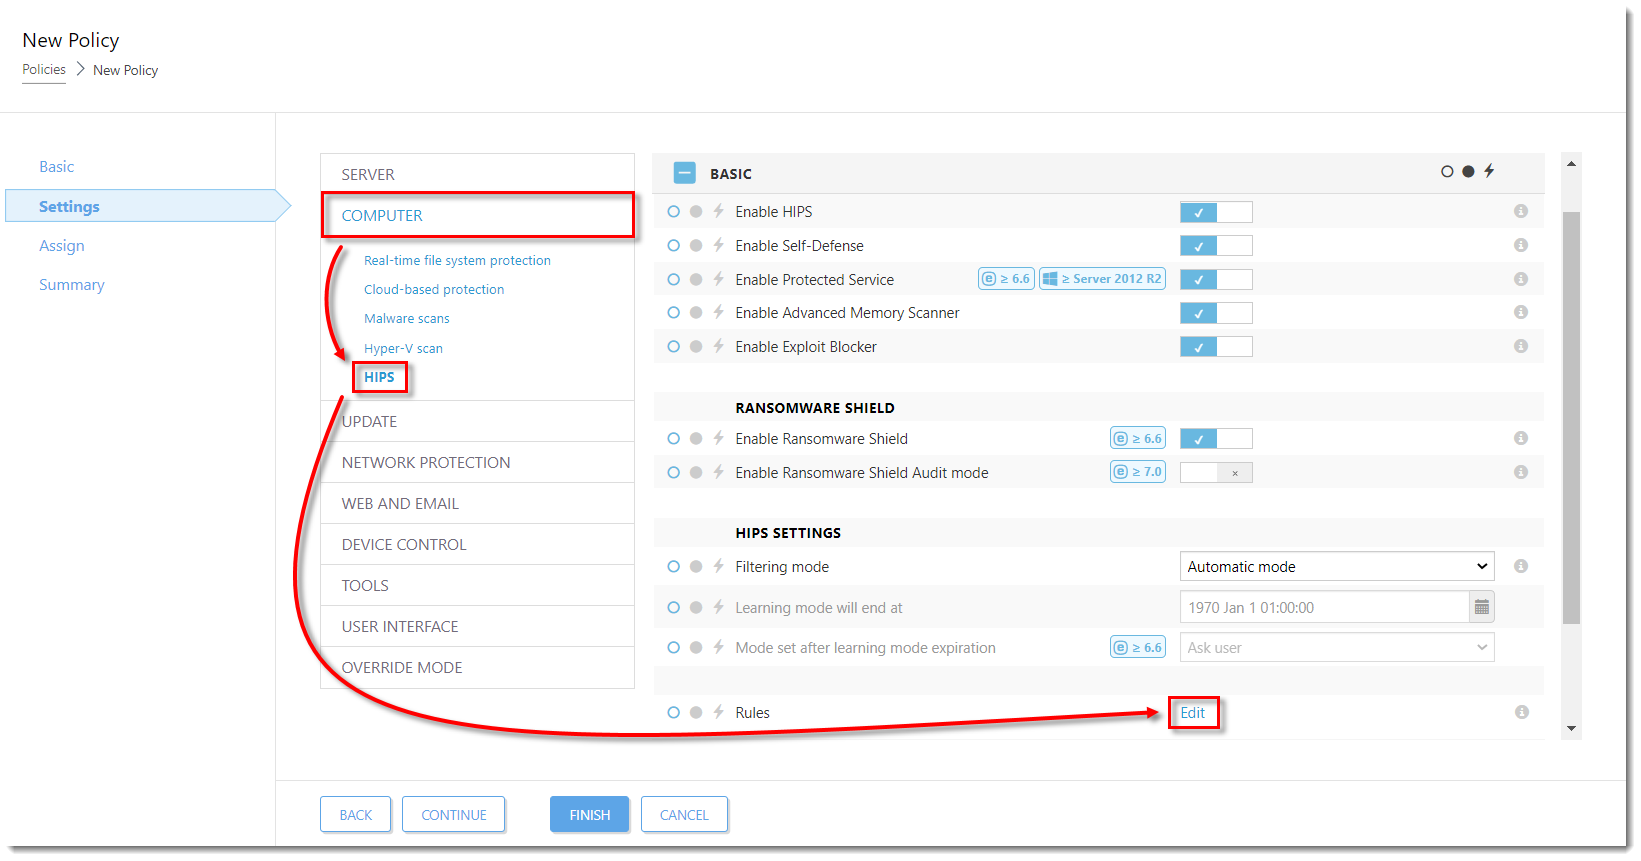
Click the image to view larger in new window
Follow these steps starting from Step 6 to configure the policy.
When the new policy is created, before you proceed with assigning the policy, in the Rules row, click the drop-down menu next to Edit and change bothsettings to Prepend.
Go to Step 7 and assign the policy to the groups or separate client computers.