Issue
- Create multiple network profiles for use on different networks
- Automatically switch between profiles when you enter or leave a zone
- Configure your network profiles in ESET Cyber Security
- Configure your network profiles in ESET Cyber Security Pro
- Define your zones in ESET Cyber Security Pro
Solution
Configure your network profiles in ESET Cyber Security
The firewall distinguishes between two types of networks:
- Private Network: This refers to familiar networks, such as those at home or work, where the user trusts all connected devices. As a result, less strict rules can be applied to communications on private networks. An inbound trusted rule can be applied to this network.
- Public Network: This applies to unfamiliar networks, for example, public Wi-Fi, where the user cannot assess the safety of communications. Strict rules should be enforced on public networks to ensure security.
From the macOS menu bar, click ESET Cyber Security → Settings and then click Network Profiles under Detection Engine.
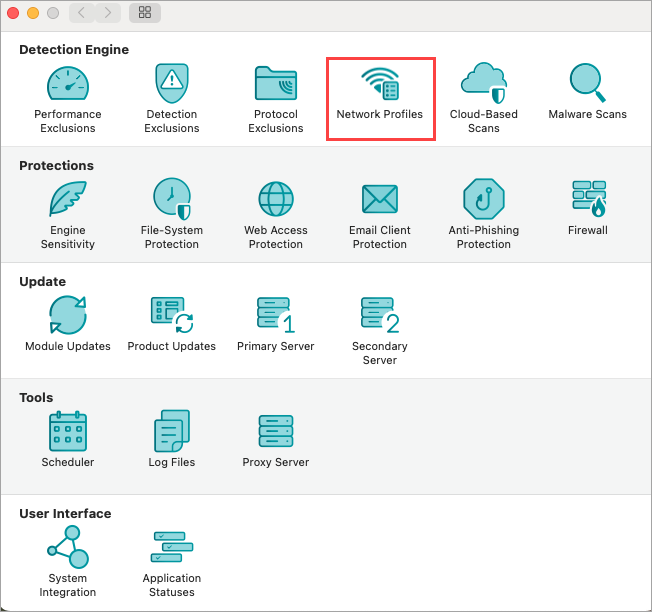
Figure 1-1 Click Private or Public or Guest to view or modify existing network files.
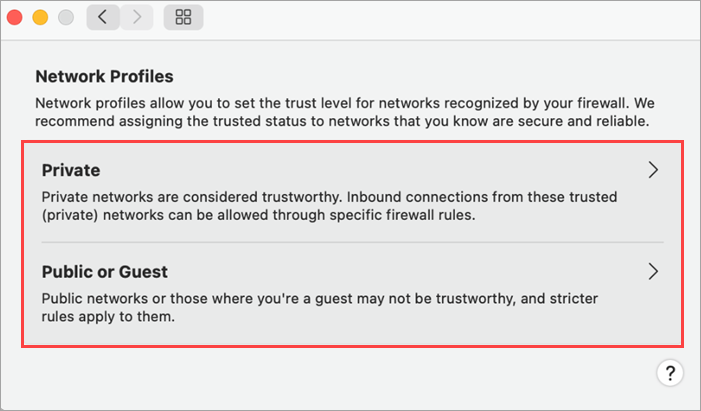
Figure 1-2 To remove a network profile, click the network, then click the - icon (remove) and click OK.
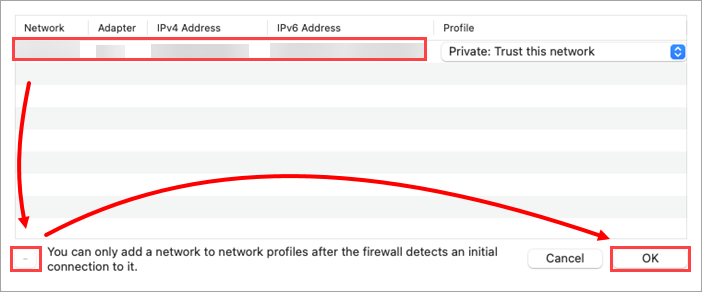
Figure 1-3
The network is identified using all available parameters provided by macOS. Access available parameters:
- Click info in the firewall popup, to display a basic set of parameters. Click share to allow users to copy all parameters to the clipboard.
- View the tooltip in the profiles setup table by hovering over the selected profile or by exporting the information to a CSV file using the context menu.
I. Configure your network profiles in ESET Cyber Security Pro
- Open ESET Cyber Security Pro.
- Click Setup → Firewalland click Setup next to Network traffic filtering.
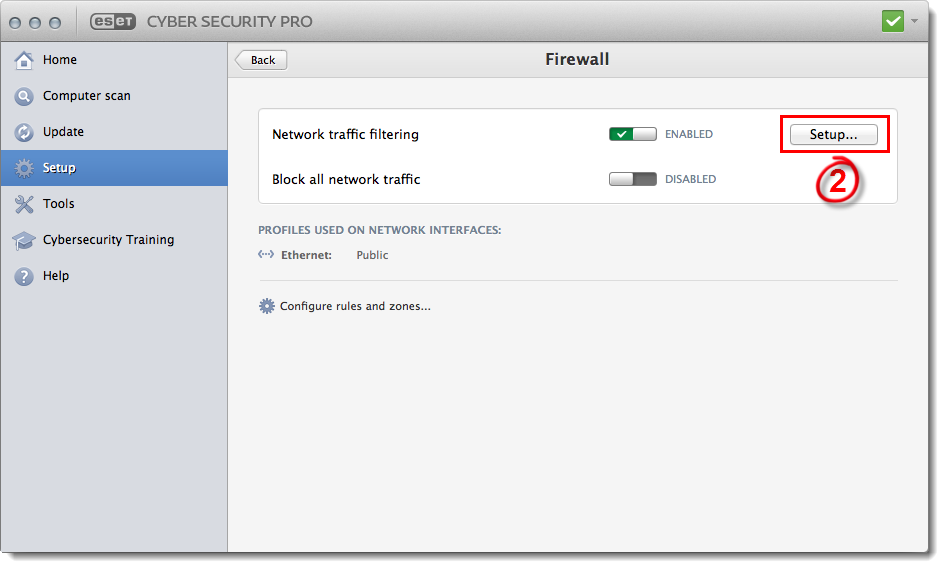
Figure 2-1
- Click the Profiles tab (see Figure 1-2).
- The default profiles are Home, Public and Work. You can customize one of these profiles or create a new profile based on the settings from an existing profile. To create a new profile, select the existing profile that you want to base the settings for your new profile on, type a name for your new profile into the New profile name field and click Clone.
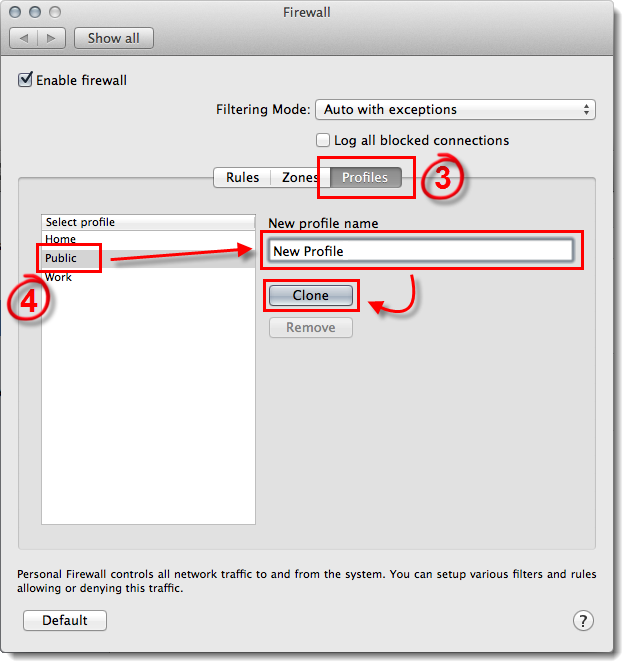
Figure 2-2
- Select Interactive from the Filtering Mode drop-down menu and exit the Firewall window.
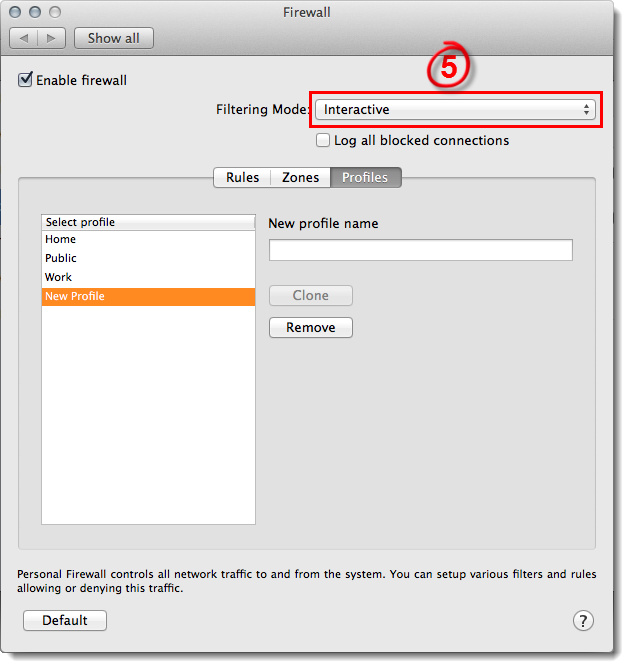
Figure 2-3
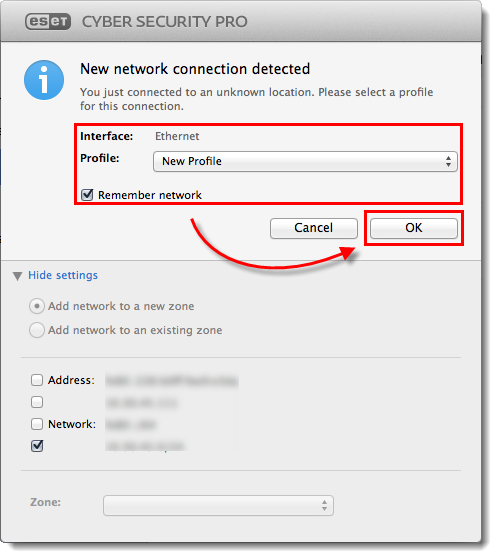
- When prompted by the firewall, select Remember action (create rule) from the drop-down menu, make sure that your new profile is selected from the Profile drop-down menu and then click Allow or Deny to create a new rule for that profile.

Figure 2-4
- Once you have created the rules that you want to use with this profile, click Setup → Firewall→ Setup and select Auto with exceptions from the Filtering Mode drop-down menu. You will no longer be prompted when the firewall detects new network traffic.
Continue to the Define your zones section below for instructions to create a new zone without creating a dedicated profile for that zone.
II. Create your zones in ESET Cyber Security Pro
In addition to zones that are automatically detected, you can add zones based on IP address, subnet, WiFi network or interface. Once created, you can set any zone to use the rules from any one of your profiles, or create a new profile with a set of rules specific to this zone. To add a new zone, follow the steps below:
- Open ESET Cyber Security Pro.
- Click Setup → Firewall.
- Click Configure rules and zones.
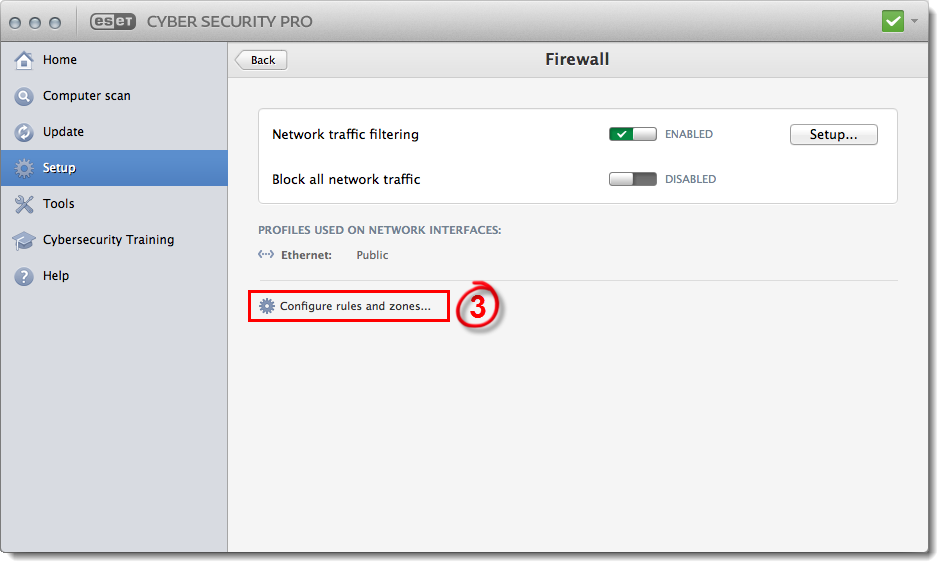
Figure 3-1
- Click the Zones tab and click Add.

Figure 3-2
- Type a name for your new zone into the Name field and select the profile that you want to apply in this zone from the Sets profile drop-down menu (see Figure 3-3).
- Use the Activator drop-down menu to define whether ESET Cyber Security Pro recognizes this new zone based on IP address, subnet, WiFi network or interface. Once you select the type of activator you want to use, complete the fields necessary for that activator (for example, if you selected IPv4/IPv6 address, type the IP address for this zone into the Address field) and click Add. ESET Cyber Security Pro will now switch to the corresponding profile any time that you enter this zone.
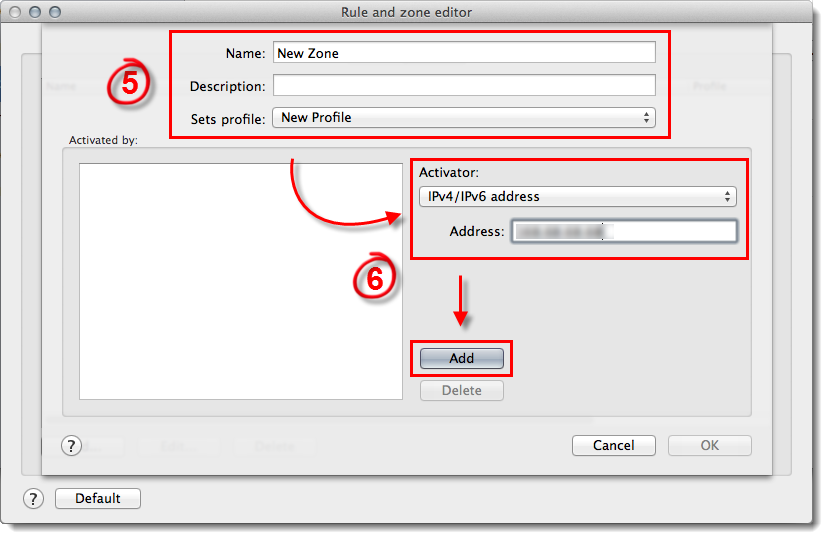
Figure 3-3