Issue
- Add exclusions to ESET Inspect or ESET Inspect On-Prem
- Add Trigger Event
- Injection into trusted process/system process
- Trusted process loaded suspicious DLL
- Add a Parent process
Details
Click here to expand
When a process injects itself into a system/trusted process, ESET Inspect or ESET Inspect On-Prem will return a detection. This will create several false positive detections. To resolve the false positives, create an exclusion that includes the process attempting to inject itself into the system/trusted process.
For more information on XML syntax and rules, see the ESET Inspect Rules Guide. ESET offers security services for ESET Inspect. Contact your local sales representative for further assistance.
Solution
Add Trigger Event
- Log in to ESET Inspect. ESET Inspect On-Prem users, open the ESET Inspect Web Console in your web browser and log in.
- Click Detections, click the drop-down menu next to Detections and select Rules. Click the gear icon below the Protect button.
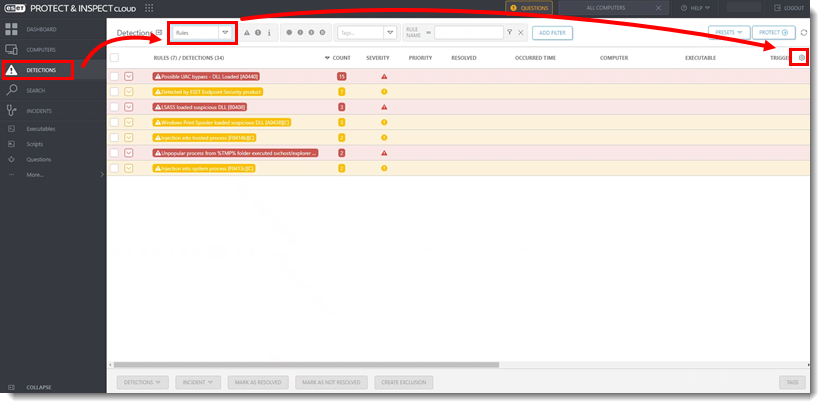
Figure 1-1 - Select Select columns.
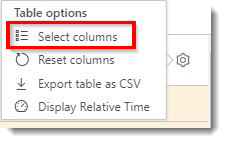
Figure 1-2 - Type Trigger into the Enter quick search pattern. field and select the check box next to Trigger Event.
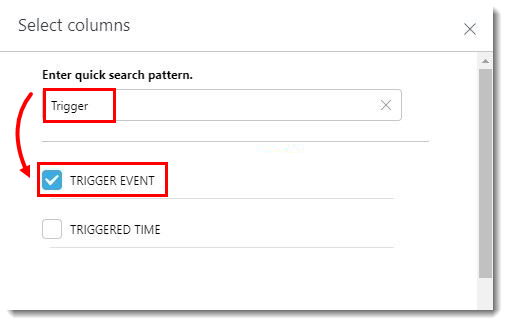
Figure 1-3
Injection into trusted process/system process
- Log in to ESET Inspect. ESET Inspect On-Prem users, open the ESET Inspect Web Console in your web browser and log in.
- Click Detections, click the drop-down menu next to Detections, and select Rules. Expand the rule to view all detections associated with the rule.
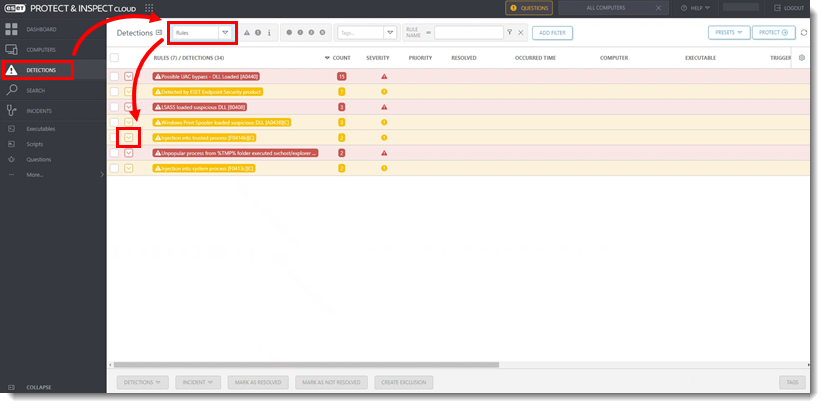
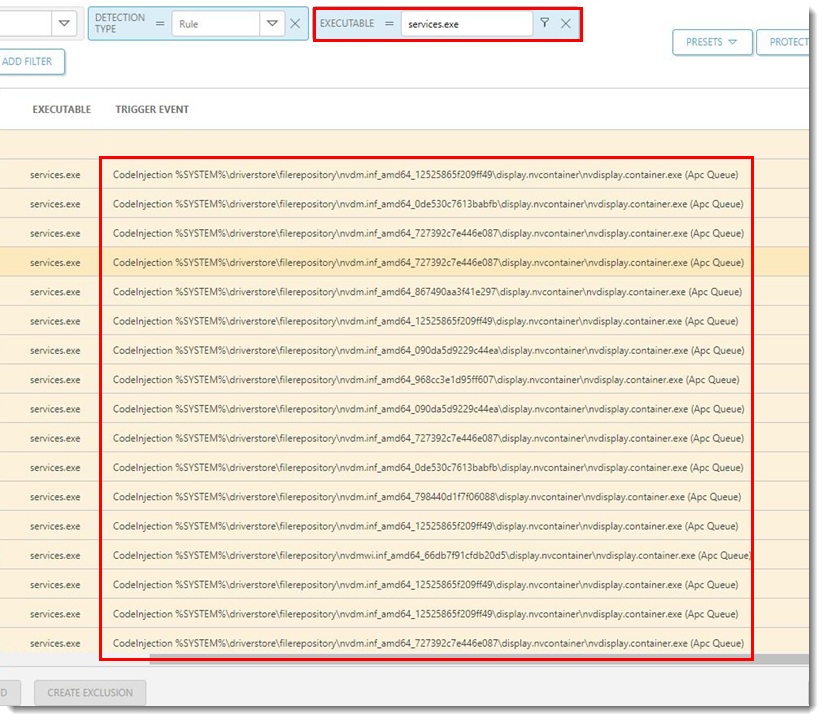
Figure 2-1 - In the Executable filter type, type the executable name and press Enter. Scroll to the right to view the full Trigger Event name.
- Select the check box next to the detection.
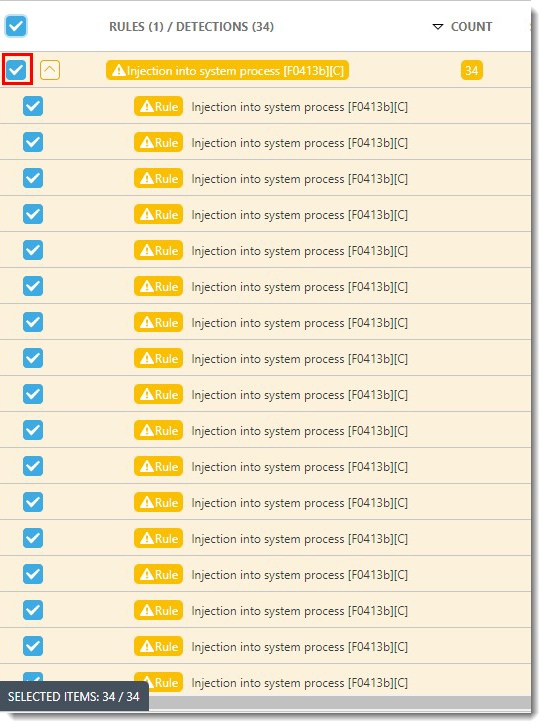
Figure 2-3 - Click Create Exclusion.
- Type a Name for the exclusion and click Criteria.
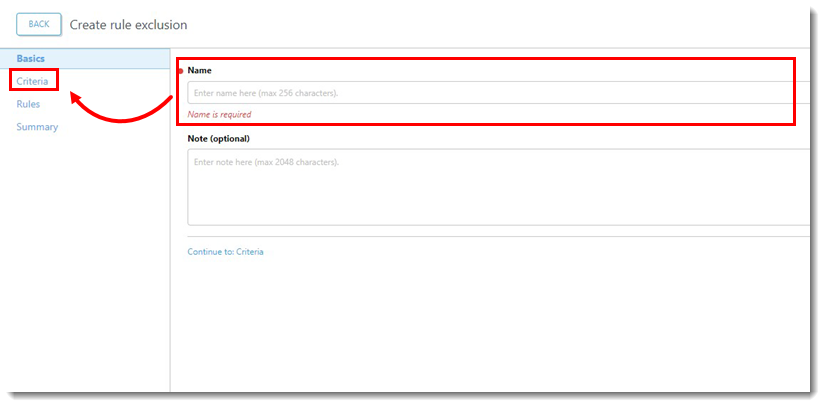
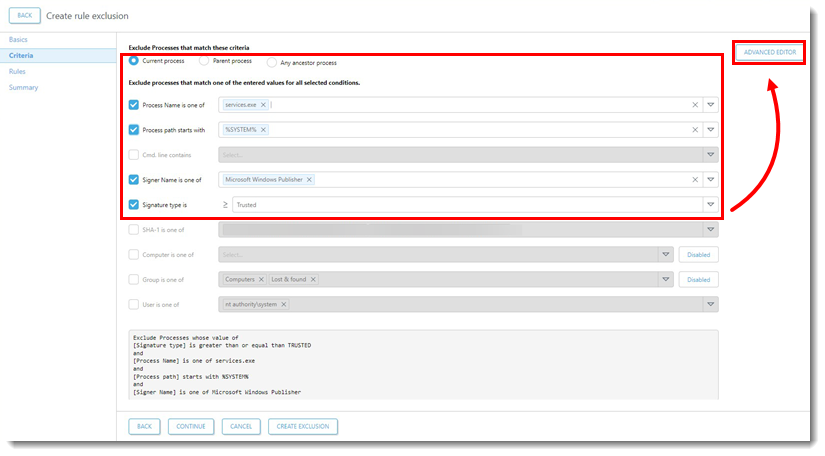
Figure 2-4 - Verify the Exclude Processes that match these criteria fields are selected and click Advanced Editor.
- Current process is selected
- Process Name is one of has the correct executable type
- Signer Name is one of has the correct signer selected
- Signer type is has Trusted or Valid selected
- Add the operations code to the Exclusion expression. Click Create Exclusion.
- The new <operations> tag must be placed between the existing </process> and </definition> closing tags.
- The condition and value in the operation will vary based on the Trigger Event name. For example, if the Trigger Event name is the same for each detection, the condition will equal
isand the value can equal the Trigger Event name. If the Trigger Event name has unique information, the condition can be set tostartsand a separate line can be set toends. In Figure 2-6 the example shows the conditions set tostartsandends.
<operations>
        <operation type="Codeinjection">
            <operator type="and">
                <condition component="FileItem" property="FullPath" condition="is" value=""/>
            </operator>
        </operation>
    </operations>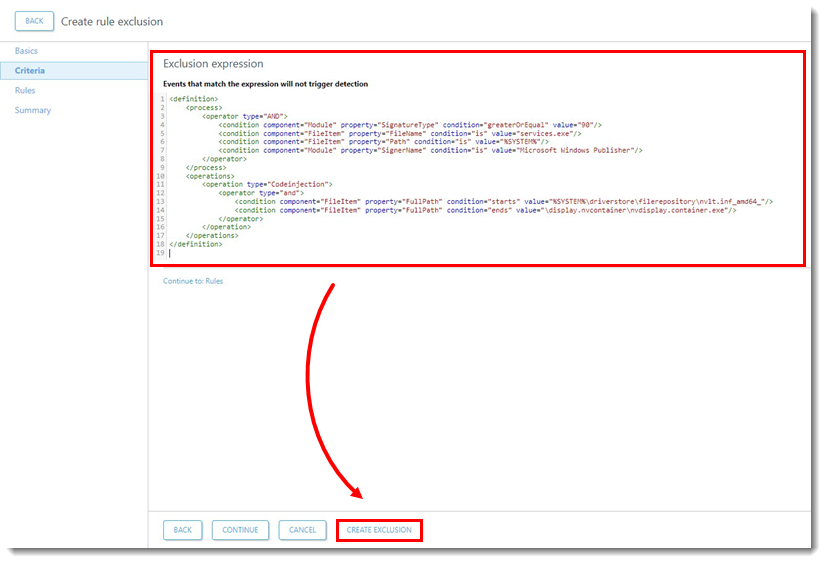
- For more information on XML syntax and rules, see the ESET Inspect Rules Guide. ESET offers security services for ESET Inspect. Contact your local sales representative for further assistance.
Trusted process loaded suspicious DLL
- Complete steps 1-6 from the Injection into trusted process/system process section.
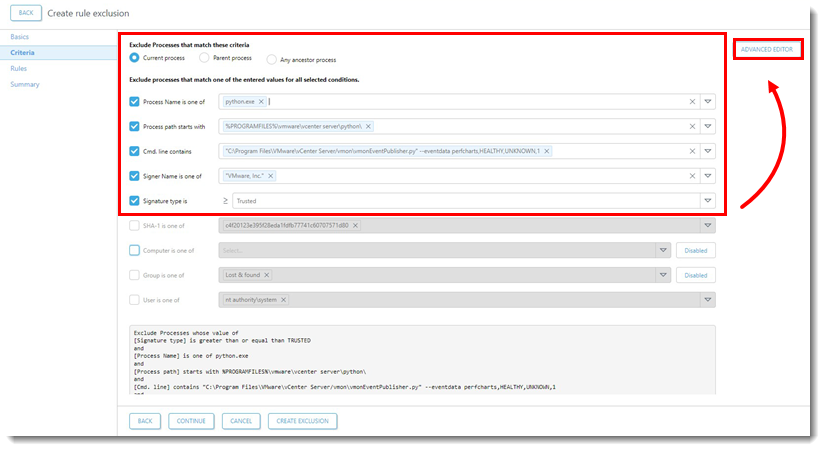
- Verify the Exclude Processes that match these criteria fields are selected. Click Advanced Editor.
- Current process is selected
- Process Name is one of has the correct executable type
- Process path starts with is completed
- Cmd. line contains contains a file path
- Signer Name is one of has the correct signer selected
- Signer type is has Trusted or Valid selected
- Add the operations code to the Exclusion expression. Click Create Exclusion.
-
- The new <operations> tag must be placed between the existing </process> and </definition> closing tags.
- The condition and value in the operation will vary based on the Trigger Event name. For example, if the Trigger Event name is the same for each detection, the condition will equal
isand the value can equal the Trigger Event name. If the Trigger Event name has unique information, the condition can be set tostartsand a separate line can be set toends. In Figure 3-2 the example shows the conditions set tostartsandends.
<operations>
        <operation type="LoadDLL">
            <operator type="and">
                <condition component="FileItem" property="FullPath" condition="is" value=""/>
            </operator>
        </operation>
    </operations>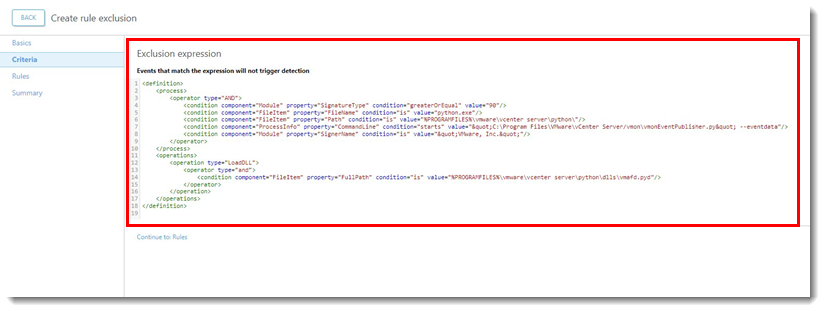
- For more information on XML syntax and rules, see the ESET Inspect Rules Guide. ESET offers security services for ESET Inspect. Contact your local sales representative for further assistance.
Add a Parent process
Adding a Parent process to the Exclusion expression creates a stricter exclusion.
- Create the initial exclusion.
- Open a new instance of ESET Inspect or ESET Inspect On-Prem. ESET Inspect users, log in to your ESET PROTECT Hub or ESET Business Account and click Open Inspect. ESET Inspect On-Prem users, open the ESET Inspect Web Console in your web browser and log in.
- In the Criteria window select Parent process. Select the correct option for Process Name is one of, Process path starts with, Signer Name is one of, and Signature type is. Click Advanced Editor.
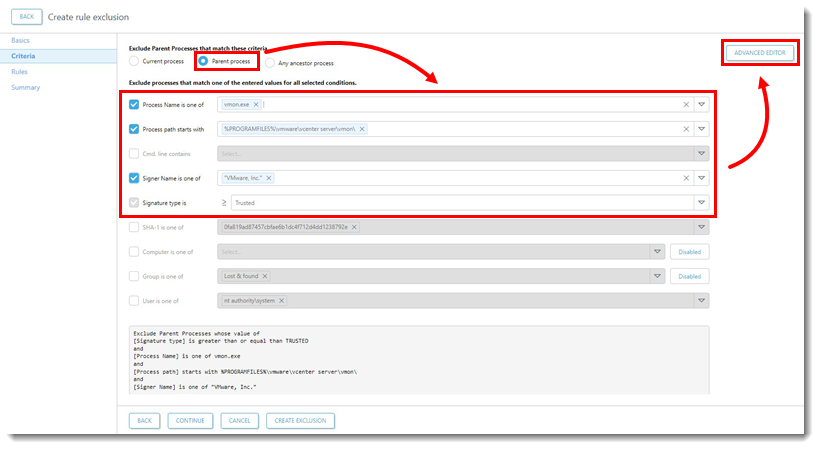
- Copy the entire expression that starts with
<parentprocess>and ends with</parentprocess>.
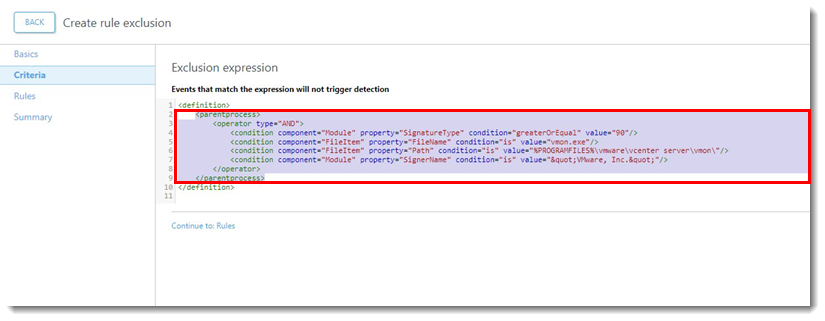
- Go back to the original exclusion and paste the Parent process into the Exclusion expression above the current
<process>.
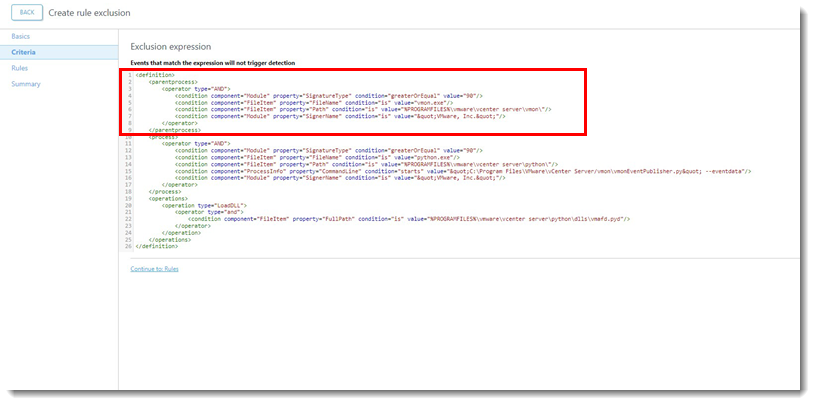
- In the new instance of ESET Inspect/ESET Inspect On-Prem, click Cancel to cancel the Parent process exclusion.