Issue
- After you upgrade to ESET PROTECT 9.0 from an earlier version or after an automatic upgrade of ESET PROTECT Cloud to version 3.0, all Tasks with Trigger type Scheduled or CRON and with option Invoke ASAP If Event Missed checked get executed one time immediately after the upgrade
- Generate a report of all the scheduled and CRON tasks in ESET PROTECT
- Before an upgrade, review all the tasks and change or remove tasks that could cause unwanted effects
- After an upgrade, consider the effects of the task execution on your environment
Solution
Generate a report of all the scheduled and CRON tasks in ESET PROTECT
Click Reports → New Report Template.
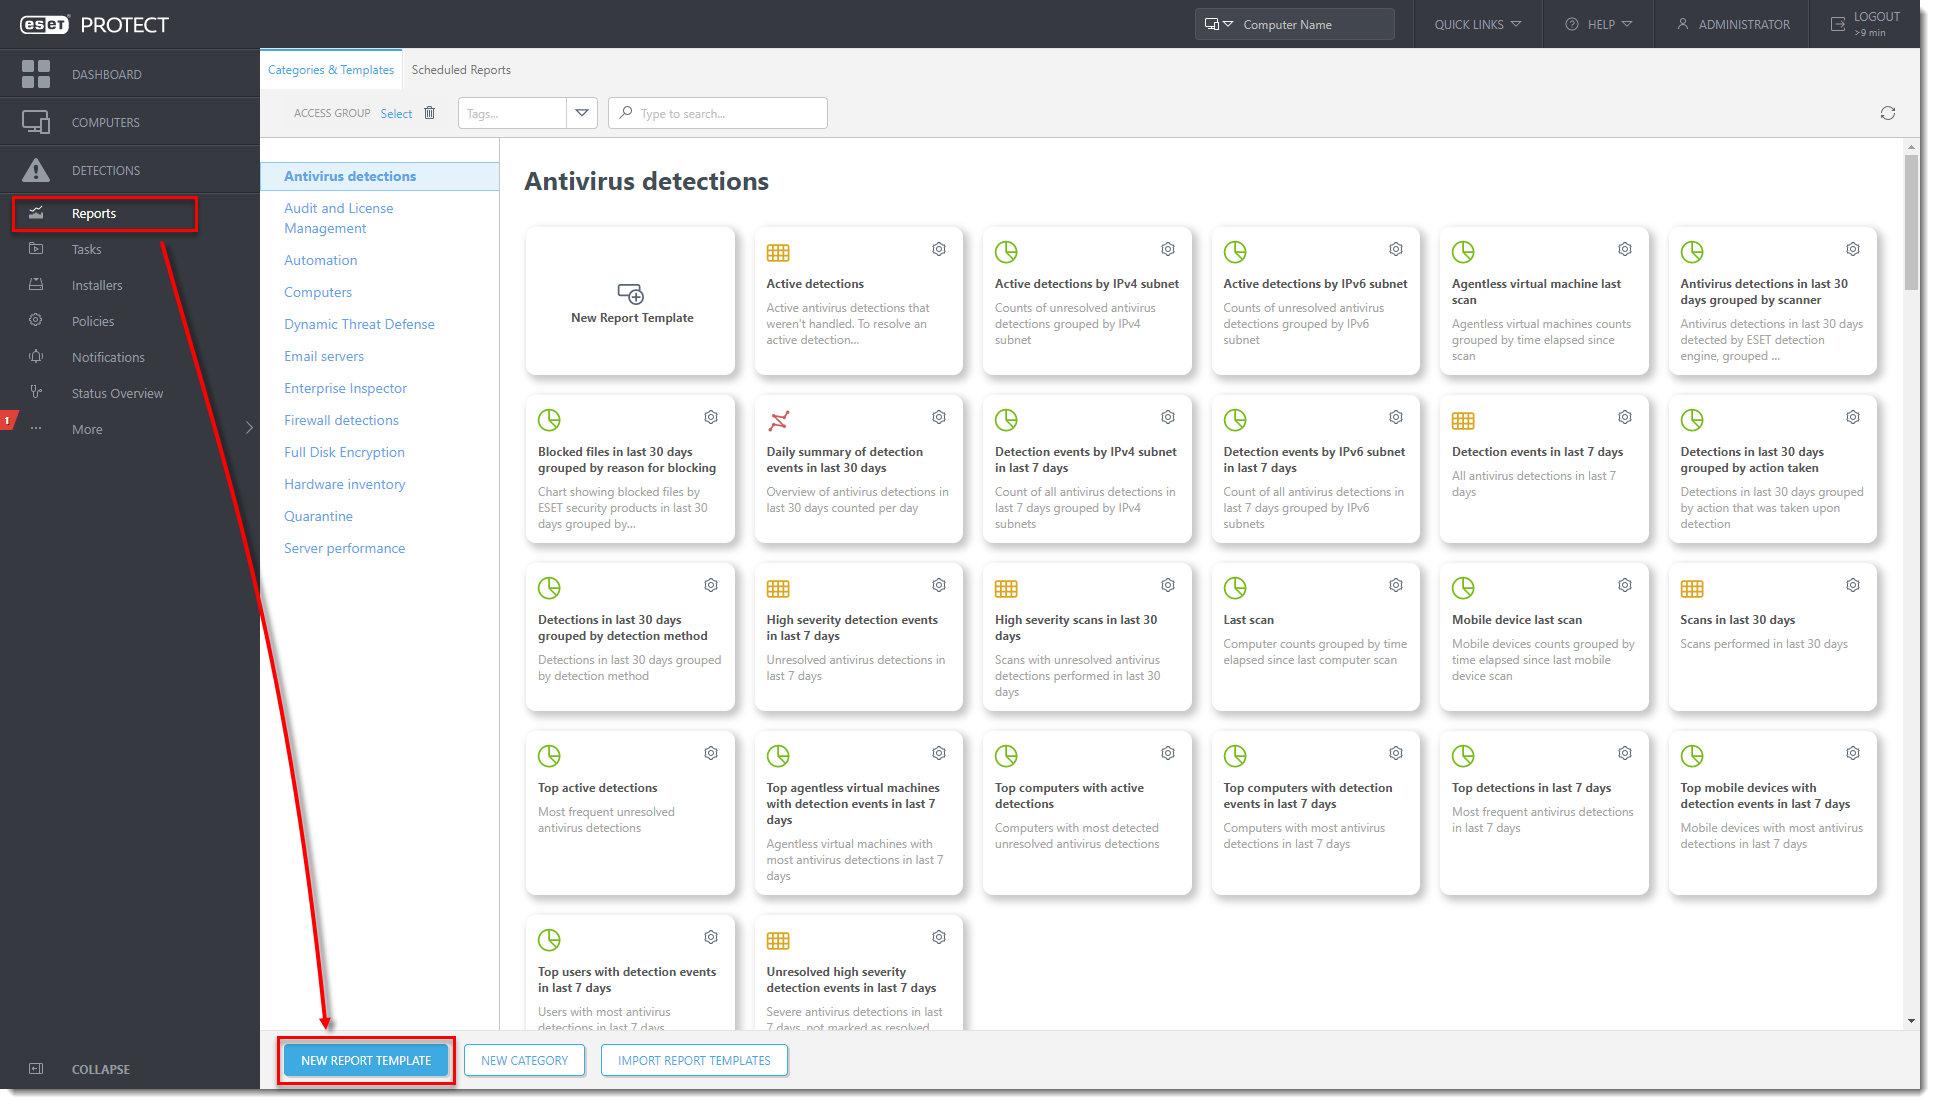
Figure 1-1
Click the image to view larger in new windowIn the Name field, type a name for your report. Click No category selected and in the dialog window, select a check box next to one of the categories (in this example, Server performance) and click OK.
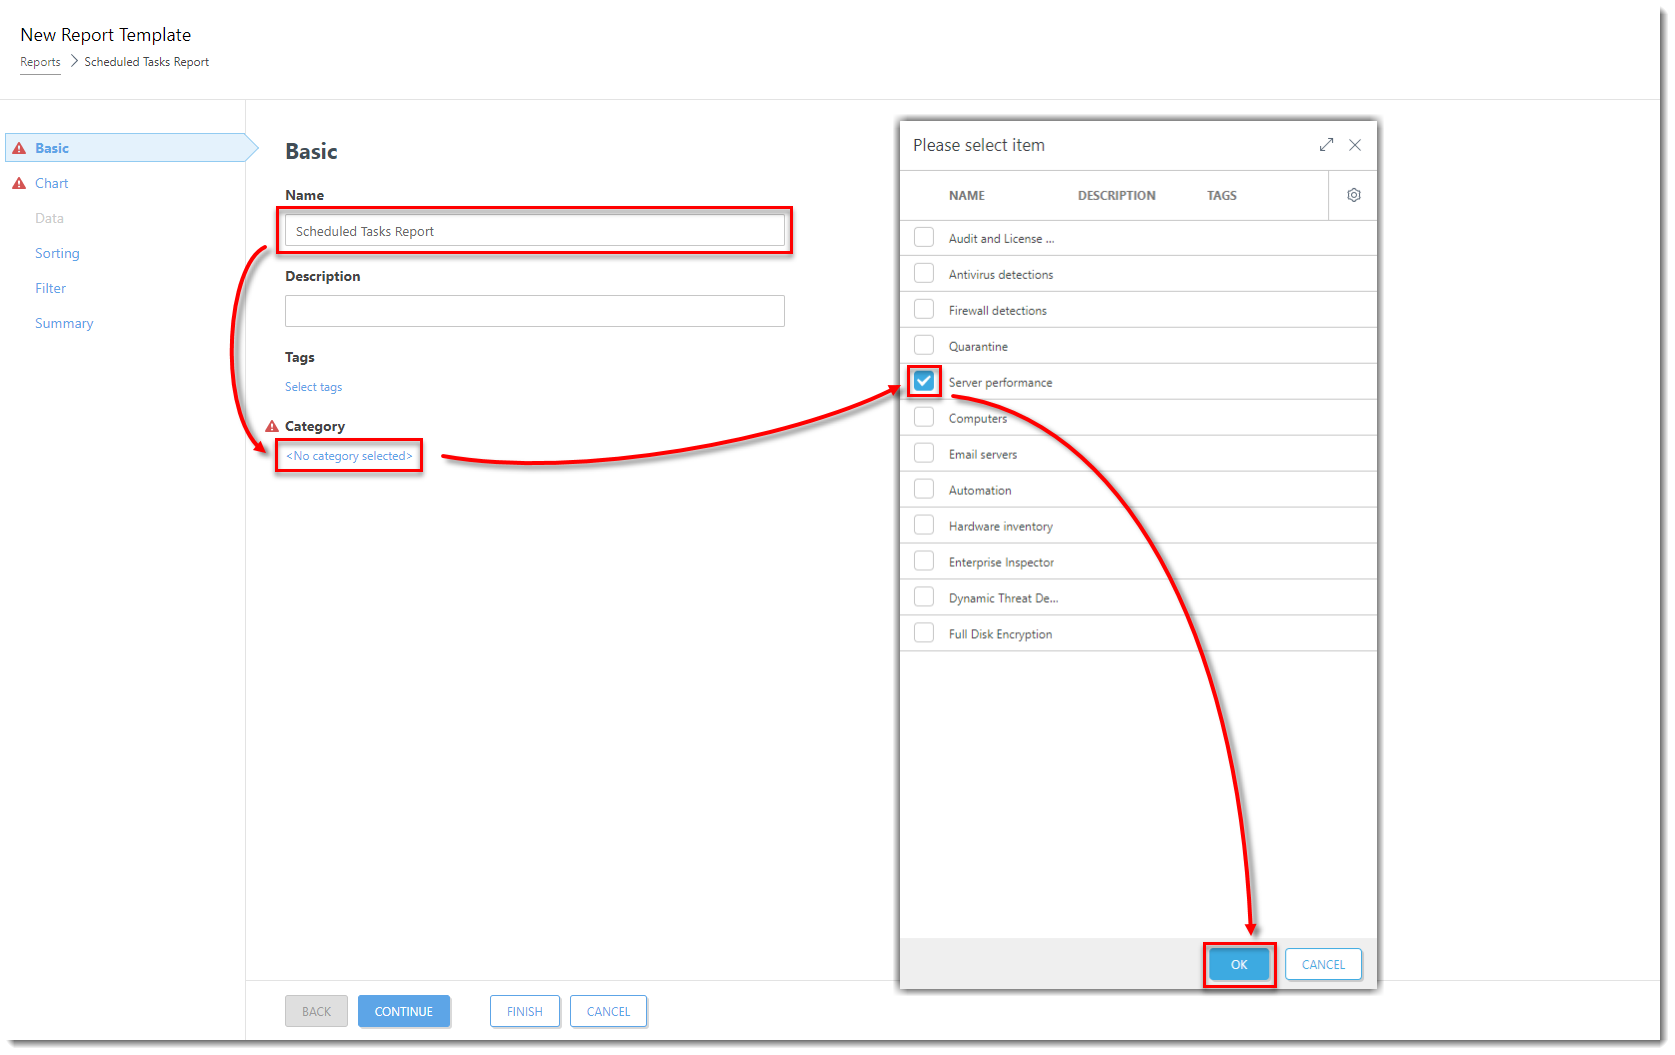
Figure 1-2
Click the image to view larger in new windowClick Chart and select the check box next to Display table.
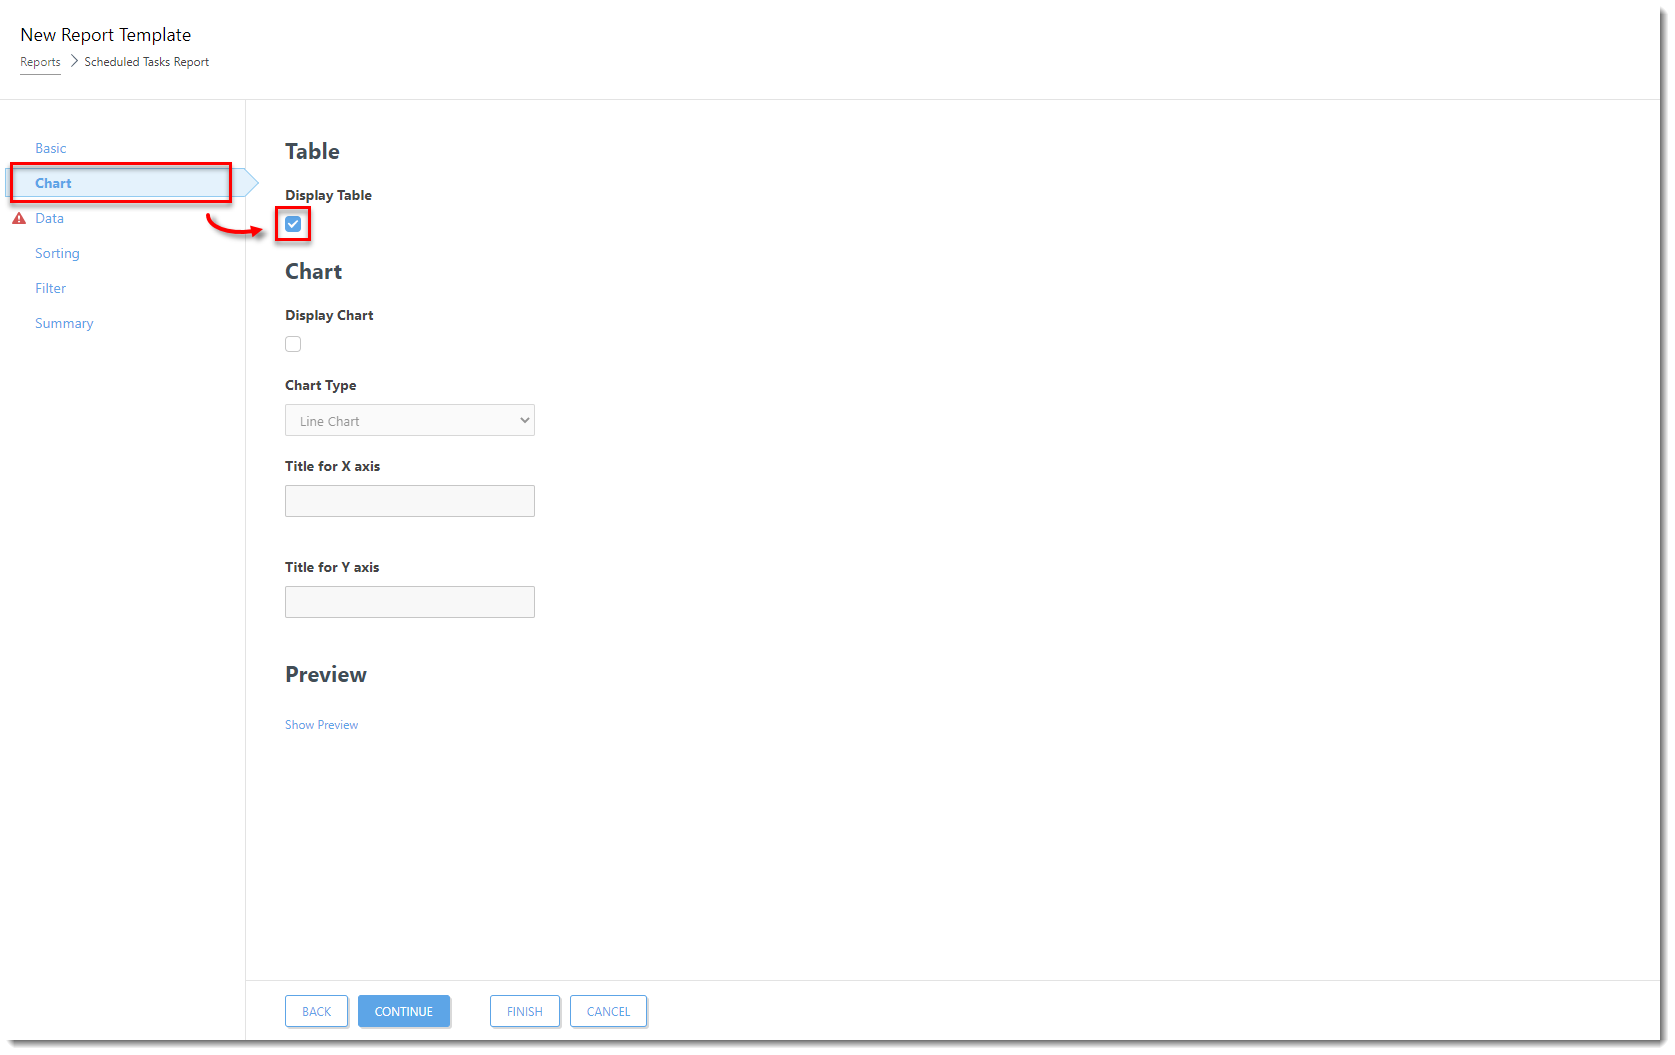
Figure 1-3
Click the image to view larger in new windowClick Data → Add Column.

Figure 1-4
Click the image to view larger in new windowIn the dialog window, select the following:
- Expand Client tasks, expand Task name, select Task name and click OK.
- Expand Client triggers, select Expiration adjusted by agent local time and click OK.
- Expand Client triggers, select Trigger group type and click OK.
- Expand Client triggers, select Trigger target description and click OK.
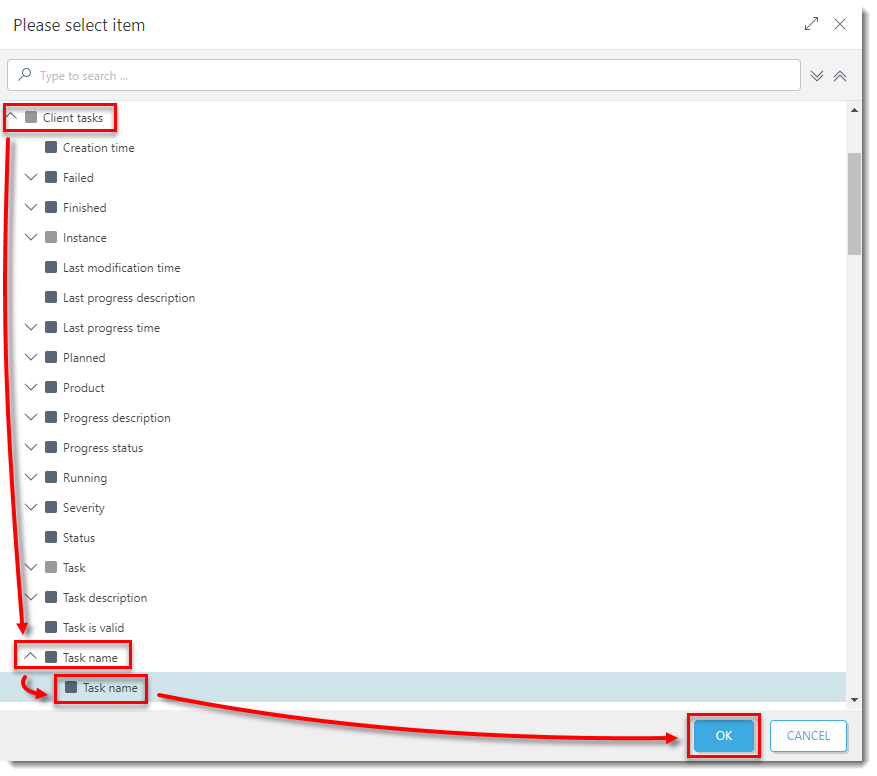
Figure 1-5
Click the image to view larger in new windowClick Filter → Add Filter,
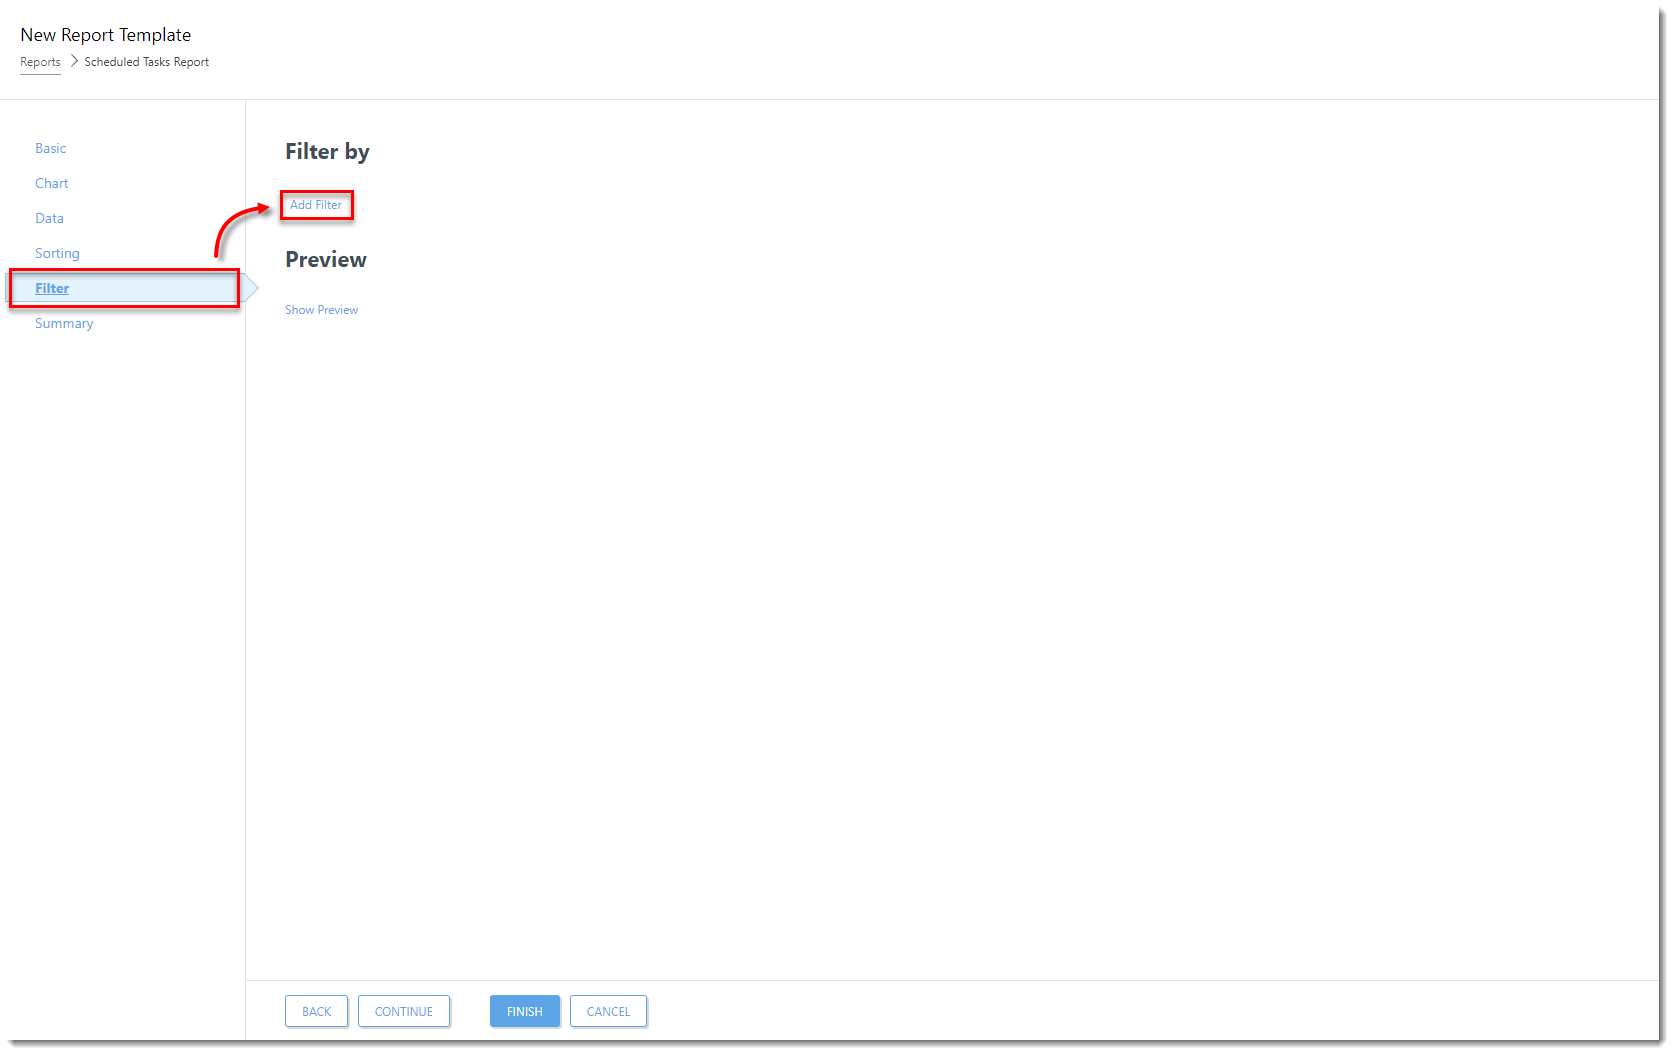
Figure 1-6
Click the image to view larger in new windowIn the dialog window, select the following:
- Expand Client triggers, select Trigger group type and click OK.

Figure 1-7 - Expand Client triggers, select Expiration adjusted by agent local time and click OK.

Figure 1-8
Click the image to view larger in new window- Expand Client triggers, select Trigger group type and click OK.
In the drop-down menu next to the Client triggers. Expiration adjusted by agent local time, select has no value.
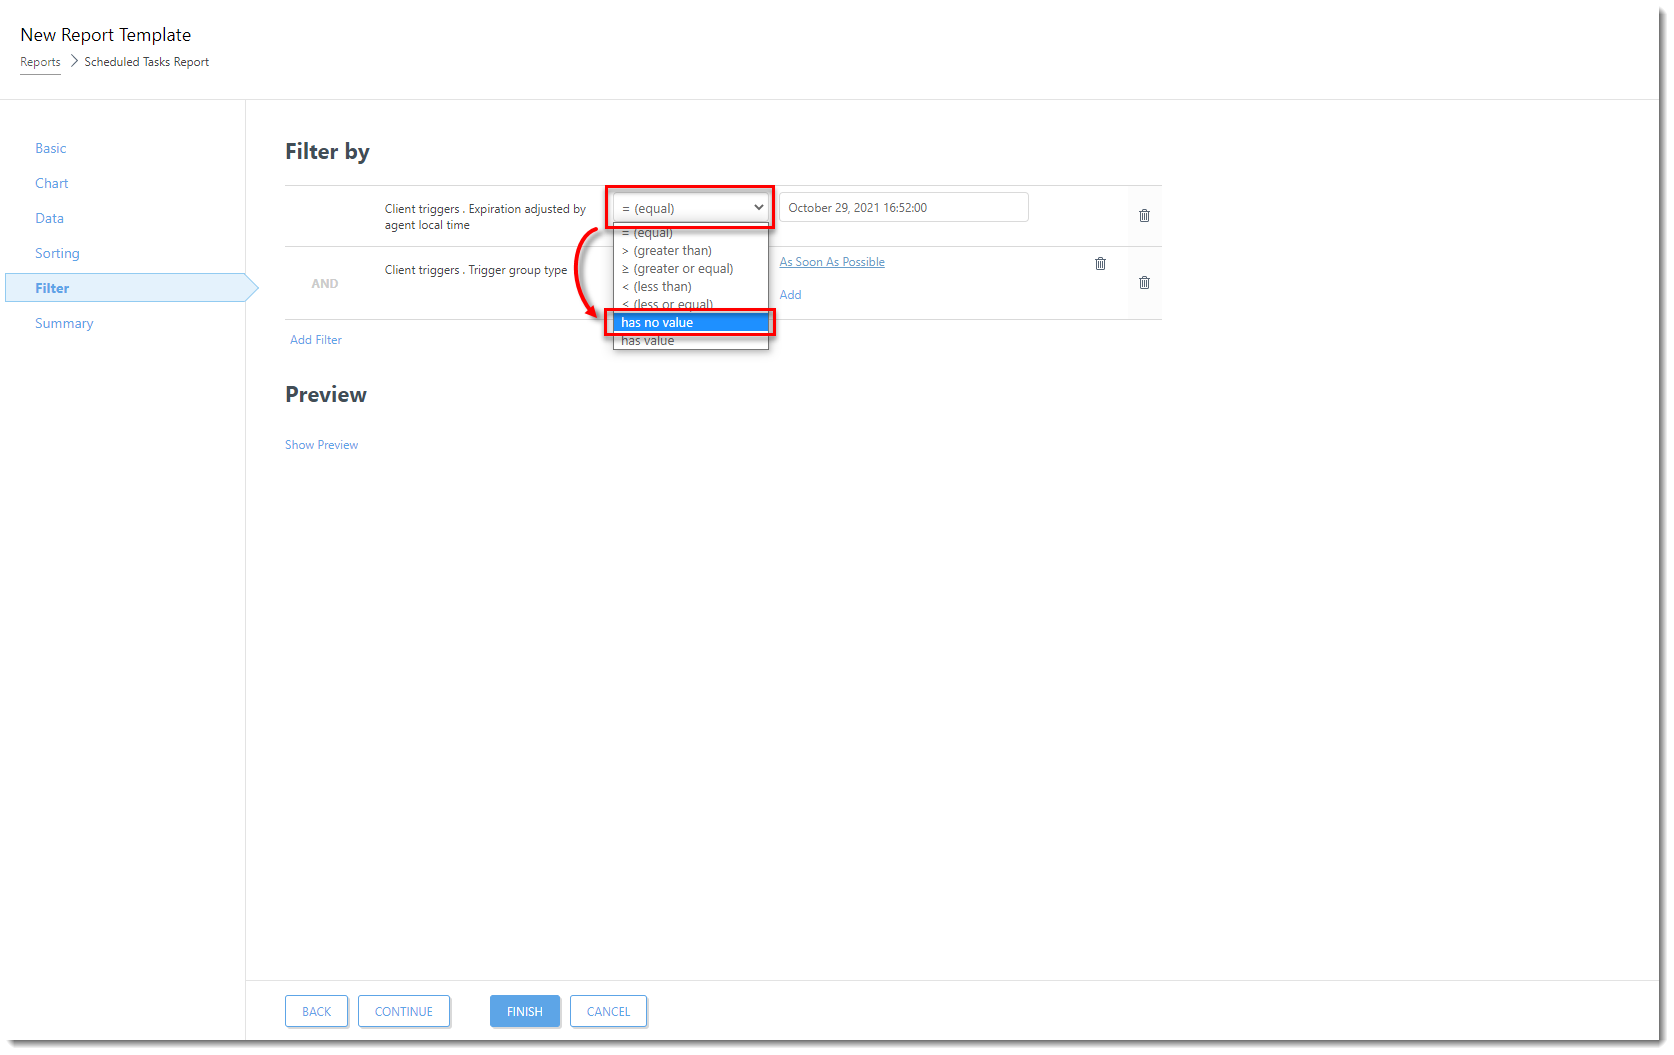
Figure 1-9
Click the image to view larger in new windowClick As Soon As Possible → Scheduled Trigger. Click Finish.
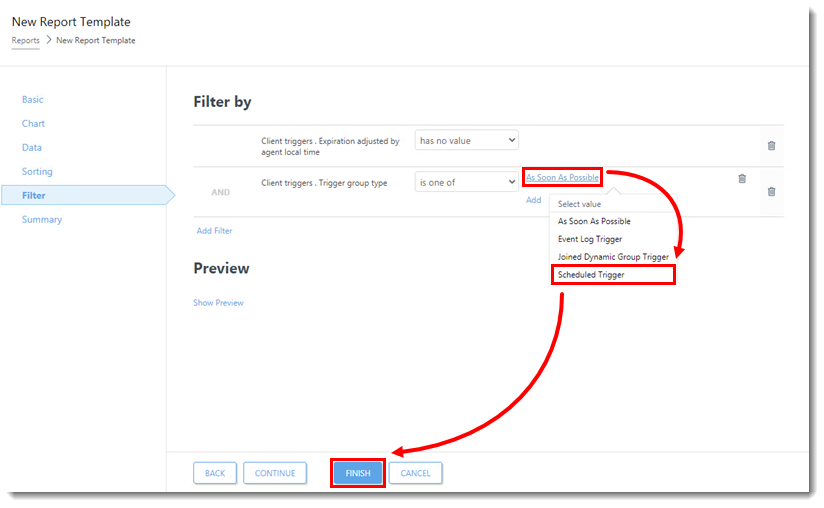
Figure 1-10 You can open the report when you click Reports, then click the category (in this example, Server performance) and then the report you created.
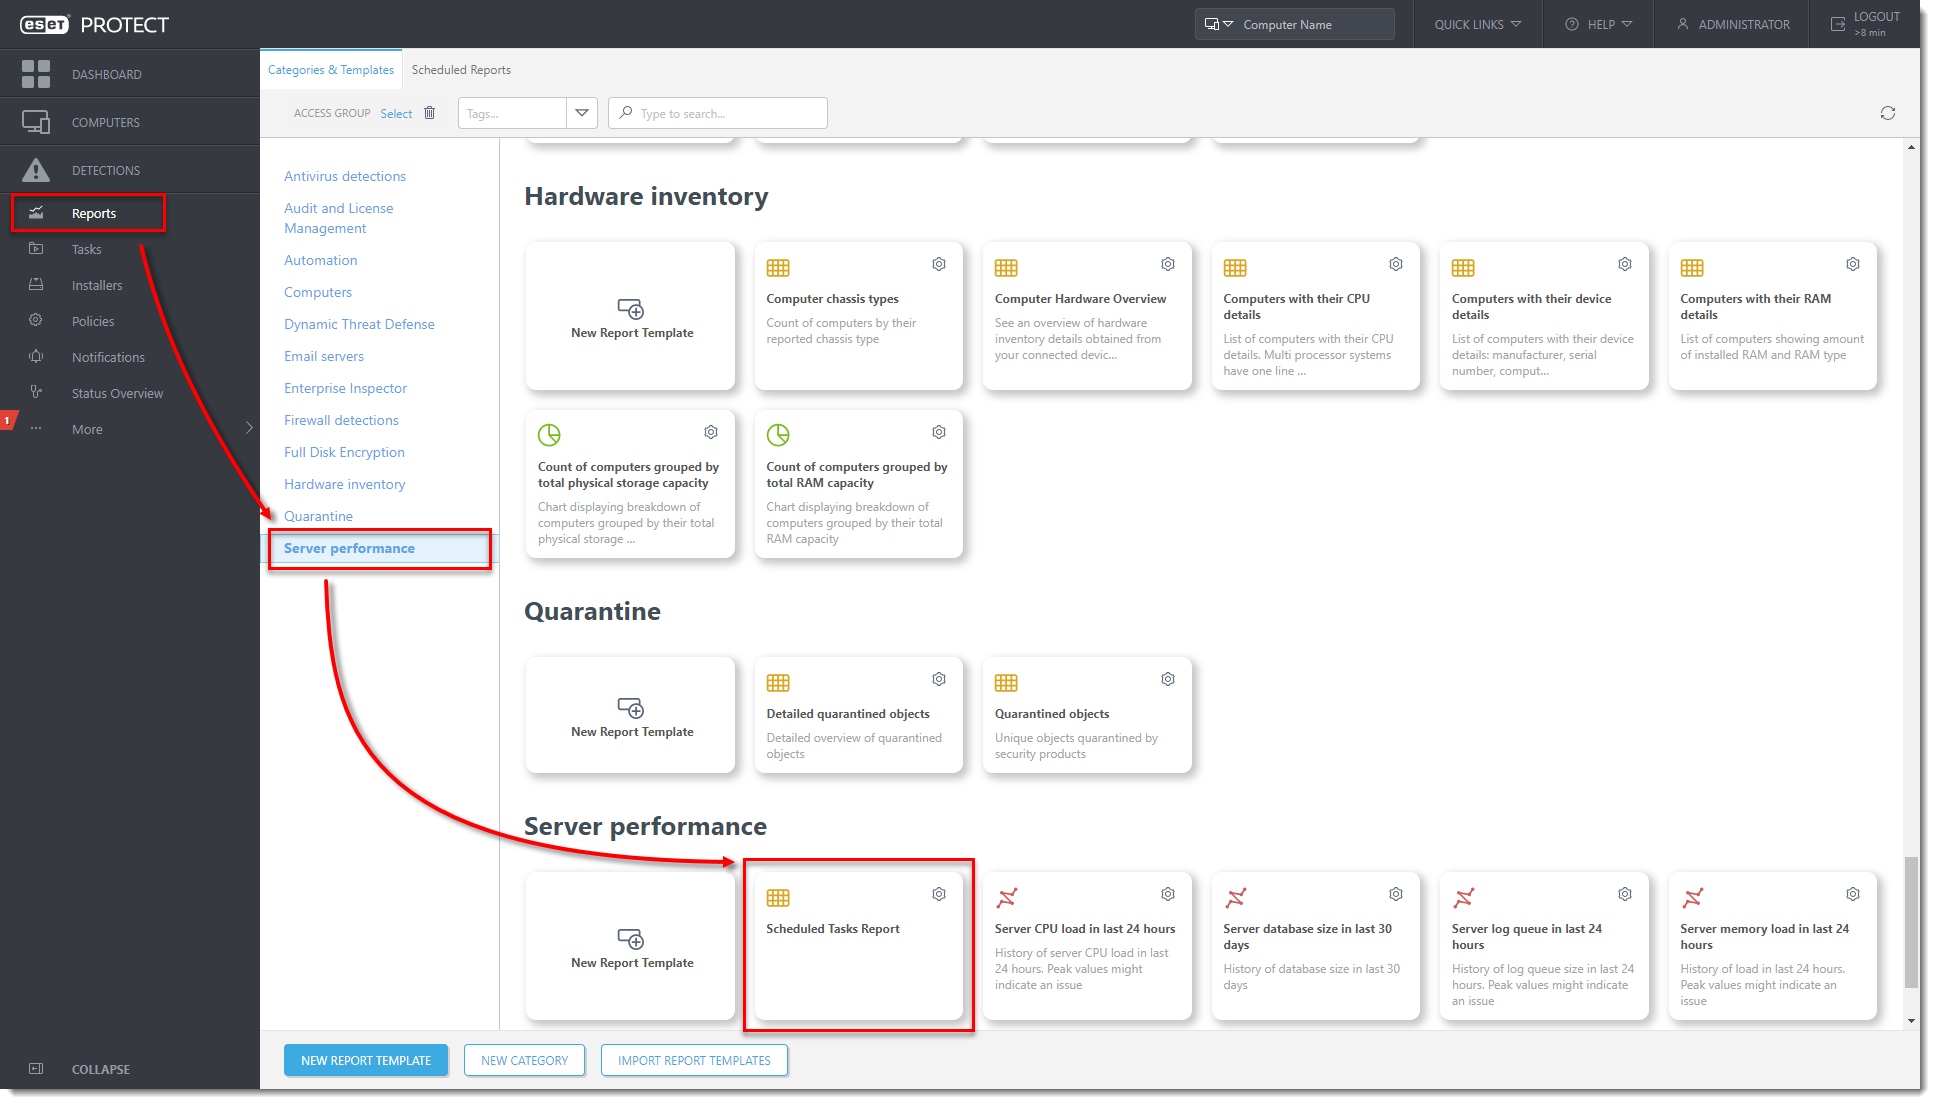
Figure 1-11
Click the image to view larger in new window