Issue
Solution
Enable Single Sign-On on new Full Disk Encryption
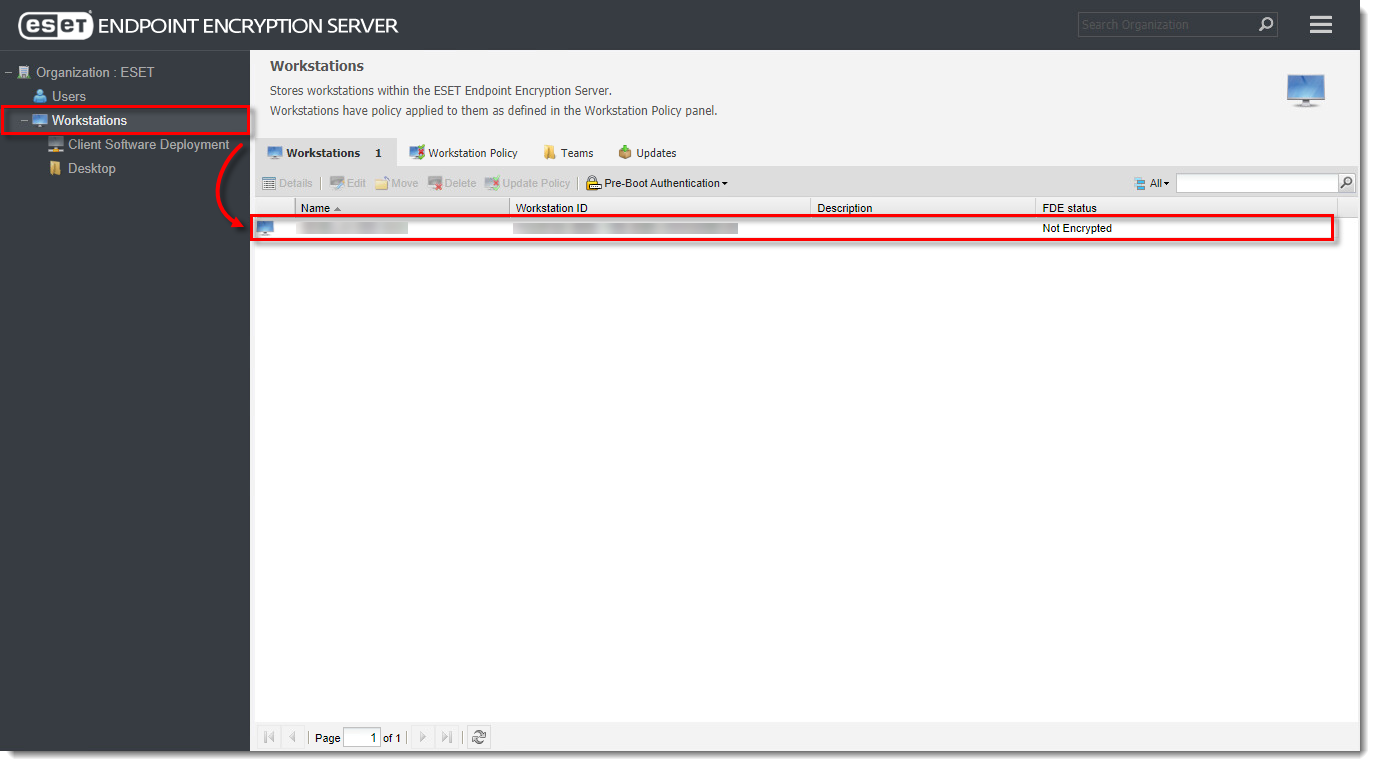
Log in to the ESET Endpoint Encryption Server.
Click Workstations and double-click the desired workstation.
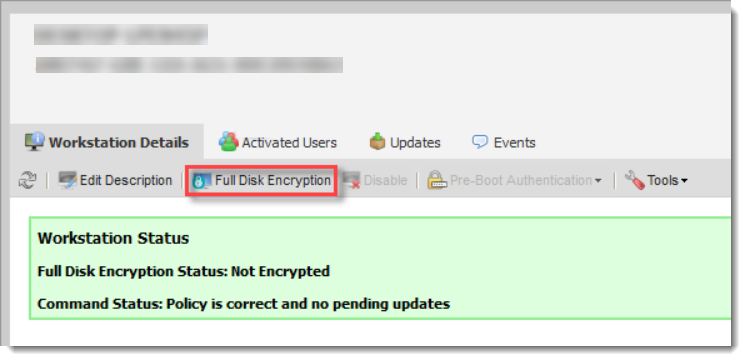
From the Workstation Details panel, click Full Disk Encryption.
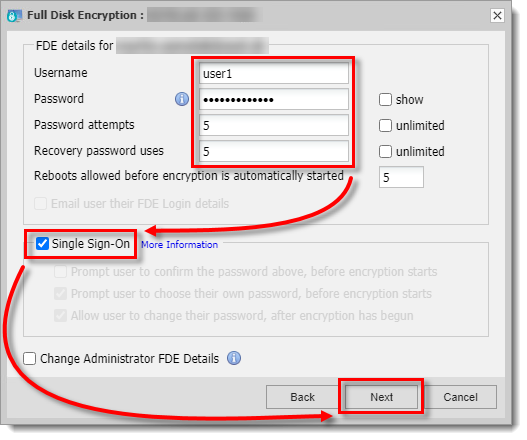
Follow the on-screen steps until you reach the dialog shown in Figure 1-3.
Type in your Username and Password and configure the password settings. Select the check box next to Single Sign-On and click Next.
Follow the on-screen steps to send the FDE command to the workstation.
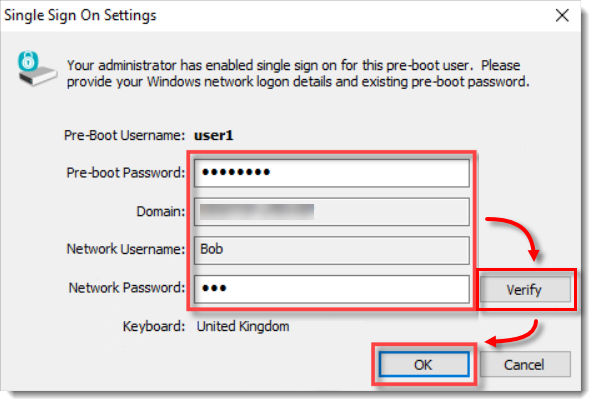
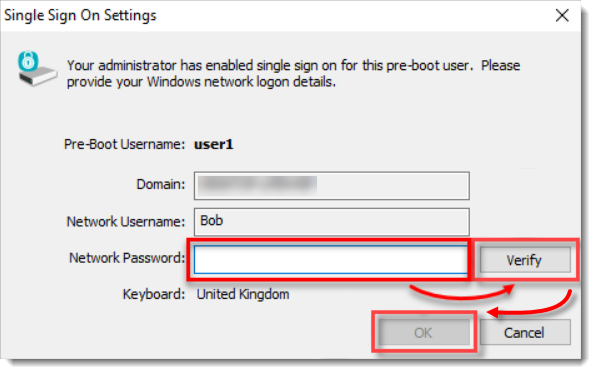
Type in the user's Network Password and click Verify. When the Password is verified, click OK.
Enable Single Sign-On on an active user
Log in to the ESET Endpoint Encryption Server.
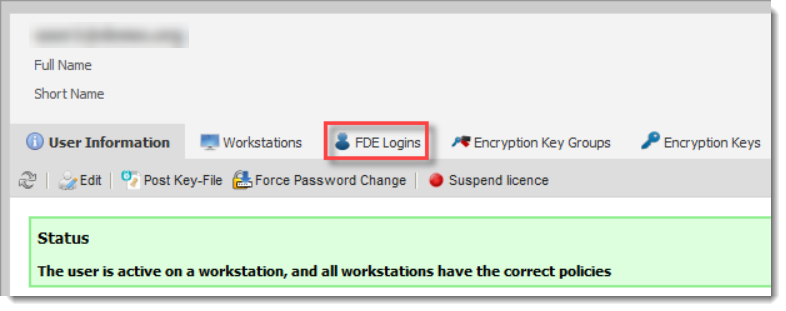
Click Users and double-click the desired user.

Click FDE Logins tab.
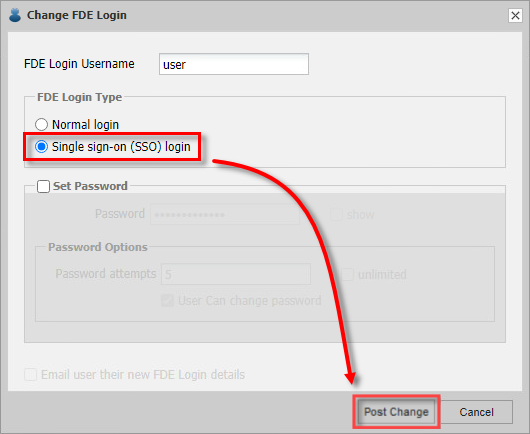
Select the user and click Change.

Select Single sign-on (SSO) login and click Post Change.
On the client workstation, right-click the ESET Endpoint Encryption notification icon and click Proxy Sync.

Type in the user's current Pre-boot Password and Network Password and click Verify. When the Password is verified, click OK.