Issue
- When deploying the ESET Management Agent Live Installer to a macOS/Linux client, the package is distributed as a
.tar.gzfile - Extract
PROTECTAgentInstaller.tar.gzand install the ESET Management Agent - Deploy ESET Management Agent to a macOS client
- Deploy ESET Management Agent to a Linux client
Solution
![]() Windows users: Use the Agent Script Installer to deploy the ESET Management Agent
Windows users: Use the Agent Script Installer to deploy the ESET Management Agent
Deploy ESET Management Agent to a macOS client
Peer certificates and Certification Authority that are created during the installation are by default contained in the Static Group All.
Click Quick links → Deploy Agent.
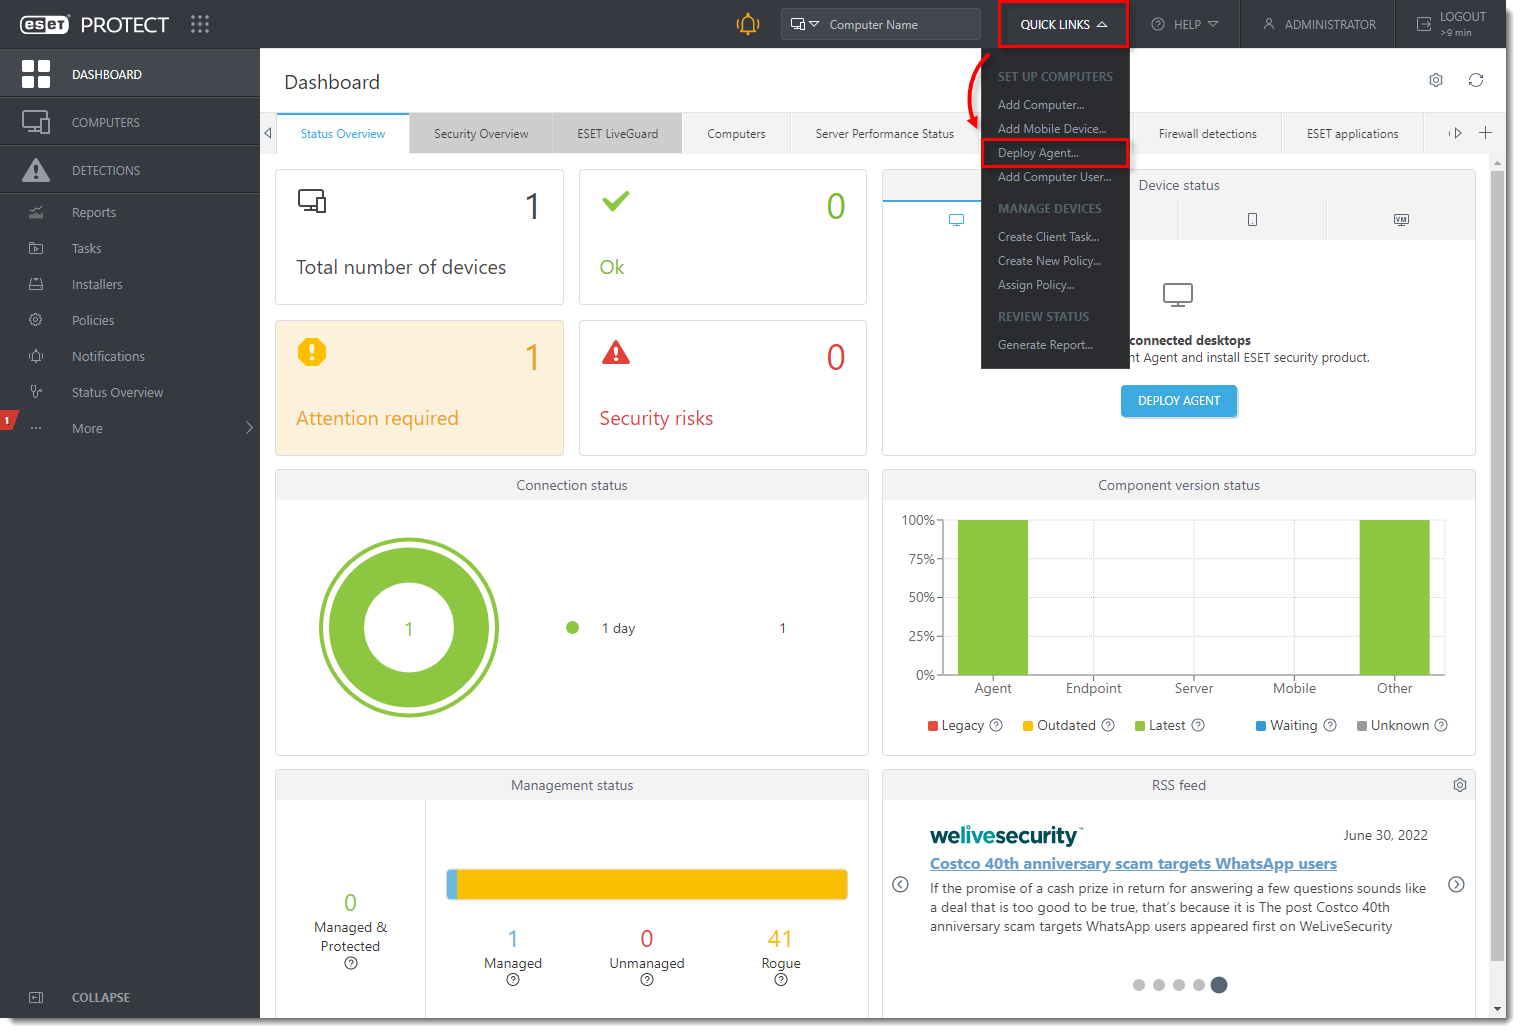
Figure 1-1 Select macOS. You can deselect the check box next to Participate in product improvement program if you do not agree to send crash reports and telemetry data to ESET. Configure other settings such as Parent group, Server hostname, Port number (default is 2222), Peer Certificate, and Certificate passphrase if needed. Optionally, click Customize more settings to view more options. Click Save & Download.
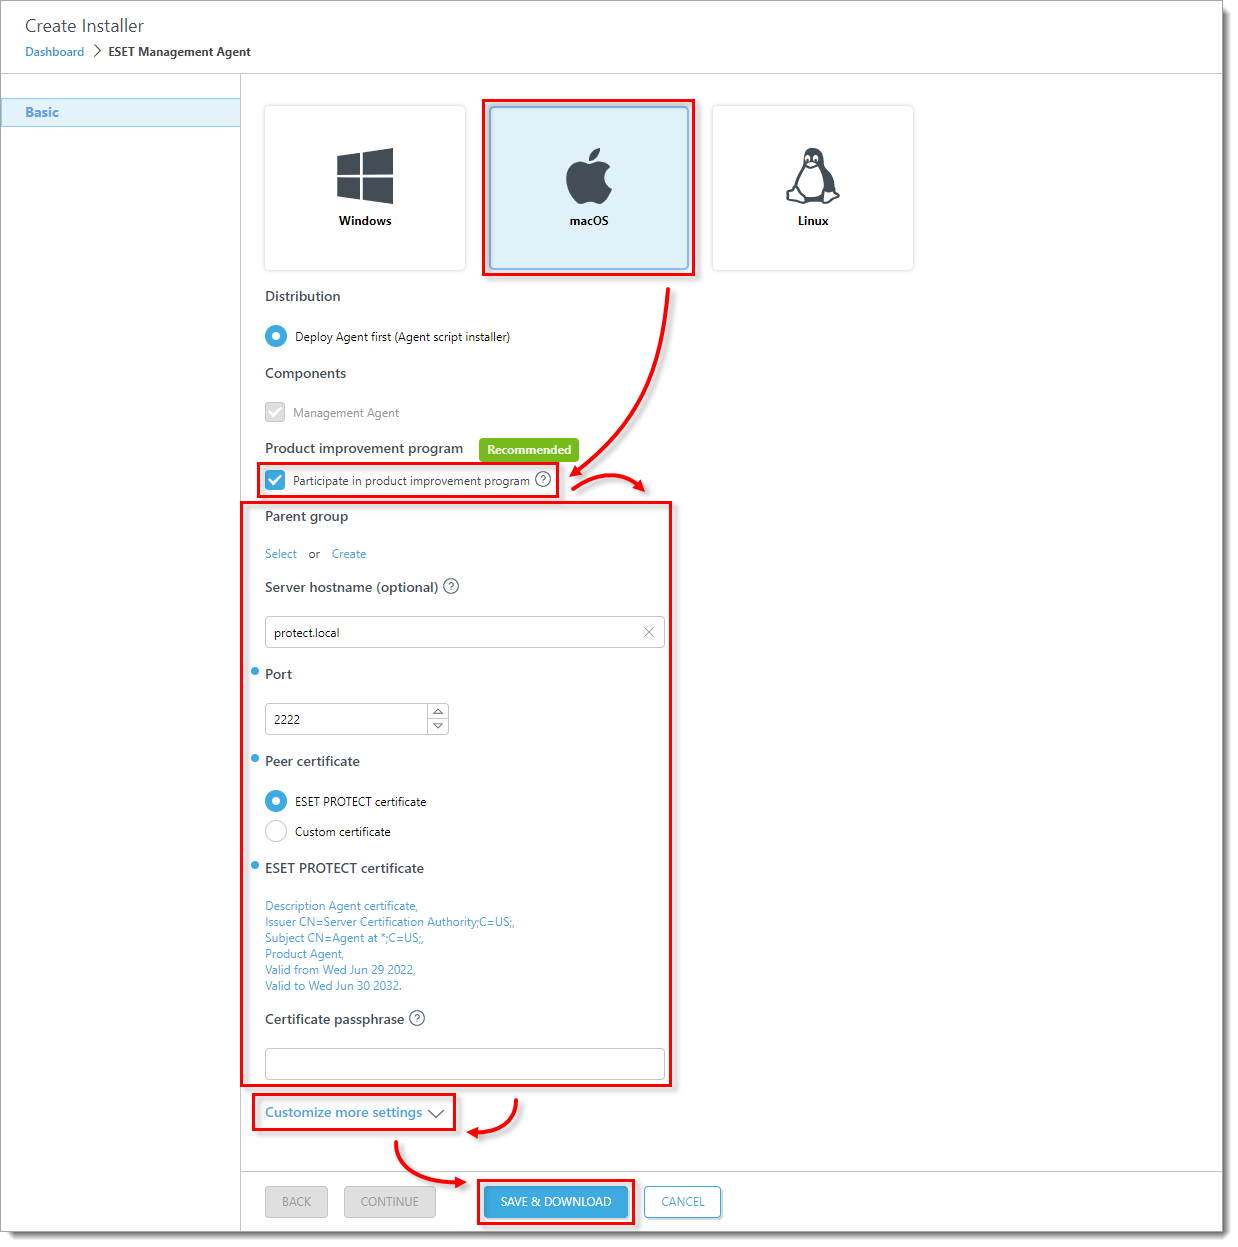
Figure 1-2 Distribute the Live Installer file to your Apple client using email or a shared network folder. Download the file to the Desktop on your client.
After you have downloaded the file to the client, double-click PROTECTAgentinstaller.tar.gz to extract the file. PROTECTAgentinstaller.sh will be extracted to your Desktop.
Click Go → Utilities and then double-click Terminal to open a new Terminal window.
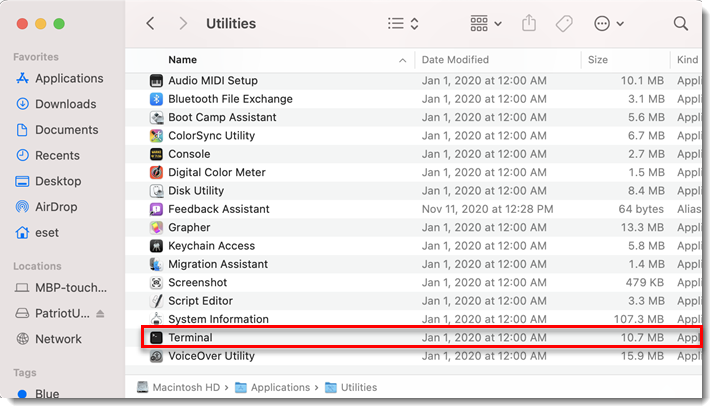
Figure 1-3 -
cd Desktopsudo bash PROTECTAgentinstaller.sh When you are prompted for your password, type the password for your user account. Though characters will not appear, your password will be entered. Press Return when you are finished to continue the installation.
Click Go → Utilities and then double-click Activity Monitor. Click the Energy tab and locate the process called ERAAgent to verify that the Agent is running. You can now manage this client computer using ESET PROTECT On-Prem.
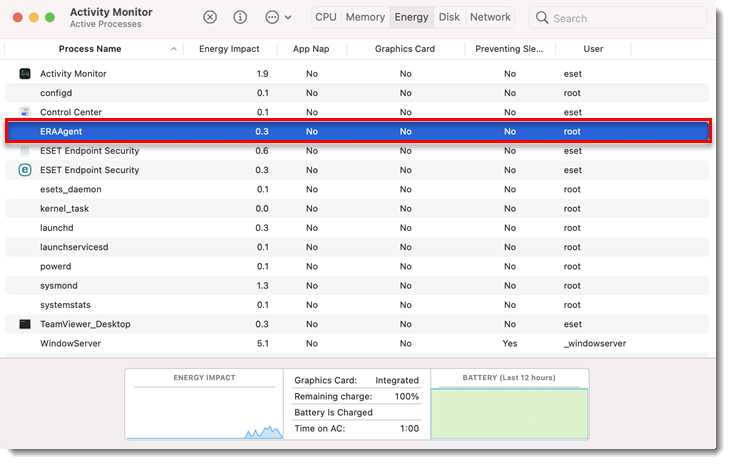
Figure 1-4 Alternatively, depending on your version of macOS, click CPU and locate the process called ERAAgent to verify that the Agent is running. You can now manage this client computer using ESET PROTECT On-Prem.
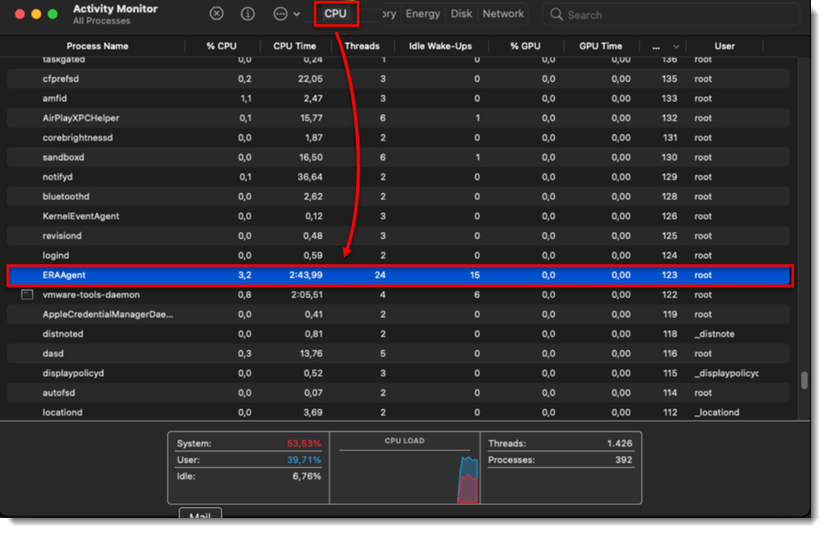
Figure 1-5 If you are performing a new endpoint installation from ESET PROTECT On-Prem, deploy ESET endpoint products to your client computers.
Deploy ESET Management Agent to a Linux client
Click Quick links → Deploy Agent.
Figure 2-1 Select Linux. You can deselect the check box next to Participate in product improvement program if you do not agree to send crash reports and telemetry data to ESET. Configure other settings such as Parent group, Server hostname, Port number (default is 2222), Peer Certificate, and Certificate passphrase if needed. Optionally, click Customize more settings to view more options. Click Save & Download.
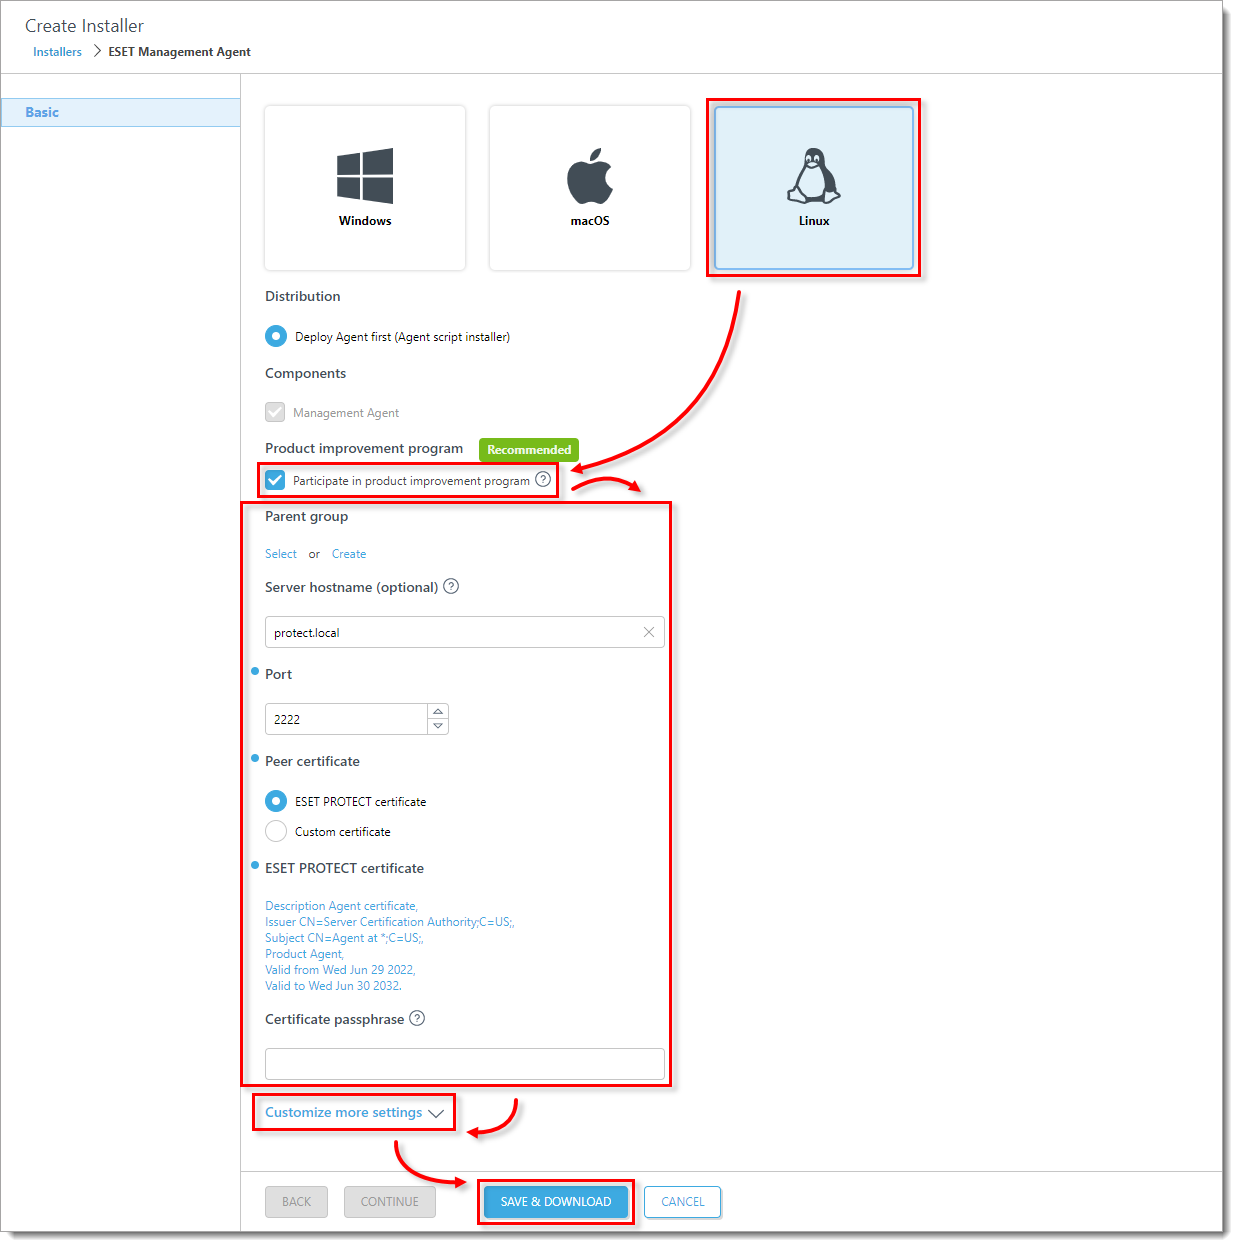
Figure 2-2 Distribute the Live Installer file to your Linux client using email or a shared network folder. Download the file to the Desktop on your client.
After you have downloaded the file to the client, double-click PROTECTAgentinstaller.tar.gz to extract the file. PROTECTAgentinstaller.sh will be extracted to your Desktop. If you prefer to extract through a terminal, type the following command:
tar -xvzf PROTECTAgentInstaller.tar.gz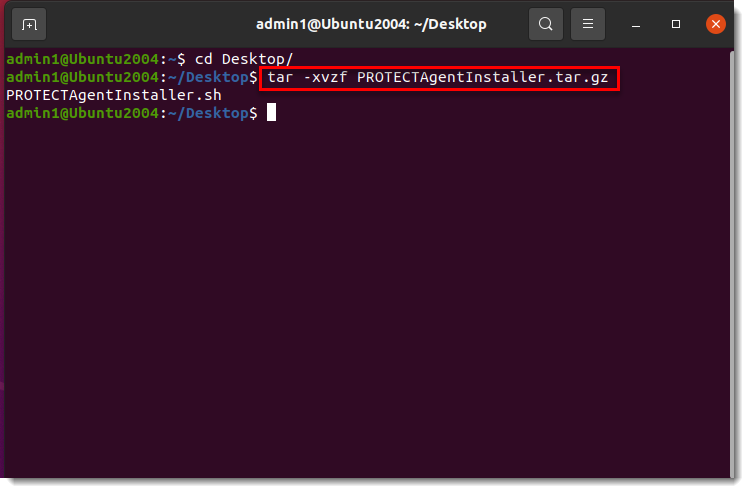
Figure 2-3 In the Terminal window, type the following commands to run the install script:
cd Desktop/sudo ./PROTECTAgentInstaller.sh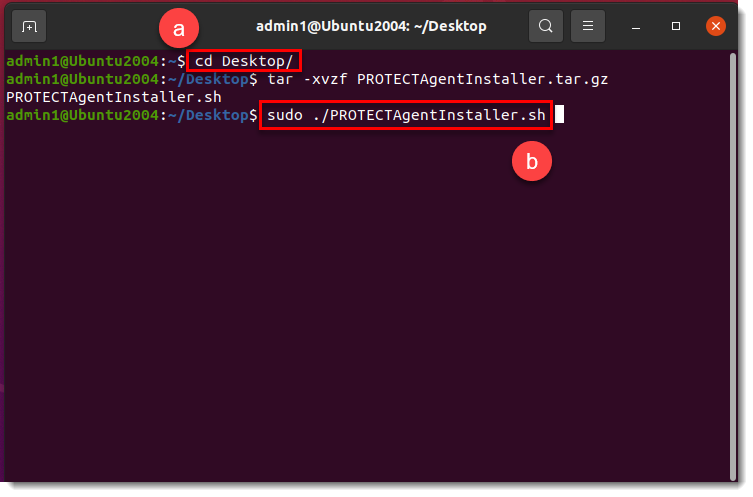
Figure 2-4 Type the password for your user account. Characters will not appear in the password field, but the password will still be entered. Press Enter on your keyboard when you are finished to continue the installation.In the Terminal window, to verify that the Agent is running, run the following command:
systemctl status eraagent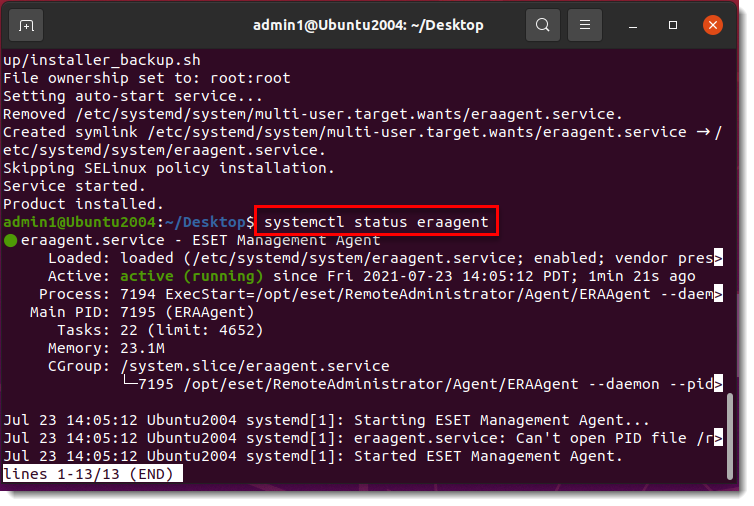
Figure 2-5 You can now manage the client computer using ESET PROTECT On-Prem. If you are performing a new endpoint installation from ESET PROTECT On-Prem, deploy ESET endpoint products to your client computers.