Issue
- You receive an error "An error occurred while loading database files from the Microsoft SQL Server databases. Check if the 'NT AUTHORITY\SYSTEM' account has sufficient permissions to read data from the system views of master databases" in ESET Windows server product
- An error appears when getting the custom location of database data
- Enable ESET service to get the custom location of database data
- Multiple Microsoft SQL Server instances on a single server
Solution
An error appears when getting the custom location of database data
Automatic exclusions for Microsoft SQL Server consist mainly of default locations of database files. However, it also consists of paths where database files are stored in custom locations. In this case, the NT AUTHORITY\SYSTEM account must have appropriate rights to extract this information from the master database.
In Microsoft SQL Server 2016 and later, Microsoft removed the sysadmin server role for the NT AUTHORITY\SYSTEM account, causing ESET Windows server products to lose access to the data in the master database, which contains the locations of the database data of the Microsoft SQL Server instance.
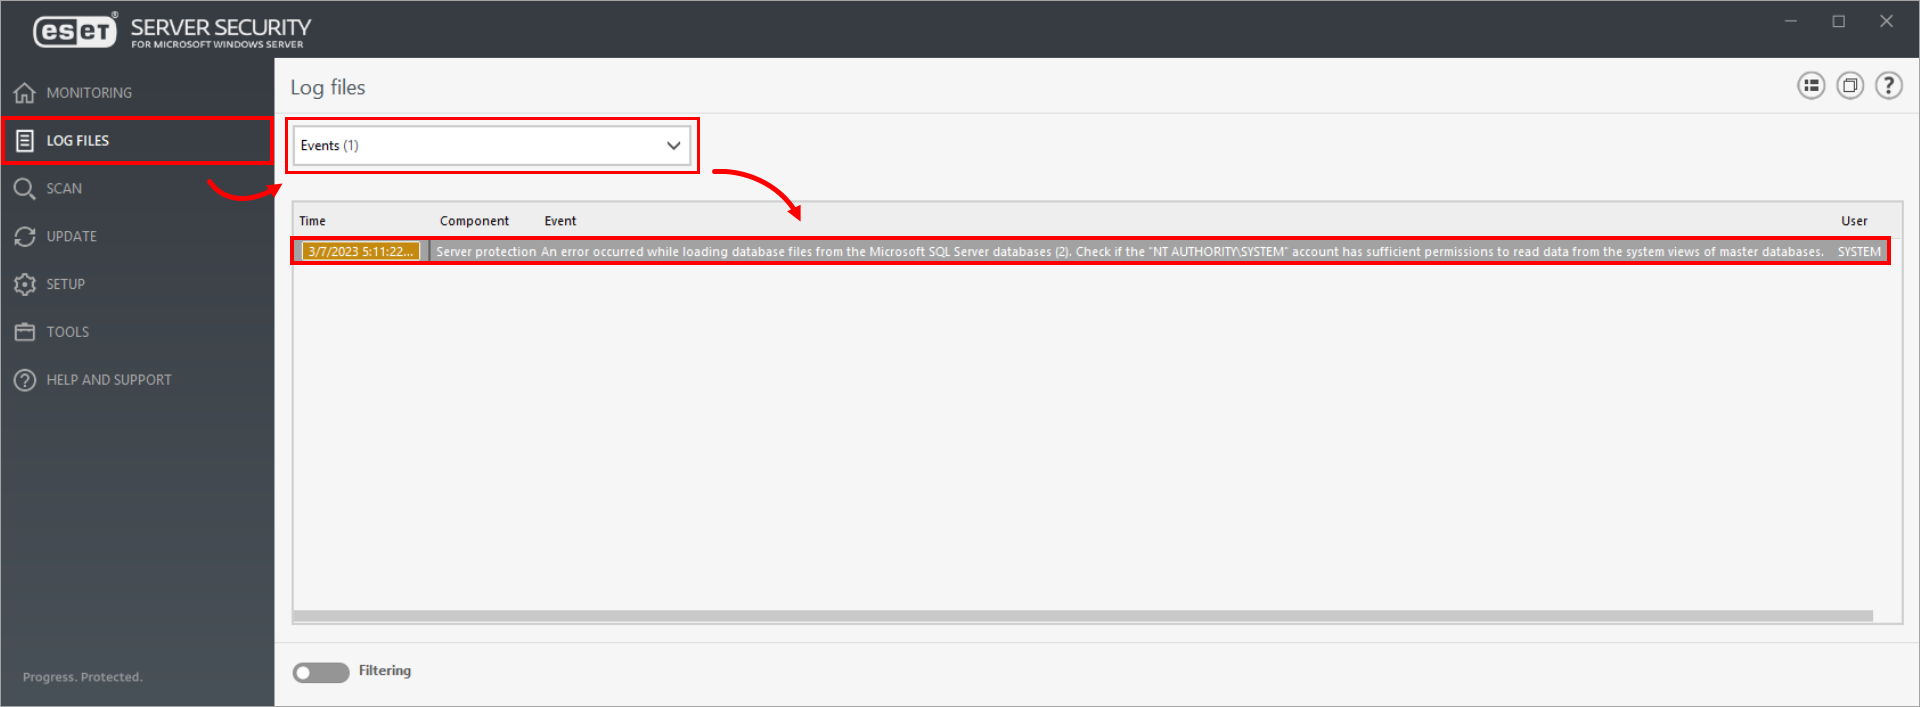
ESET Windows server products inform about this issue via the error message. Click Log files, select Events from the drop-down menu, and view the error message:
"An error occurred while loading database files from the Microsoft SQL Server databases. Check if the 'NT AUTHORITY\SYSTEM' account has sufficient permissions to read data from the system views of master databases."
Click the image to view larger in new window
Enable ESET service to get the custom location of database data
To enable our service to get the custom location of database data, follow one of the three procedures below using Microsoft SQL Server Management Studio:
- Grant the 'View any definition' permissions to the NT AUTHORITY\SYSTEM account (recommended)
- Grant the 'sysadmin' server role to the NT AUTHORITY\SYSTEM account
- Assign the 'db_owner' database role to the 'master' database in the NT AUTHORITY\SYSTEM account
A. Grant the 'View any definition' permissions to the NT AUTHORITY\SYSTEM account (recommended)
-
Navigate to Microsoft SQL Server Management Studio and connect to the chosen Microsoft SQL Server instance.
-
Click Securables. In the Grant column, select the check box next to View any definition. Click OK.
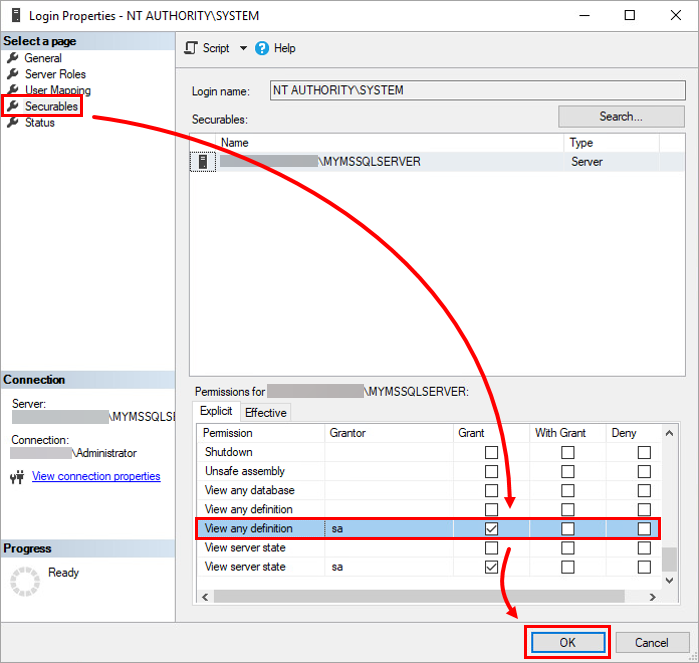
Figure 2-1
B. Grant the 'sysadmin' server role to the NT AUTHORITY\SYSTEM account
-
Navigate to Microsoft SQL Server Management Studio and connect to the chosen Microsoft SQL Server instance.
-
Click Server Roles, select the check box next to sysadmin and click OK.
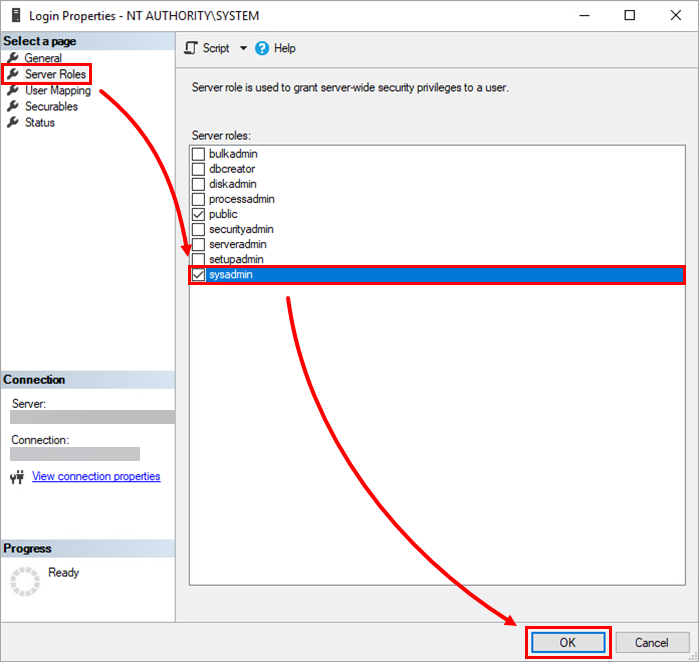
Figure 2-2
C. Assign the 'db_owner' database role to the 'master' database in the NT AUTHORITY\SYSTEM account
-
Navigate to Microsoft SQL Server Management Studio and connect to the chosen Microsoft SQL Server instance.
-
Click User Mapping. In Users mapped to this login section, select the check box next to master. In Database role membership for section, select the check box next to db_owner. Click OK.
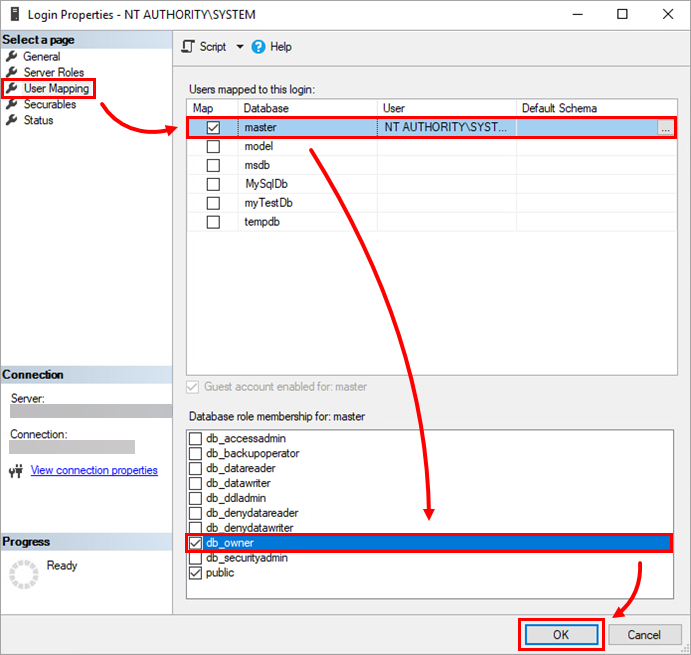
Figure 2-3
Multiple MS SQL Server instances on a single server
You can connect to a specific instance of Microsoft SQL Server using the connection dialog displayed when you start Microsoft SQL Server Management Studio:
-
Navigate to Microsoft SQL Server Management Studio and connect to the chosen server.
- Type in the instance in the Server name field in the format below and click Connect.
<server_name>\<instance_name>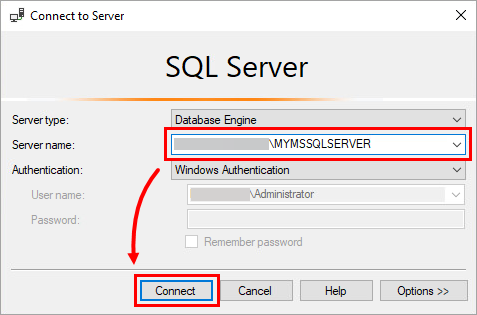
Figure 3-1
Get the list of Microsoft SQL Server instances
There are several ways how to get the list of Microsoft SQL Server instances installed on the server:
-
When installing a new instance of Microsoft SQL Server, in the step where you type the name of the new instance, the Installation Wizard will display a list of currently installed instances.
-
List of installed instances is located in the following Windows registry path:
HKEY_LOCAL_MACHINE\SOFTWARE\Microsoft\Microsoft SQL Server\Instance NamesTo get the list, use the following PowerShell command:
Get-Item "HKLM:\SOFTWARE\Microsoft\Microsoft SQL Server\Instance Names\SQL" | % {$_.Property} -
Each Microsoft SQL Server instance installs the corresponding service into the system. The name of this service has the following format:
SQL Server (<instance_name>)You can filter these services in the system to get a list of installed Microsoft Server SQL instances using the following PowerShell command:Get-Service | ?{ $_.DisplayName -like "SQL Server (*" }