Issue
- You receive the warning message "Using unencrypted connection! Please configure the webserver to use HTTPS" when accessing ESET PROTECT On-Prem Web Console
- Reinstall ESET PROTECT On-Prem Web Console using the All-in-one installer and use an automatically generated certificate
- Reinstall ESET PROTECT On-Prem Web Console using the All-in-one installer and use a custom certificate
- Generate a new certificate and configure HTTPS connection for ESET PROTECT On-Prem Web Console
- Configure HTTPS connection for ESET PROTECT On-Prem Web Console using a custom certificate
Details
Click to expand
ESET PROTECT On-Prem Web Console installed manually uses HTTP by default. For security reasons, we recommend setting up ESET PROTECT On-Prem to use HTTPS.
To use HTTPS, you can reinstall ESET PROTECT On-Prem Web Console using the All-in-one installer or configure Apache Tomcat to use an HTTPS connection.
Solution
Related solution: Linux users
Reinstall ESET PROTECT On-Prem Web Console using the All-in-one installer and use an automatically generated certificate
Reinstall the ESET PROTECT On-Prem Web Console using the All-in-one installer to generate the secure connection (HTTPS) certificate automatically.
-
Ensure Apache Tomcat is used only by ESET PROTECT On-Prem Web Console.
-
Uninstall Apache Tomcat. This will also uninstall the ESET PROTECT On-Prem Web Console.
-
Download the ESET PROTECT On-Prem All-in-one installer. Use the same version as your ESET PROTECT On-Prem Server. Check the version of ESET PROTECT On-Prem and related components.
-
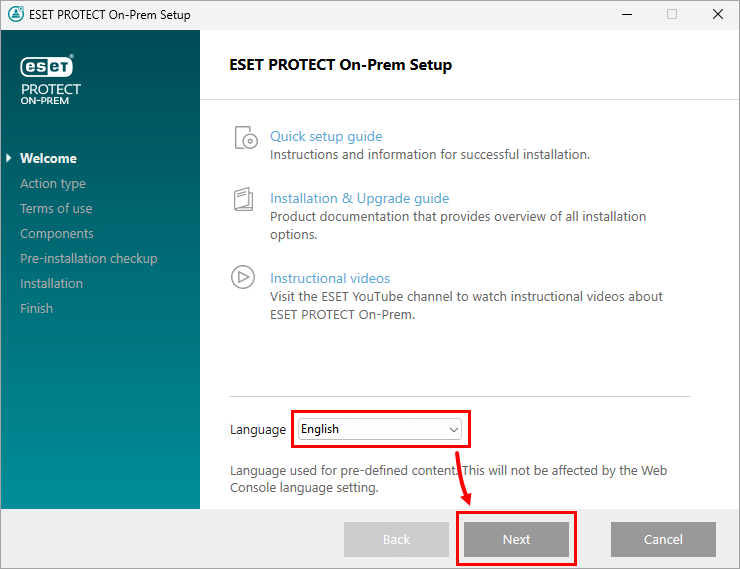
Run the ESET PROTECT On-Prem All-in-one installer. Choose your language and click Next.
-
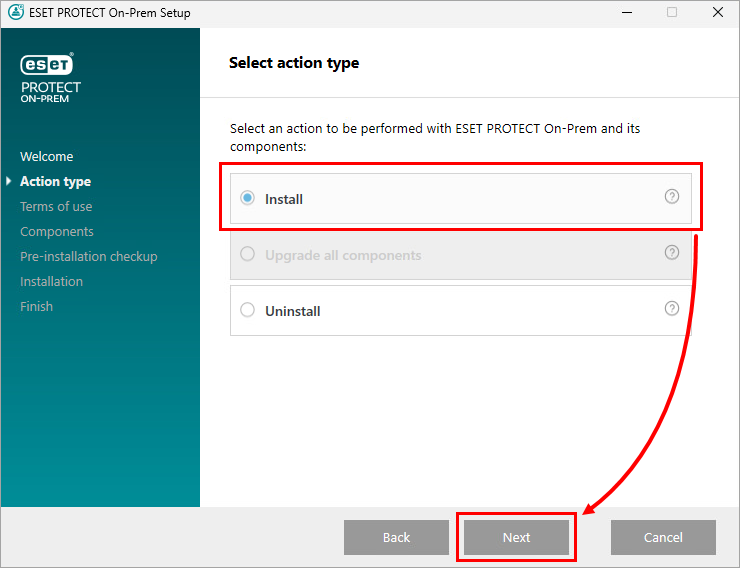
Select Install and click Next.
-
Review the Terms of Use, select the check box next to I accept the Terms of Use and click Next.
-
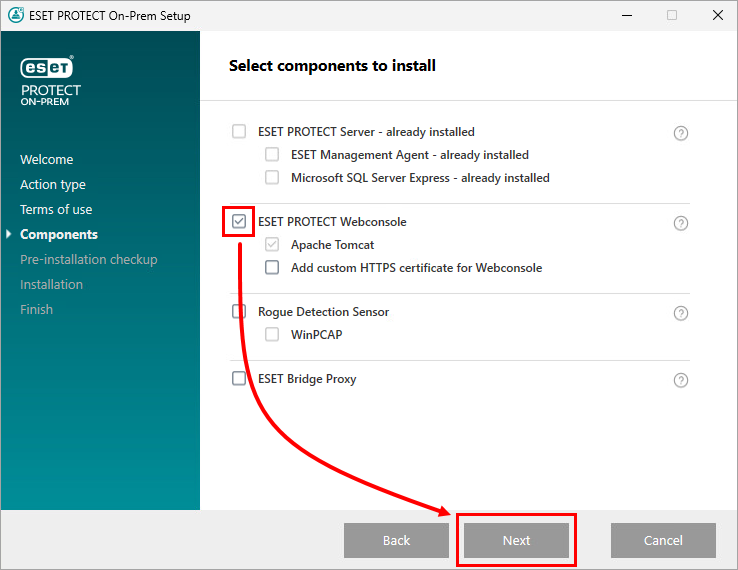
Select the check box next to ESET PROTECT Webconsole and click Next.
-
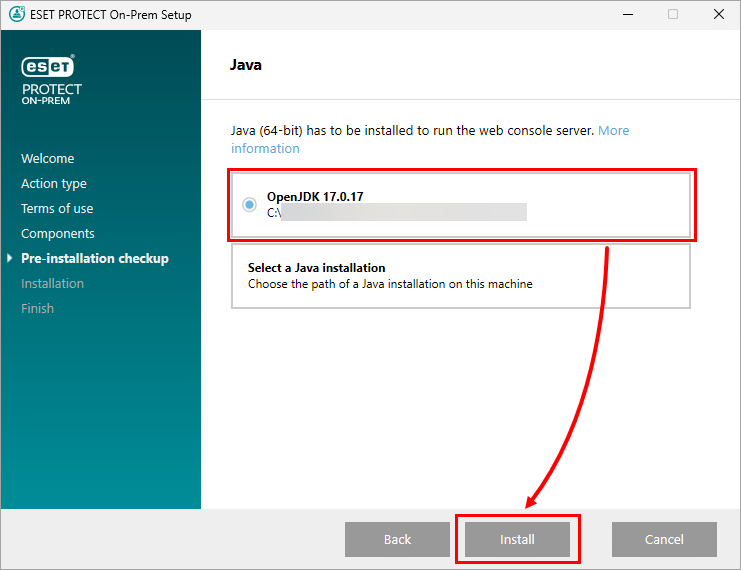
Select your Java installation and click Install.
-
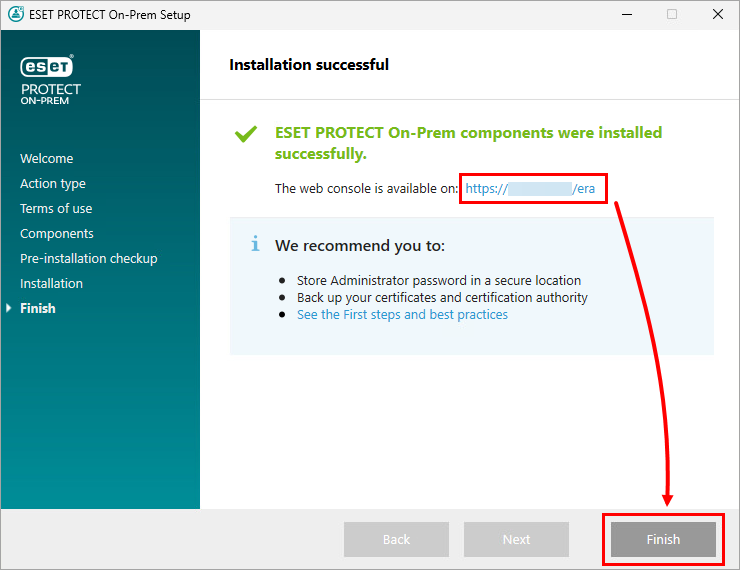
The HTTPS certificate is automatically generated during the installation. After successful installation, you can access the ESET PROTECT On-Prem Web Console using the secure connection. Click Finish.
Reinstall ESET PROTECT On-Prem Web Console using the All-in-one installer and use a custom certificate
Reinstall the ESET PROTECT On-Prem Web Console using the All-in-one installer and add a custom HTTPS certificate.
-
Ensure Apache Tomcat is used only by ESET PROTECT On-Prem Web Console.
-
Uninstall Apache Tomcat. This will also uninstall the ESET PROTECT On-Prem Web Console.
-
Download the ESET PROTECT On-Prem All-in-one installer. Use the same version as your ESET PROTECT On-Prem Server. Check the version of ESET PROTECT On-Prem and related components.
-
Run the ESET PROTECT On-Prem All-in-one installer. Choose your language and click Next.
-
Select Install and click Next.
-
Review the Terms of Use, select the check box next to I accept the Terms of Use and click Next.
-
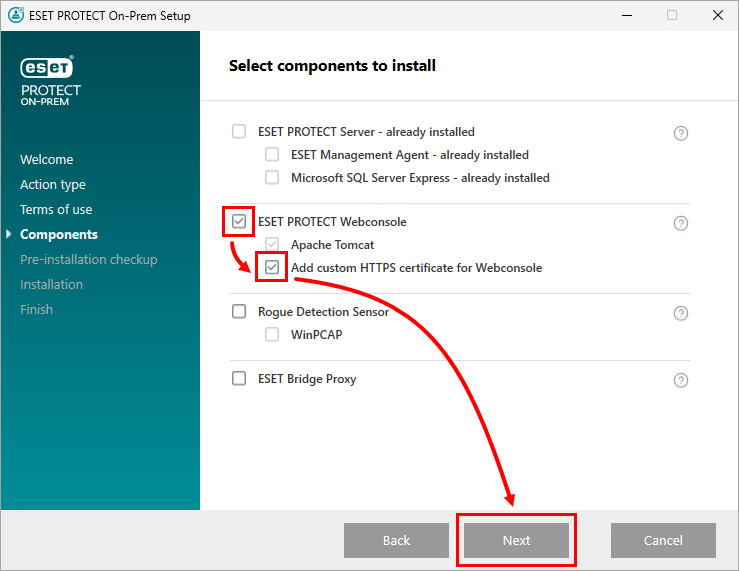
Select the check box next to ESET PROTECT Webconsole and Add custom HTTPS certificate for Webconsole, and click Next.
-
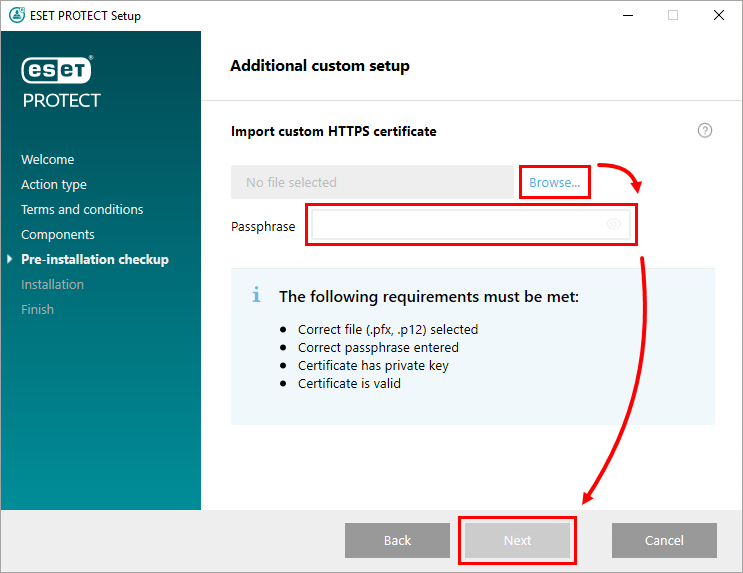
Click Browse, navigate to and select your custom certificate, type in the Passphrase, and click Next.

-
Select your Java installation and click Install.
-
The custom certificate will be used during the installation. After successful installation, you can access the ESET PROTECT On-Prem Web Console using the secure connection. Click Finish.
Generate a new certificate and configure HTTPS connection for ESET PROTECT On-Prem Web Console
Generate a new certificate via Java keystore and configure HTTPS connection in Apache Tomcat for ESET PROTECT On-Prem Web Console.
-
Create a keystore with an SSL certificate.
Java includes keytool.exe, which enables you to create a certificate via the command line. You must generate a new certificate for each Tomcat instance (if you have multiple Tomcat instances) to ensure that other Tomcat instances will remain secure if one certificate is compromised.
Navigate to the exact location of the keytool.exe file. The path depends on the OS and Java version, see the example below:
C:\Program Files\Java\jre1.8.0_201\bin -
Open command line / terminal in the keytool.exe location.
-
Edit and run the following command. Edit the -keystore, -storepass and -keypass parameters based on your environment.
keytool.exe -genkeypair -alias "tomcat" -keyalg RSA -keysize 4096 -validity 3650 -keystore "C:\Program Files\Apache Software Foundation\Tomcat_folder\tomcat.keystore" -storepass "yourpassword" -keypass "yourpassword" -dname "CN=Unknown, OU=Unknown, O=Unknown, L=Unknown, ST=Unknown, C=Unknown" -
Edit and run the following command. Edit -file and -ext parameters to export the certificate sign request from the keystore.
keytool.exe -certreq -alias tomcat -file "C:\Install\Tomcat\tomcat.csr" -keystore "C:\Program Files\Apache Software Foundation\Tomcat_folder\tomcat.keystore" -ext san=dns:ESETPROTECT -
Get the SSL certificate signed with the Root Certificate Authority (CA) of your choice.
You can proceed to step 8 if you plan to import a Root Certificate Authority later. If you choose to proceed this way, your web browser may display warnings about a self-signed certificate, and you will need to add an exception to connect to ESET PROTECT On-Prem Web Console via HTTPS.
-
Import the root certificate and intermediate certificate of your CA to your keystore. The entity that signed your certificate usually makes these certificates available. It is necessary because the certificate reply is validated using trusted certificates from the keystore.
Edit and run the following commands. Edit -keystore and -file parameters based on your environment.
keytool.exe -import -alias root -keystore "C:\Program Files\Apache Software Foundation\Tomcat_folder\tomcat.keystore" -trustcacerts -file "C:\root.crt"keytool.exe -import -alias intermediate -keystore "C:\Program Files\Apache Software Foundation\Tomcat_folder\tomcat.keystore" -trustcacerts -file "C:\intermediate.crt.pem" -
When you receive the signed certificate with the Root CA, import the public key of the CA and then the certificate tomcat.cer into your keystore.
Edit and run the following command. Edit the -file and -keystore parameters.
keytool.exe -import -alias tomcat -file "C:\Install\Tomcat\tomcat.cer" -keystore "C:\Program Files\Apache Software Foundation\Tomcat_folder\tomcat.keystore" -
Navigate to the Apache Tomcat config folder. The path depends on the OS and Apache Tomcat version, see the example below:
C:\Program Files\Apache Software Foundation\apache-tomcat-9.0.112\conf -
Open the server.xml file using a text editor (for example, Notepad) and add the following code after the </Engine> tag (if there is already a <Connector tag present, edit the code to the example below).
Edit the keystoreFile and keystorePass parameters based on your environment.
<Connector server="OtherWebServer" port="443" protocol="org.apache.coyote.http11.Http11NioProtocol" SSLEnabled="true" maxThreads="150" scheme="https" secure="true" clientAuth="false" sslProtocol="TLS" keystoreFile="C:\Program Files\Apache Software Foundation\Tomcat_folder\tomcat.keystore" keystorePass="yourpassword"/> -
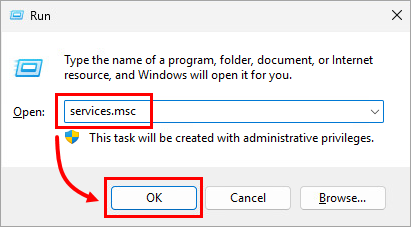
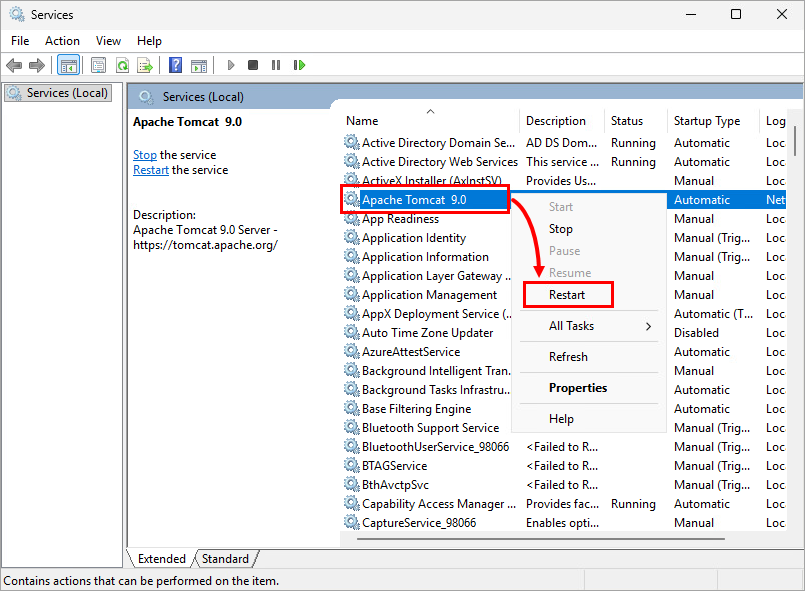
Press the Windows key + R, type services.msc, and click OK.
-
Right-click the Apache Tomcat 9.0 service and select Restart from the context menu.
Configure HTTPS connection for ESET PROTECT On-Prem Web Console using a custom certificate
Configure HTTPS connection in Apache Tomcat for ESET PROTECT On-Prem Web Console using a custom certificate.
- Move the certificate.pfx file to the Apache Tomcat installation folder. The path depends on the OS and Apache Tomcat version, see the example below:
C:\Program Files\Apache Software Foundation\apache-tomcat-9.0.112\ -
Navigate to the Apache Tomcat config folder. The path depends on the OS and Apache Tomcat version, see the example below:
C:\Program Files\Apache Software Foundation\apache-tomcat-9.0.112\conf\ -
Open the server.xml file using a text editor (for example, Notepad).
-
If there is no <Connector tag after the </Engine> tag (for example, when you perform a new installation of Apache Tomcat), copy the following string into the Server.xml after the </Engine> tag.
Edit the keystoreFile, keystorePass and keystoreTag parameters based on your environment.
<Connector server="OtherWebServer" port="443" protocol="org.apache.coyote.http11.Http11NioProtocol" SSLEnabled="true" maxThreads="150" scheme="https" secure="true" clientAuth="false" sslProtocol="TLS" keystoreFile="C:\Program Files\Apache Software Foundation\Tomcat_folder\certificate_file.pfx" keystorePass="Secret_Password_123" keystoreType="PKCS12" sslEnabledProtocols="TLSv1.2,TLSv1.3" ciphers="TLS_AES_256_GCM_SHA384, TLS_CHACHA20_POLY1305_SHA256, TLS_AES_128_GCM_SHA256, TLS_ECDHE_RSA_WITH_AES_128_CBC_SHA256, TLS_ECDHE_RSA_WITH_AES_128_GCM_SHA256, TLS_ECDHE_RSA_WITH_AES_128_CBC_SHA, TLS_ECDHE_RSA_WITH_AES_256_CBC_SHA384, TLS_ECDHE_RSA_WITH_AES_256_GCM_SHA384, TLS_ECDHE_RSA_WITH_AES_256_CBC_SHA, TLS_RSA_WITH_AES_128_CBC_SHA256, TLS_RSA_WITH_AES_128_GCM_SHA256, TLS_RSA_WITH_AES_128_CBC_SHA, TLS_RSA_WITH_AES_256_CBC_SHA256, TLS_RSA_WITH_AES_256_GCM_SHA384, TLS_RSA_WITH_AES_256_CBC_SHA" />? -
If the <Connector tag is present after the</Engine> tag (for example, when you restore the server.xml file after an Apache Tomcat upgrade), replace the values of parameters listed below with your values.
- keystoreFile—Provide the full path to the certificate file (.pfx, .keystore, or other). If you use a non-JKS certificate (for example, a .pfx file), delete the keyAlias (it is present in Server.xml by default) and add the proper keystoreType.
- keystorePass—Provide certificate passphrase.
- keystoreType—Specify the certificate type.
-
-
Press the Windows key + R, type services.msc, and click OK.
-
Right-click the Apache Tomcat 9.0 service and select Restart from the context menu.